
Create Subscription Plans in Shopify
Subscription plans can be added to existing products or you can start from scratch and create new products with subscription plans. The approach you take depends on whether or not you have an existing shop with existing products and if you want to keep your subscription business separated from your sales business.
What is a subscription plan?
A subscription plan is a term used to describe the agreement between the vendor and the customer, that covers the terms for usage of a product for an agreed upon price and an agreed upon duration.
Typically there are four important components in a subscription plan:
- The product itself and its variations
- The subscription duration (6,12,18,24 months)
- The charging period/frequency (daily, weekly, monthly, yearly)
- The price itself (which depends on the subscription duration and the charging period/frequency)
These four components together define and make up a subscription plan. A subscription plan usually consists of components that have a price implication but it also include components that do not have a price implication.
Important: When you get circuly on board to manage your subscriptions, subscription plans are always created in Shopify by using product variables and metafields and not in circuly. circuly is only connected to your shop system via API and can easily retrieve the necessary information about the product and subscription and process it accordingly.
This gives you more flexibility in creating, maintaining and editing your subscription plans as your business approach changes.
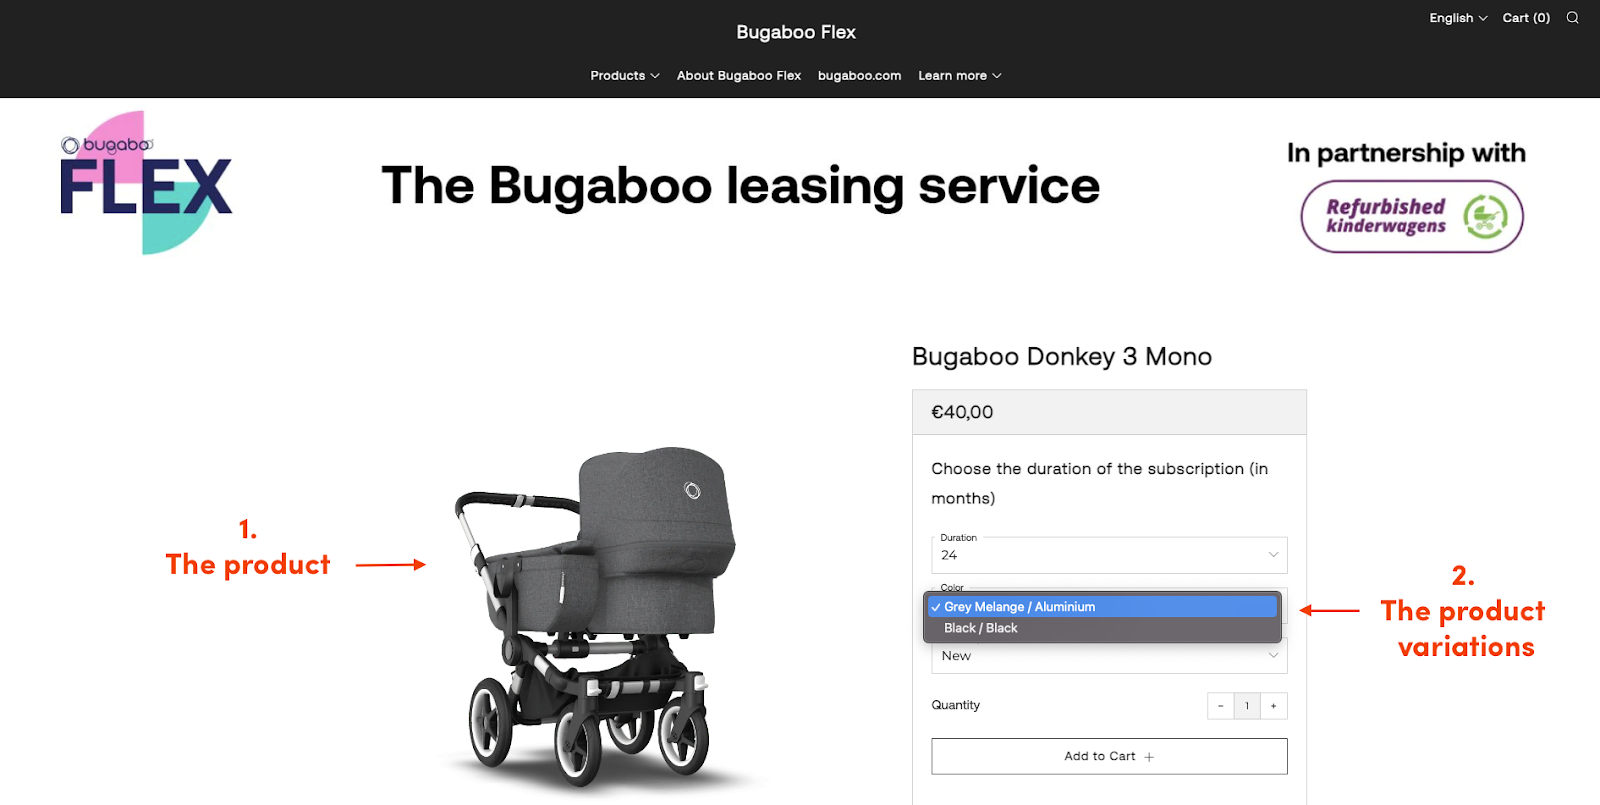
Here’s an example: Bugaboo Flex by Bugaboo
Bugaboo Flex is a subscription service by Dutch baby goods manufacturer, Bugaboo. Bugaboo uses Shopify to set up their subscription products, catalogue them and create subscription plan.
Given below are different components of their subscription plan.
- The product and its variations - in Bugaboo’s case, the product variation is about available product colours and has no impact on the overall subscription price of the product. But product variations can have an impact on the price of the product. For example, the price of the overall subscription changes when the subscription product is an IT product (such as laptops, phones etc.) and has different storage options.
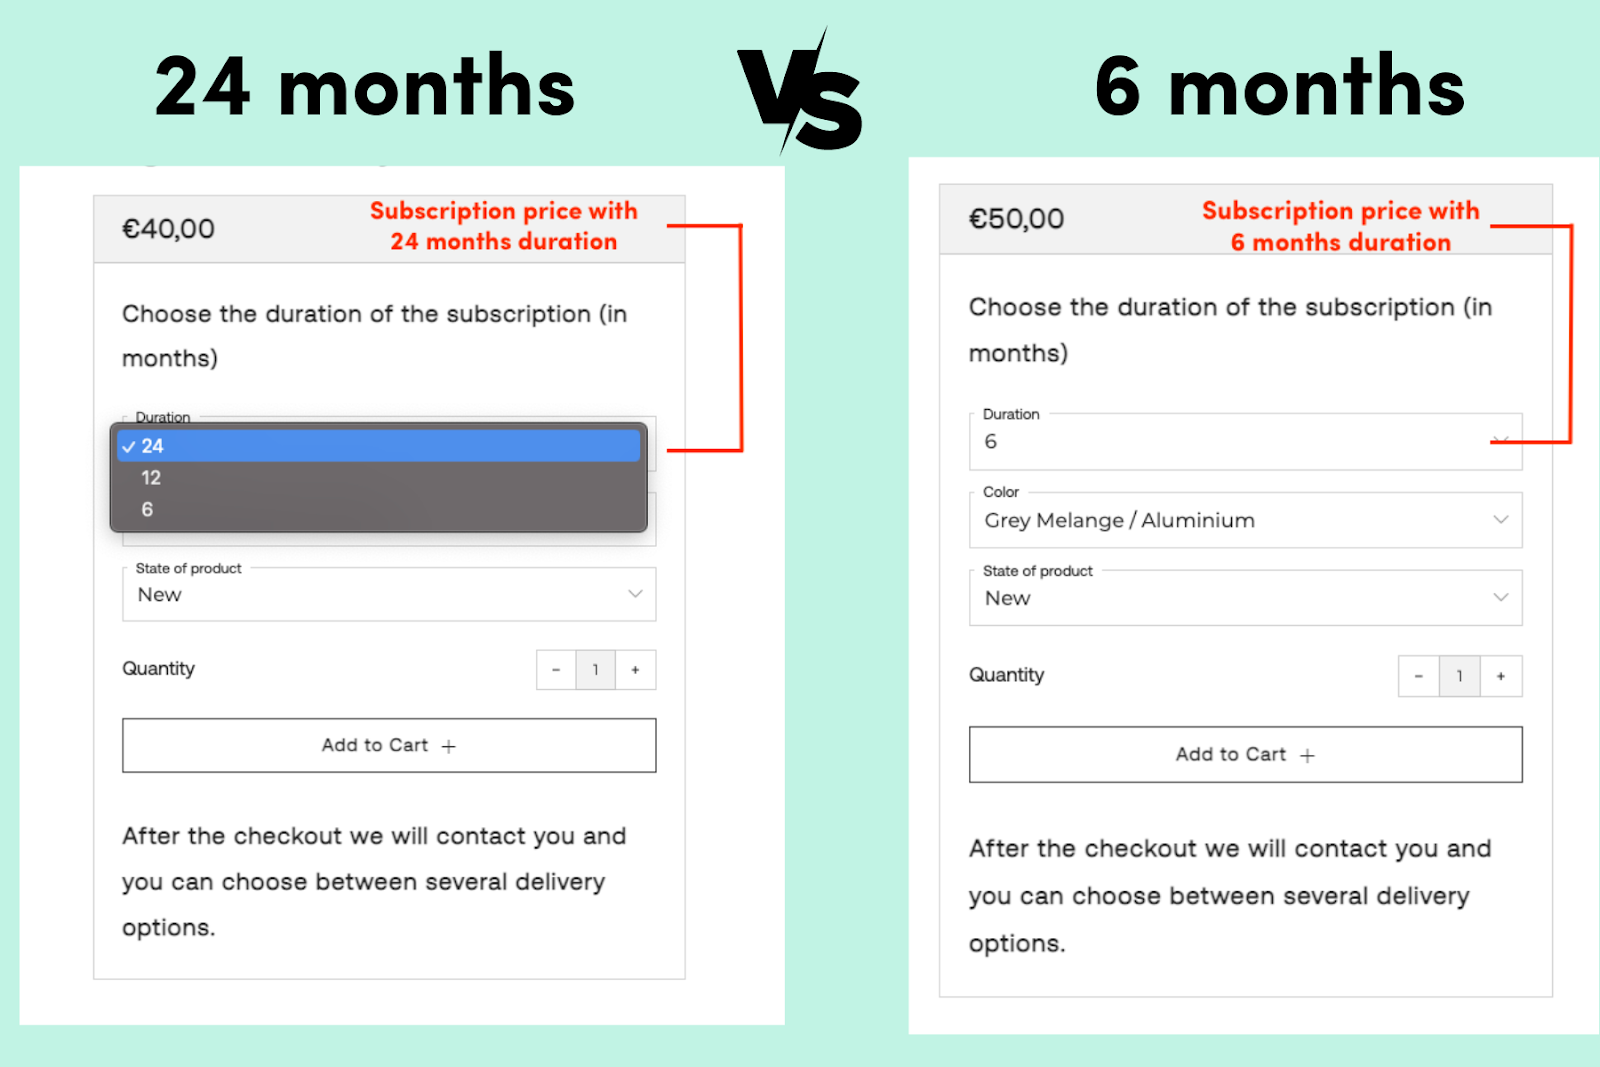
- The subscription duration - the overall subscription prices changes with the overall subscription duration. Duration based pricing is a commonly used pricing strategy for product subscriptions.
- Product state - Bugaboo has another component in its subscriptions plan that has an impact on the price and that is the state of the product.
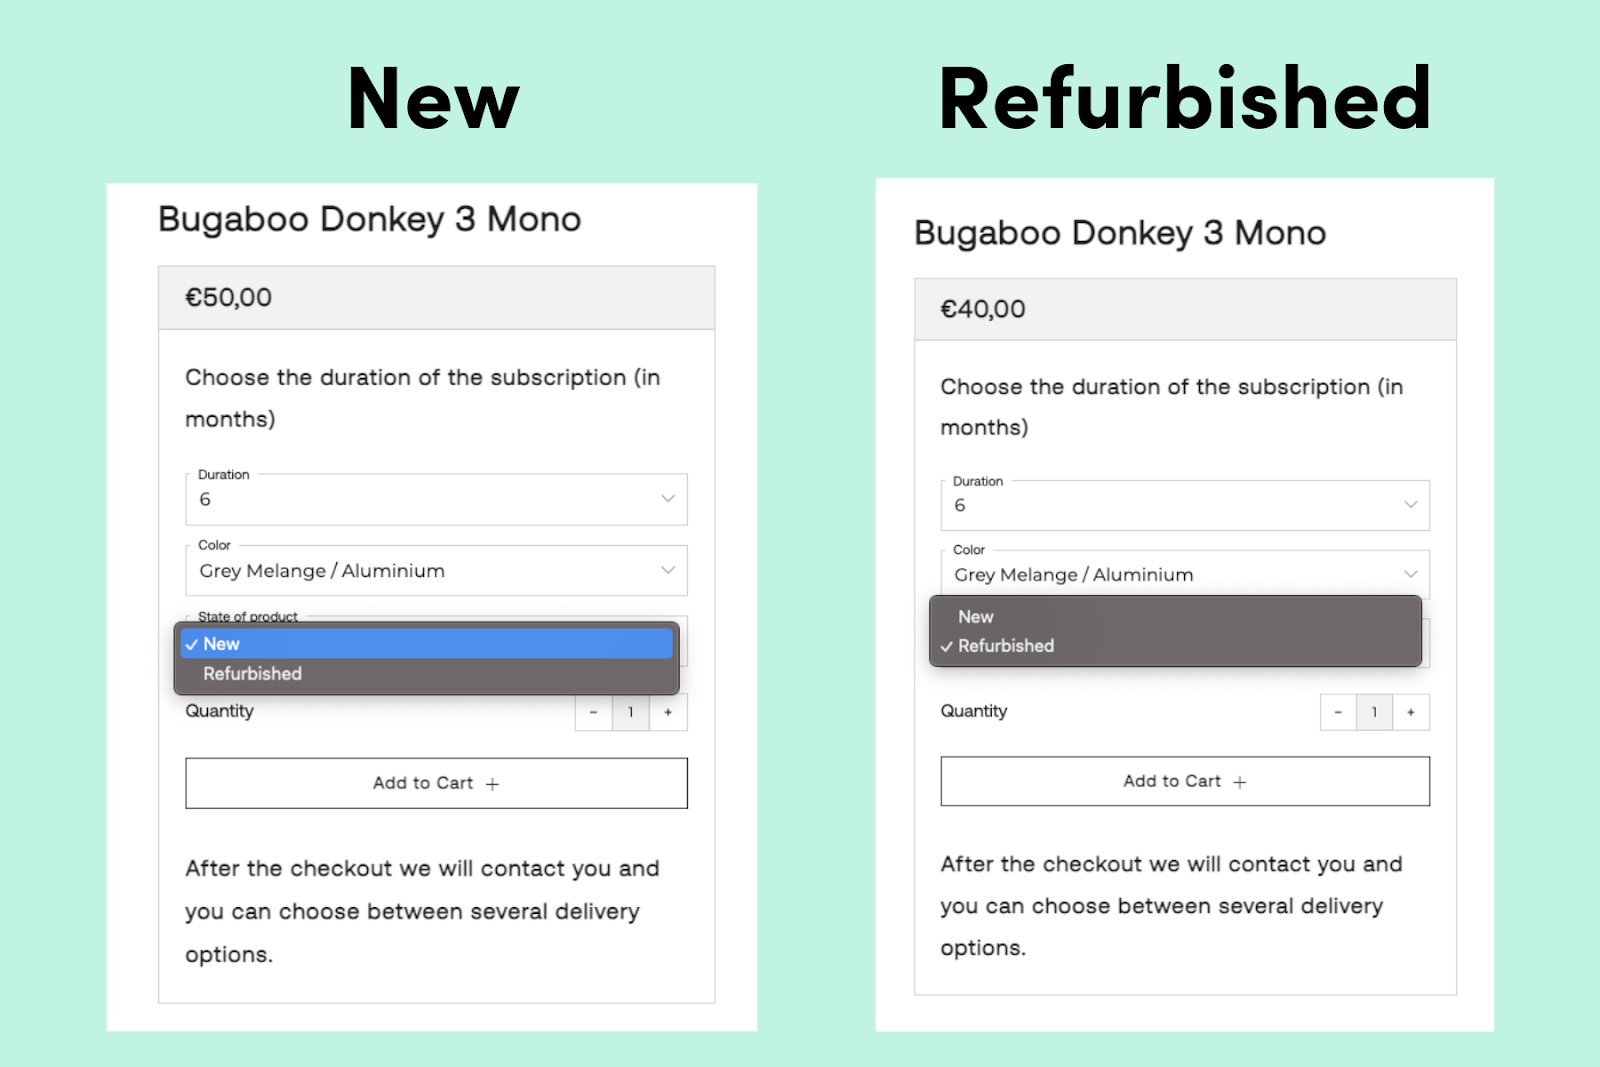
As you can see the subscription plan varies as per the different components and these components vary from one business to another.
Therefore before setting up your subscription plan it is important to work out all the components that will have an impact on the price and also the components that will not have an impact on the price but are included to provide more customisation option to the customer.
How to create a subscription plan in Shopify?
There are two steps involved in setting up a subscription plan:
- Set up products in Shopify
- Set up metafields in Shopify
Set up products in Shopify
Adding products
- Login to your Shopify admin account > And go to Products in the left navigation bar.
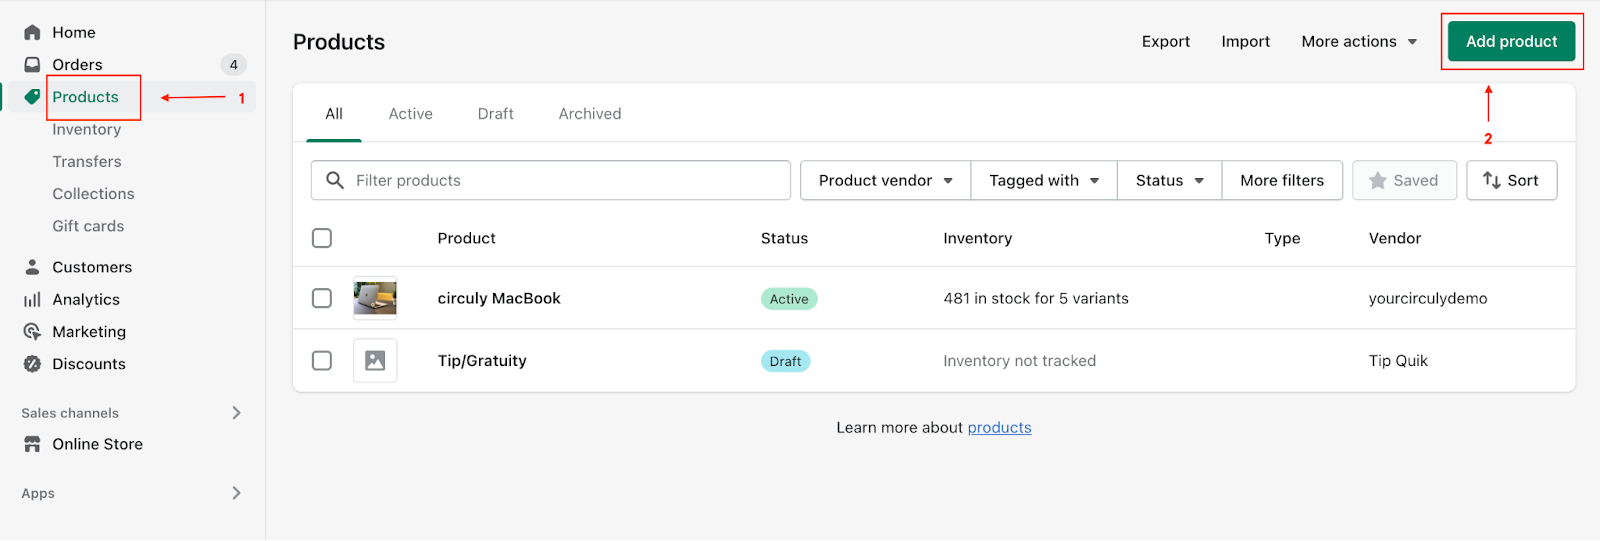
- On the Products page click on the button that says Add products.
- Start by entering a Title for your product along with additional details such as detailed description, media files, price etc.
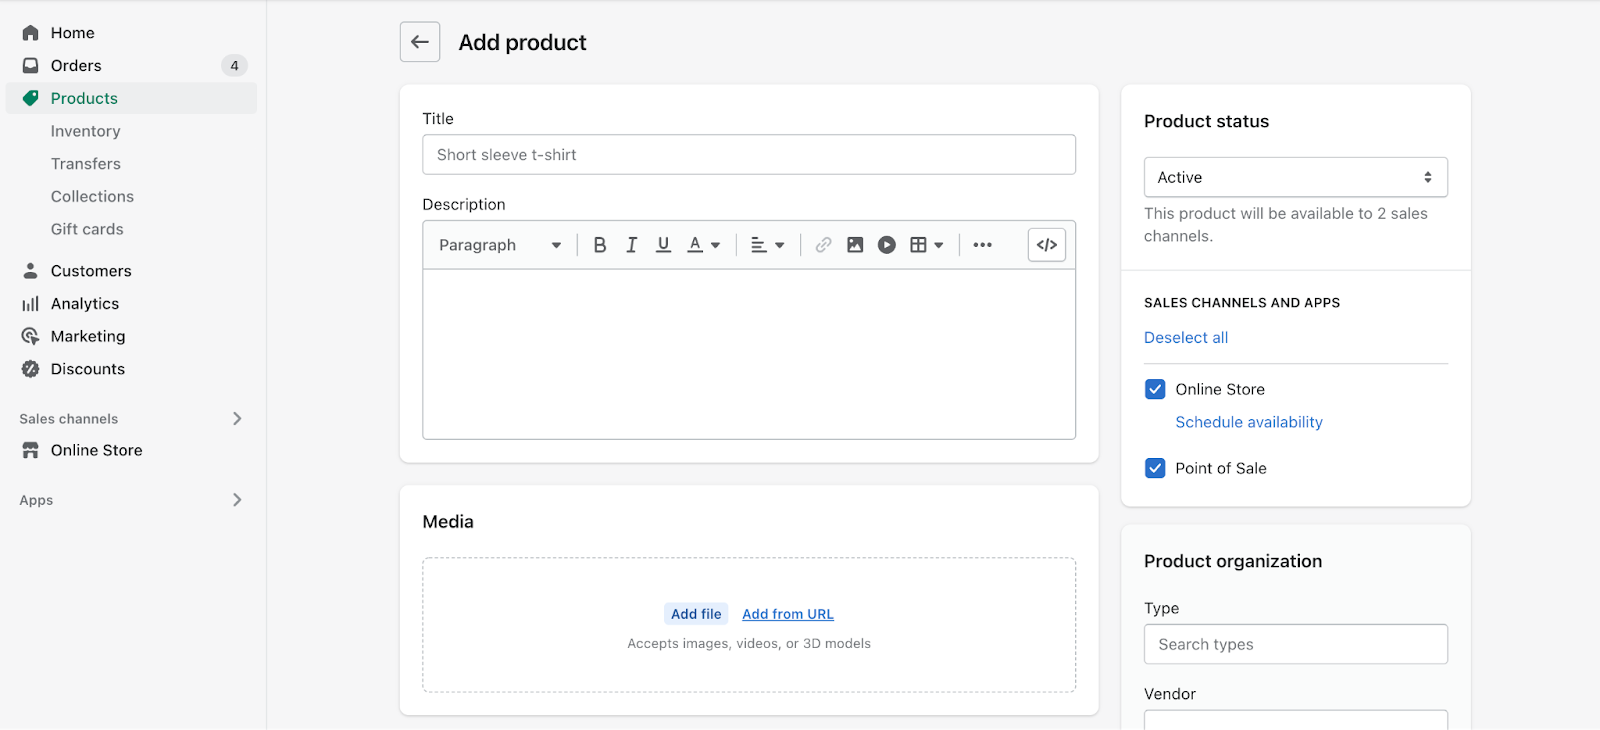
- Click Save.
Adding variants
Add variants if your product comes in more than one option such as size, colour, storage etc. Use variants to define the components of a subscription plan for the same product.
For example: You want to create a subscription plan for renting Macbook Pro which is available in two colours and in different subscription durations. One variant option will be colour, that is Silver or Black and another variant option will be subscription duration, that is, 1 month, 6 month, 12 month and 18 month subscription.
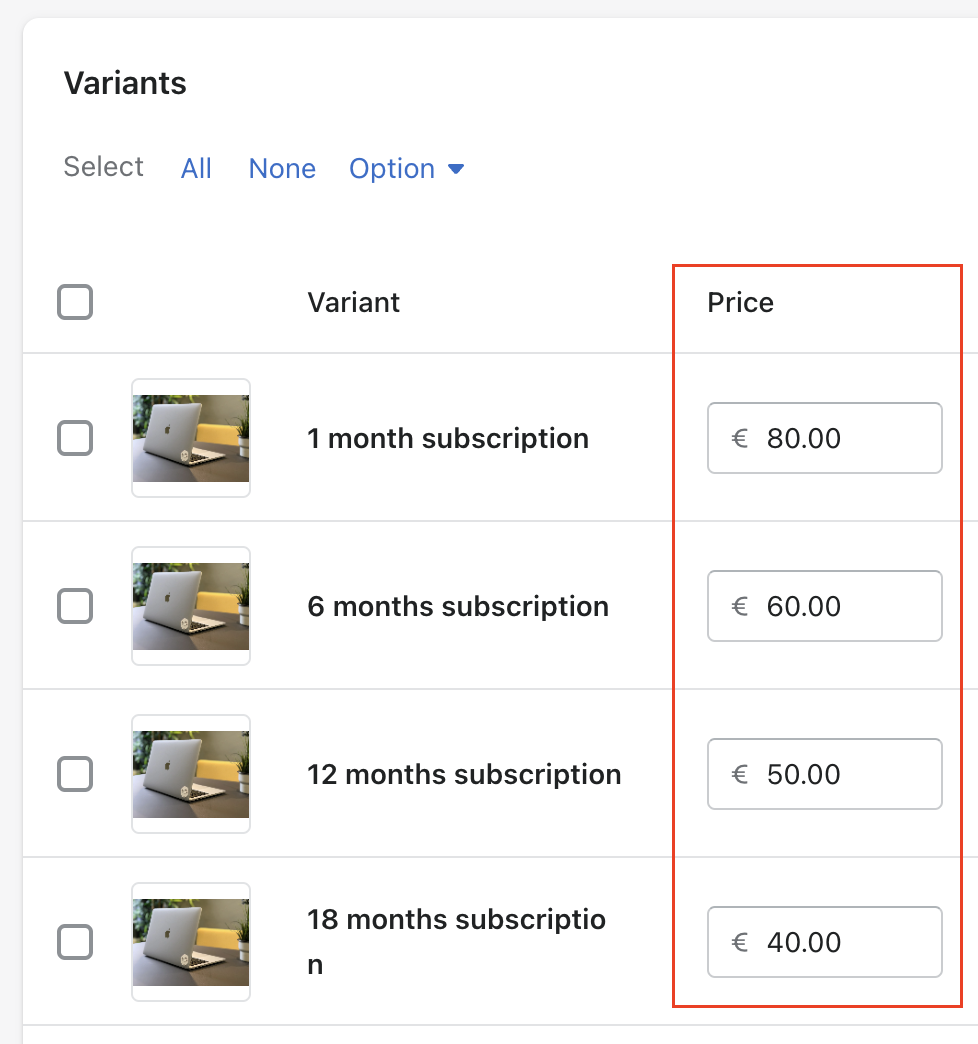
If the variant options have an impact on the price, add the price in the Variants fiel as shown in the image below.
Steps:
- On the Add product page scroll down to Variants and check the box the checkbox that says “This product has multiple options, like different sizes or colours”.
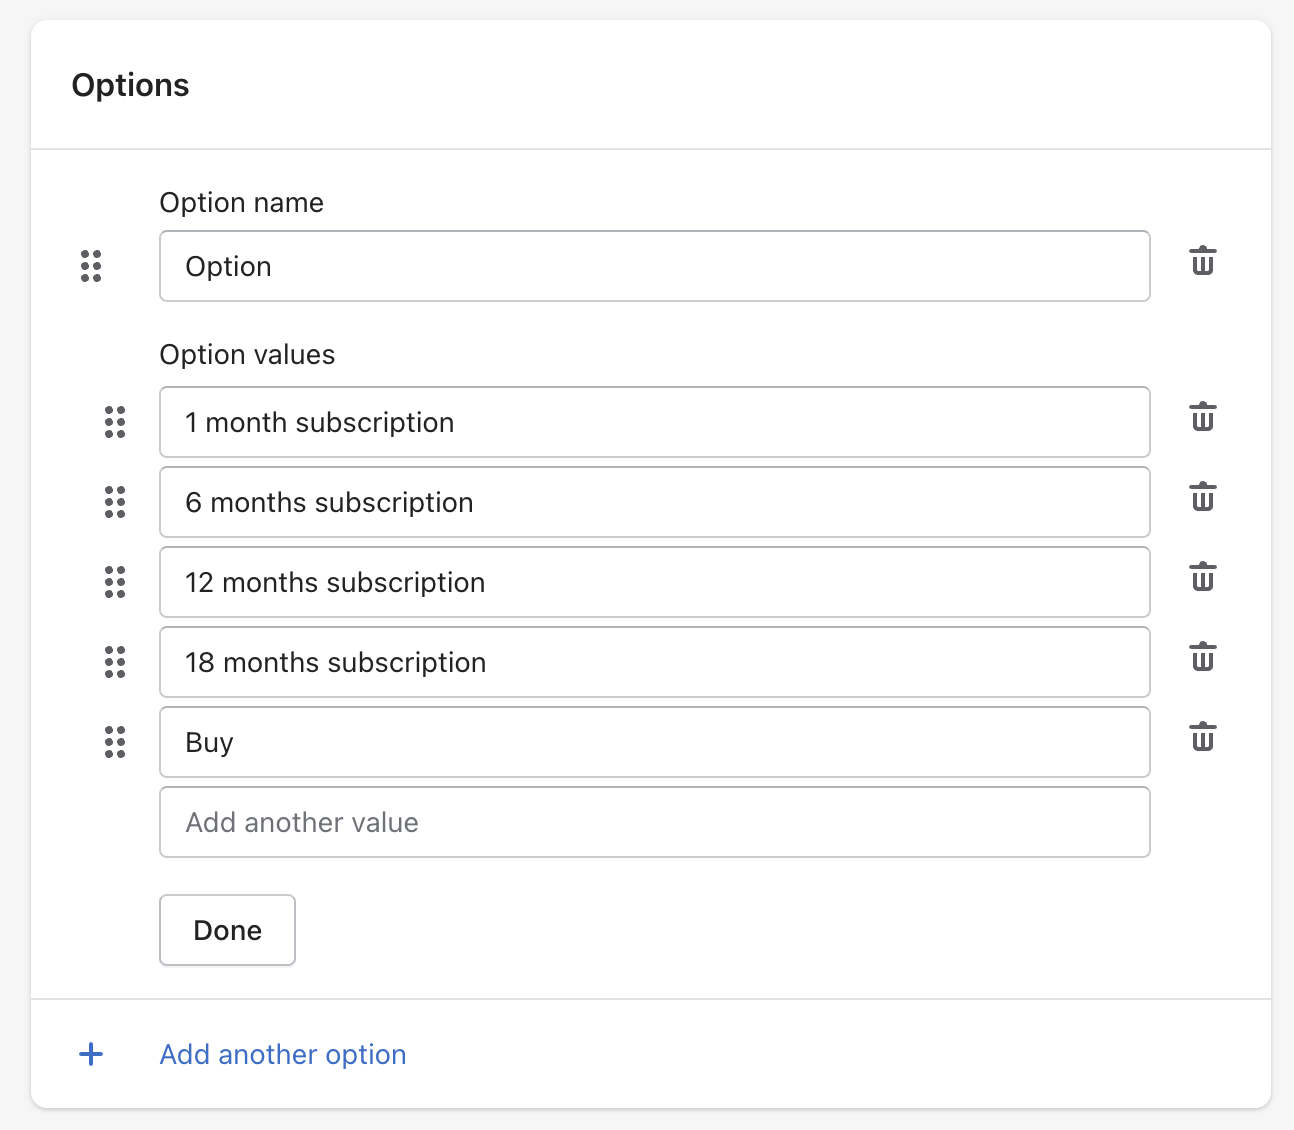
- Then start adding the different variations for the product.
- Under OPTIONS > Click on Option 1 > And enter an option name, for example Size, (the name you enter here is displayed on the frontend to your customers)
- In the Option values field > Enter each option value and separate the different options with a comma, for example Small, Medium, Large. (the values you enter here are displayed on the frontend to your customers)
- In you want to add more variant options then click on Add another option. Shopify allows you to have up to 3 options for each product. If you want to have more options you can do so via a third party Shopify app.
- Add images for each vairnat.
- Click Save.
Here’s an example of how the variants look.
.gif)
Pro tip: give all the variants the same SKU so that the stock descreses as soon as an order is placed for all subscription durations
Set up Metafields in Shopify
Metafields enable you to customise the functionality and appearance of your Shopify store by allowing you to save specialised information that isn't usually captured in the Shopify admin. You can use Metafields to display specialised information on your website/online store in a variety of ways. For a renntal/subscription business using metafields helps to define whether a product is a “rented” product or a “bought” product.
Once you’ve created a few products with its product variants continue to create a subscription plan using Metafields.
Steps:
- Install the Metafields guru app from the Shopify App store.
- After installing the app Y Go to Apps in your Shopify admin and configure it.
- After confirgutaion go to Apps > Metafield Guru App Home > Click on Products.
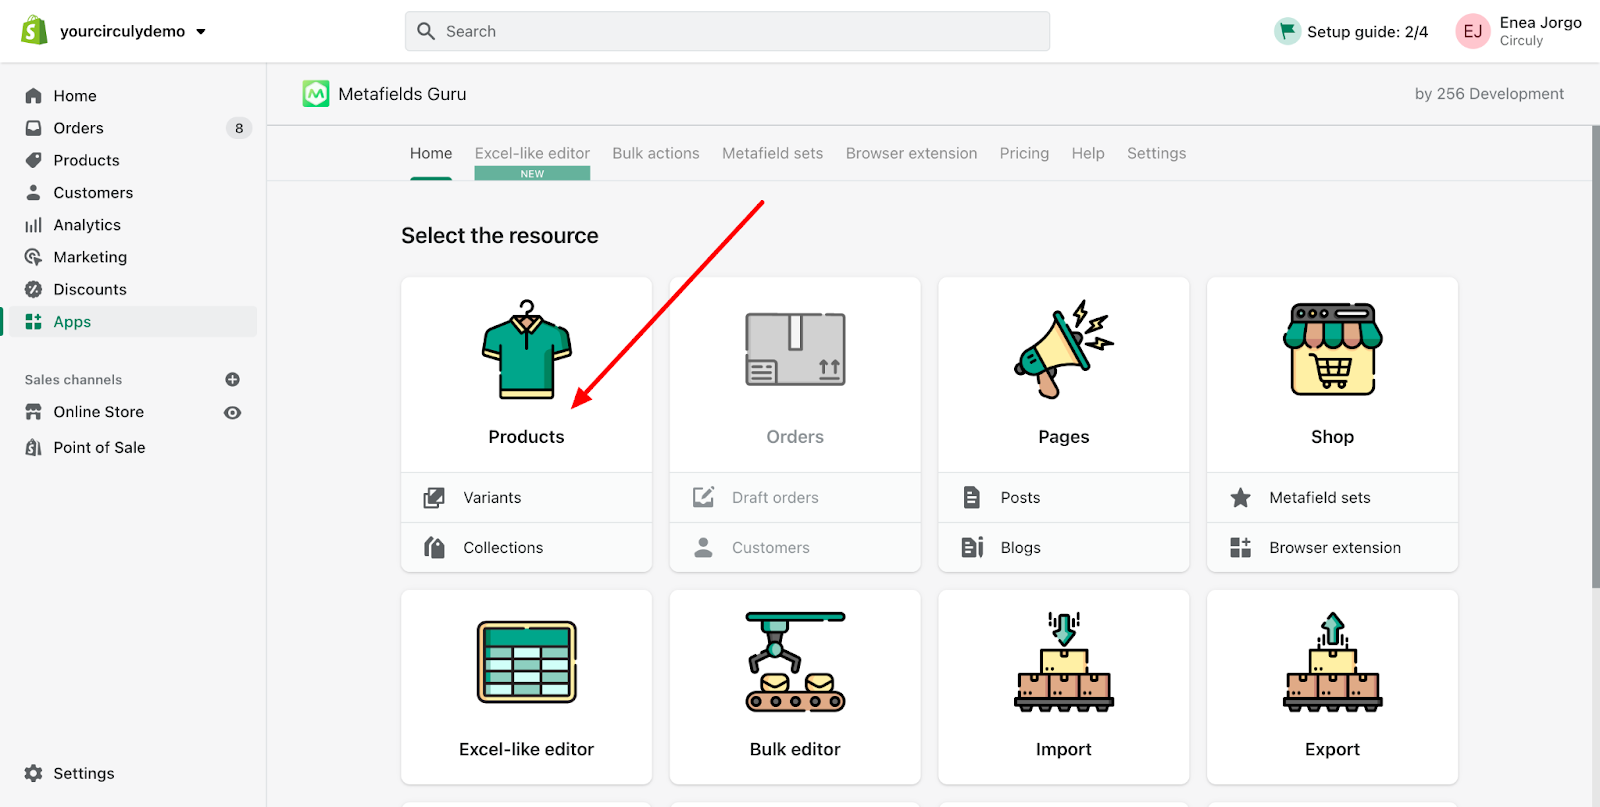
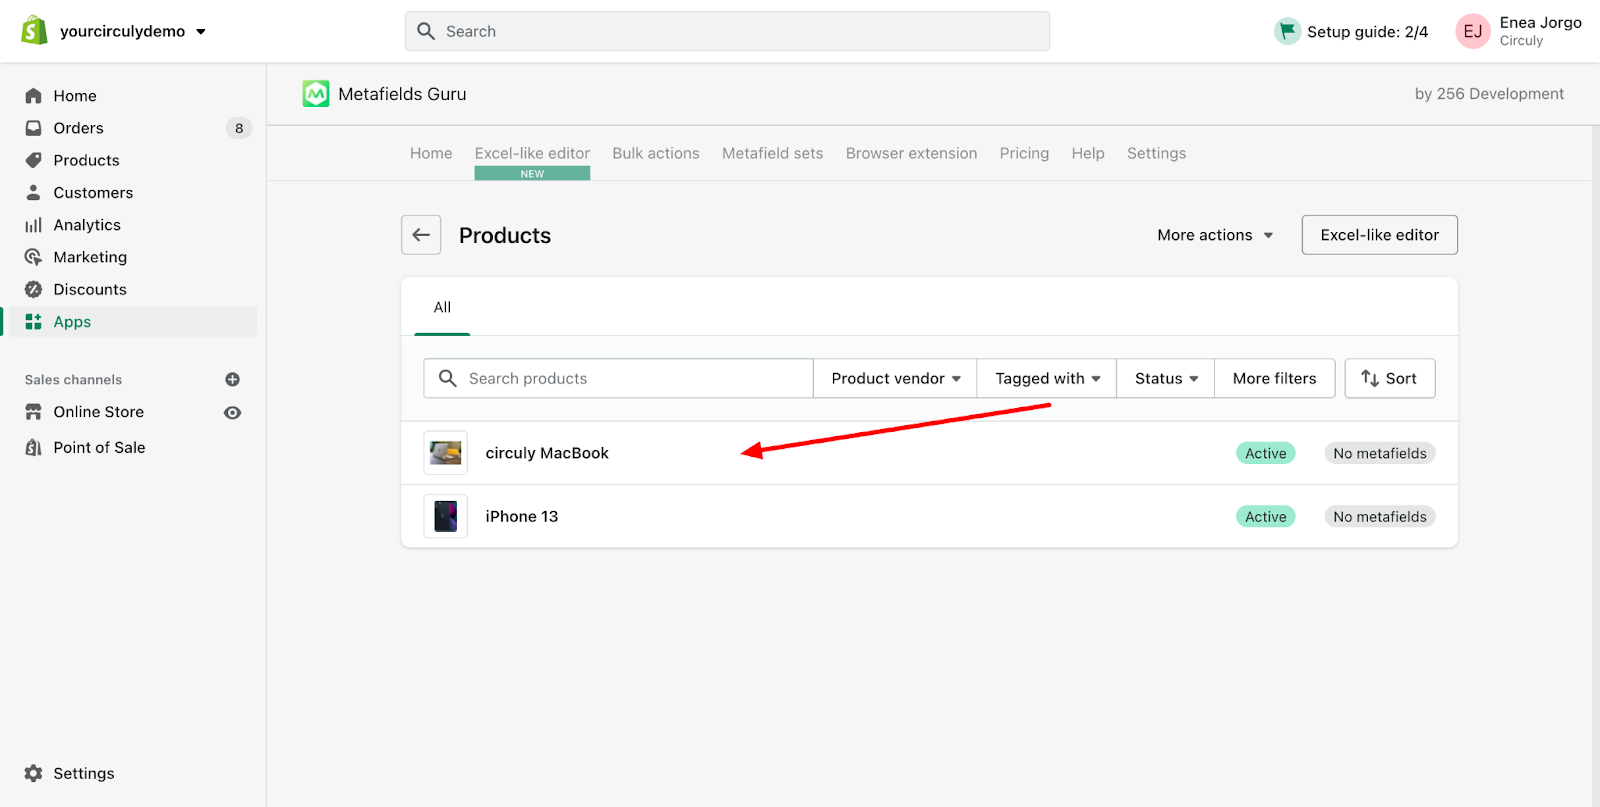
- Select a product from your product list.
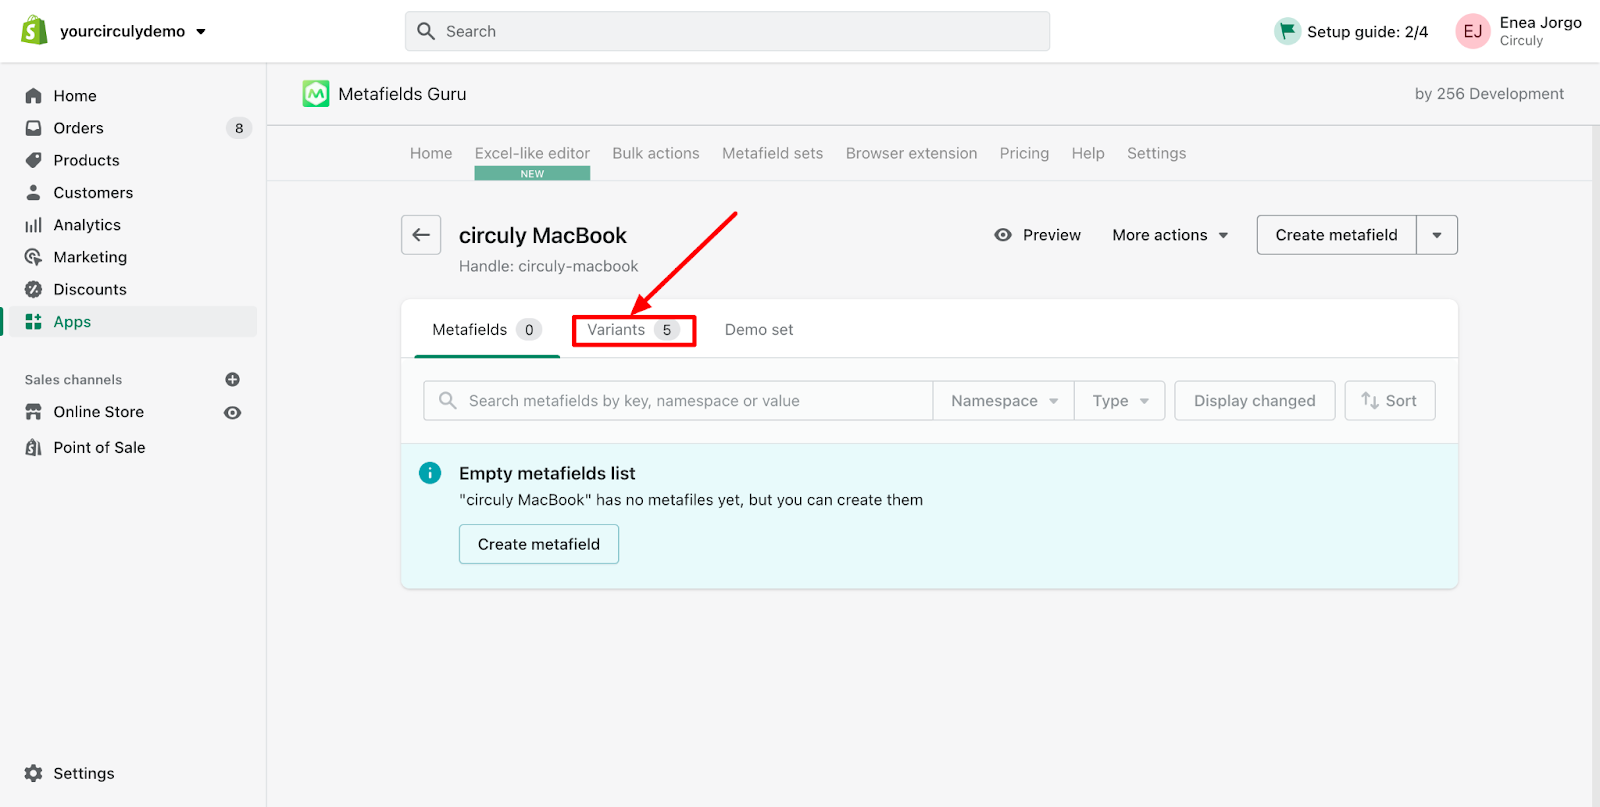
- You can do the set up for all the variants or one of them. To set up for one of the variations > Click on Variants (as shown in the image below).
Note: Creating metafields to define whether the product is a subscription product or a regular product, the subscription duration and the subscription period.
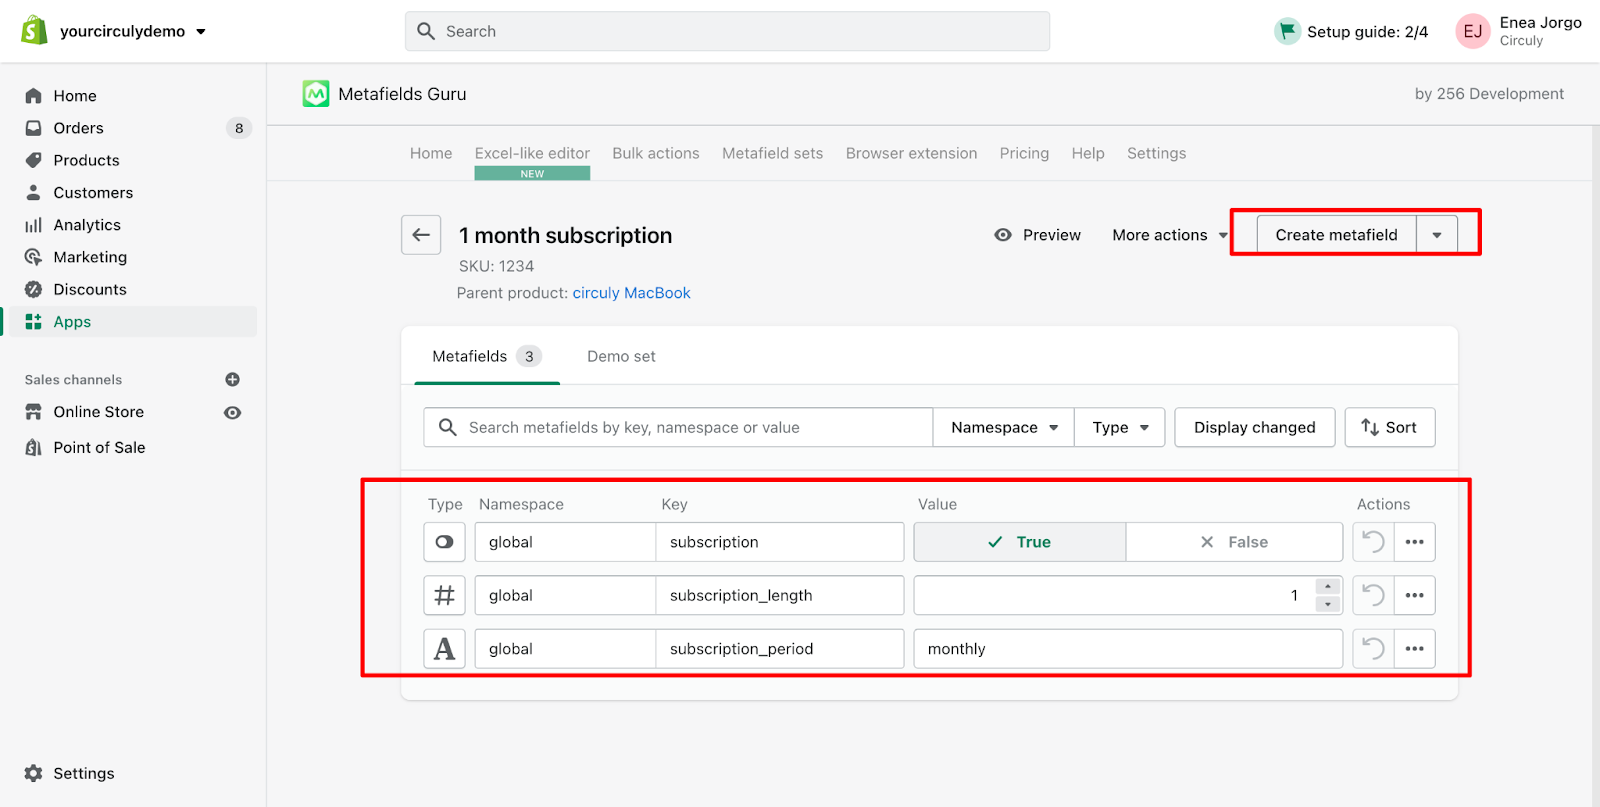
- Click on Create metafield > Add information as shown in the image below.
- Subscription > true / false, if the product is a rental or not
- subscription_length > the subscription duration
- subscription_period > daily / weekly / monthly / yearly
Bulk action
For bulk action, filter all variants and map them with the conditions mentioned above. You can filter them by Product ID, Product Name etc.
If you want to add more components to your subscription plan besides the one mentioned above, you can easily do so by using the Metafield Guru App. To set up additional fields such as a countdown, description, color etc, read this article.