
Connect Any Tool to circuly
With circuly you can export data from the circuly operations backend and plug it into a tool of your choice. The best way to do this is via Zapier where you can also create automations.
If you decide to use Zapier, then the first thing you need to do is to make sure that the tool you want to send information to from circuly is available on Zapier.
Webhooks in circuly
circuly also provides you with the option of using webhooks to take data out of circuly and plug it into a tool of your choice to create automations. You can use an API endpoint of our choice or work with Zapier (our recommendation is to use Zapier) to make two apps talk to one another.
About Webhooks
Webhooks are automated messages sent from one app to another in case something happens or something is updated/changed. It’s a way for different tools to “communicate” to each other and get automated information when something new happens. With webhooks you can push data from one app to another.
Here’s a simple analogy from Zapier about Wehbooks
“There are two ways your apps can communicate with each other to share information: polling and webhooks. As one of our customer champion's friends has explained it: Polling is like knocking on your friend’s door and asking if they have any sugar (aka information), but you have to go and ask for it every time you want it. Webhooks are like someone tossing a bag of sugar at your house whenever they buy some. You don't have to ask, they just automatically punt it over every time it's available.”
Using webhooks with Zapier
When you use Webhooks there’s a sender that send the data and a receiver that receives that data. So there is a place where the action is “triggered”, and a place this action goes to, to convey that something has happened.
You can use Webhooks to create all sorts of automations. You can use an API endpoint of our choice or work with Zapier (our recommendation is to use Zapier) to make two apps talk to one another.
There’s a lot of room for creativity when it comes to creating automations. The automations you make depends on what exactly you want to automate. Based on that you can think what information you will need from a tool to make that automation work.
Note: Webhooks by Zapier is only available to Zapier users on a paid plan.
Requirements
Create a Zapier account - to work with zapier, you need to create an account.
Create an account on the tool you want to use - you also need to create an account on the tool you want to use with Zapier.
Understanding what you need
With webhooks you first have to figure out what you want to automate and the information you will require to automate it. Then you need to match it with the information that is available and can be used to create the automation.
Example
Connecting a shipping tool (we’re using Easyship as an example) to circuly via Zapier and using webhooks to transfer data to the shipping tool.
Overview
- Set up trigger by selecting Webhooks by Zapier > A URL will be generated by Zapier > Copy the URL. This is the URL where the information will be sent to everytime there is something being changed or updated.
- Go to your circuly operations backend and create a Webhook > Paste the URL from Zapier. Any updates or changes will be sent to this URL.
- Search for the tool in the action window while creating a Zap and connect it to Zapier.
- Done. Your tool is connected to circuly via Zapier.
Detailed steps given below
Setup in Zapier and circuly
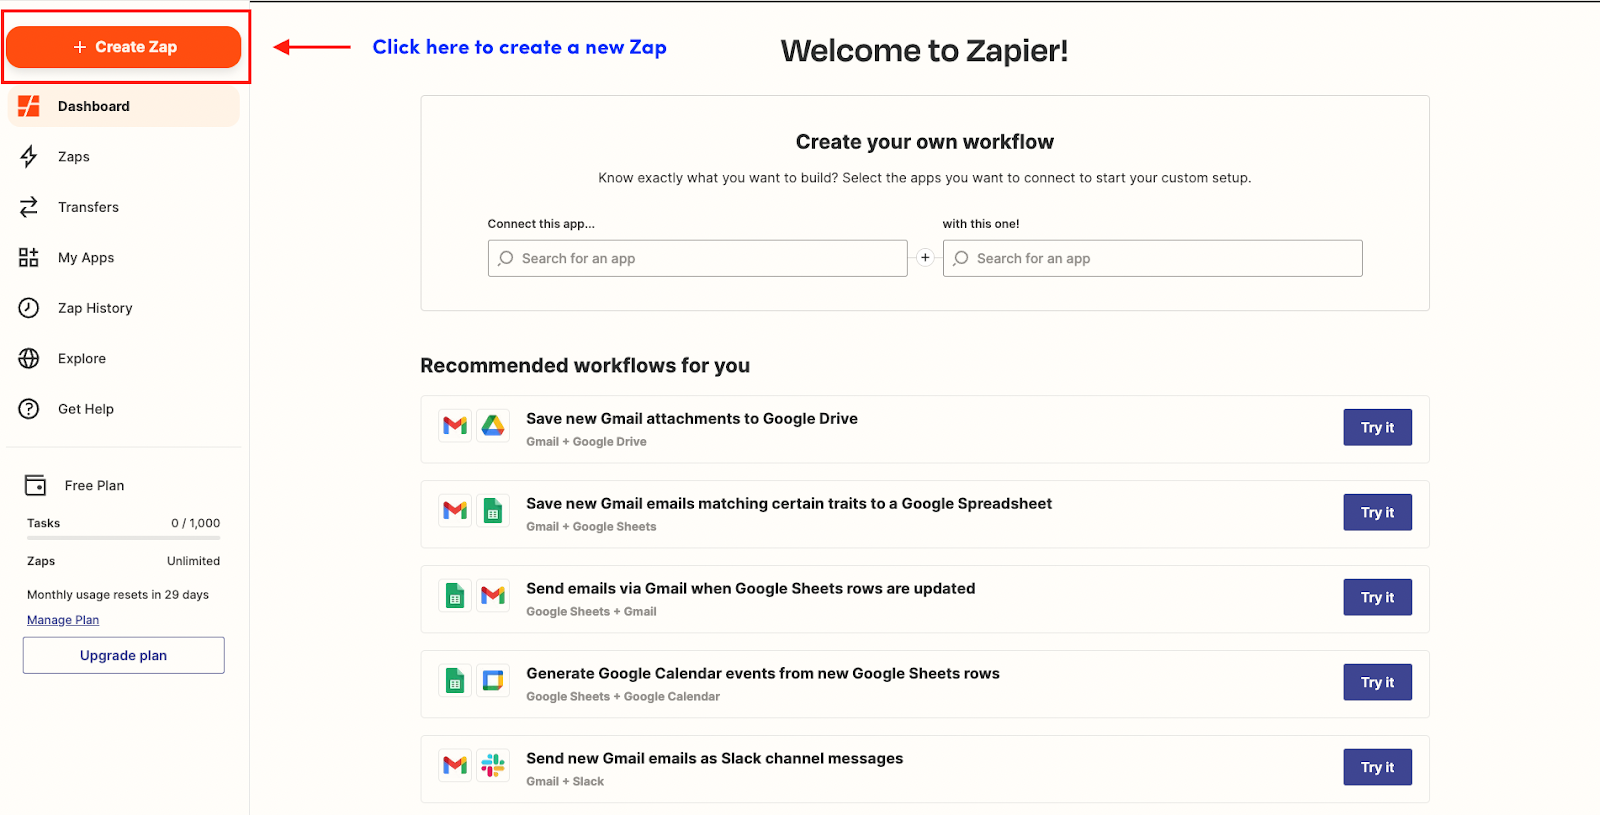
- In your Zapier home > Click on the button that says + Create Zap.
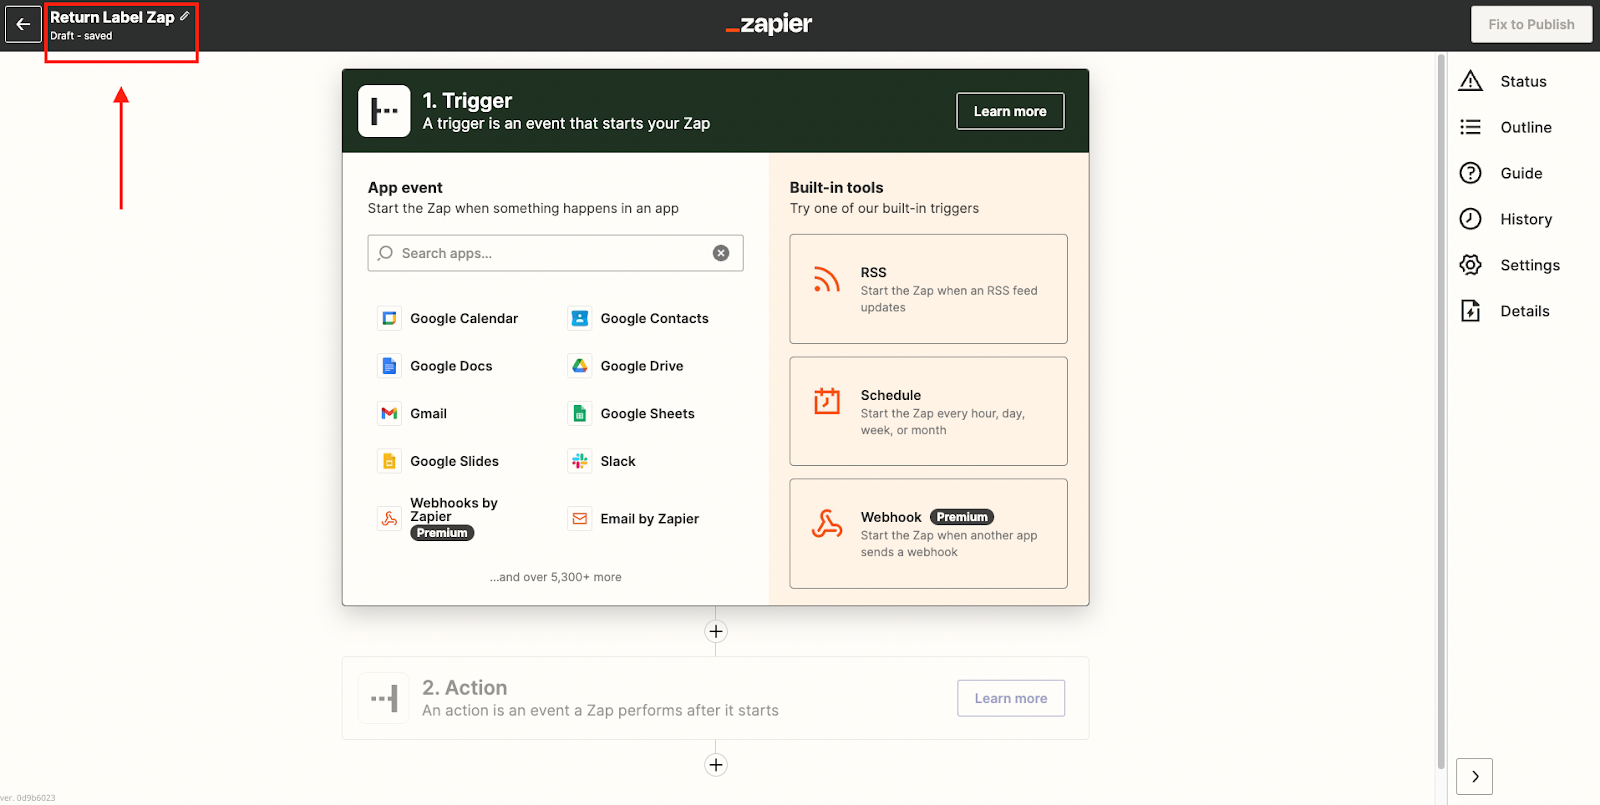
- In the Zapier Editor > Start by giving the Zap a name.
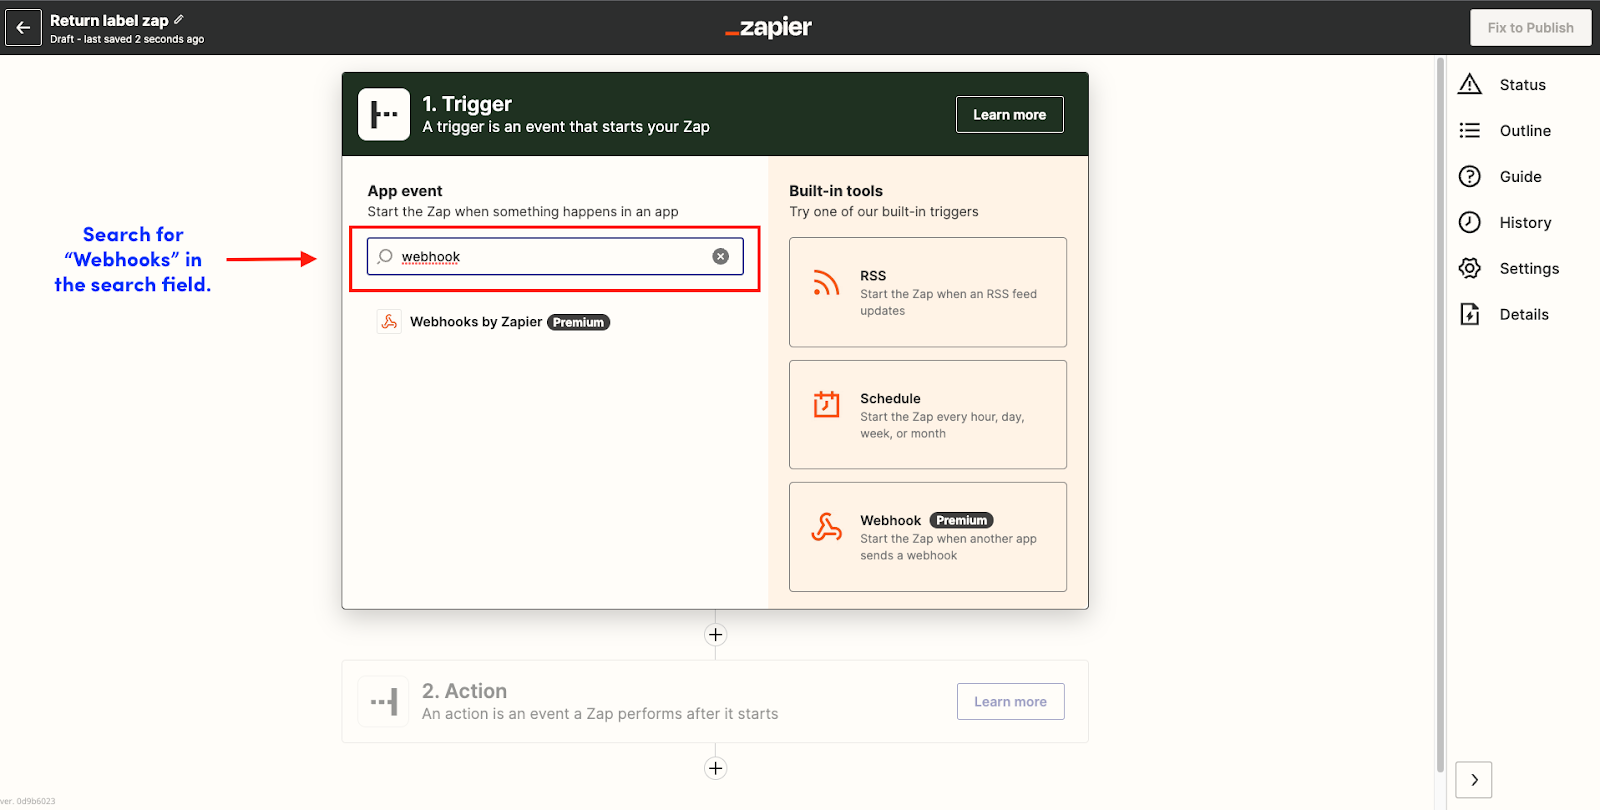
- In the same window > Search for “Webhook” in the search field > And click on “Webhooks by Zapier”
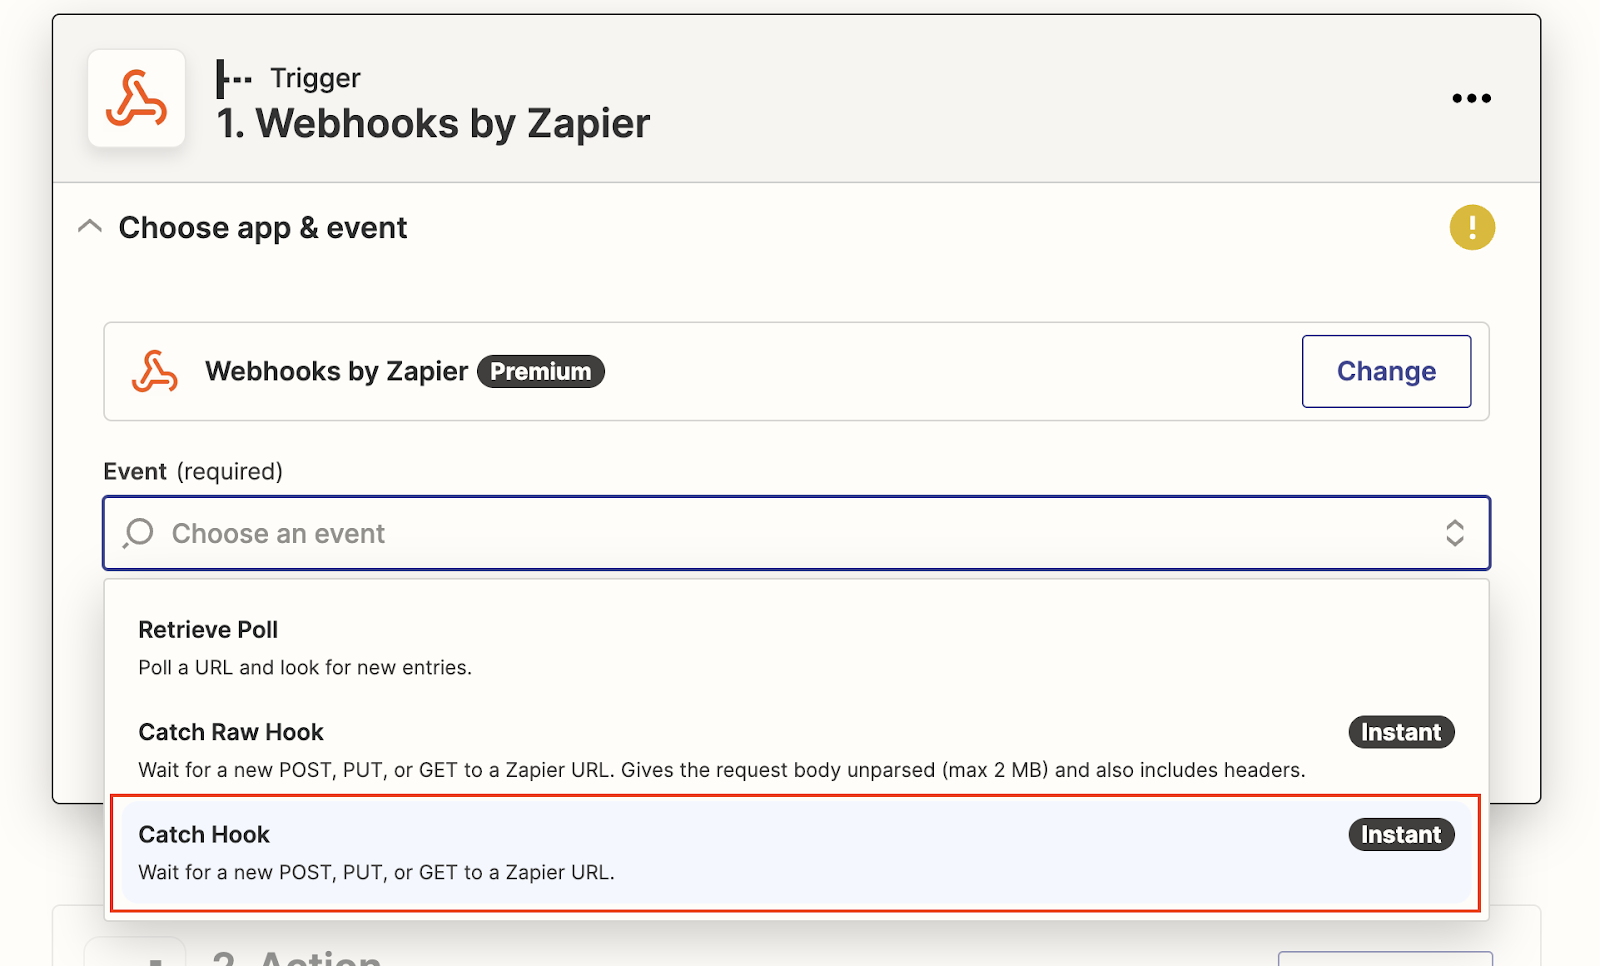
- Under Events > Select Catch Hook > And click on the Continue button.
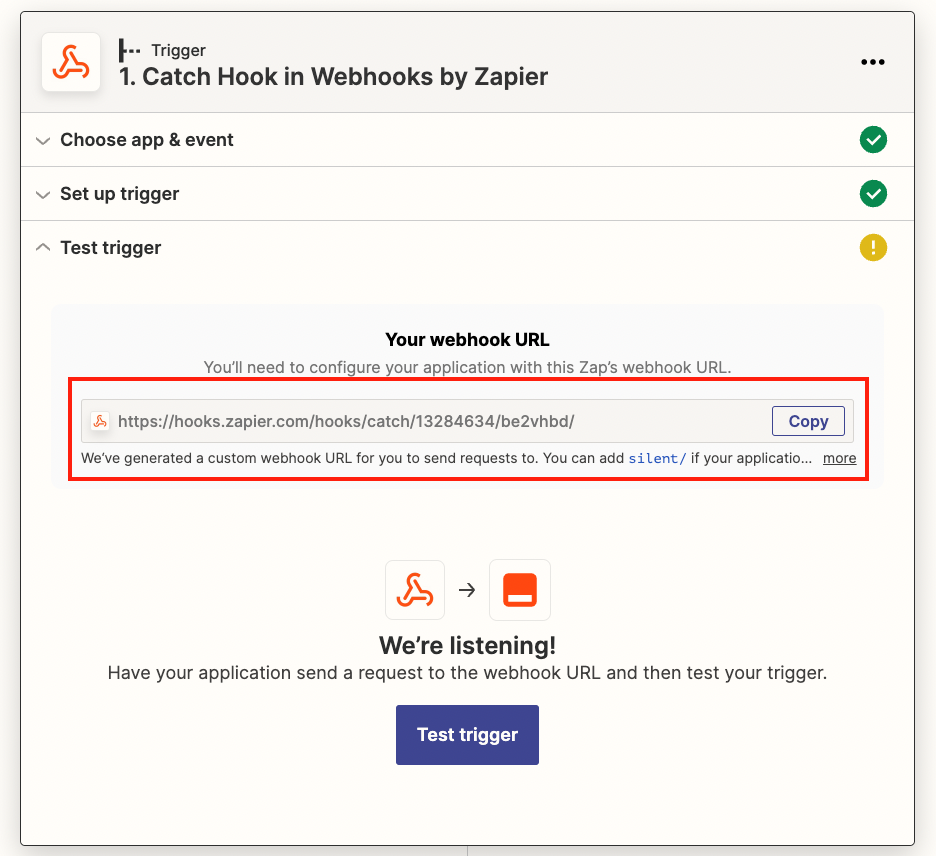
- Leave the field Pick off a Child Key blank for now > And click on the Continue button.
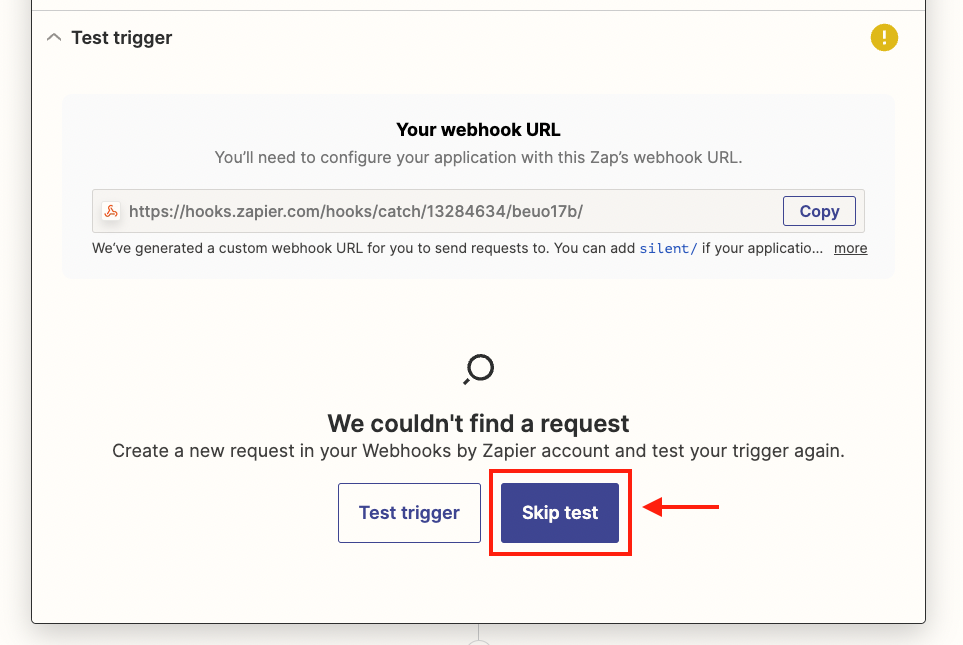
- Copy the URL given under Your webhook URL.
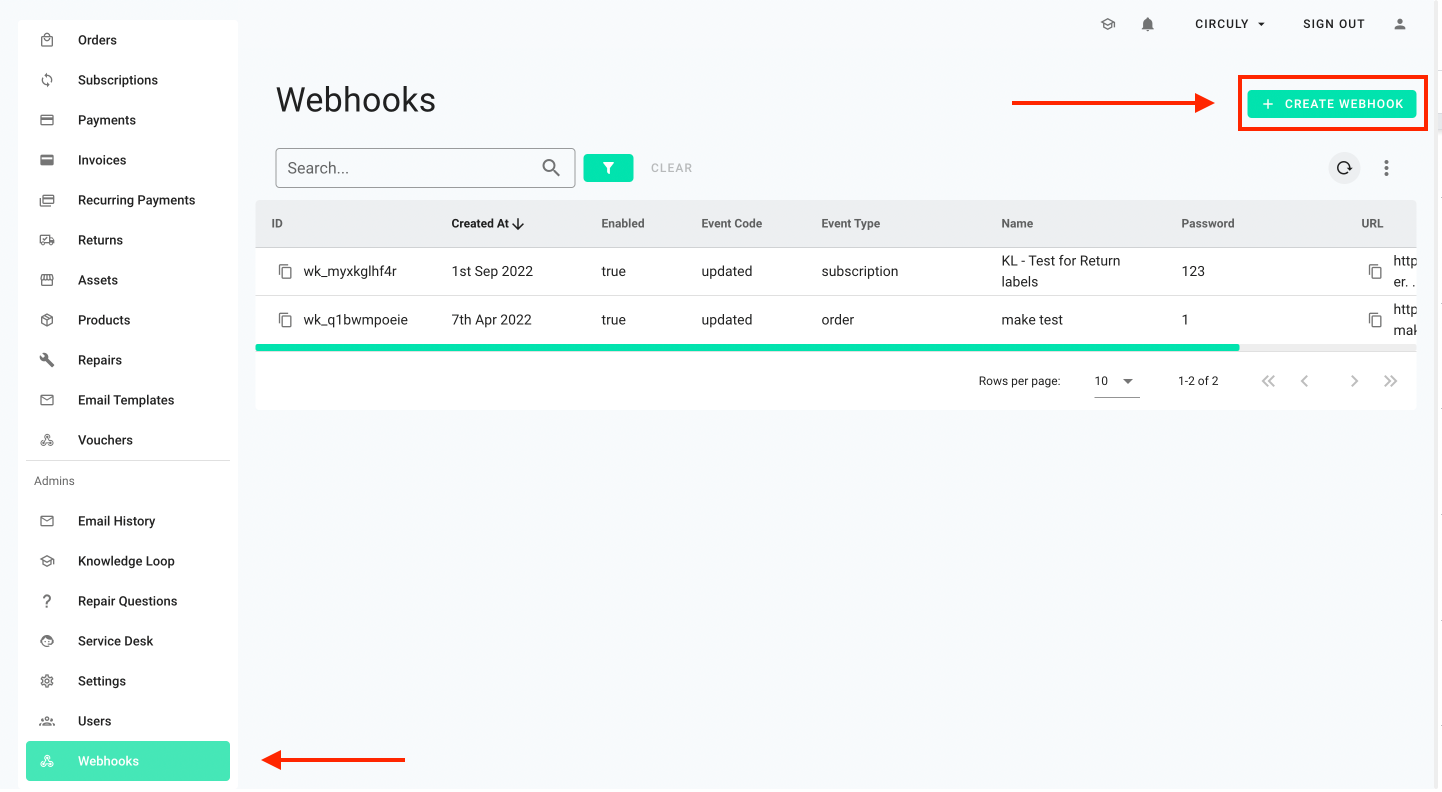
- Login in to your circuly Operations Backend > Go to the Webhooks tab > Click on the + CREATE WEBHOOK button.
- In the Create webhook window > Under Event Type select subscriptions > Under Event Code select updated > Give the webhook a Name > Set a Password > Paste the URL that you copied from Zapier into the URL field.
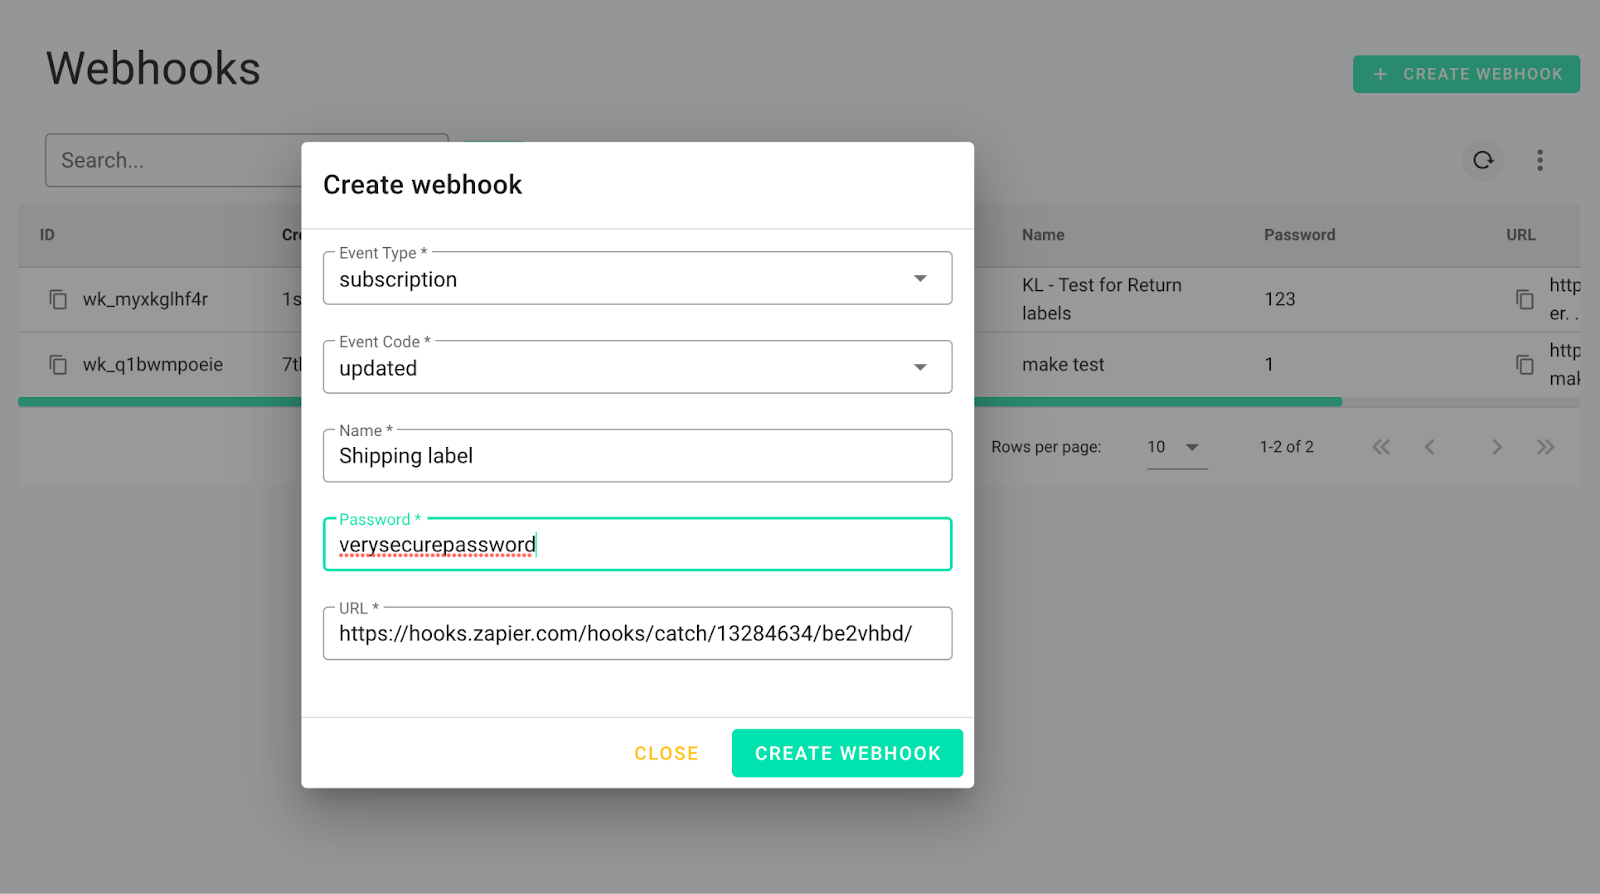
Now everytime anything in a Subscription is updated, Webhook will catch that update/change and send it to Zapier.
Optional: If you have test orders and subscriptions in your operations backend, you can change something in the subscription to test the trigger. But if no change or update has been made in the Subscription at the time you are creating a Zap then the Test trigger button will not lead to any results.
- To test the trigger > Go back to your Zapier account > Click on the button that says Test trigger.
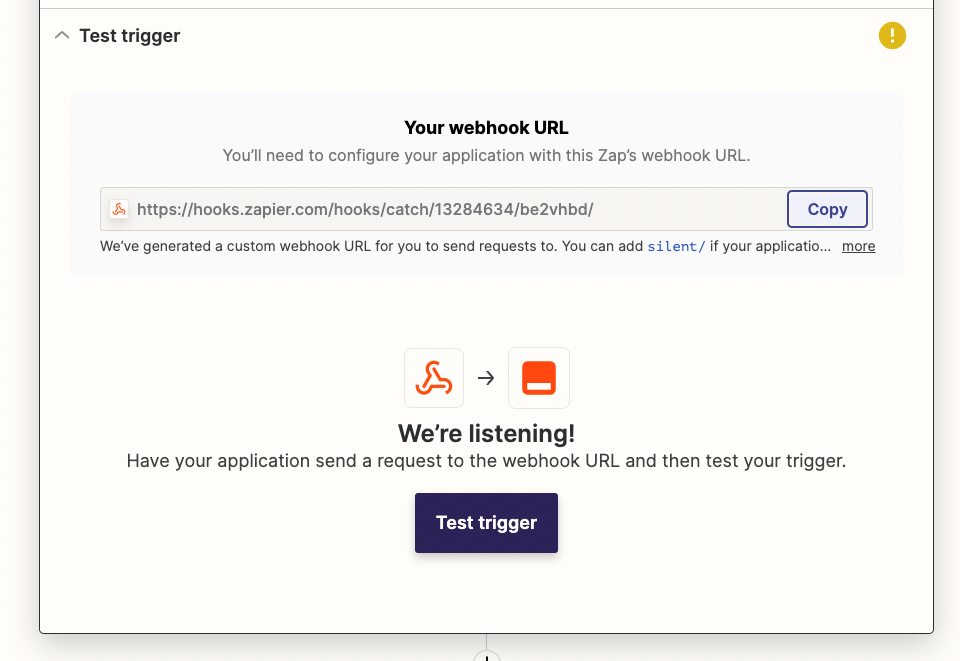
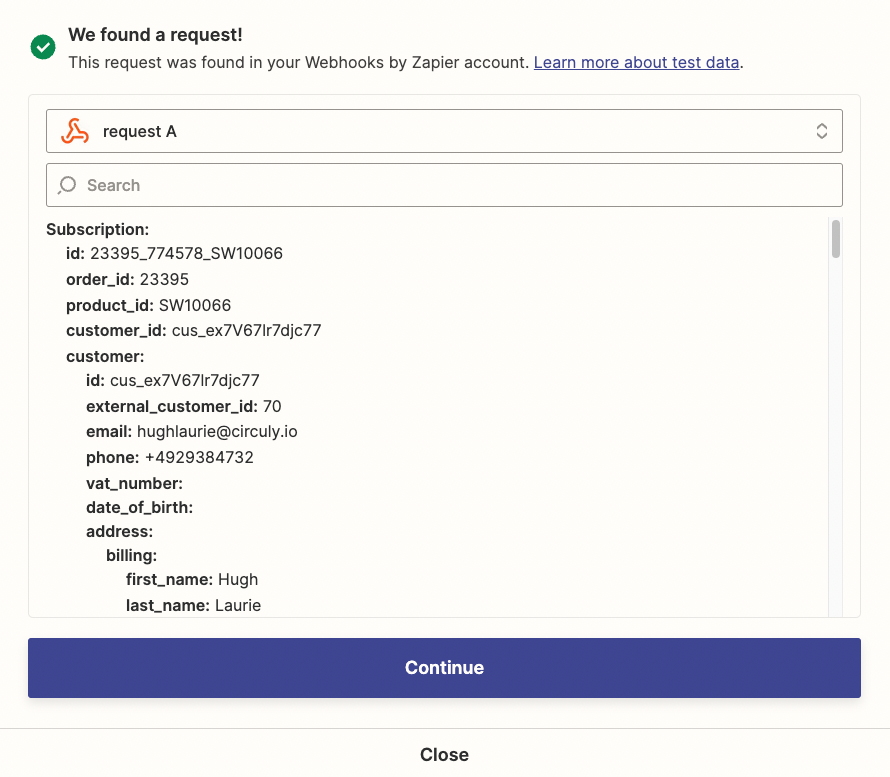
- If you’ve made any changes in the Subscription, clicking on the Test trigger button will show you that a Request was found.
- If you dont want to make any changes to a subscription > You can also skip the test by clicking on the button that says Skip test.
- Then click on the button that says Continue to next step.

Sending data to a tool
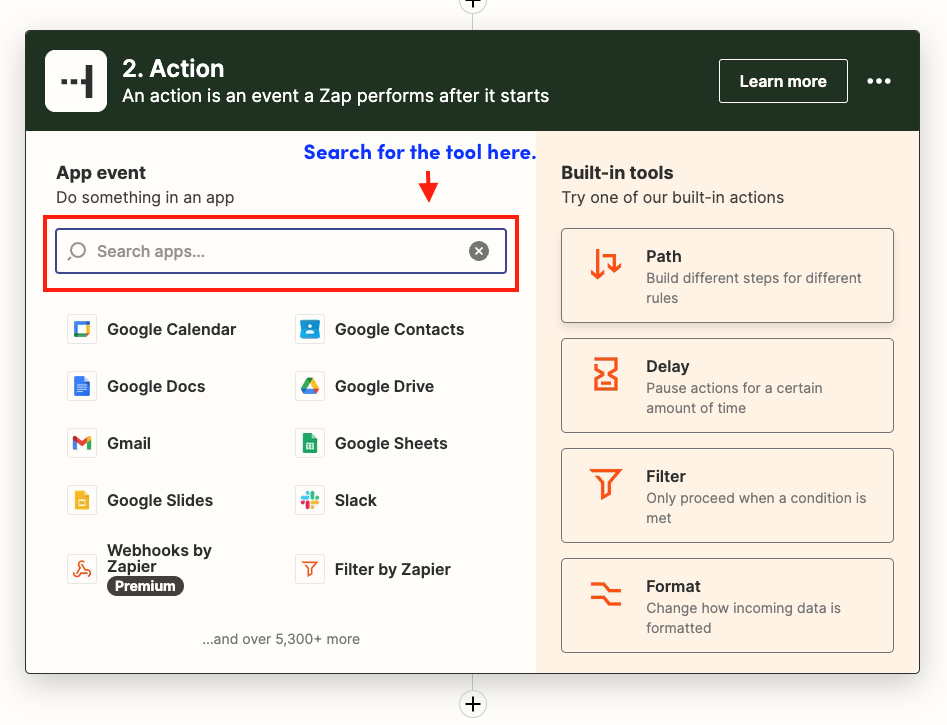
- In the Action window > Search the name of the tool you want to connect (we are using Easyship as an example).
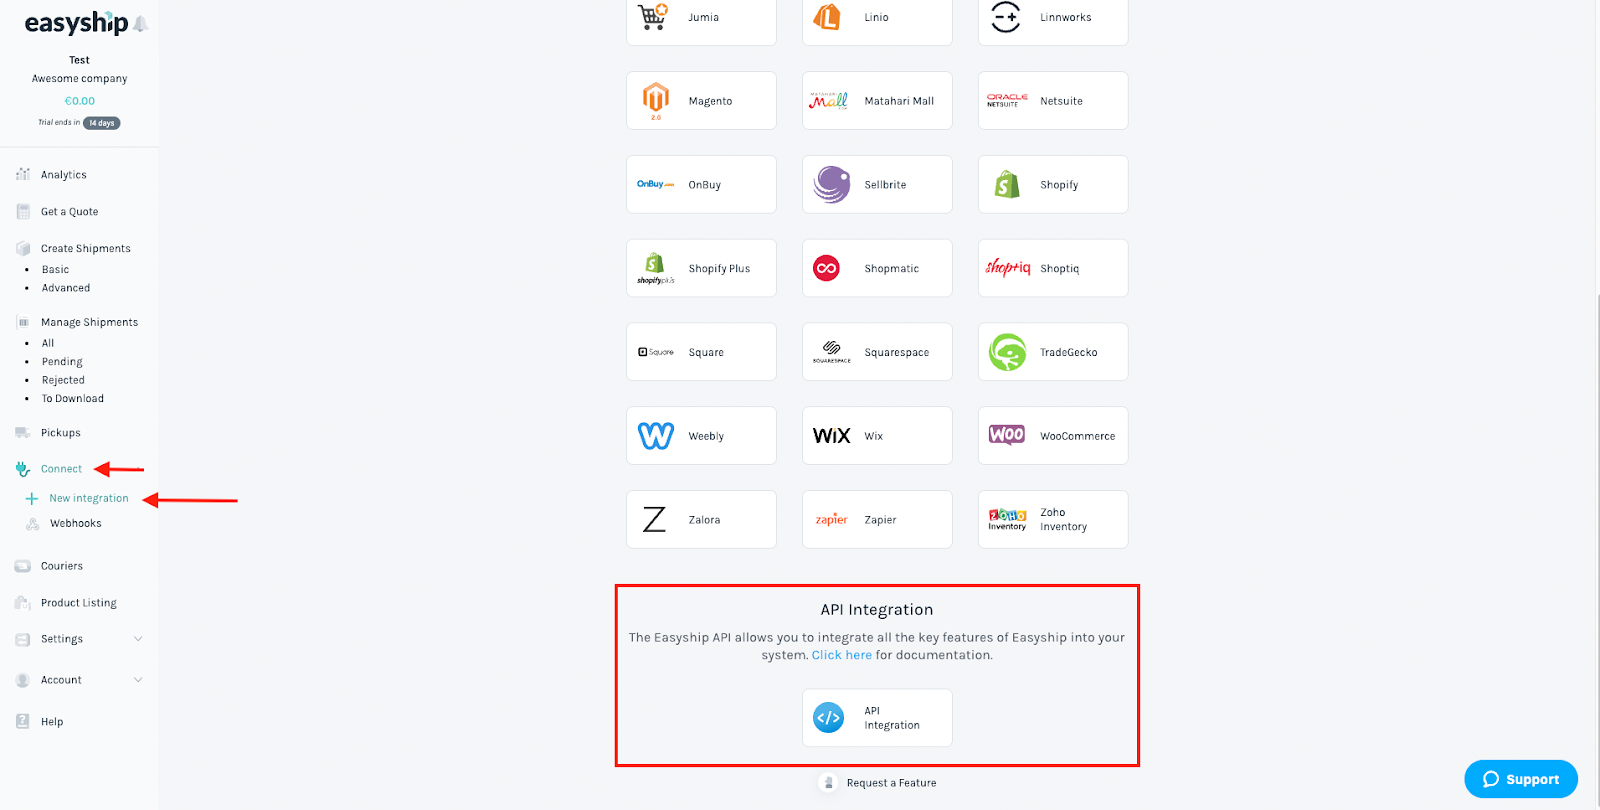
Note: Make sure to connect your tool with Zapier. Here’s how it works for Easyship > In your Easyship account > Go to Connect in the left nav bar > Click on + New Integration > Select Zapier from the list > Click on the Connect button.
Once you’ve completed the necessary steps in the tool, go to Zapier
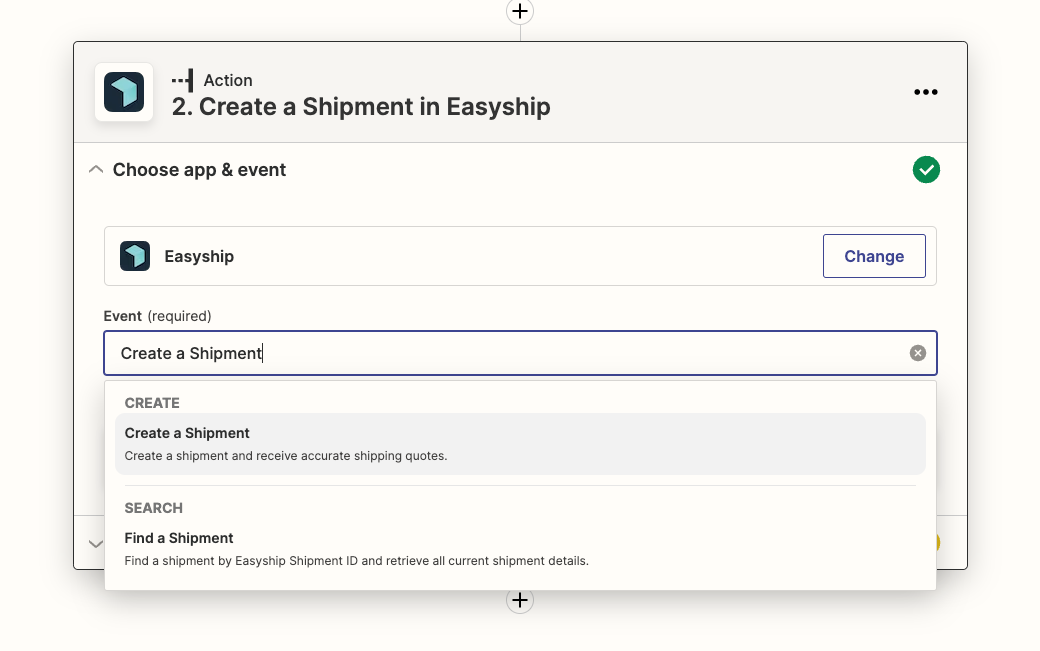
- Under Event > Select an Event (we are using Create a Shipment as an example) > Choose an account > Click on the Continue button.
- Under Set up actions fill in all the necessary details in the given input field.
To fill in details, either type in the input field or click on the field to get a list of values that can be automatically taken from the data retired via webhooks.

- If everything is right, you’ll get a success message. See image below.
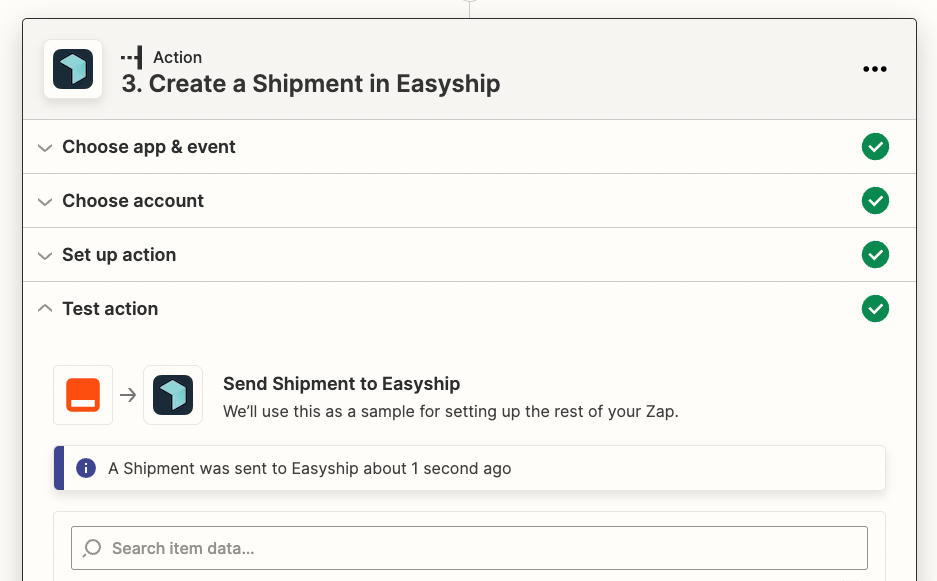
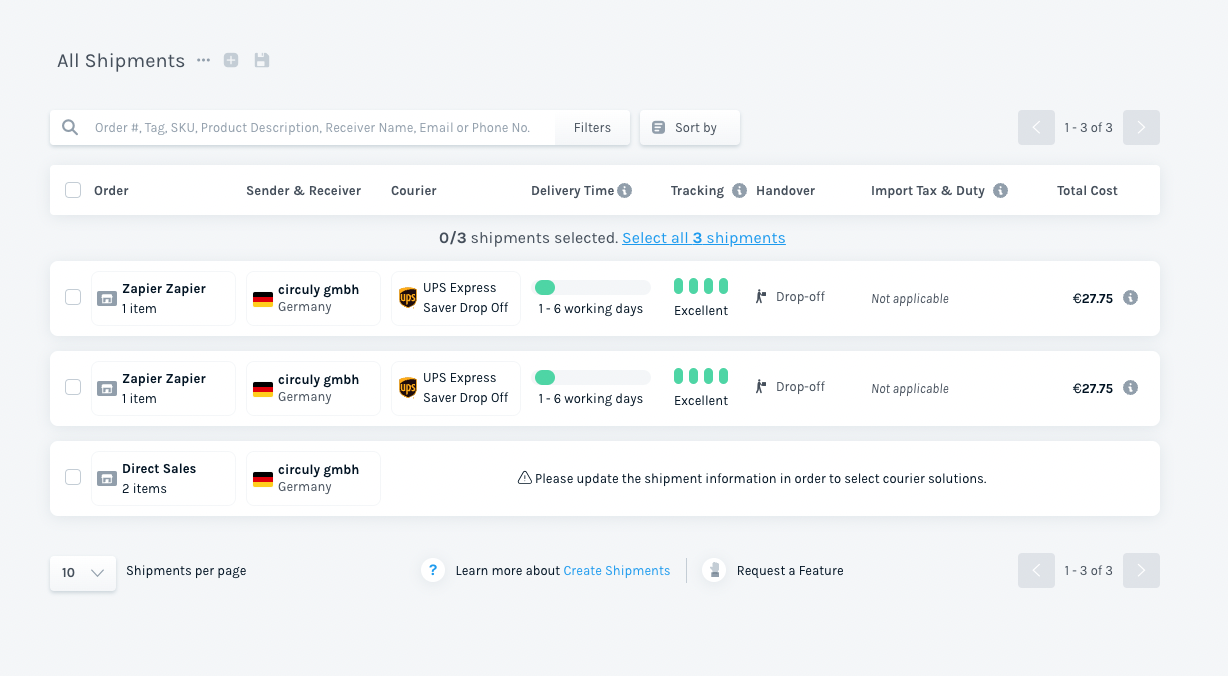
- Check your shipping tool to see if you’ve received a shipment from zapier.
- Done.