
Filter Functionality in circuly
Introduction
Each tab in circuly Hub (Orders, Subscriptions, Customers, Invoices) has an index page that displays a list — such as the Order List, Subscription List, or Customer List. You can use filters to segment these lists and display exactly the information you want. The filter functionality in the circuly Hub helps you quickly narrow down data so you can focus on what matters most.
Feature Overview
- Flexible filtering: Apply multiple filters to slice your data based on different fields and criteria. The fields available depend on the tab you’re working in (e.g. Customer fields under the Customers tab).
- Saved views: You can save your filter settings as default views, making it easy to switch between different filtered perspectives without setting them up each time. You can save multiple views and toggle between them whenever needed.
- Active filters: All applied filters are shown under Active filters, so you always see exactly how your data is being filtered.
- Resetting filters: Clear all filters anytime with the Clear button to return to the unfiltered list.
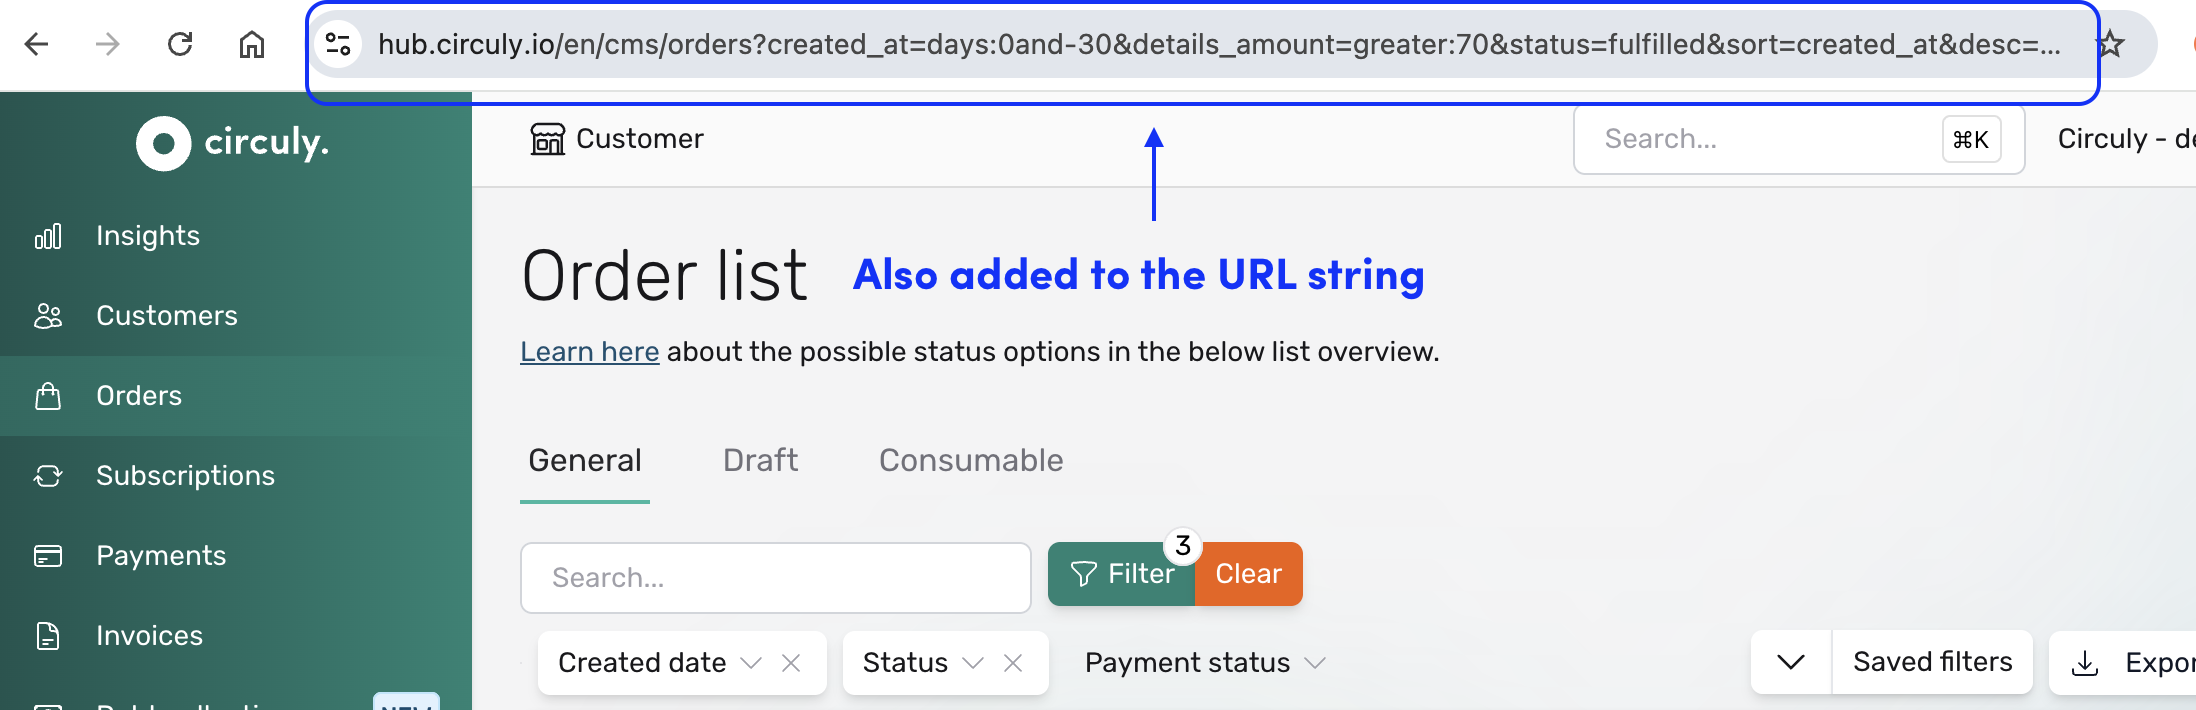
- Browser-friendly: Filters are added to the URL string, so if you navigate back and forth using your browser’s arrow keys, your filters stay intact and don’t reload — making it easier to explore data without losing your current view.
Step-by-Step Guide
How to add a filter
- In the circuly Hub, click on the Filter button.
- Select a Filter key.
- The options shown here depend on which tab you’re in. For example, in the Customers tab, the dropdown will show all the column headings from your customer list.
- Select an Operator to define your filter condition.
- Available options include:
- Is, Contains, Excludes, Matches, Is Empty, Date, or Date Range.
- Certain value options also contain predefined values such as status.
- In case of numerical possibilities operators like greater than and less than as well.
- Available options include:
- Click + Add filter to apply it.
Note: if you don’t actively click this button, the filter won’t be applied.
- Once applied, the filter will appear under Active filters.
- Repeat these steps to add more filters as needed.
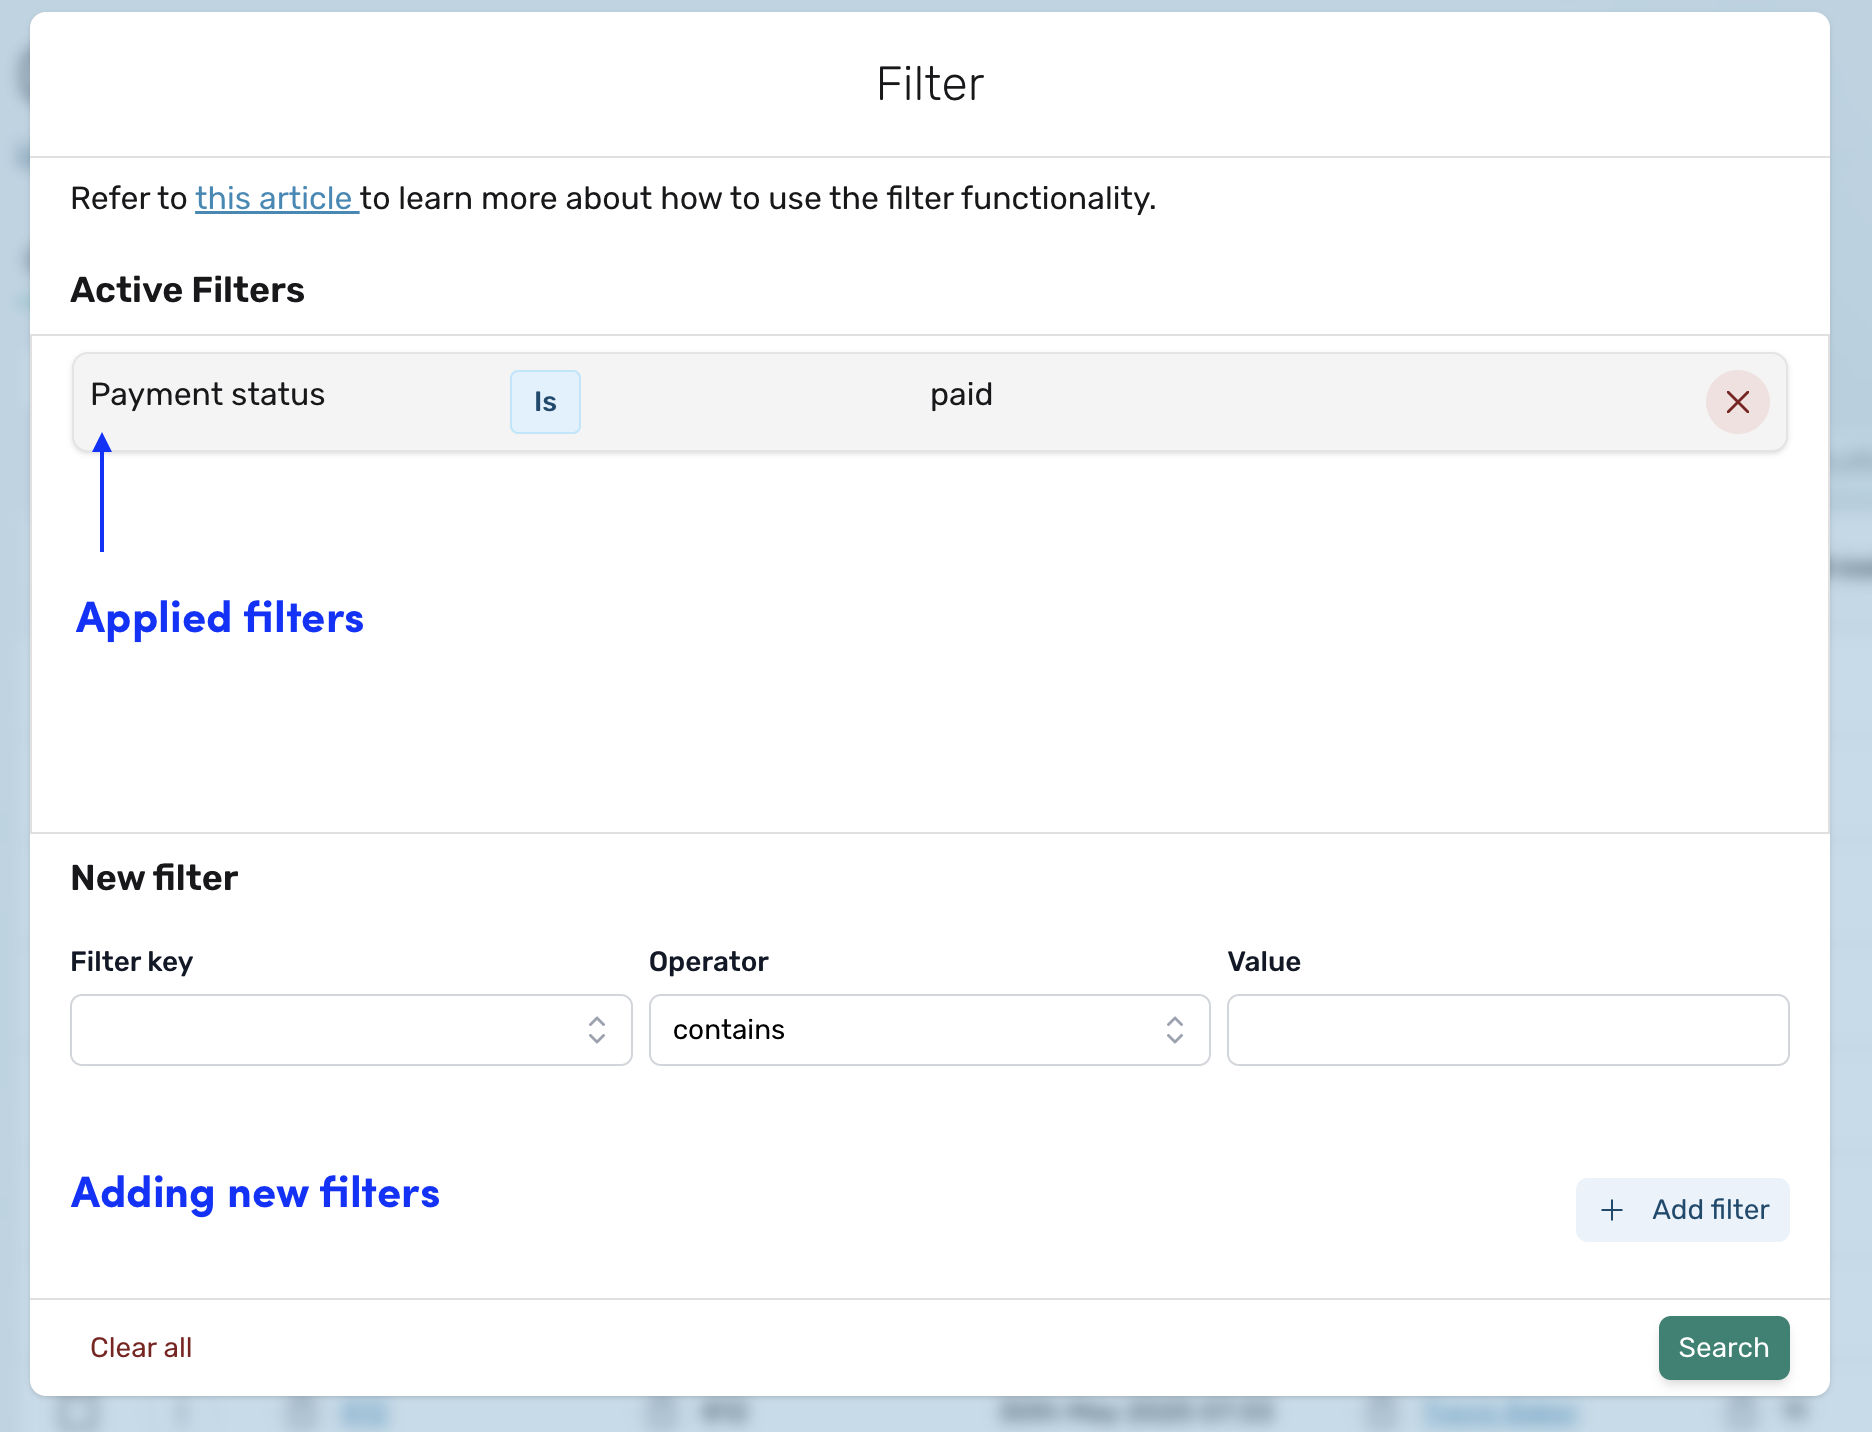
- When you’re ready, click Search to update your list with the applied filters.
How to save a filter view
- After adding all your desired filters, click on the Save as function.

- Give this set of filters a name to save it.
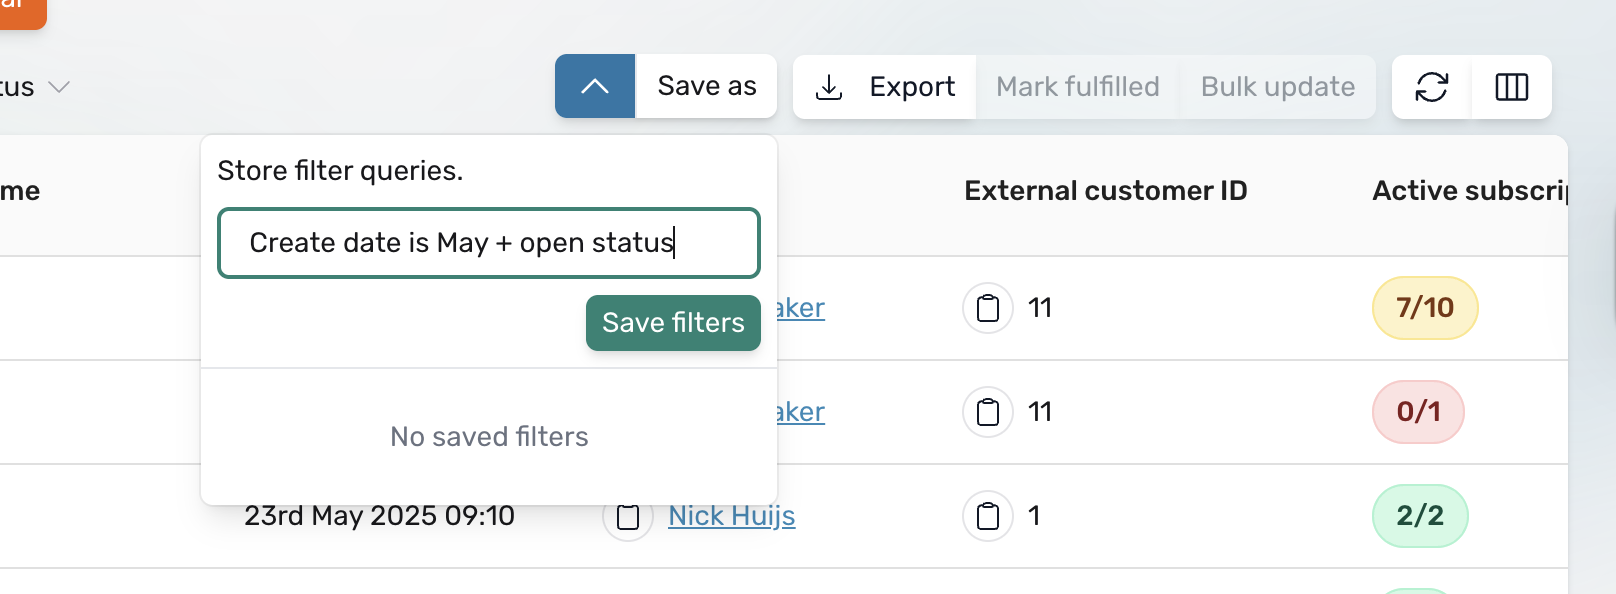
- You can create and save multiple views.
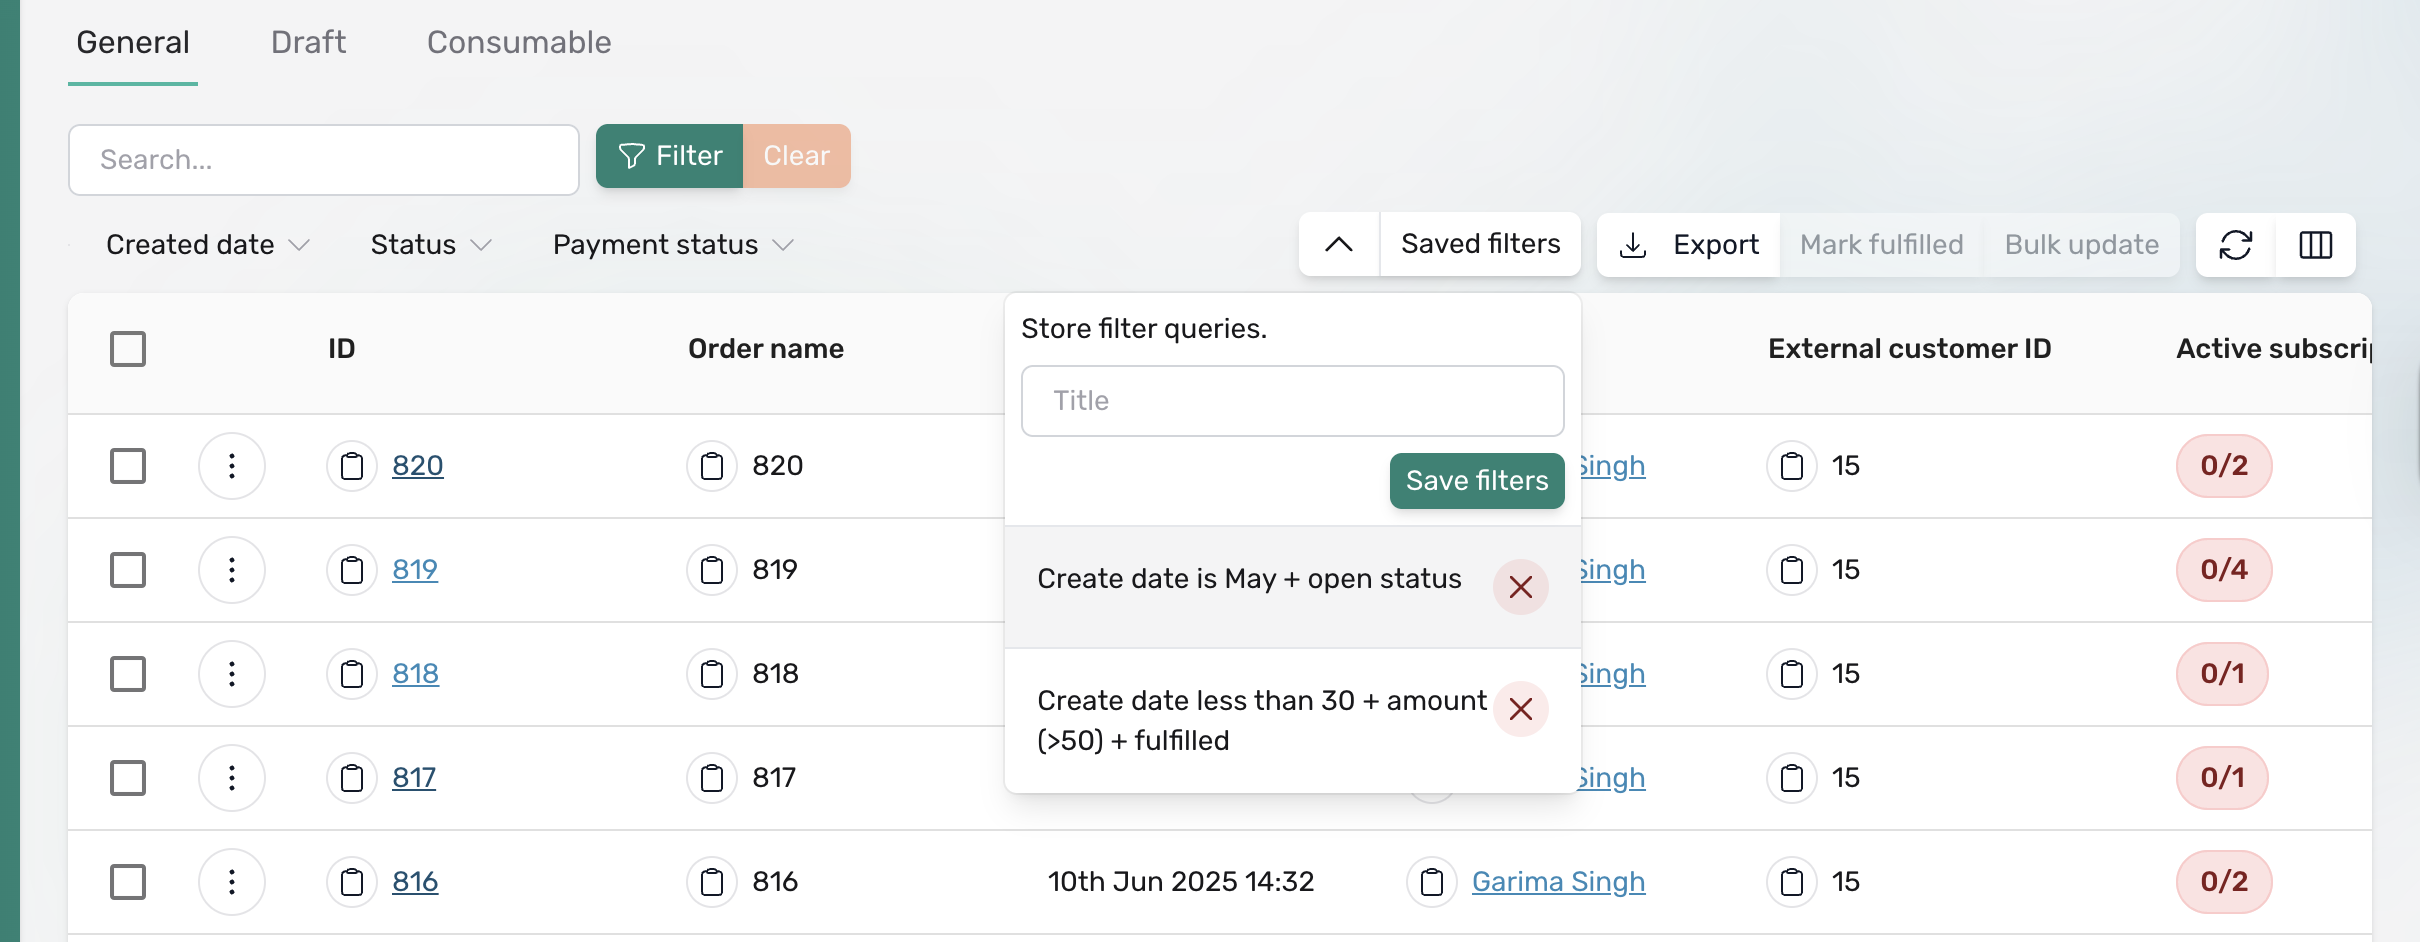
- Later, simply select the saved view to instantly apply all its filter settings.
How to navigate between saved filter views
If you’ve saved more than one filter view, you’ll see a list of saved filters under “Saved Filters.”
To switch between different filtered perspectives:
- Simply click on any saved filter in the list to apply it immediately.
- To move from one applied filter to another, just select a different saved filter from the list.
Important: Clicking on the cancel (×) icon next to a saved filter will permanently delete that saved filter.
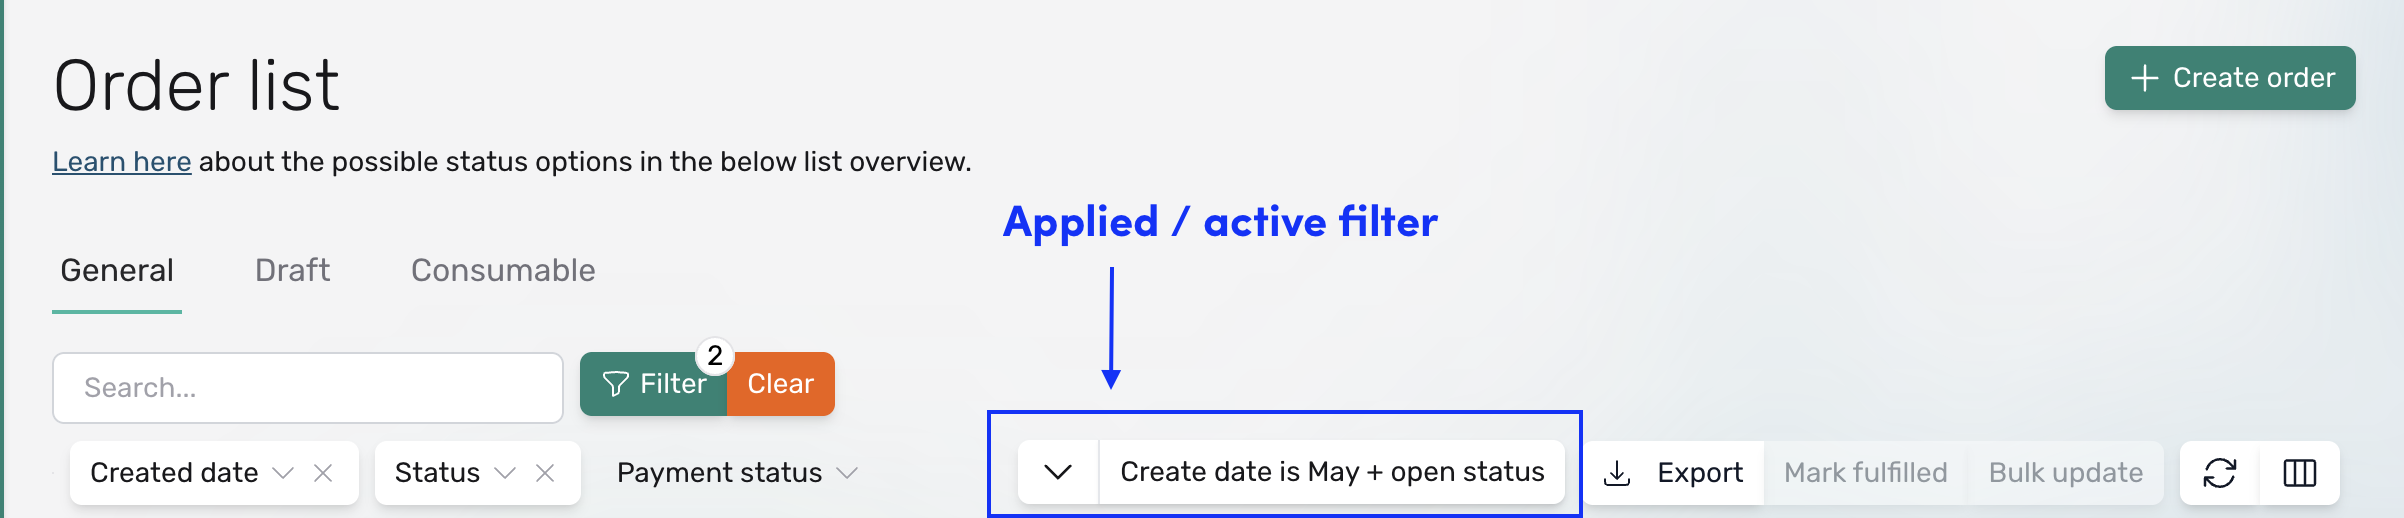
How to see which filter is currently active
You can always tell which saved filter is currently applied by checking the highlighted or selected filter under the Saved Filters section. This clearly shows which conditions are filtering your displayed list.
Pro tips: browser navigation & bookmarks
- When you use your browser’s back and forward buttons, the circuly Hub keeps your filters intact — even if you move to another tab and return — because the filters are stored in the URL.
- You can also bookmark the URL (including the filter string) to always land on the exact filtered view you want whenever you log back into Circuly.
You’re all set to start using filters in the circuly Hub. Try out different combinations and save your favourite views to make your work even easier.
If you have any questions or run into something unexpected, our team is always here to help.