Setup Metafields in Shopify
Metafields enable you to customise the functionality and appearance of your Shopify store by storing specialized information that isn't usually captured in the default Shopify admin. For rental or subscription-based businesses, metafields are a powerful way to distinguish between “rented” and “bought” products in your store setup.
Introduction
In a subscription business, knowing whether a product is meant to be rented or purchased outright is crucial for managing pricing, user experience, and business logic. Metafields let you store and manage this distinction in Shopify
Feature Overview
To distinguish between rented and bought products, use the following metafield structure:
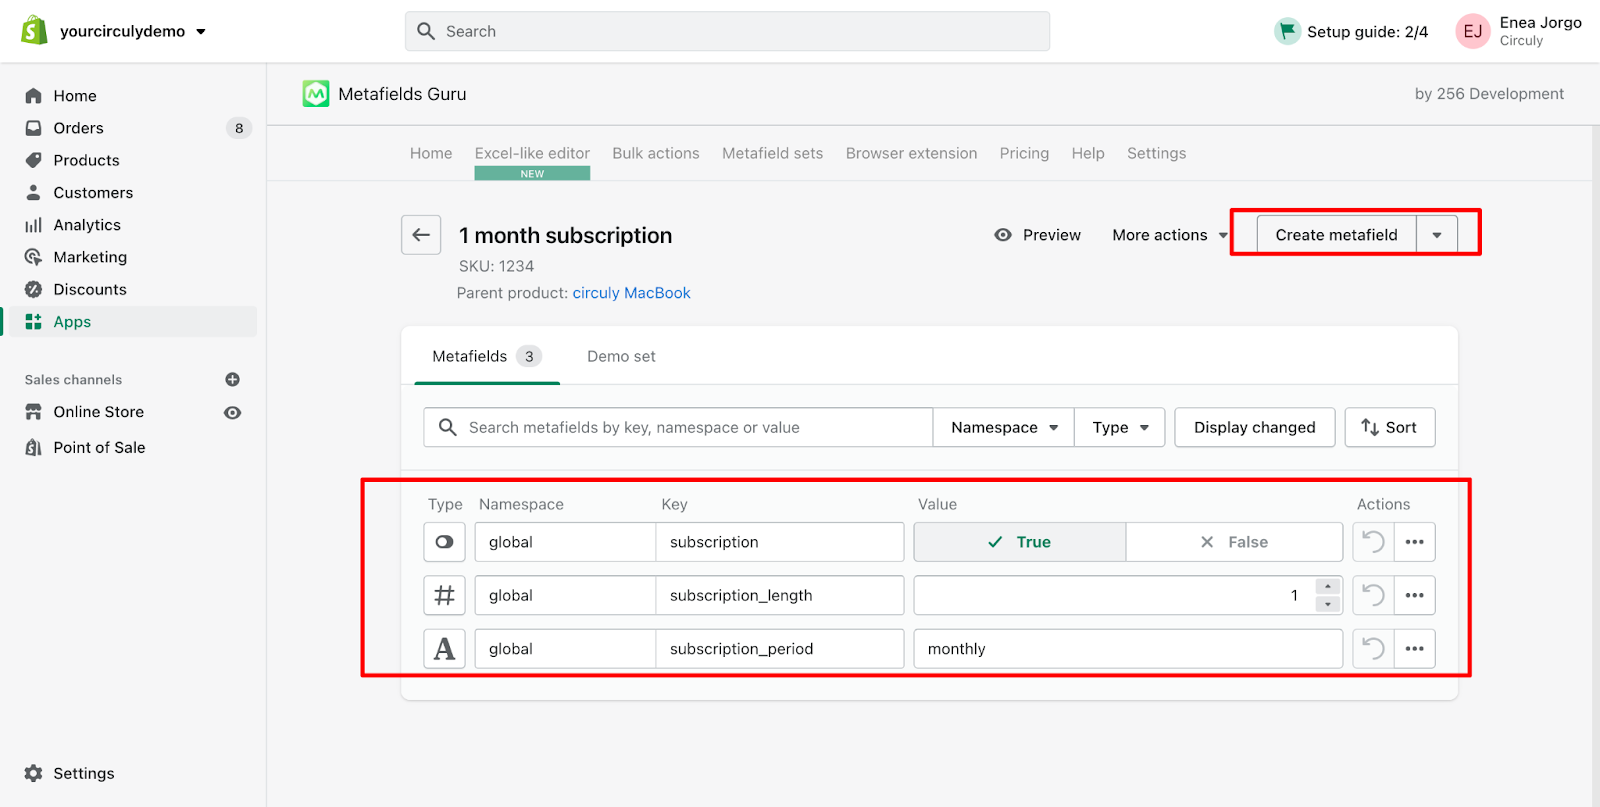
subscription→ true / false (Defines if the product is a rental)subscription_length→ number (Specifies the duration of the subscription)subscription_period→ daily / weekly / monthly / yearly (Defines the time unit for the subscription)
These metafields can be applied to each product variant individually or through a bulk process.
Process Overview
There are two ways to set up metafields:
- Manually per product: Ideal if you’re just getting started or have only a few products.
- Bulk action: Efficient for stores with many products that need to be mapped at once.
Step-by-Step Guide
Option 1: Set Up Metafields One-by-One
- Install Metafield Guru
- Go to your Shopify store > Apps > Search and install Metafield Guru.
- Open the App
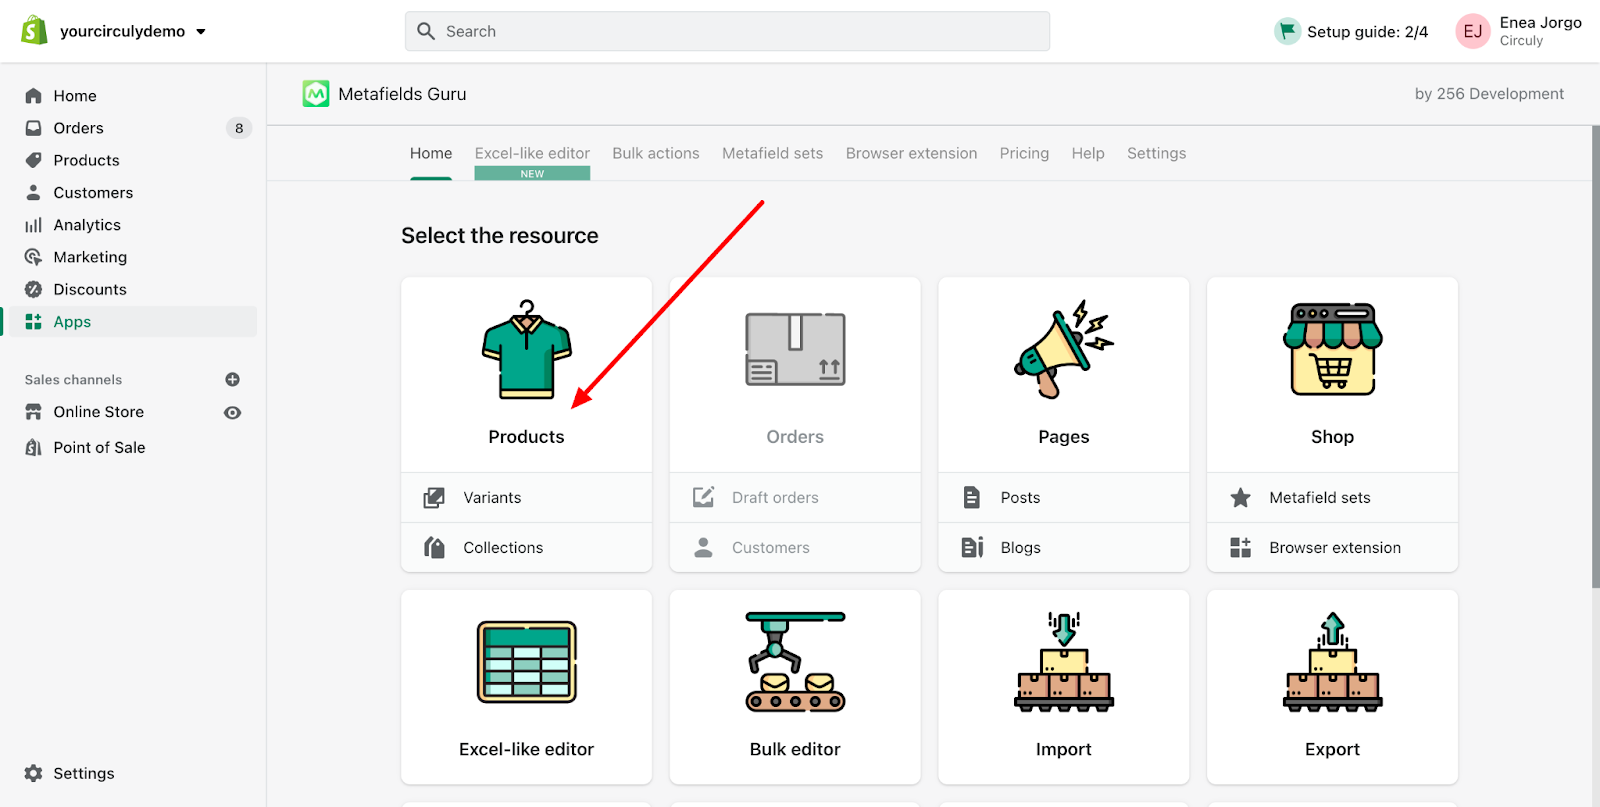
- Navigate to Metafield Guru > Home > Products.

- Select a Product
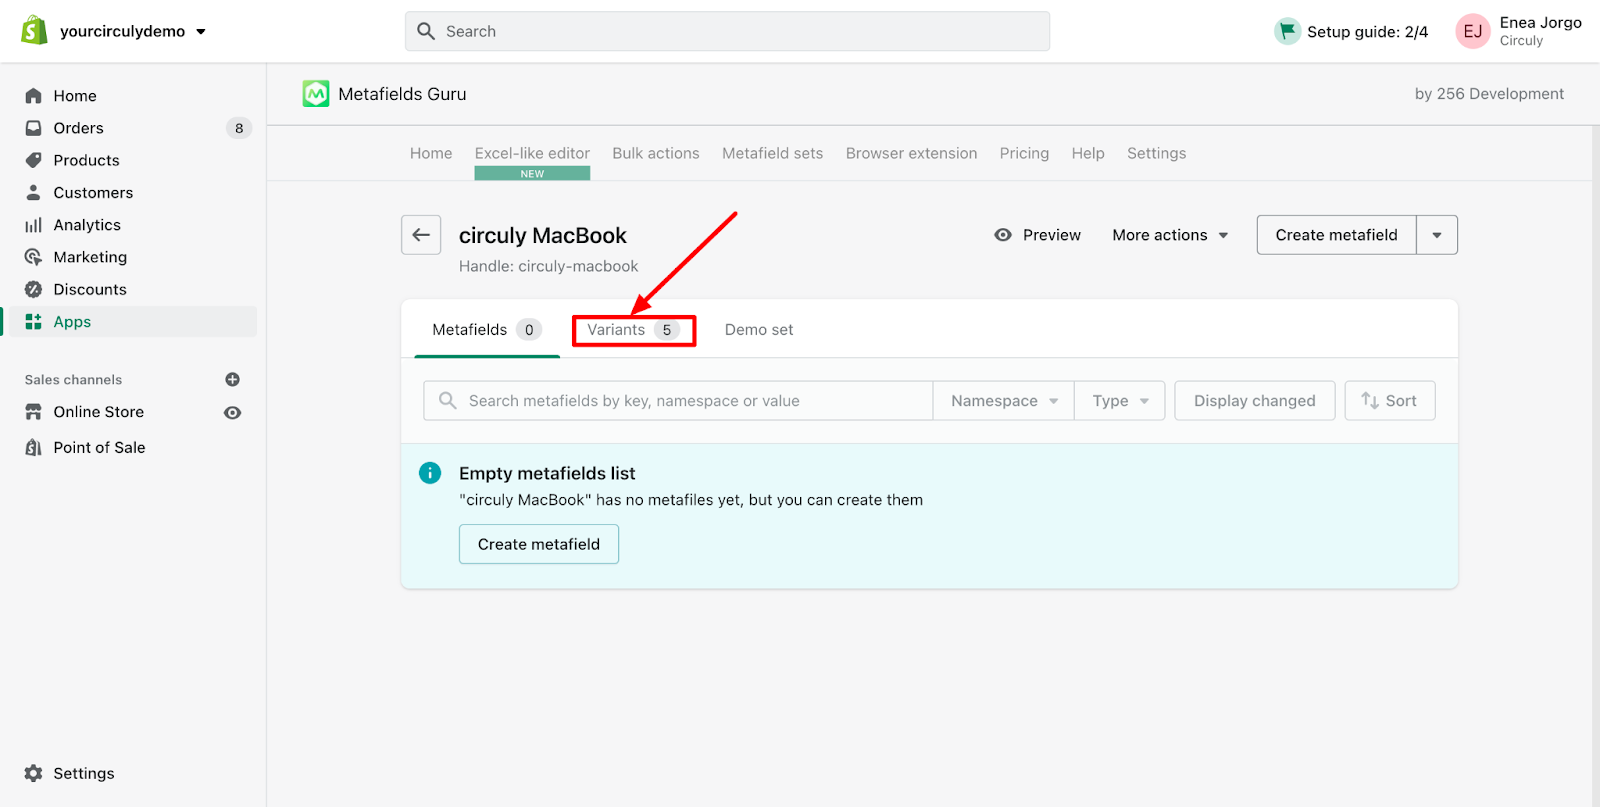
- Choose the product you want to update metafields for.

- Edit Variants
- Click on Variants to access each product variation.

- Create Metafields
- For each variant, click on Create Metafield.
- Enter the following values:
subscription→ true (for rental) or false (for purchase)subscription_length→ e.g., 12subscription_period→ monthly / weekly / yearly, etc.

Option 2: Bulk Update Metafields
- Filter Variants
- Within Metafield Guru or any bulk editing tool, filter product variants by Product ID, Name, or Type.

- Apply Conditions
- Map values based on your business rules:
- Rentals:
subscription: true,subscription_length: 12,subscription_period: monthly - Purchases:
subscription: false
- Rentals:
- Map values based on your business rules:
- Run the Bulk Edit
- Confirm changes and apply the metafields to all selected products.
Final Note
Using metafields correctly ensures your Shopify storefront displays accurate information and integrates properly with circuly’s subscription features. Whether you're offering long-term rentals, short-term leasing, or outright sales, properly structured metafields allow you to manage product types efficiently across your catalog.

