Create a Subscription
Introduction
When your customer goes over your checkout and places an order by completing the payment process, an order is created in the circuly Hub. In order to start collecting recurring payments for the order a subscription needs to be created for it.
Feature Overview
In circuly the process of creating a subscription for an order enables various subscription-specific tasks such as creating a recurring payment schedule, charging the payment on the due date, tracking the minimum subscription duration, end date, renewals etc.
The process of creating a subscription for an order can be either performed manually or it can be automated. Under the manual process there are a few different options to create a subscription, whereas the automated way of creating a subscription is through circuly's Customer API.
To ensure these processes run smoothly, you need to decide how subscriptions are created—either manually or through automation. You can always change your approach at a later stage. When you are new to circuly and just getting started, the manual approach may be better suited as it gives you the possibility to see how the system works.
Available options to create a subscription
There are multiple ways to create a subscription in the circuly Hub. You can create a subscription from the following:
- Manually for every order
- From the Orders tab
- From the Customers tab
- Bulk create subscriptions
- Bulk upload subscriptions
- circuly API for automated creation
Step-by-step guide
In this article we'll cover both the manual and the automated process of creating subscriptions for order.
- Manual creation via Orders tab
- In your circuly Hub > Go to the Orders tab.
- In the Order List click on the order for which you want to create a subscription.
Note: To identify which order have a subscription already and which don't, you can look at the Active subscription column.
- In the Order overview window > Click on the Process subscription button to start the subscription creation process.
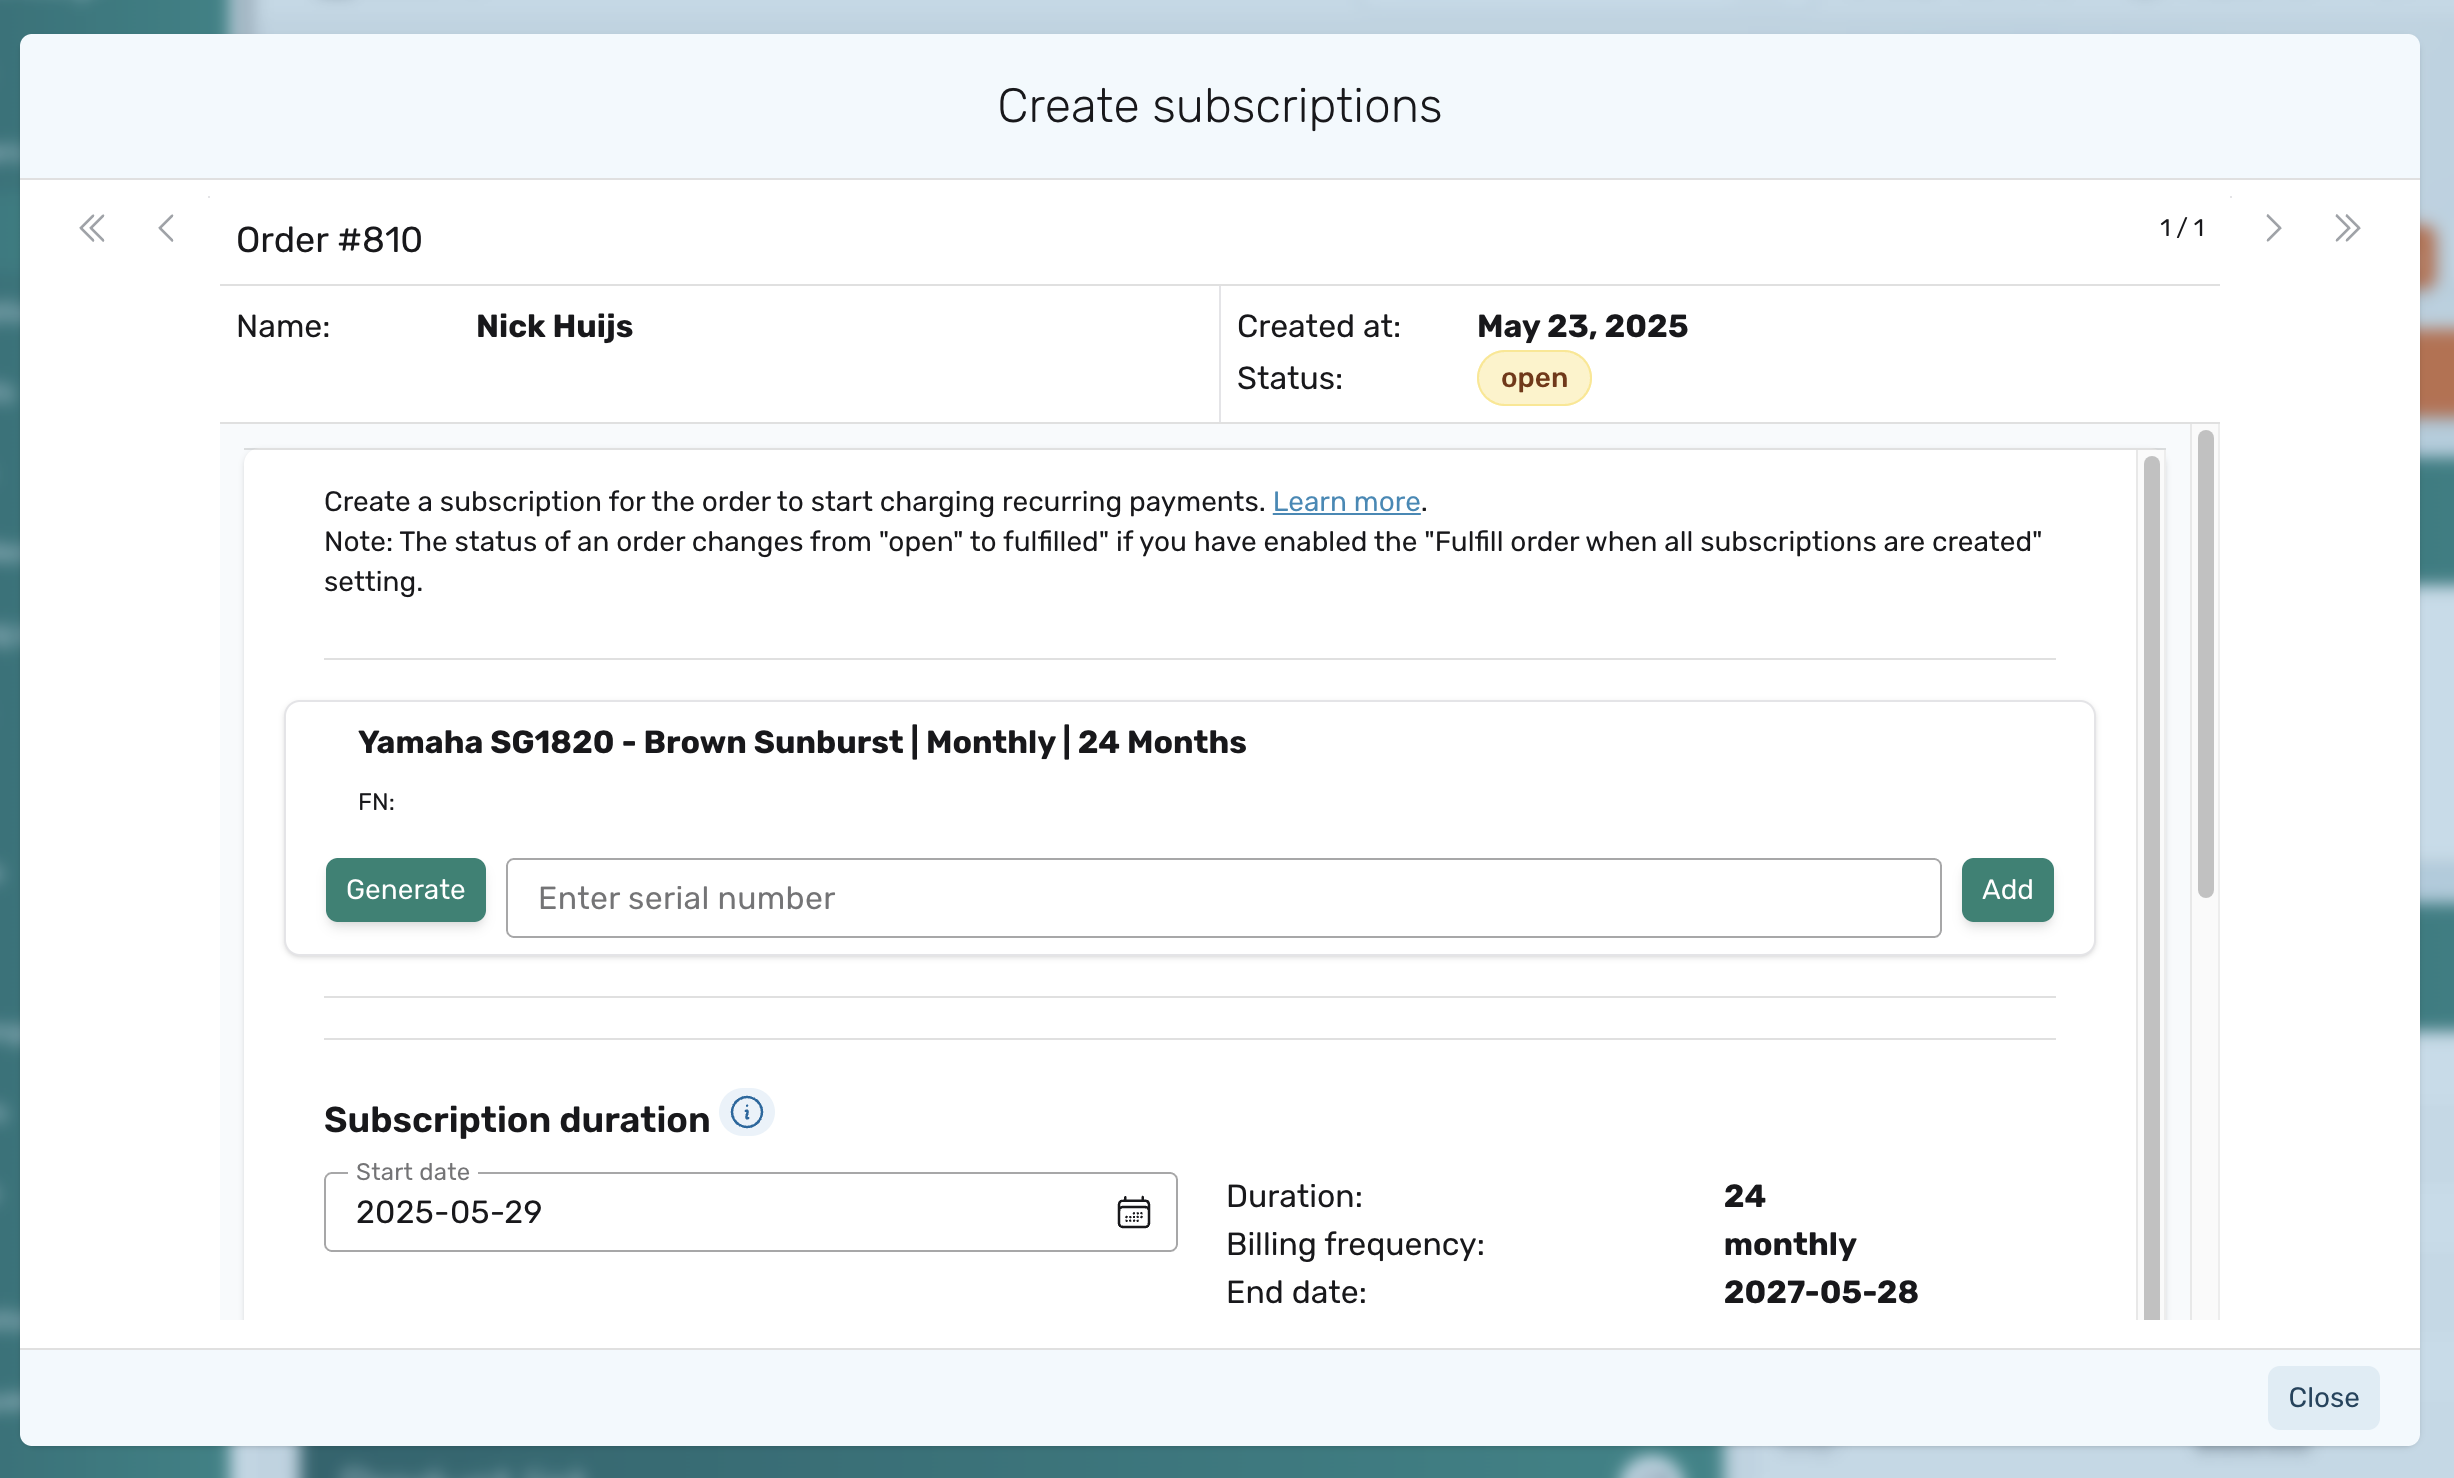
- Generate or add a serial number to the subscription to assign a product to the subscription and connect it with the customer and the associated subscription.
Note: When you click on "Generate", circuly assigns a random unique ID to the product. If your products already have pre-defined serial numbers, you can manually enter them. This ensures accurate product-level tracking—like revenue, rental cycles, repairs, and usage—since all tracking in circuly is tied to the serial number.

- Select a start date or confirm the one already displayed.
- Finalise the process by clicking on the Submit button.
Tip: This process can be automated via our customer API. This is the POST request you can use https://api-docs.circuly.io/docs/customers-api-docs/f301d280d321c-creates-a-new-subscription that you can use for creating a subscription.
- Manual creation via Customers tab
- In your circuly Hub > Go to the Customers tab.
- From the Customer list select the customer for whom you want to create a subscription.
- Click on the Process open order button
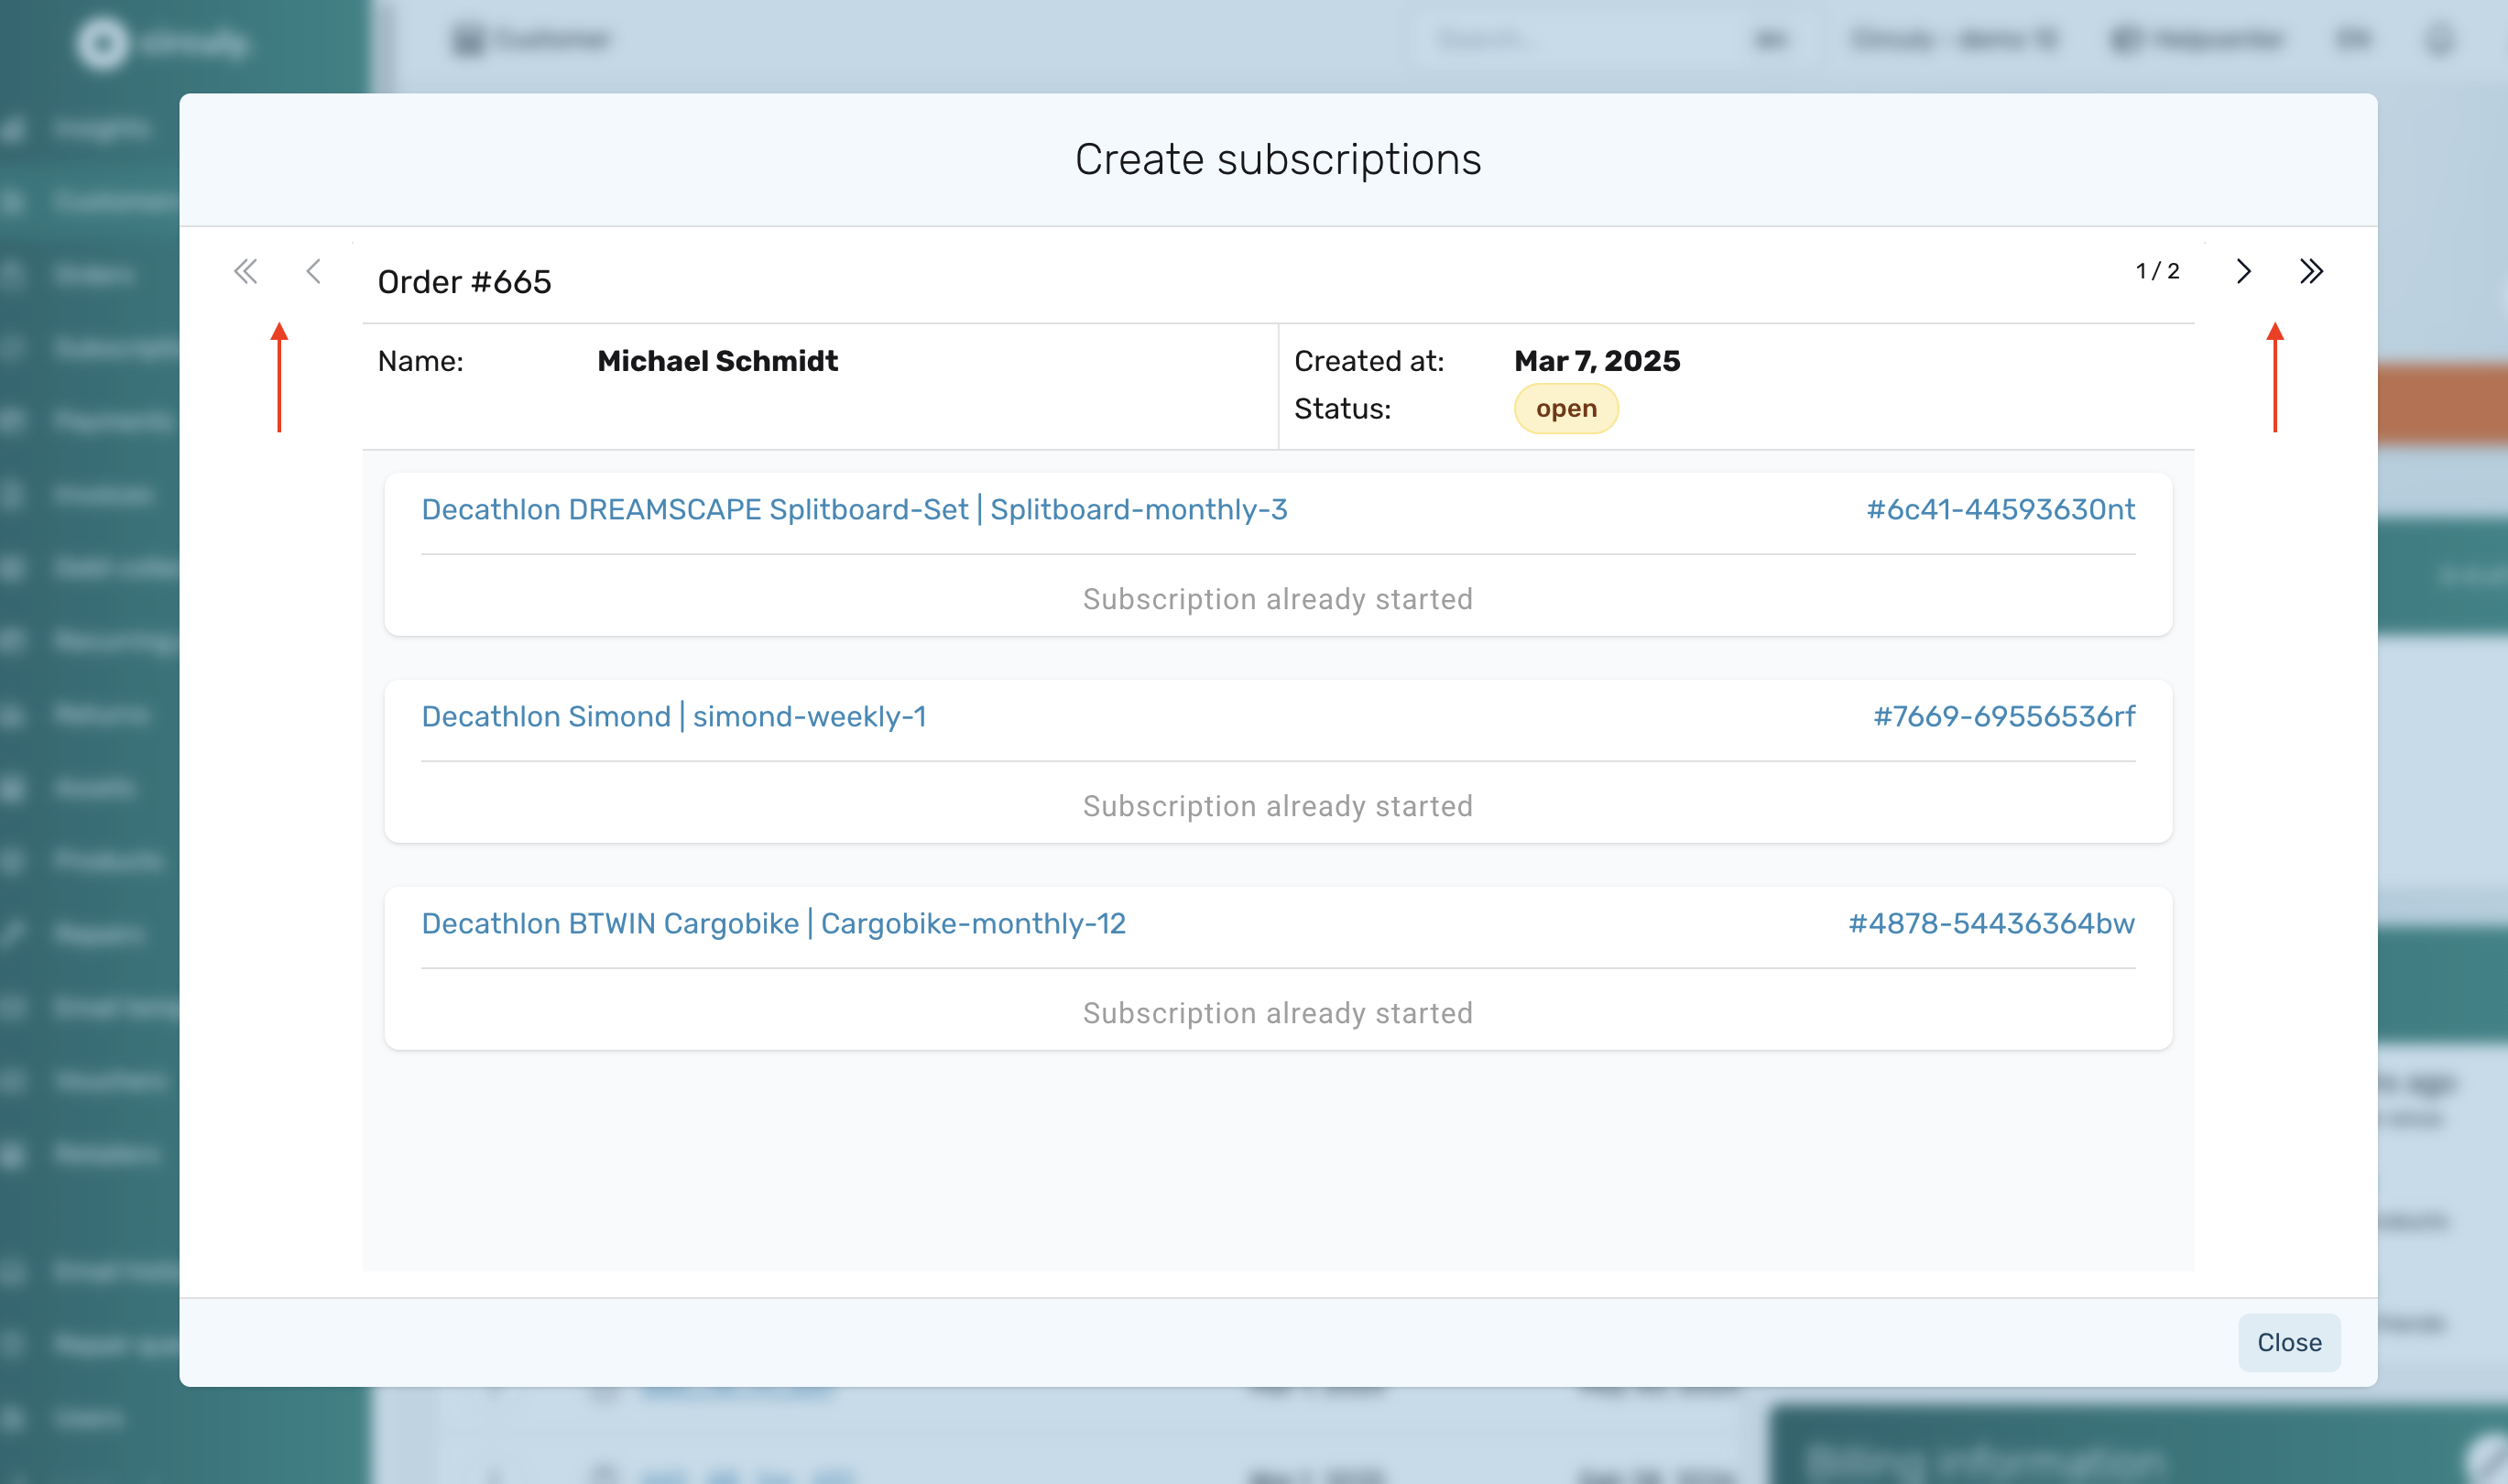
- Use the left and right arrow keys to switch between orders or get to orders that do not have an attached subscription yet.

- In the Create Subscription window > Generate or add a serial number to the subscription to assign a product to the subscription and connect it with the customer and the associated subscription.
Note: When you click on "Generate", circuly assigns a random unique ID to the product. If your products already have pre-defined serial numbers, you can manually enter them. This ensures accurate product-level tracking—like revenue, rental cycles, repairs, and usage—since all tracking in circuly is tied to the serial number.
- Select a start date or confirm the one already displayed.
- Finalise the process by clicking on the Submit button.
Good to know
- Typically the starting date of a subscription can only be in the future but you can also create the starting date in the past if you have the associated setting enabled. Learn more about the past date setting.
- You can automate the process of selecting a subscription start date so that you don't have to manually select a date every-time you create a subscription. Learn more.
- Bulk create subscriptions
In order to create a subscription in the regular way you have to select an order (or customer if you are using the customer tab to create the subscription) and go to the Order Overview to create a subscription. You can skip that by bulk updating Orders into Subscriptions.
Detailed steps: How to bulk update orders into subscriptions.
- Bulk upload subscriptions
With circuly you can create subscriptions in bulk and skip manually assigning serial number to a product in case you have thousands of orders coming in on a daily basis.
Detailed steps: How to create subscriptions in bulk.
- Create subscriptions via the circuly API
You can use the circuly API to create subscriptions. Follow the link to the circuly Customer API documentation.
What happens next
- The "Subscription activated" email is sent to the customer from the Email Templates.
- The order is displayed in the Subscription List under the Subscription tab because the order now has an active subscription attached to it.

