
Exchange Groups: Unleash the Power of Streamlined Choices
Introduction
In a world where consumer choice is abundant, guiding your customers with curated selections can dramatically improve their decision-making experience. Research shows that 87% of customers appreciate curated product experiences that reduce decision fatigue and support confident choices.
circuly’s Exchange Groups feature enables you to deliver this experience. By allowing customers to choose a replacement product from a pre-defined, tailored group, you empower them to swap products without being overwhelmed by irrelevant options.
Feature overview
Exchange Groups is a feature in the circuly Hub that lets you:
- Create collections of related product variants.
- Enable customers to swap their current subscription product with another from the same collection.
- Maintain price consistency or customise pricing for each variant.
- Limit availability based on stock.
One-time feature setup
Step 1: Create an exchange group collection
Step 2: Map variants to the collection
Step 3: (Optional) Go over the swap settings in the Settings tab
Step 4: Enable the "Check System Stock" setting
Technical setup
Step 1: Create an exchange group collection
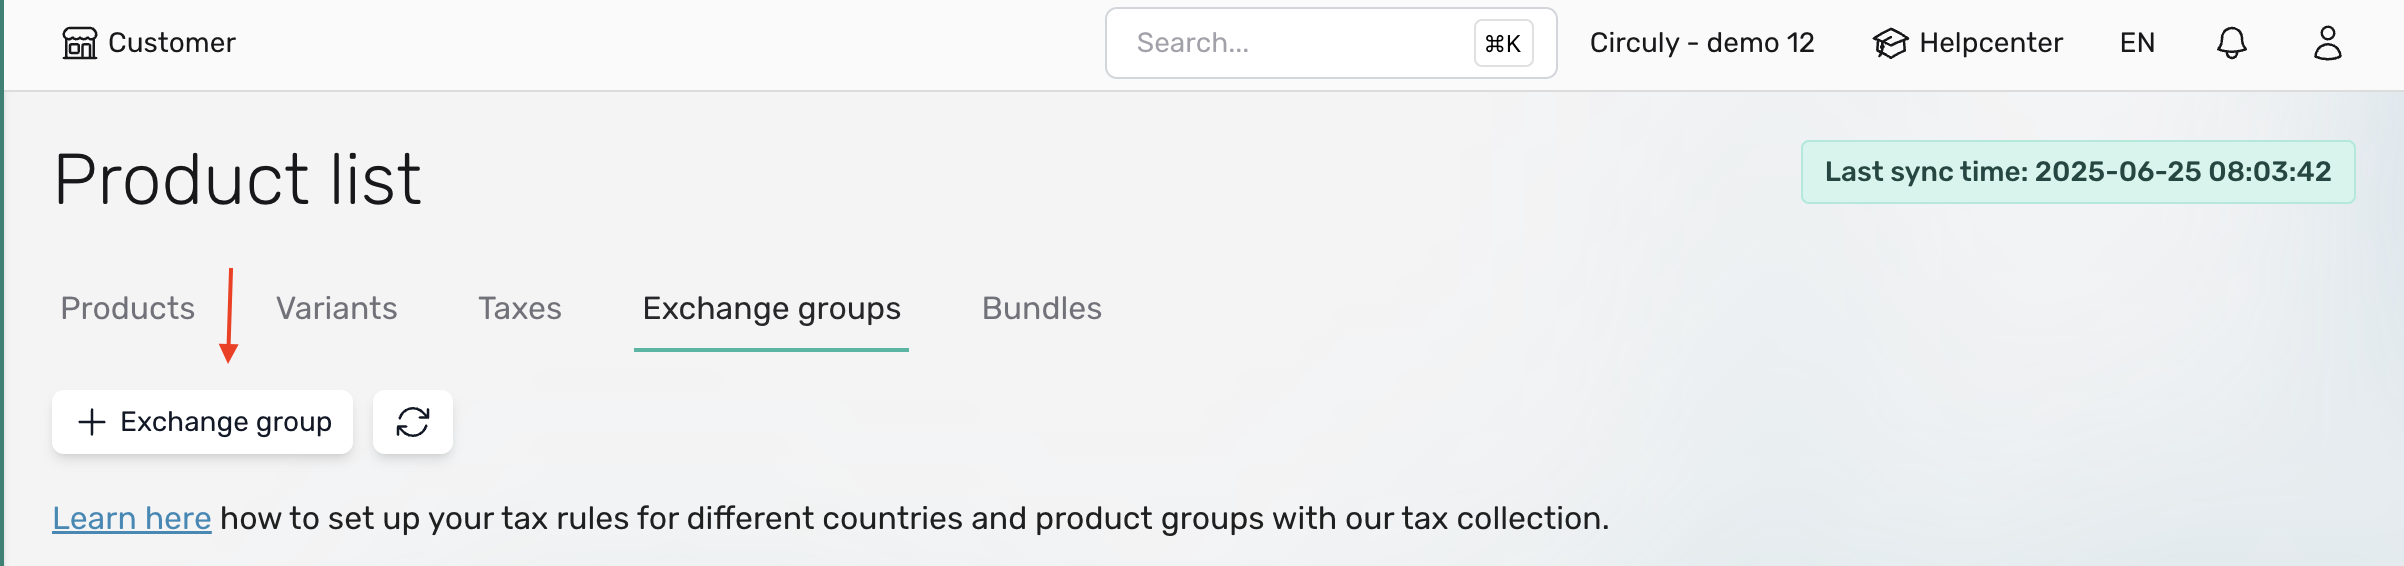
- Go to Products > Exchange Groups tab.
- Click on + Exchange group.
- Fill in the group title, description, and optional exchange discount.
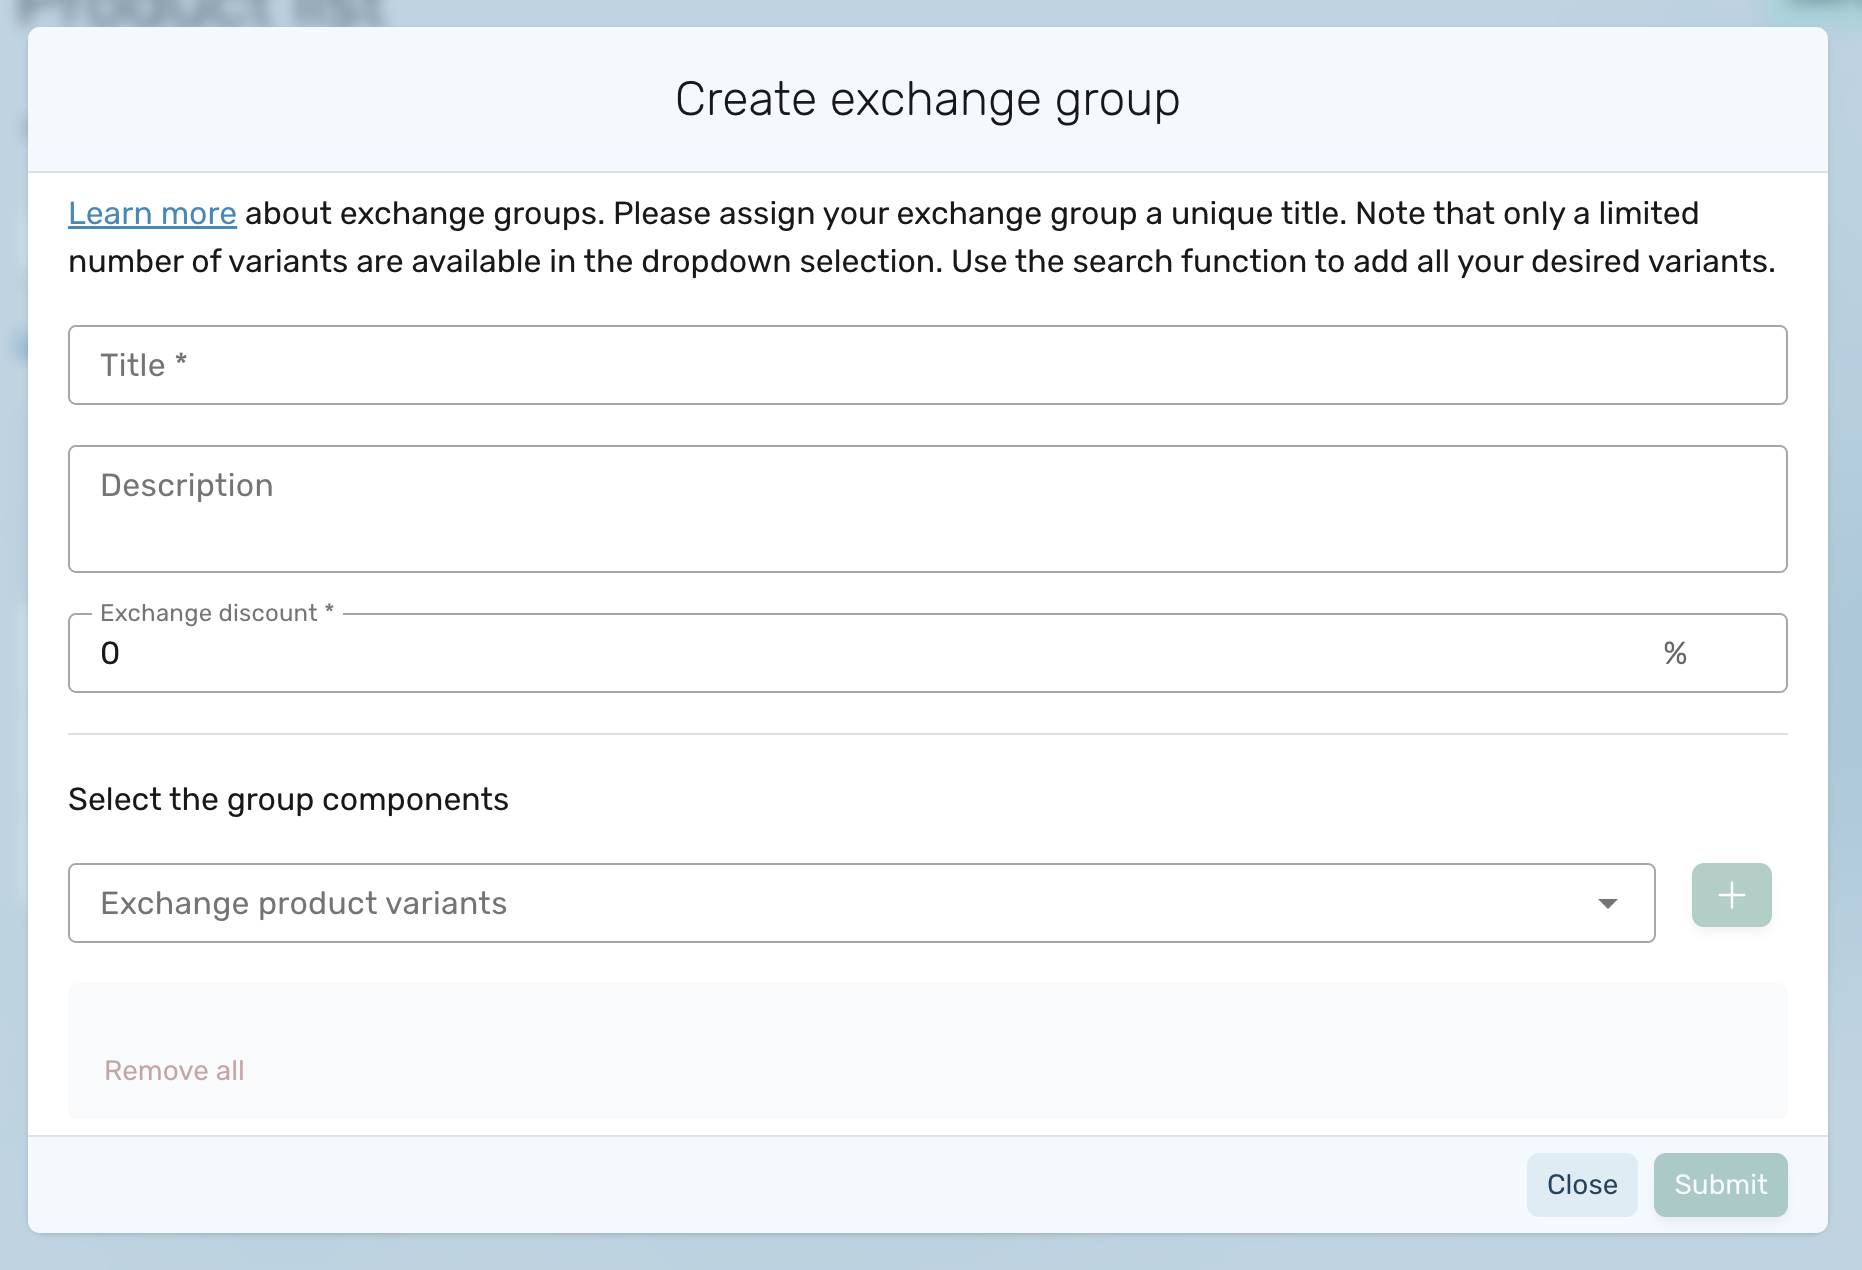
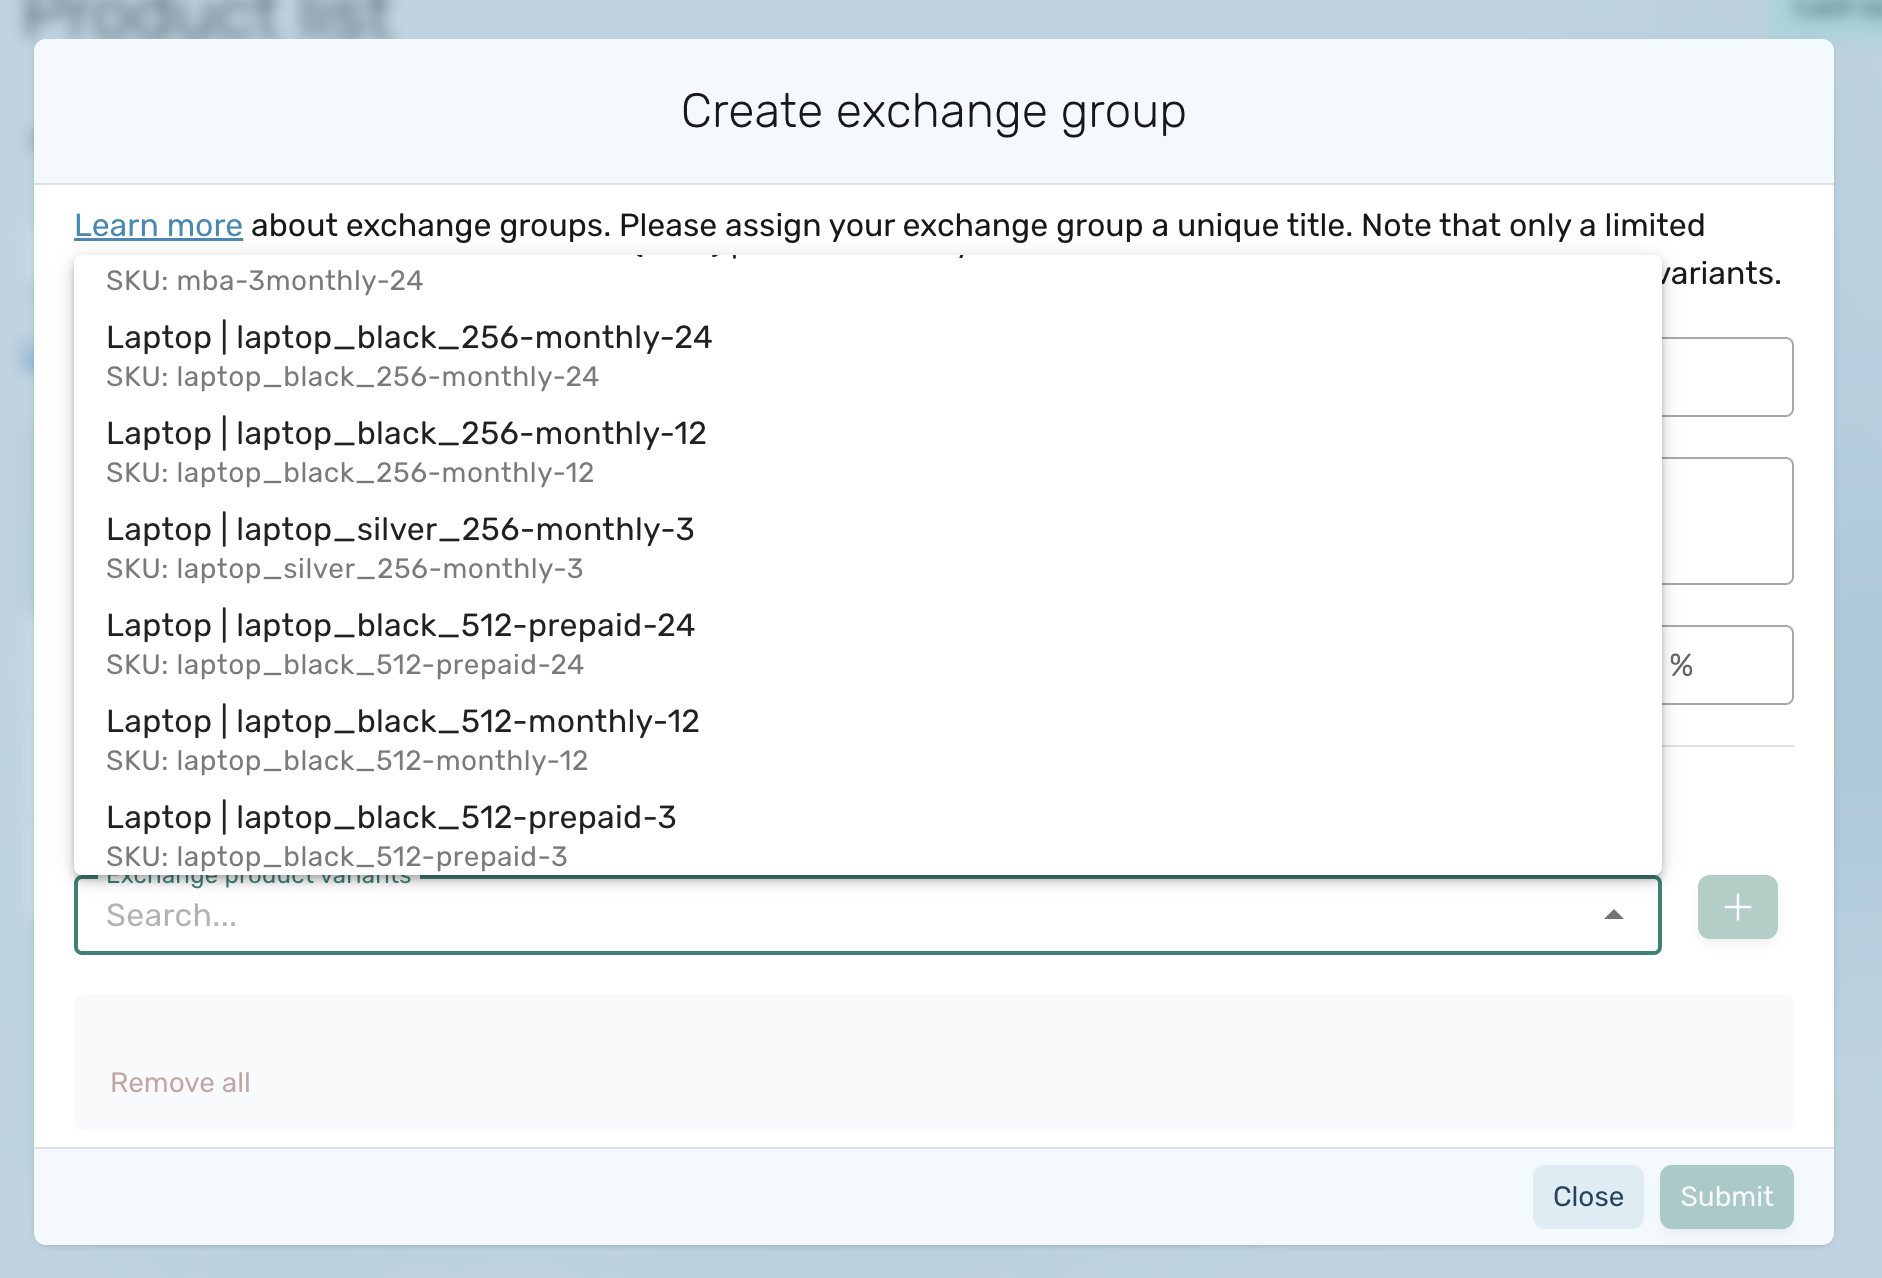
- Assign product variants via the dropdown or skip this and assign them in the next step.
- Click Submit.
Note: An exchange group can include up to 1000 product variants.
Step 2: Map variants to the collection
- Navigate to the Variants tab.
- Select the variants you want to group by checking the checkbox > Then click on Map to exchange collection button.
- Choose the desired collection from the dropdown > Click Map to groups.
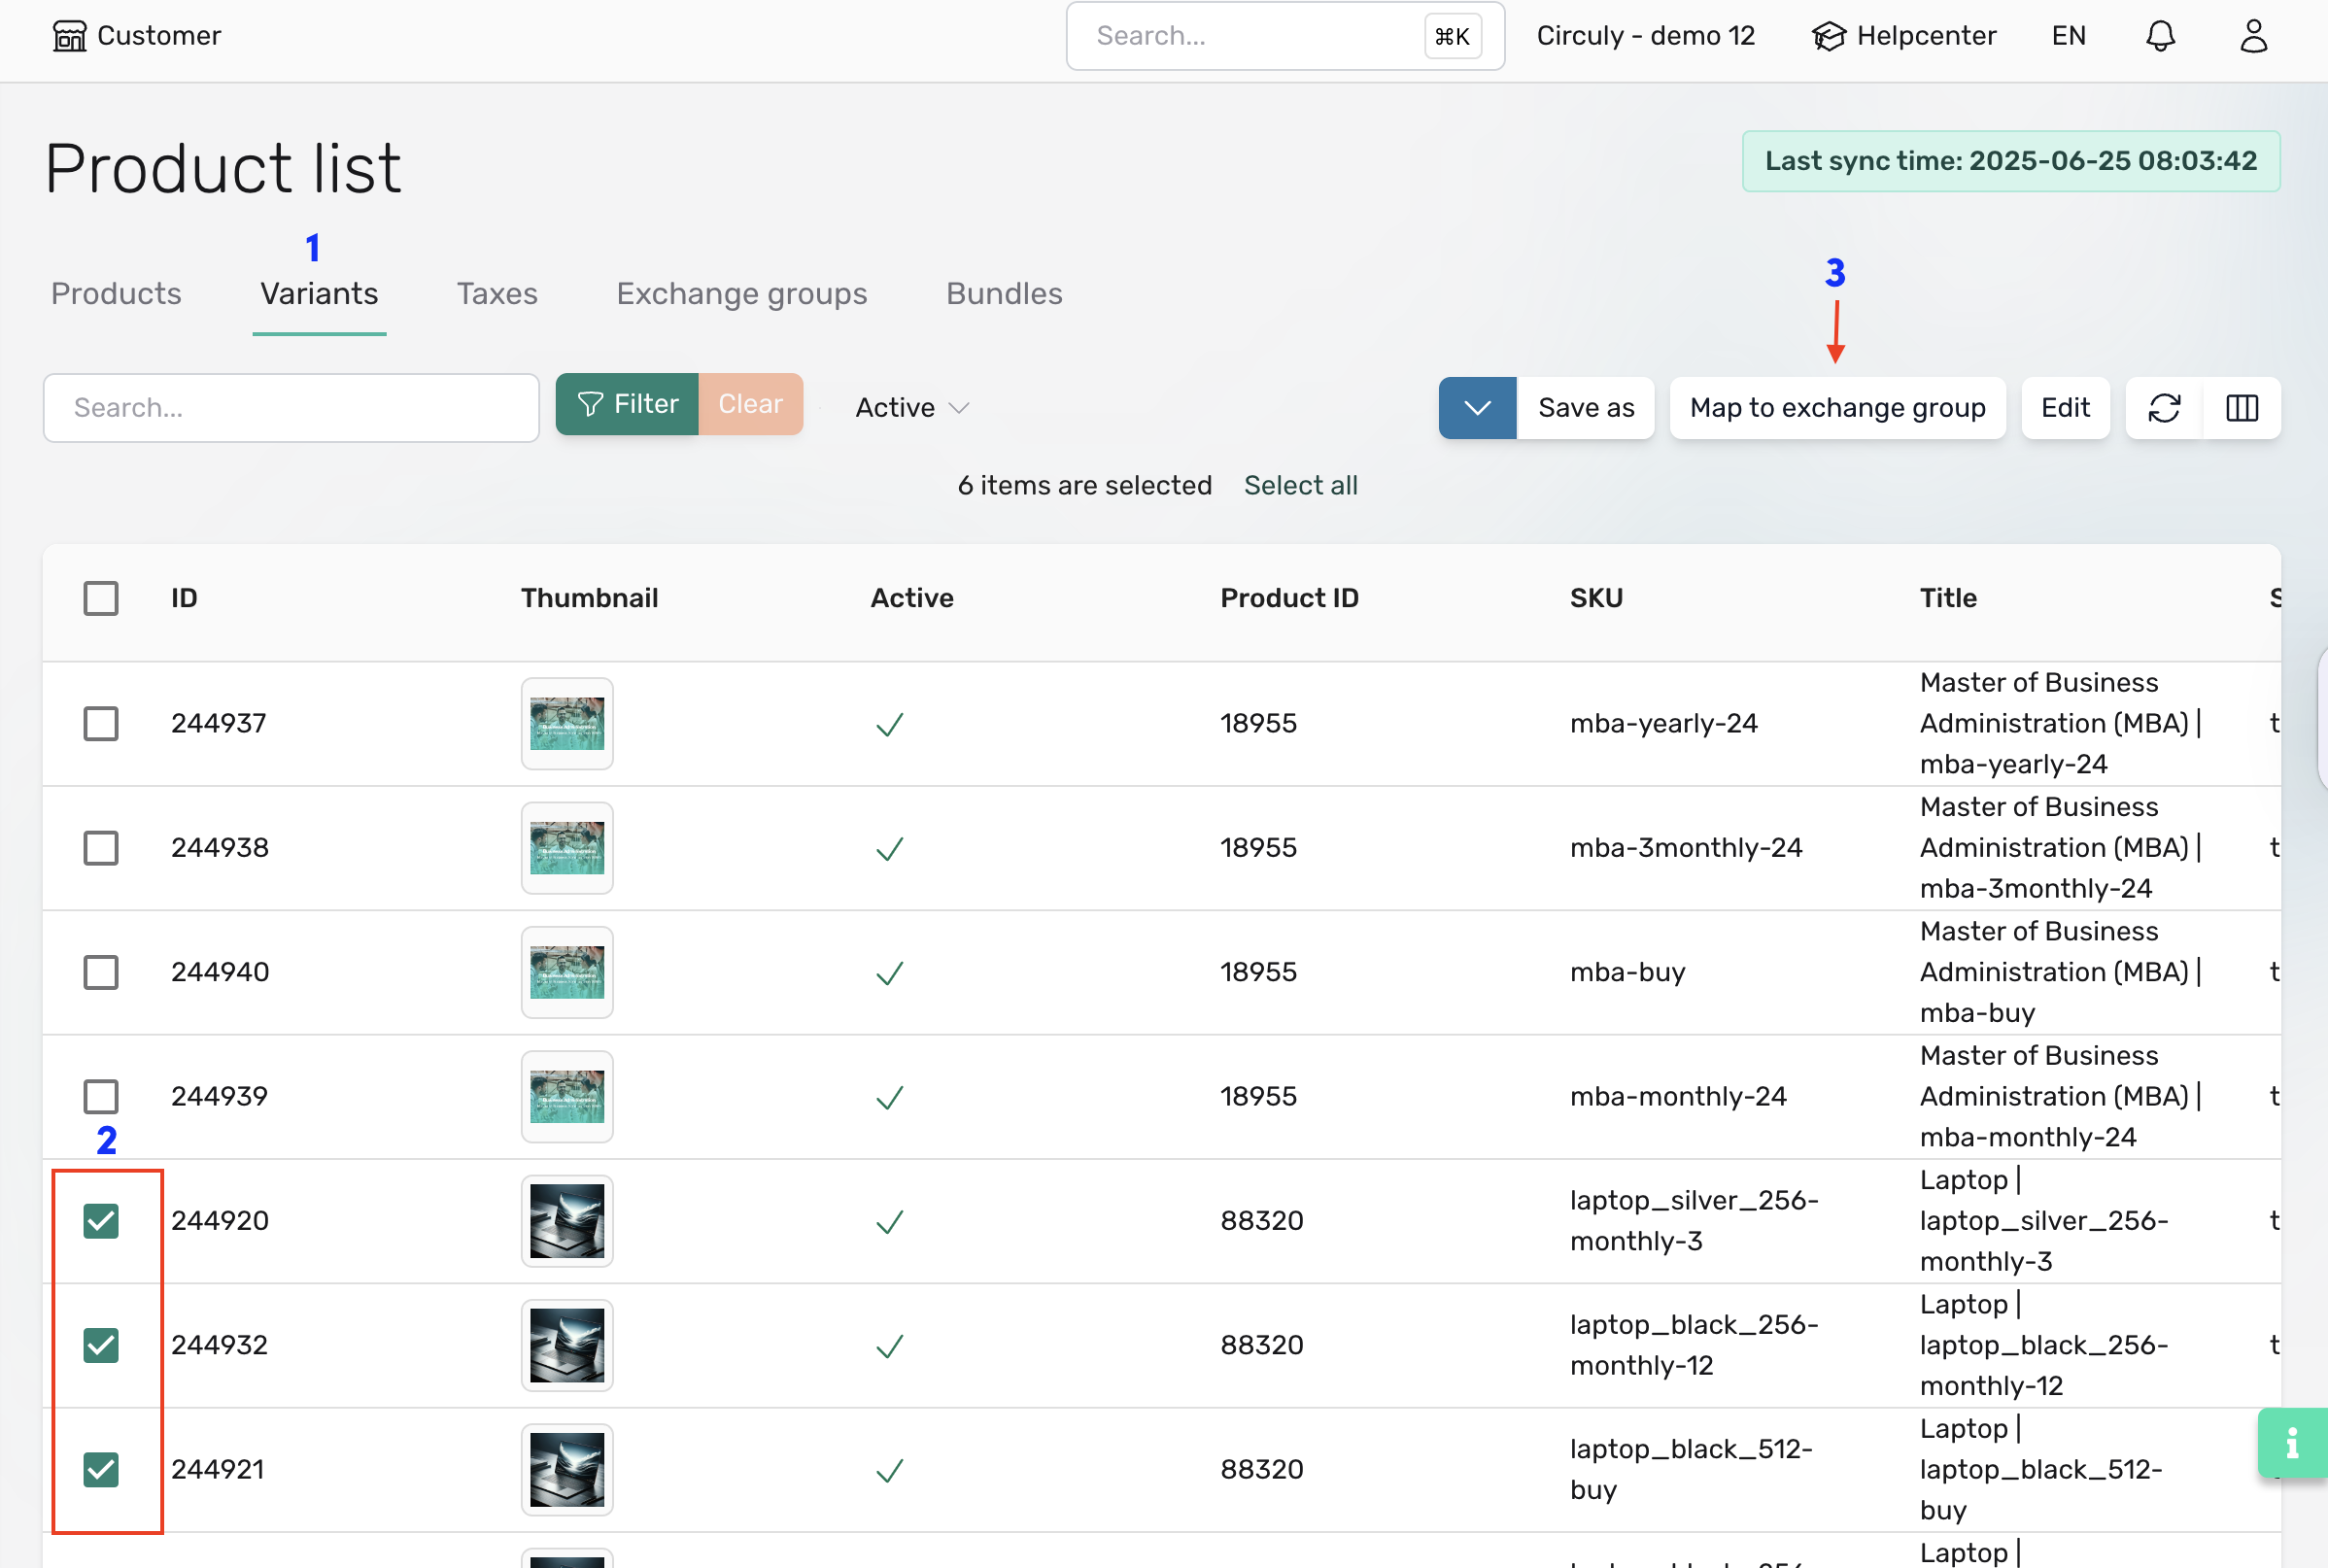
To verify, scroll horizontally in the Variants tab to view the Exchange Group column.
Step 3: (Optional) Review swap settings
Exchange Groups use the swap logic and associated settings. Ensure your swap settings are configured under Settings > Swaps.
Step 4: Enable system stock check
To avoid offering out-of-stock products, activate the stock validation feature:
- Go to Settings > Checkout > Pre-Checkout > Check System Stock.
- If already active for checkout, the same logic applies to the Self-Service Portal.
Note: Update your collections regularly if you have stock-sensitive items like refurbished products.
Good to Know
- All product data (e.g. price, name) is imported from your shop system into circuly.
- Exchange Group pricing follows your shop system by default, but flat pricing per collection can be arranged upon request via the service desk.
- Exchange Groups are only available for new orders. If you want to enable this feature for existing subscriptions, contact circuly support.
Process for your customers
Here’s how the exchange process looks for your customers:
- Customer logs into the Self-Service Portal.
- Opens subscription menu > Clicks Change product.
- Clicks CONFIRM.
- A window slides in from the right.
- Customer selects a product from the dropdown (display includes product image and price).
- Clicks Save changes.
Stock validation is triggered at this point. If the selected product is out of stock, an error is displayed.
The subscription status changes from active to pending replacement.
Note: To display your custom terms and conditions, share the desired text with circuly to include in your white-label Self-Service Portal.
Process for a circuly user
- A new order is created in the circuly Hub unless the Delay Swapped Orders setting is enabled.
- Process this order manually or update its status based on your shop system flow.
Learn more about manually creating subscriptions or using the bulk update feature to update orders.
Business cases and ideas
1. Consumable subscriptions
- Example: Protein powders in different flavours (vanilla, chocolate, cookie dough).
- Create a collection named “Flavours – Black Edition” and map the variants.
- Customers choose their preferred flavour through the Self-Service Portal.
Also applicable to coffee, baby diapers, wine, and other consumables.
2. Tangible product subscriptions
- Strollers: Offer swaps between compact, large, or double strollers.
- Bikes: Let customers upgrade to bigger kids’ bikes as the child grows.
- Furniture: Allow seasonal swaps (e.g. summer lounge chairs vs. winter armchairs).