
When using circuly, you need to inform your customers about the use of our services. Please do so in your Privacy Statement by including the following snippet. A privacy policy is a document contained on a website that explains how a website or organization will collect, store, protect, and utilize personal information provided by its users.
This is only a sample for orientation and that we do not guarantee any liability for the legal validity.
For English version, please see below
DE - German
Beschreibung und Zweck
Auf dieser Website nutzen wir für unseren Checkout und das Subscription Management circuly. circuly ist ein Software-Unternehmen aus Deutschland mit dem Hauptsitz in Deutschland, 33602 Bielefeld, Obernstr. 50, Telefon: +49 176 552 884 77. Hierbei handelt es sich um eine integrierte Software-Lösung, mit der wir verschiedene Aspekte unseres Subscription Management abdecken. Dazu zählen unter anderem: Checkout, Kundenlogin, Rechnungen und Zahlungsabwicklungen, Kommunikation, Returen-Management und Reporting. Diese Informationen werden auf Servern unseres Softwarepartners circuly gespeichert. Sie können von uns genutzt werden, um mit unseren Kunden in Kontakt zu treten und unsere Abo-Leistungen zu erbringen. Alle von uns erfassten Informationen unterliegen dieser Datenschutzbestimmung. Wir nutzen alle erfassten Informationen ausschließlich zur Verarbeitung der (Abo-)Bestellung.
Rechtsgrundlage
Die Rechtsgrundlage für die Nutzung der Dienste von circuly ist Art. 6 Abs. 1 lit. f) DSGVO (berechtigtes Interesse). Unser berechtigtes Interesse an dem Einsatz dieses Dienstes ist die effiziente und kundenfreundliche Abwicklung von Abo-Verträgen.
Empfänger
Empfänger ist circuly GmbH, Obernstr. 50, 33602 Bielefeld, Deutschland.
Übermittlung in Drittstaaten
Durch den Einsatz des Dienstes werden ggf. personenbezogenen Daten in ein Drittland übermittelt. Im Falle einer Übermittlung von personenbezogenen Daten stellt der Anbieter das Schutzniveau der DSGVO durch die Einhaltung der Art. 44 ff. DSGVO sicher. Sofern kein Angemessenheitsbeschluss mit dem Drittland besteht, in dem der Datenimporteur seinen Sitz hat, erfolgt die Übermittlung vorbehaltlich geeigneter Garantien. Bei Rückfragen wenden Sie sich gerne an unseren Datenschutzbeauftragten.
Dauer der Datenspeicherung
Die Daten werden gelöscht, sobald sie für die Erreichung des Zweckes ihrer Erhebung nicht mehr erforderlich sind. Darüber hinaus werden die Daten gelöscht, sofern Sie Ihre Einwilligung widerrufen bzw. die Löschung der personenbezogenen Daten verlangen.
Widerspruchsmöglichkeit
Sie haben nach Art. 21 Abs. 1 DSGVO jederzeit das Recht, Widerspruch gegen die Verarbeitung Ihrer personenbezogenen Daten einzulegen. Sofern Sie von Ihrem Recht Gebrauch machen, findet eine Verarbeitung zu diesem Zweck nicht mehr statt. Weitere Informationen hierzu finden Sie weiter oben in unserer Datenschutzerklärung unter “Rechte der betroffenen Personen”.
Vertragliche oder gesetzliche Pflicht
Es besteht keine vertragliche oder gesetzliche Pflicht für die Bereitstellung der Daten.
Weitere Datenschutzhinweise via Link
https://www.circuly.io/data-privacy
https://www.circuly.io/data-processing-agreement
EN - English Version
Description and purpose
On this website we use the circuly checkout and subscription management software. circuly is a software company based in Germany, headquartered at 33602 Bielefeld, Obernstr. 50, phone: +49 176 552 884 77. This is an integrated software solution that we use to cover various aspects of our Subscription Management. These include: Checkout, customer login, invoices and payment processing, communication, return management and reporting. This information is stored on servers run by our software partner circuly. It may be used by us to contact our customers and provide our subscription services. All information we collect is subject to this Privacy Policy. We use all information collected exclusively for processing the (subscription) order.
Legal basis
The legal basis for the use of circuly services is Art. 6 para. 1 lit. f) DSGVO (legitimate interest). Our legitimate interest in using this service is the efficient and customer-friendly processing of subscription contracts.
Recipient
The recipient is circuly GmbH, Obernstr. 50, 33602 Bielefeld, Germany.
Transfer to Third Countries
Through the use of the service, personal data may be transferred to a third country. In the event of a transfer of personal data, the Provider shall ensure the level of protection of the DSGVO by complying with Art. 44 et seq. DSGVO. If there is no adequacy decision with the third country in which the data importer is based, the transfer is subject to appropriate safeguards. If you have any queries, please contact our data protection officer.
Duration of data storage
The data is deleted as soon as it is no longer required to achieve the purpose for which it was collected. Furthermore, the data will be deleted if you revoke your consent or request the deletion of the personal data.
Possibility of objection
In accordance with Art. 21 (1) DSGVO, you have the right to object to the processing of your personal data at any time. If you exercise your right, processing for this purpose will no longer take place. Further information on this can be found above in our data protection declaration under "Rights of data subjects".
Contractual or legal obligation
There is no contractual or legal obligation to provide the data.
Further data protection information via link.
Further data protection information via link
https://www.circuly.io/data-privacy
https://www.circuly.io/data-processing-agreement
Please also make sure, that you include your Privacy Statement into the circuly Checkout. To do so, paste the URL to your Privacy Statement into the settings in the circuly operations backend. If you do not have access to that setting, please create a service desk ticket with the link to your privacy statement.
Mistakes happen—sometimes customers order the wrong product, or the wrong product is shipped to them. Depending on whether the product has already been sent and whether a subscription has started, there are different ways to resolve the issue using the circuly Operations Backend.
Wrong product situations can occur either due to customer error or operational mishandling. circuly offers several workflows to correct these errors depending on the order and subscription status. This article outlines the different cases and the recommended actions.
Here’s what you can do about it:
Scenario 1.1: Subscription Has Already Started
Subscription Status: Active
Do not manually cancel the order or set the subscription to "pending return" before swapping, as swap/replacement is only available for active subscriptions.
Scenario 1.2: Subscription Has Not Yet Started
If the product has not yet left your warehouse, here’s what to do:
Once identified, you can either:
Option 1: Edit the Order Item
Use this if the wrong product, SKU, duration, price, or frequency needs to be corrected.
To enable this option, go to: Settings > Orders > ORDER and toggle on Allow order item editing.
Option 2: Replace the Serial Number
Use this if the product is correct but the wrong serial number was assigned.
With circuly you can export data from the circuly operations backend and plug it into a tool of your choice. The best way to do this is via Zapier where you can also create automations.
If you decide to use Zapier, then the first thing you need to do is to make sure that the tool you want to send information to from circuly is available on Zapier.
circuly also provides you with the option of using webhooks to take data out of circuly and plug it into a tool of your choice to create automations. You can use an API endpoint of our choice or work with Zapier (our recommendation is to use Zapier) to make two apps talk to one another.
Webhooks are automated messages sent from one app to another in case something happens or something is updated/changed. It’s a way for different tools to “communicate” to each other and get automated information when something new happens. With webhooks you can push data from one app to another.
Here’s a simple analogy from Zapier about Wehbooks
“There are two ways your apps can communicate with each other to share information: polling and webhooks. As one of our customer champion's friends has explained it: Polling is like knocking on your friend’s door and asking if they have any sugar (aka information), but you have to go and ask for it every time you want it. Webhooks are like someone tossing a bag of sugar at your house whenever they buy some. You don't have to ask, they just automatically punt it over every time it's available.”
When you use Webhooks there’s a sender that send the data and a receiver that receives that data. So there is a place where the action is “triggered”, and a place this action goes to, to convey that something has happened.
You can use Webhooks to create all sorts of automations. You can use an API endpoint of our choice or work with Zapier (our recommendation is to use Zapier) to make two apps talk to one another.
There’s a lot of room for creativity when it comes to creating automations. The automations you make depends on what exactly you want to automate. Based on that you can think what information you will need from a tool to make that automation work.
Note: Webhooks by Zapier is only available to Zapier users on a paid plan.
Create a Zapier account - to work with zapier, you need to create an account.
Create an account on the tool you want to use - you also need to create an account on the tool you want to use with Zapier.
With webhooks you first have to figure out what you want to automate and the information you will require to automate it. Then you need to match it with the information that is available and can be used to create the automation.
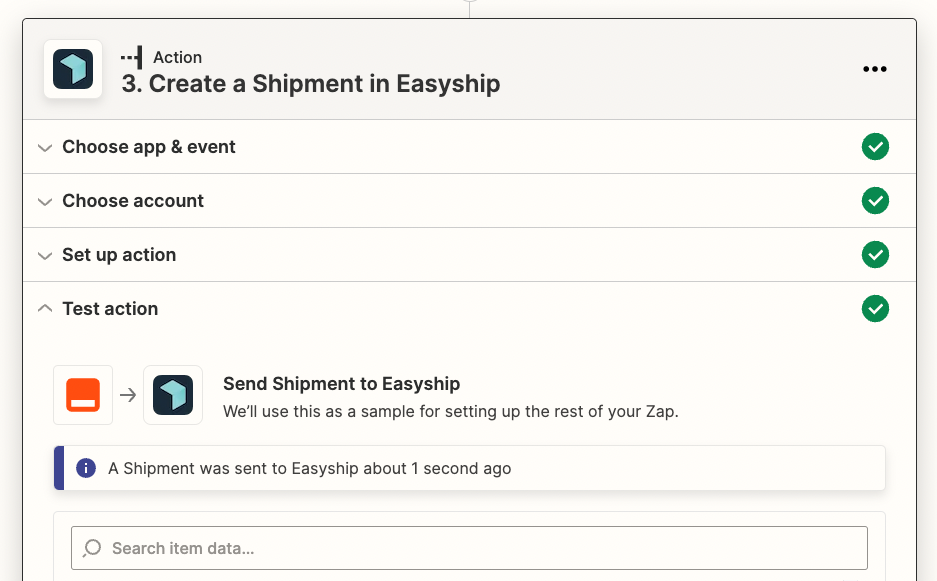
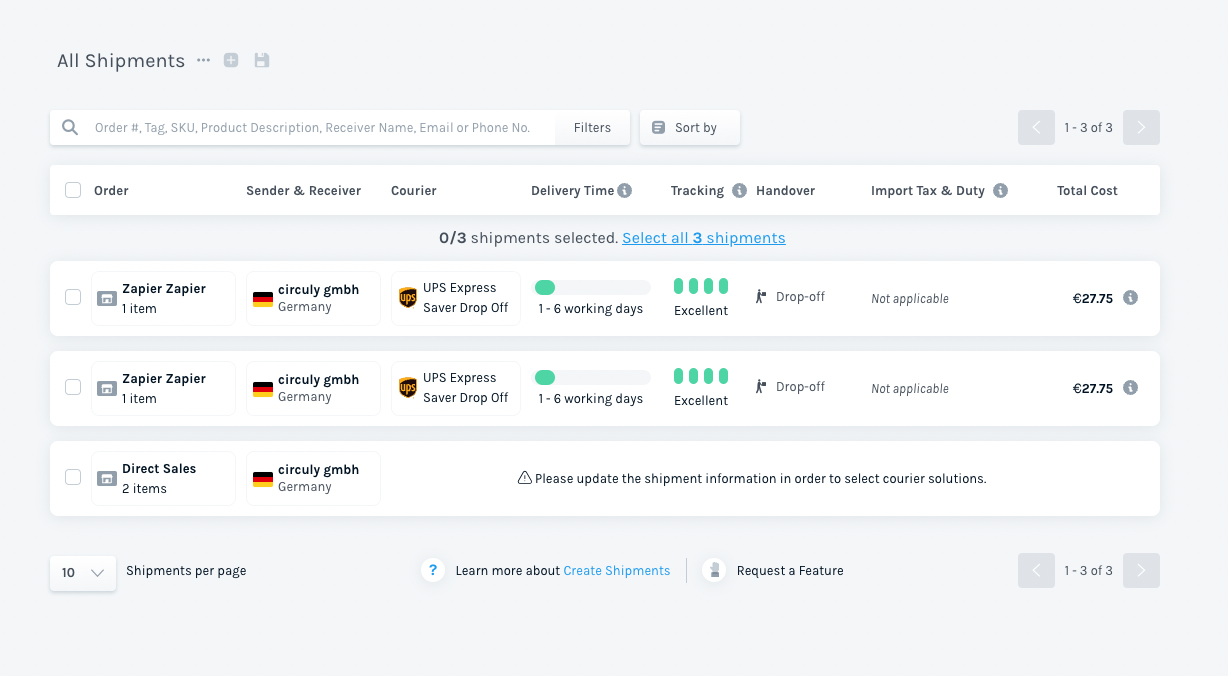
Connecting a shipping tool (we’re using Easyship as an example) to circuly via Zapier and using webhooks to transfer data to the shipping tool.
Detailed steps given below
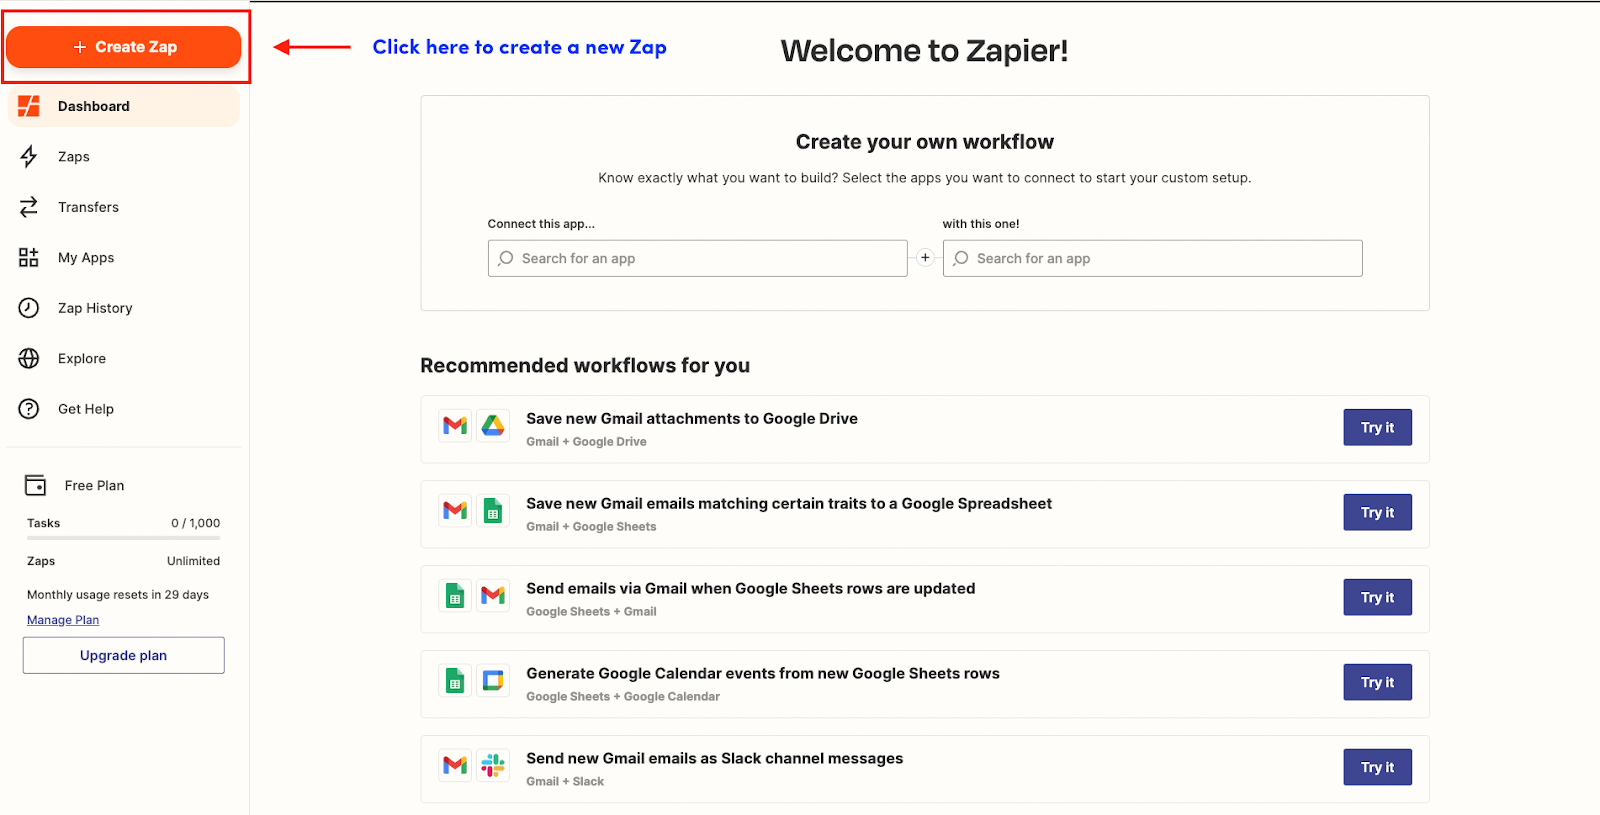
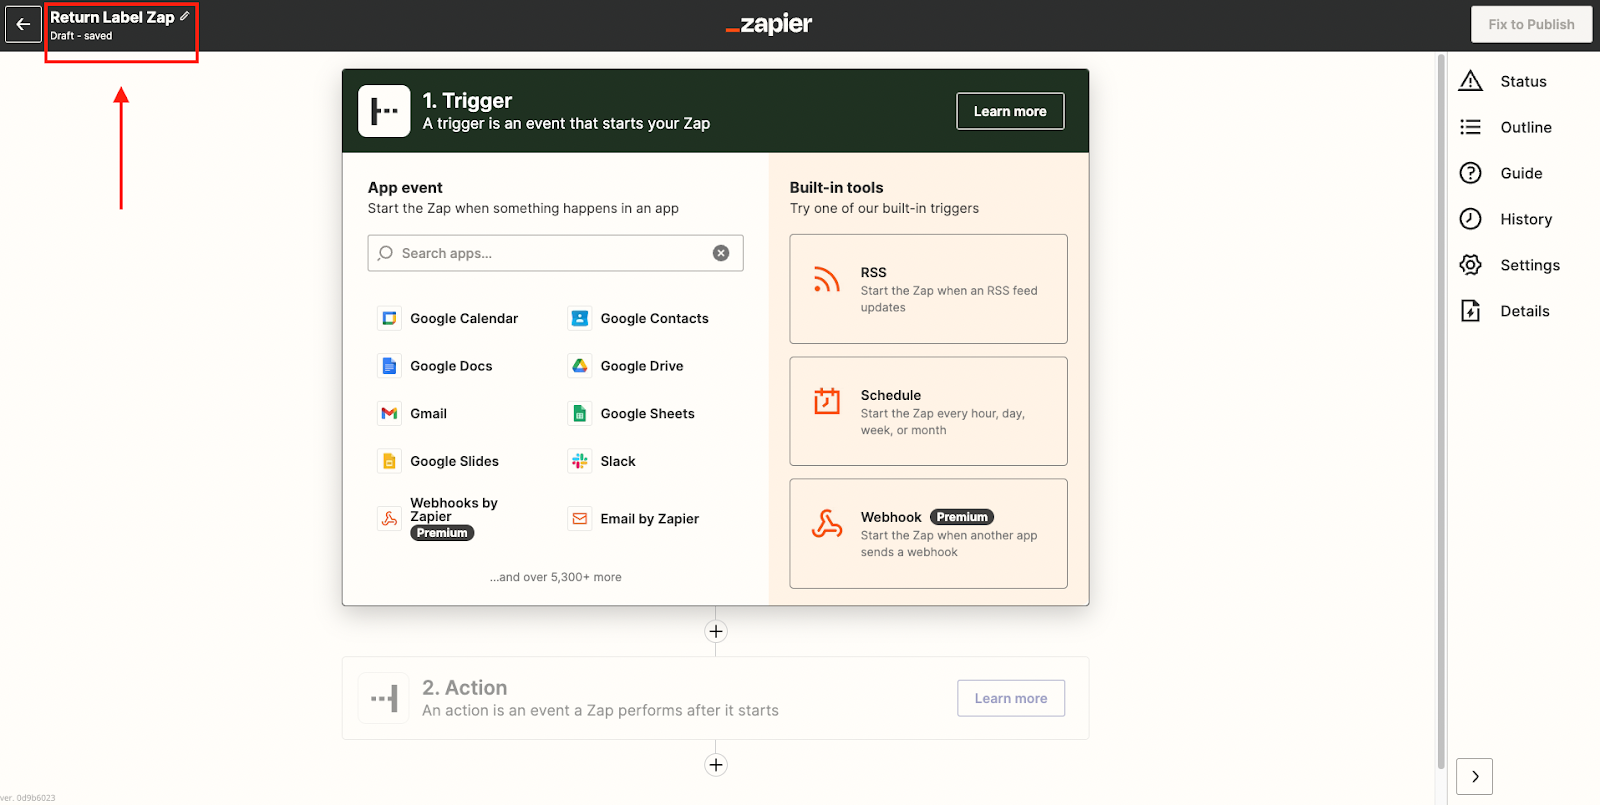
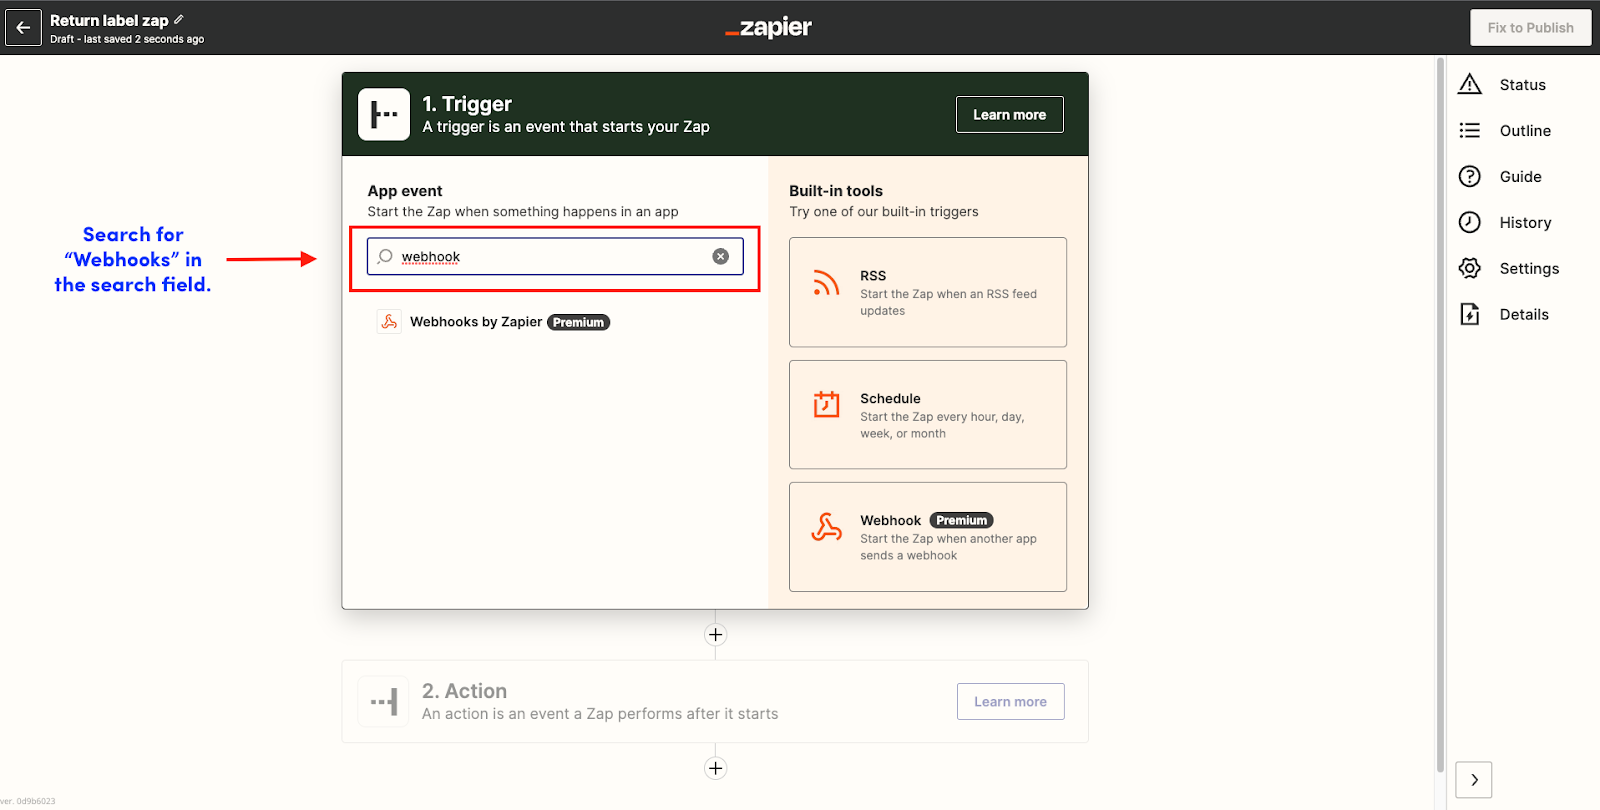
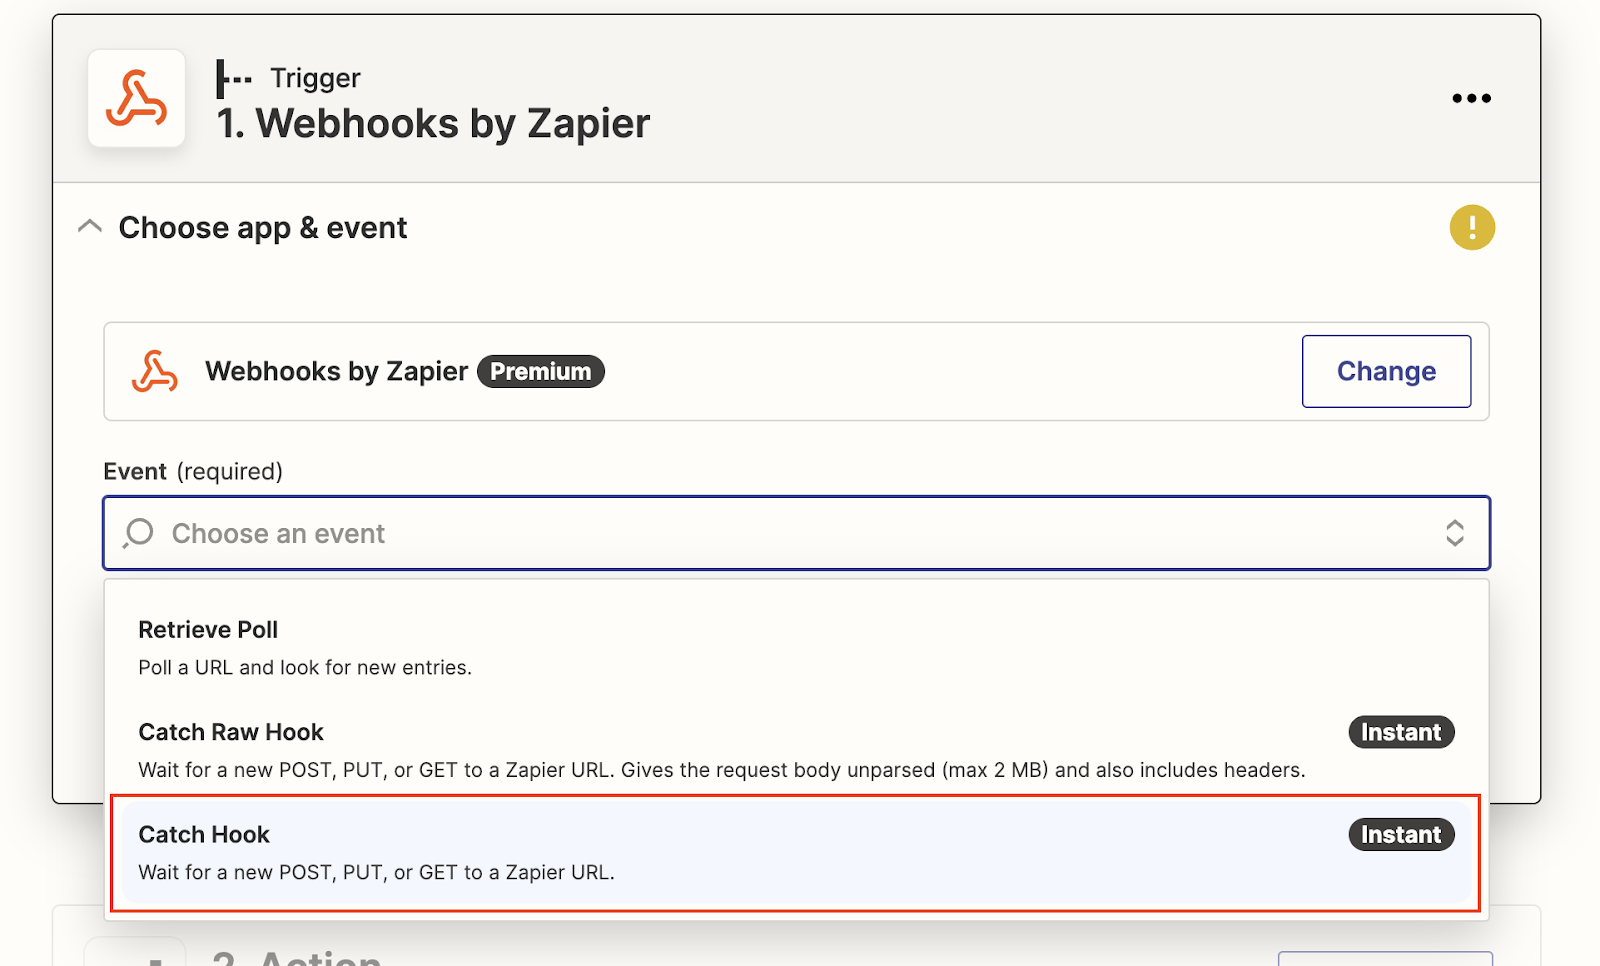
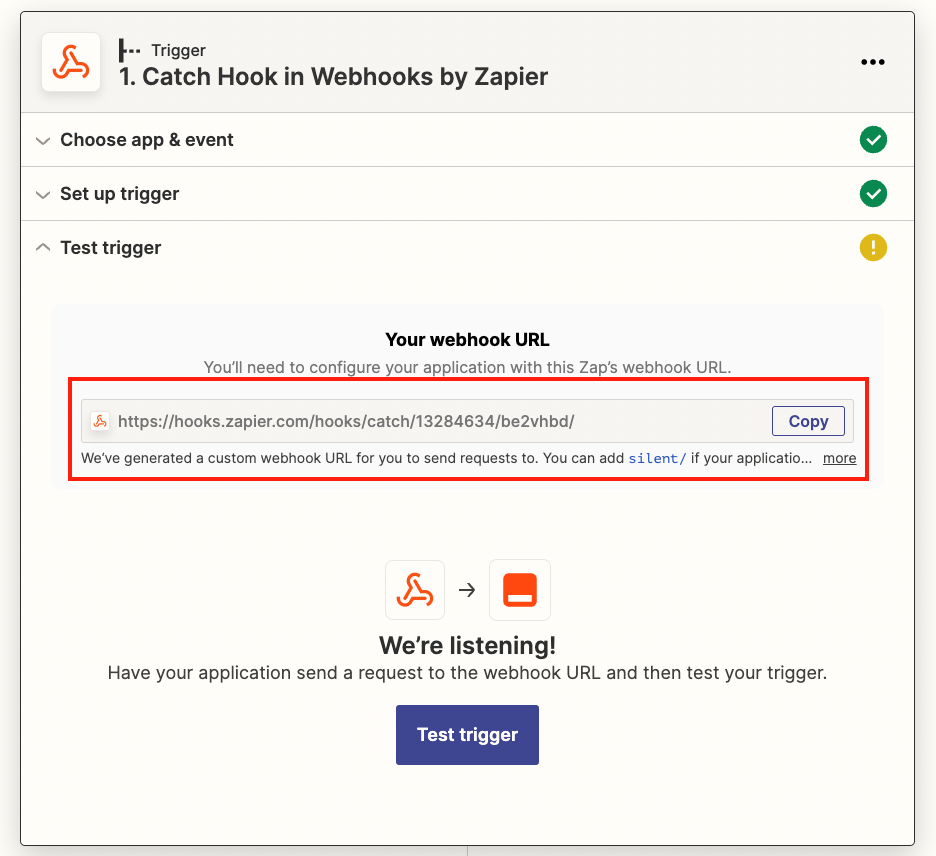

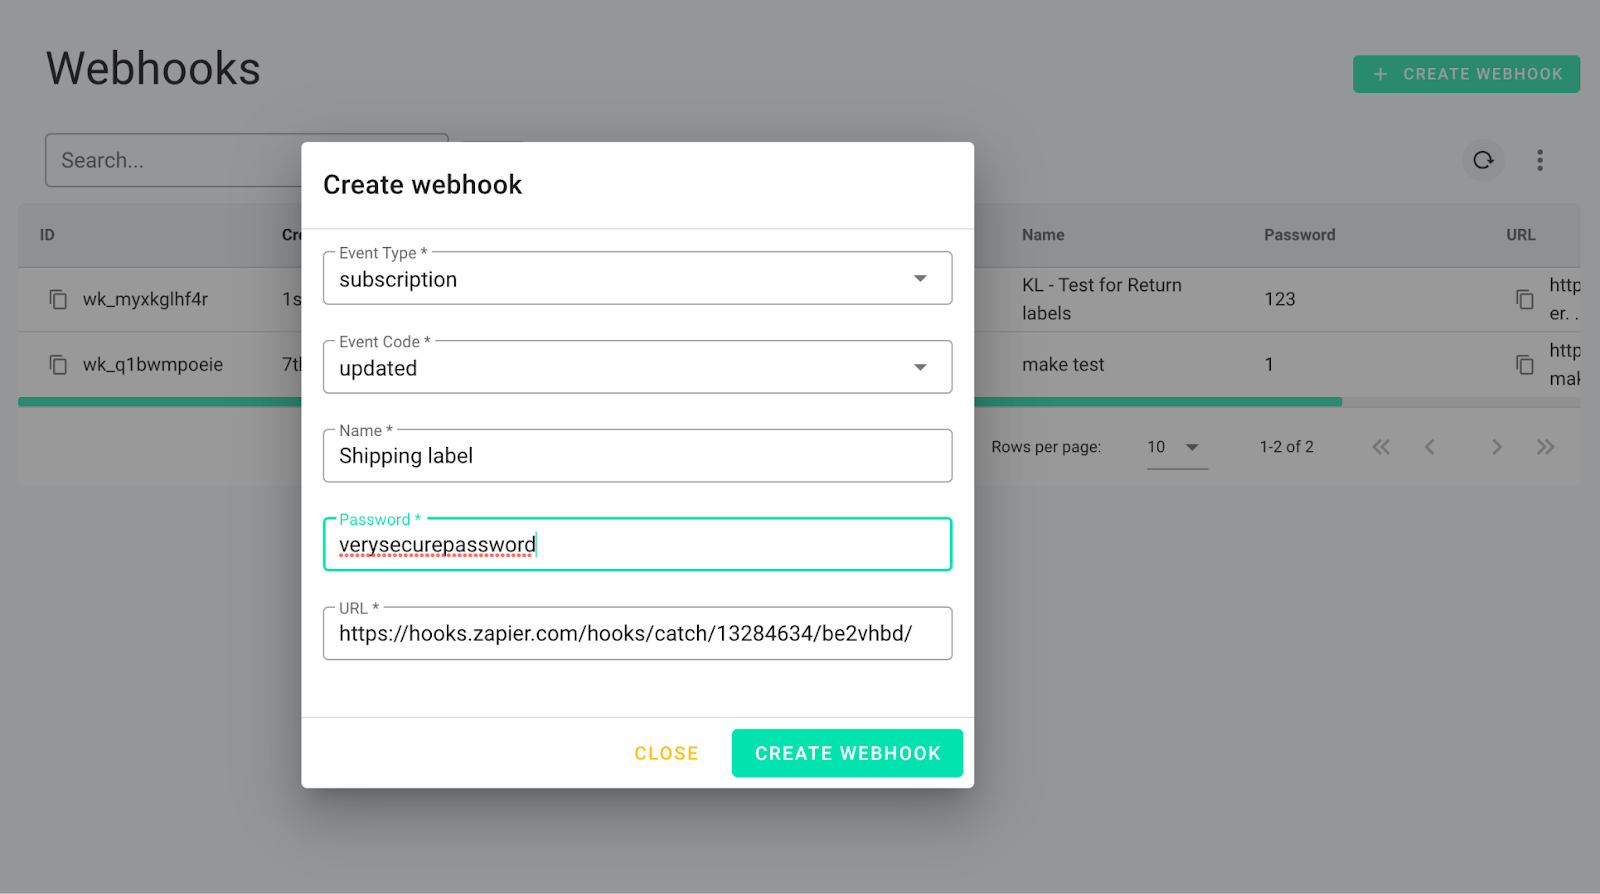
Now everytime anything in a Subscription is updated, Webhook will catch that update/change and send it to Zapier.
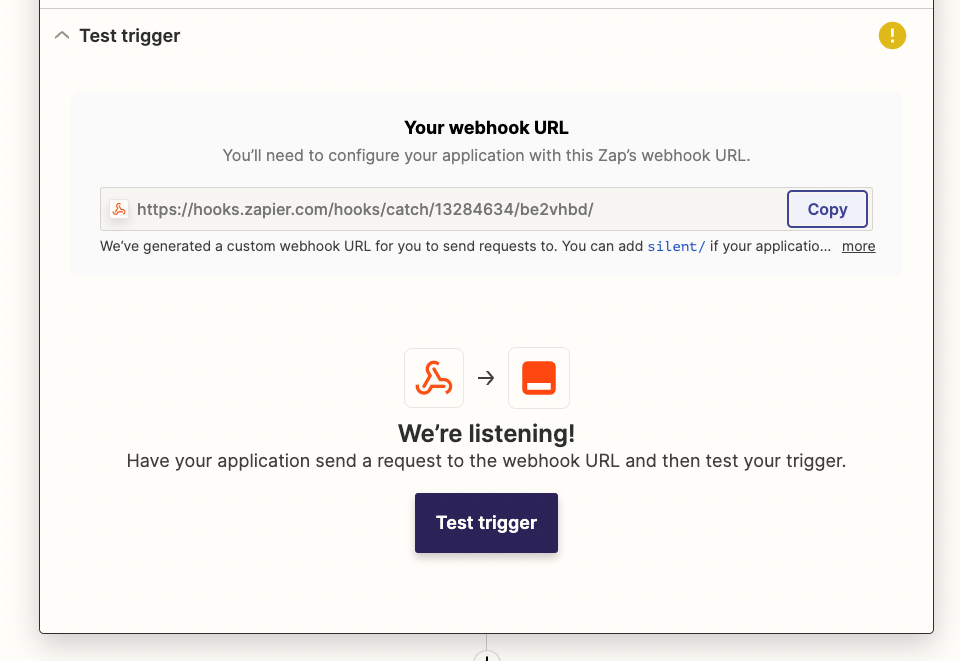
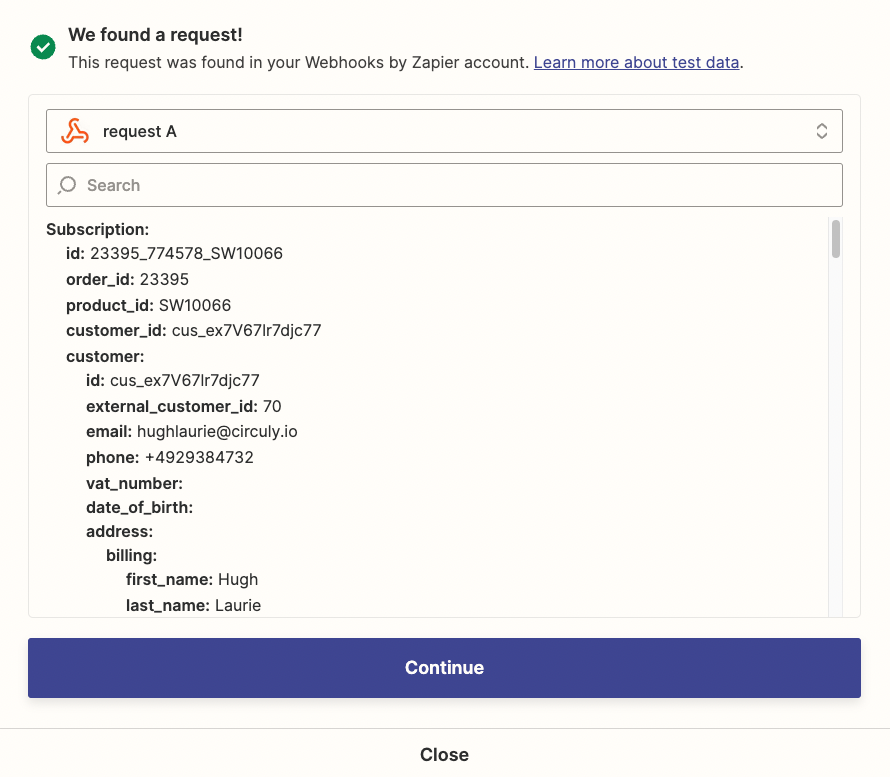
Optional: If you have test orders and subscriptions in your operations backend, you can change something in the subscription to test the trigger. But if no change or update has been made in the Subscription at the time you are creating a Zap then the Test trigger button will not lead to any results.
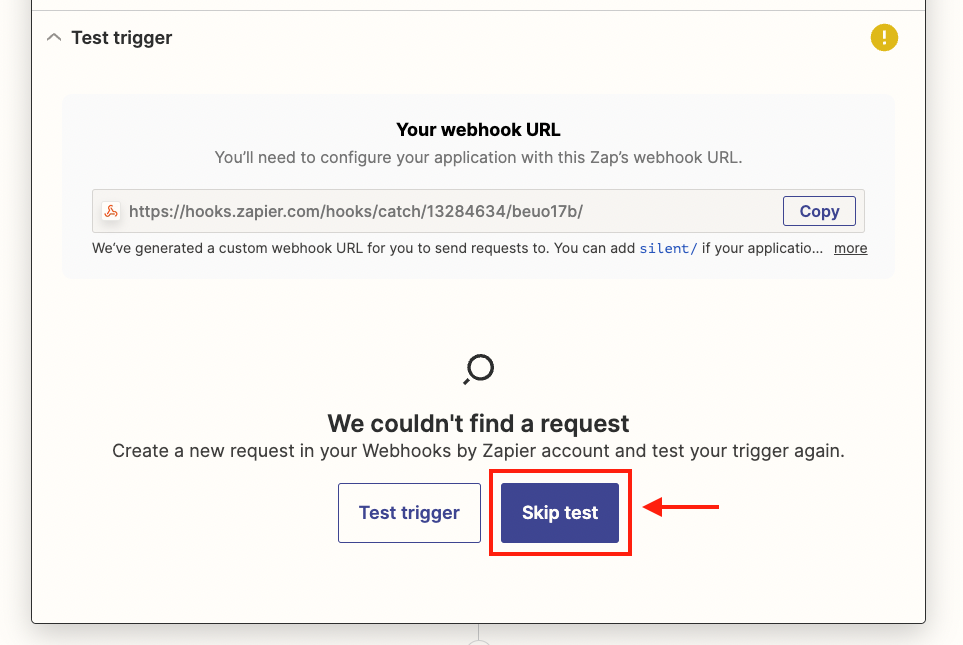
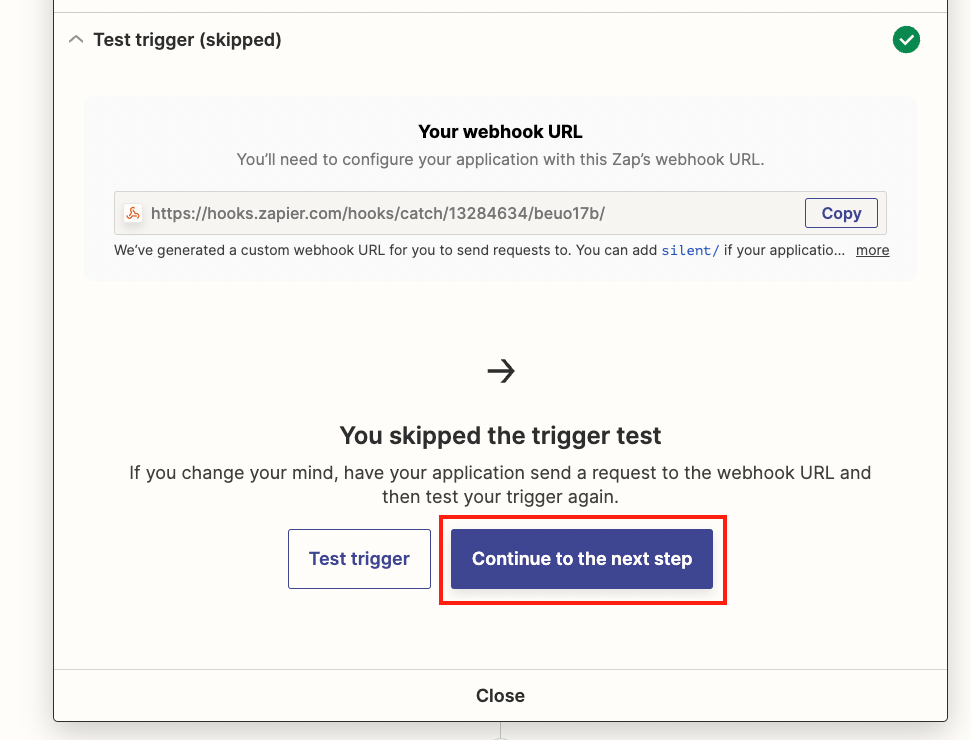
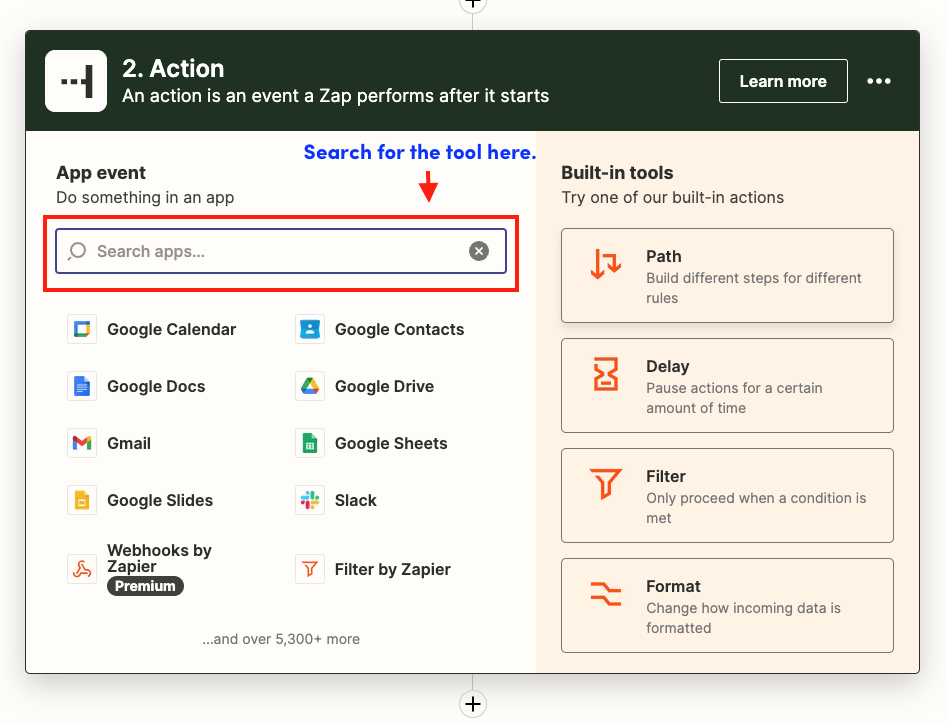
Note: Make sure to connect your tool with Zapier. Here’s how it works for Easyship > In your Easyship account > Go to Connect in the left nav bar > Click on + New Integration > Select Zapier from the list > Click on the Connect button.

Once you’ve completed the necessary steps in the tool, go to Zapier
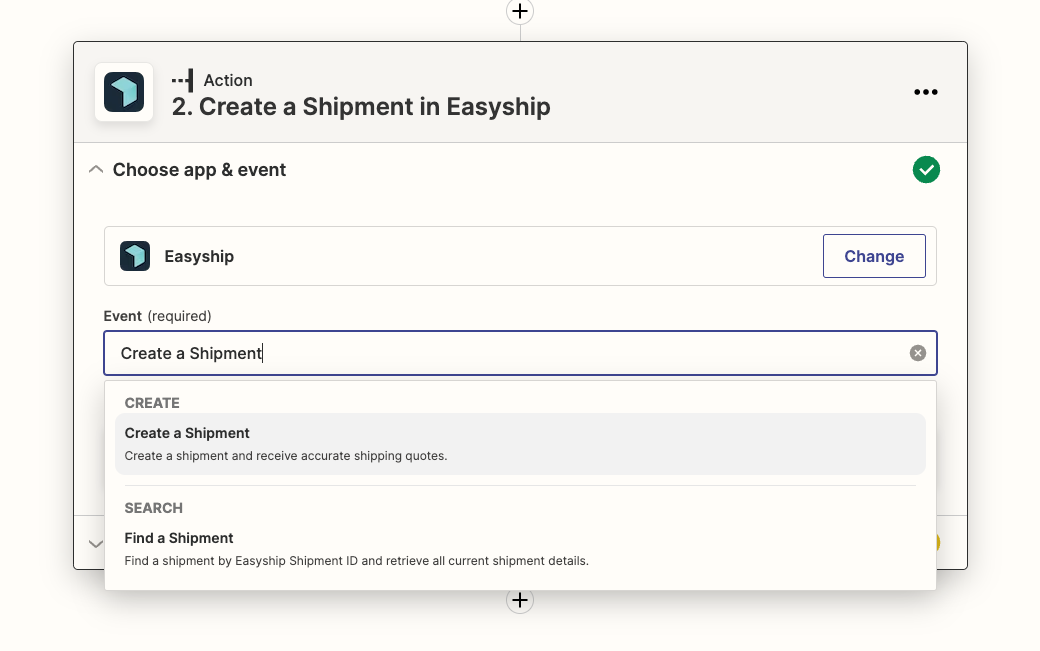
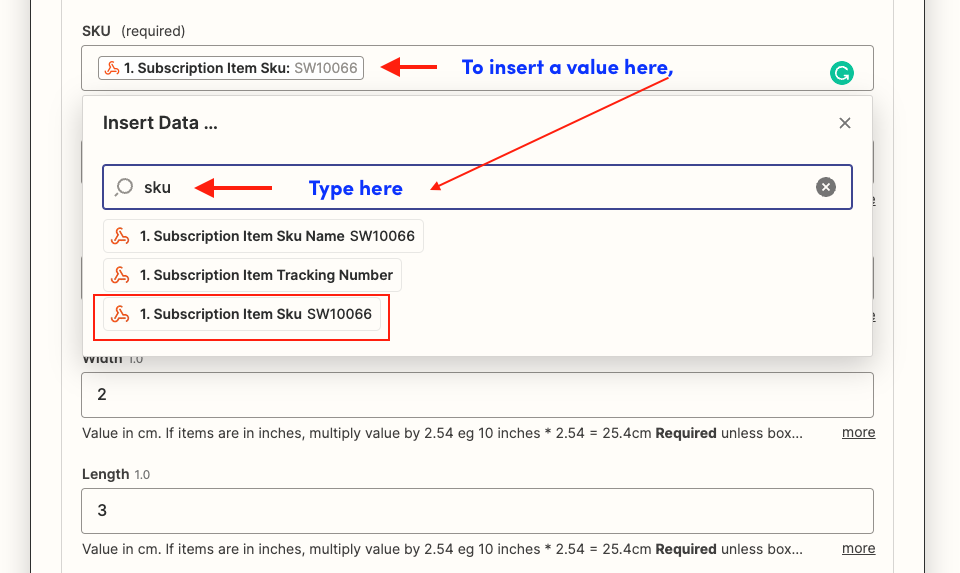
To fill in details, either type in the input field or click on the field to get a list of values that can be automatically taken from the data retired via webhooks.
Subscription settings in circuly allow you to control how subscriptions are created, activated, renewed, cancelled, and managed. By adjusting these settings in the circuly Hub, you can streamline operations, automate customer journeys, and stay compliant with local regulations.
This article gives you a complete overview of the subscription-related settings available in circuly, what they do, and when you should use them.
The subscription settings cover areas like:
These settings give you granular control over how subscriptions behave throughout their lifecycle.
These settings give you full control over your subscription logic. You can combine multiple settings to automate processes like:
Make sure to align these configurations with your fulfillment capabilities, legal obligations, and customer experience strategy.
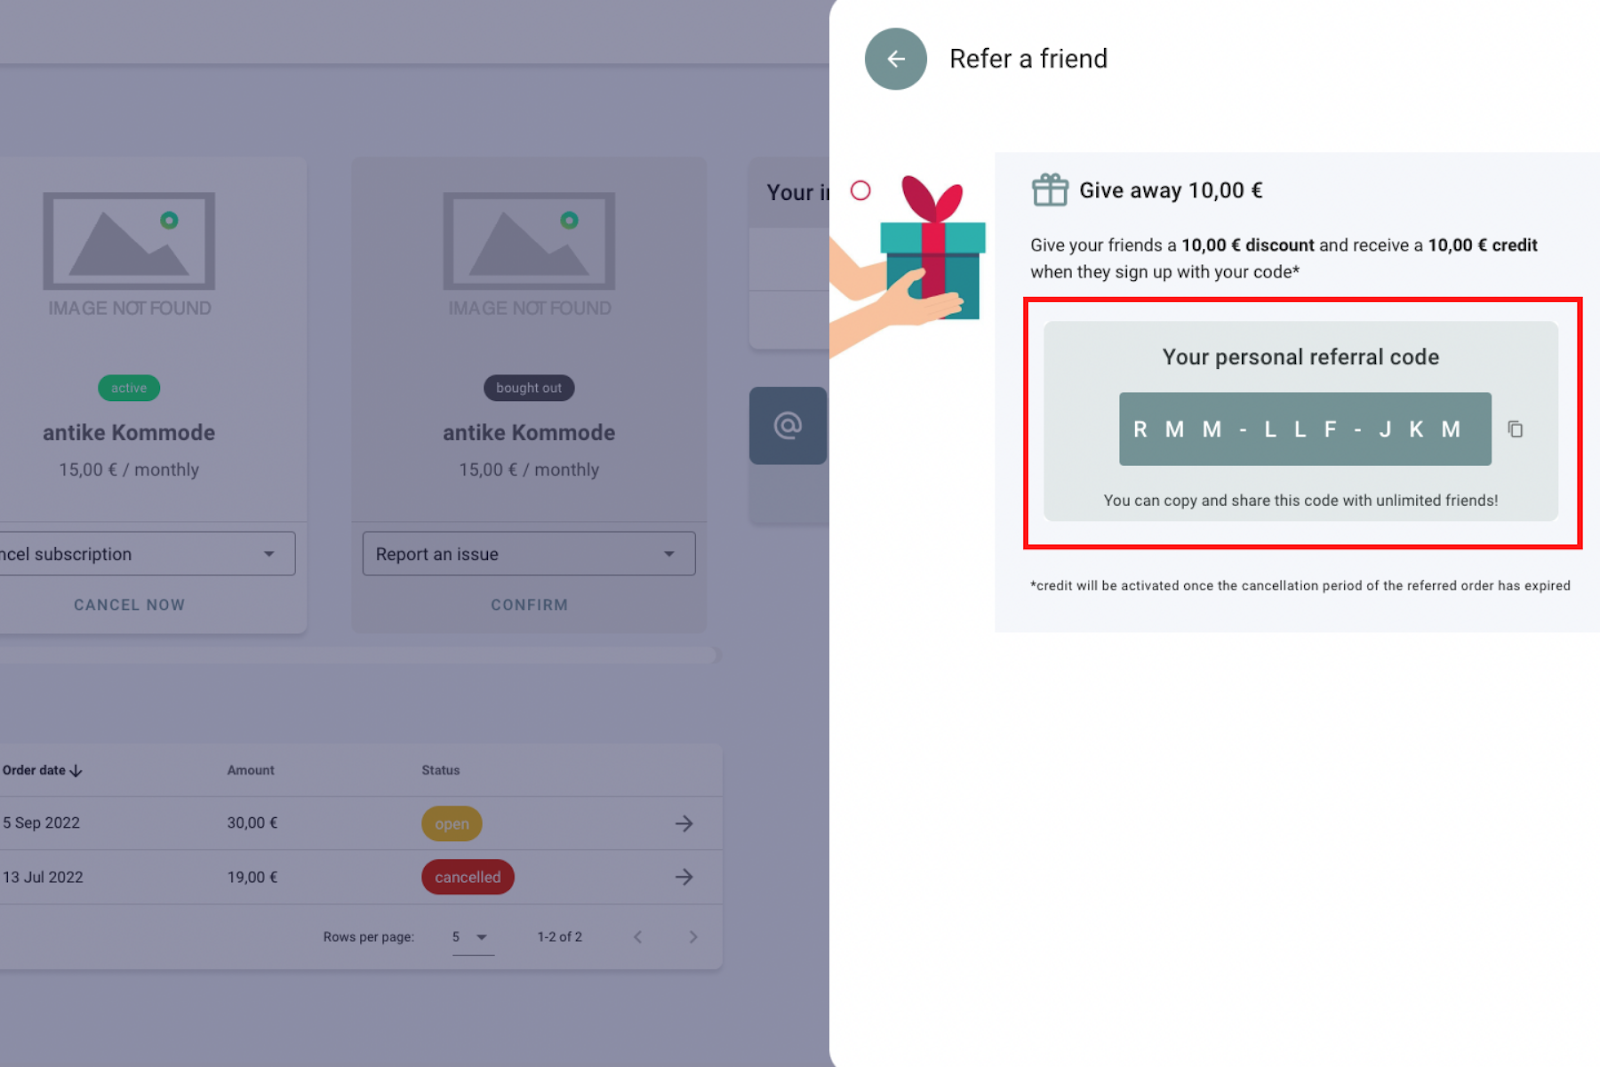
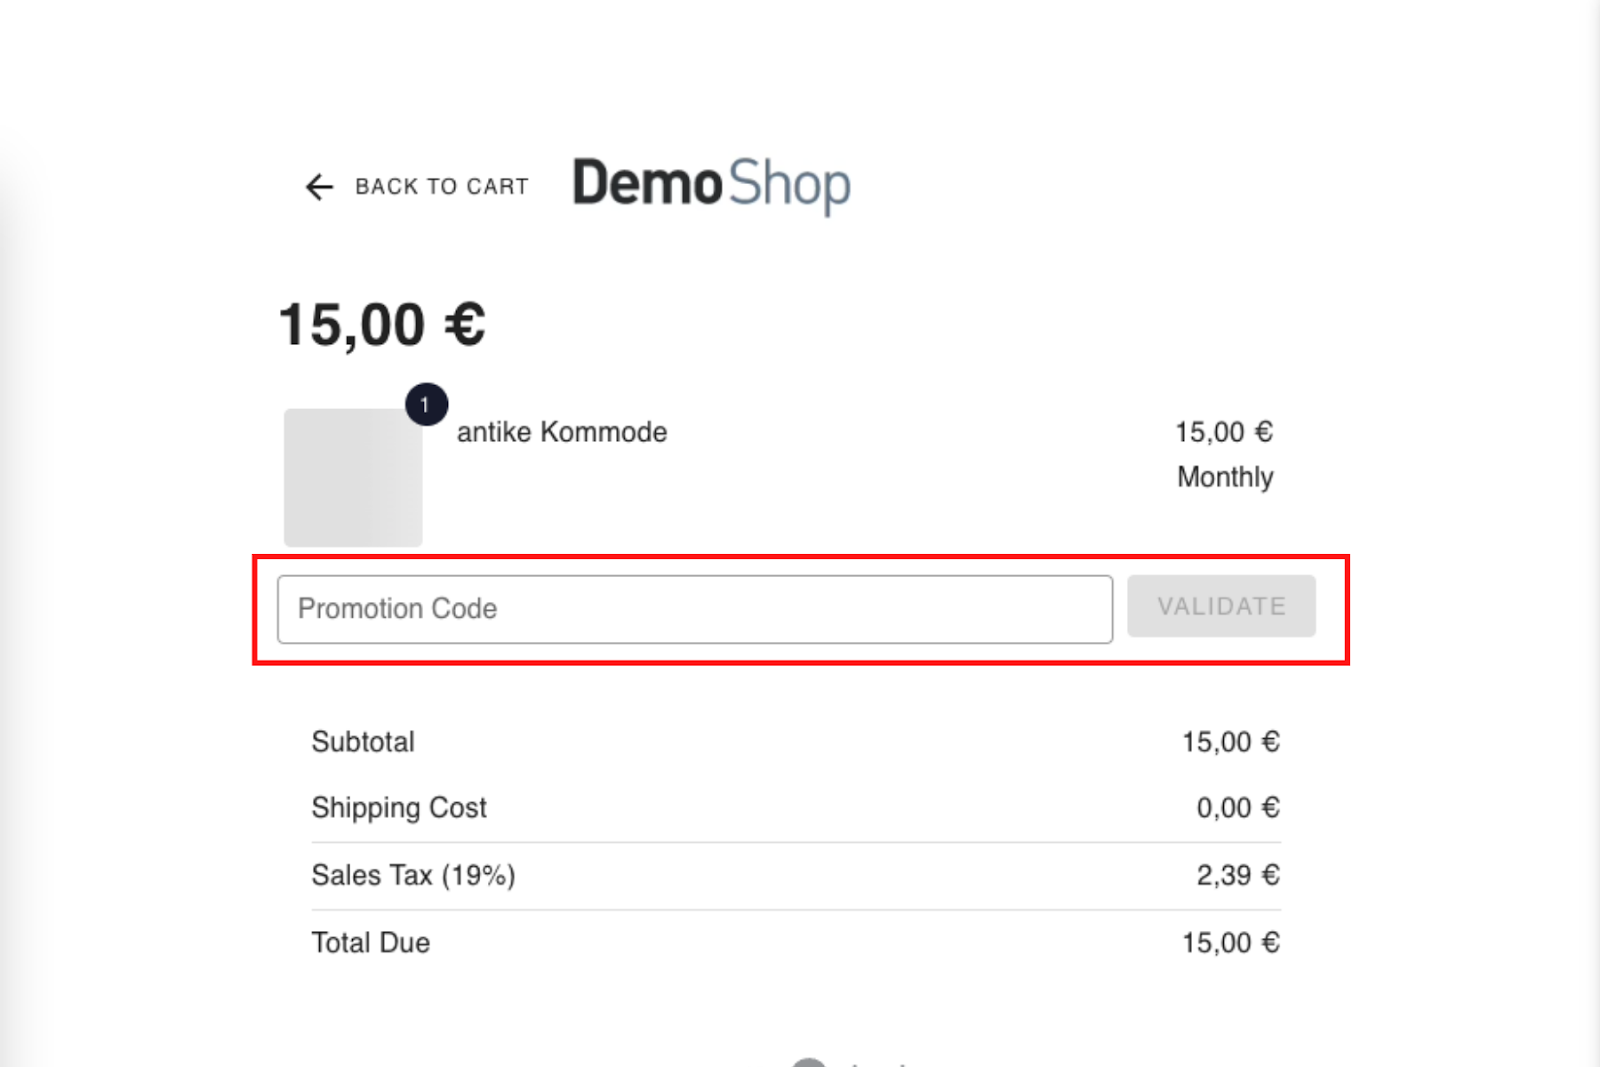
The Refer a friend feature in circuly allows your existing customers to share unique voucher codes with their friends. When a friend uses the voucher code during checkout, they receive a discount—and the referring customer earns a reward, added to their account balance.
This win-win setup helps you acquire new customers while rewarding loyal ones.
Variables used include: is_account_balance, from_account_balance, and final_invoice_amount.
Clearly explain how the reward will be used (account balance, not cashback), and ensure transparency to avoid misunderstandings.
.png)
Q: Can customers use their balance for new checkouts?
A: No, account balance is only applied to future recurring payments.
Q: What happens if the balance is greater than the recurring amount?
A: The surplus remains in the account and is used for upcoming payments until exhausted.
Q: Why is the feature only available after the early cancellation period?
A: To reduce fraud and ensure the referring customer remains subscribed for a certain period.
Webhooks are automated messages sent from one app to another in case something happens or something is updated/changed. It’s a way for different tools to “communicate” to each other and get automated information when something new happens. With webhooks you can push data from one app to another.
Here’s a simple analogy from Zapier about Webhooks
“There are two ways your apps can communicate with each other to share information: polling and webhooks. As one of our customer champion's friends has explained it: Polling is like knocking on your friend’s door and asking if they have any sugar (aka information), but you have to go and ask for it every time you want it. Webhooks are like someone tossing a bag of sugar at your house whenever they buy some. You don't have to ask, they just automatically punt it over every time it's available.”
If you want to become a webhooks pro and show off your webhooks knowledge to a colleague (or your boss), we recommend reading this article by Zapier.
Test your knowledge after you’re done reading the article by Zapier: How did webhooks get’s it name?
But you don't really need to be a webhooks pro to use them. Let’s jump right in.
circuly also provides you with the option of using webhooks to take data out of circuly and plug it into a tool of your choice to create automations. You can use an API endpoint of our choice or work with Zapier (our recommendation is to use Zapier) to make two apps talk to one another.
If you decide to use Zapier, then the first thing you need to do is to make sure that the tool you want to send information to from circuly is available on Zapier.
As mentioned above a webhooks catches data and send it to a destination every time something is updated or changed. Webhooks only catches the events that are changed or updated (this is relevant for creating zaps and will be discussed later).
When you use Webhooks there’s a sender that send the data and a receiver that receives that data. So there is a place where the action is “triggered”, and a place this action goes to, to convey that something has happened.
You can use Webhooks to create all sorts of automations. You can use an API endpoint of our choice or work with Zapier (our recommendation is to use Zapier) to make two apps talk to one another.
There’s a lot of room for creativity when it comes to creating automations. The automations you make depends on what exactly you want to automate. Based on that you can think what information you will need from a tool to make that automation work.
Note: Webhooks by Zapier is only available to Zapier users on a paid plan.
Create a Zapier account - to work with zapier, you need to create an account.
Create an account on the tool you want to use - you also need to create an account on the tool you want to use with Zapier.
A return label is a shipping label that’s prepaid and pre-addressed. Let’s see how you can get relevant data out of circuly via webhooks and send it to an app (we’re using Easyship) to creates a return label via Zapier.
With webhooks you first have to figure out what you want to automate and the information you will require to automate it. Then you need to match it with the information that is available and can be used to create the automation.
IMPORTANT: When you use circuly to manage your subscriptions, a subscription has a start date and an end date. If you do not use any of the auto-renewal features, then active subscriptions go into a “pending return” stage when the subscription end date as arrived. If you use the auto-renewal feature then subscriptions stay active until a customer makes a cancellation request from the customer self-service portal or write an email requesting a cancellation. When that happens, you can approve or disapprove the the cancellation based on whether or not the minimum subscription duration has passed and set it to pending return. You ideally want to generate a return label when a subscription goes into the “pending return” and “pending replacement” state.
When a customer makes a cancellation request from the customer self service portal and if you work with the auto-cancel subscription setting, then active subscriptions are immediately and automatically set to pending return and bypass the minimum subscription duration period.
When the subscription status is set as pending return, the return workflow is triggered, meaning that the customer has to return the subscription product within a certain time period.
It is at this stage that you ideally want to generate a return label and send it to the customer so that your customer can return the product.
To create a return label for such subscriptions, follow these steps:
Steps:
Now every time anything in a Subscription is updated, Webhook will catch that update/change and send it to Zapier.
Optional: If you have test orders and subscriptions in your operations backend, you can change something in the subscription to test the trigger. But if no change or update has been made in the Subscription at the time you are creating a Zap then the Test trigger button will not lead to any results.
Webhooks will send information to Zapier every-time something is updated in a subscription which includes all changes to all subscriptions such as subscription extension, subscription renewals, status changes etc.. But you don’t want to create a return label when the subscription is being extended or when a subscription amount is being changed. Therefore you need to set filters. To create a return label, all that you need is the status of the subscription and that’s the filter you can set while setting up your Zap.

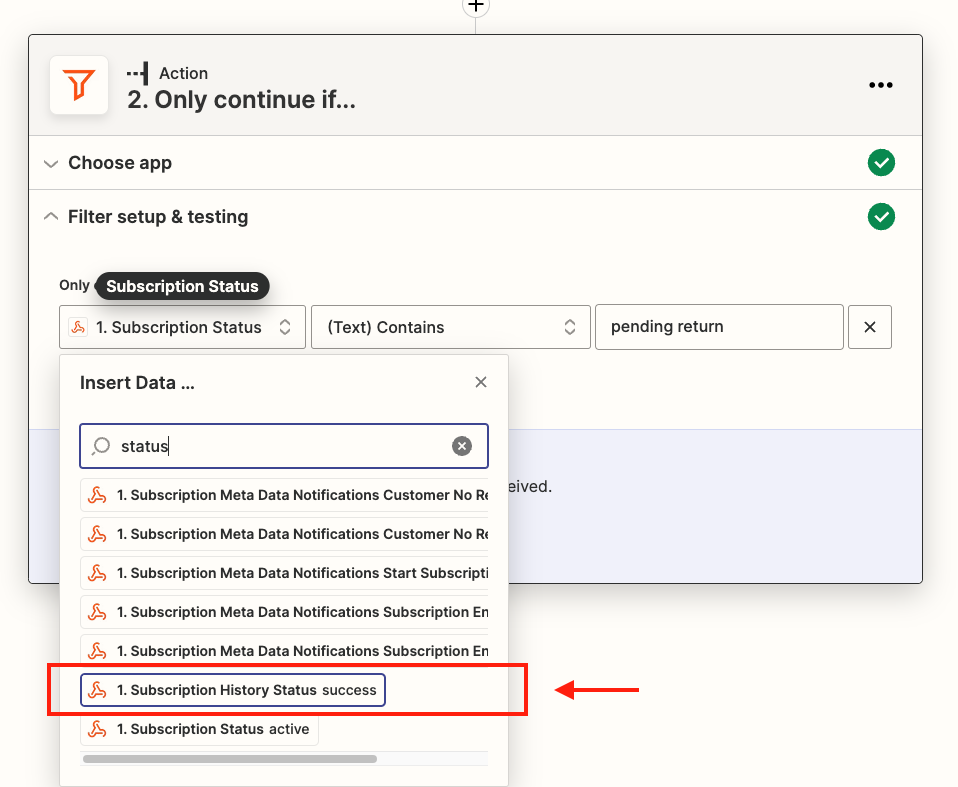

Testing the filter
When you test the filter, you might get the message that Your Zap would not have continued. Reason being that the data webhook is sending to Zapier does not contain a sample for pending return because this was not one of the changes that was made to Subscriptions and caught by webhook. See image below.
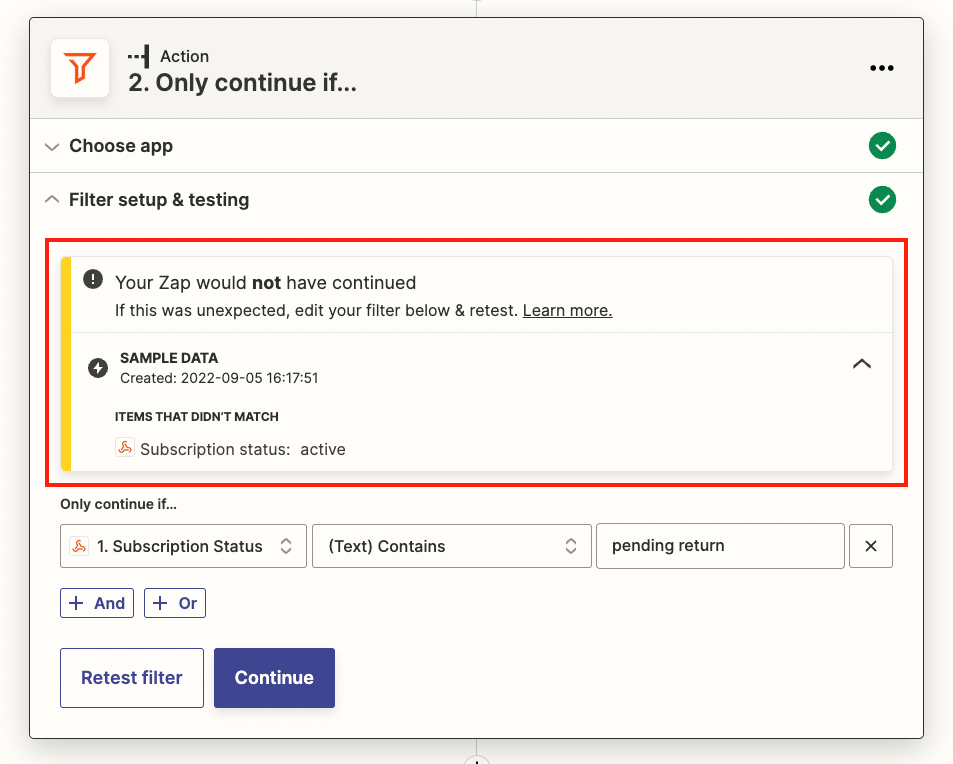
However this doesn’t mean that the filter doesnt work. If you change the value in the Enter test or insert data field from “pending return” to “active” and click on continue, you’ll see that you know have a success message. See image below.
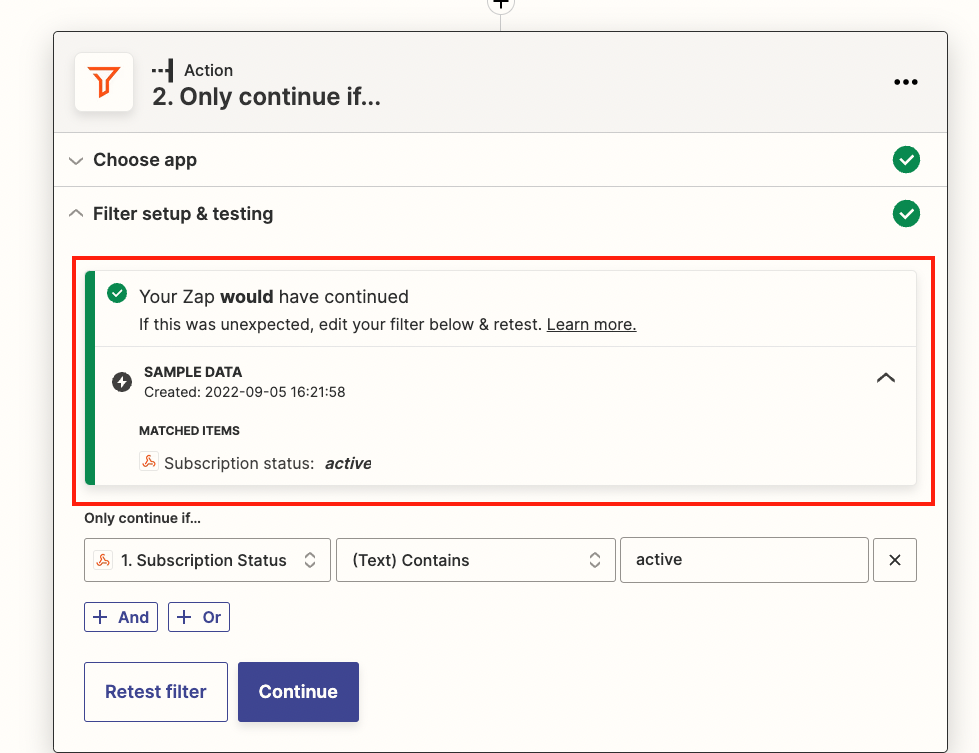
You can ignore this and click on continue to move to the next step, that is sending info to your shipping tool.
Note: Make sure to connect your tool with Zapier. Here’s how it works for Easyship > In your Easyship account > Go to Connect in the left nav bar > Click on + New Integration > Select Zapier from the list > Click on the Connect button.
Once you’ve completed the necessary steps in the tool, go to Zapier
To fill in details, either type in the input field or click on the field to get a list of values that can be automatically taken from the data retired via webhooks.

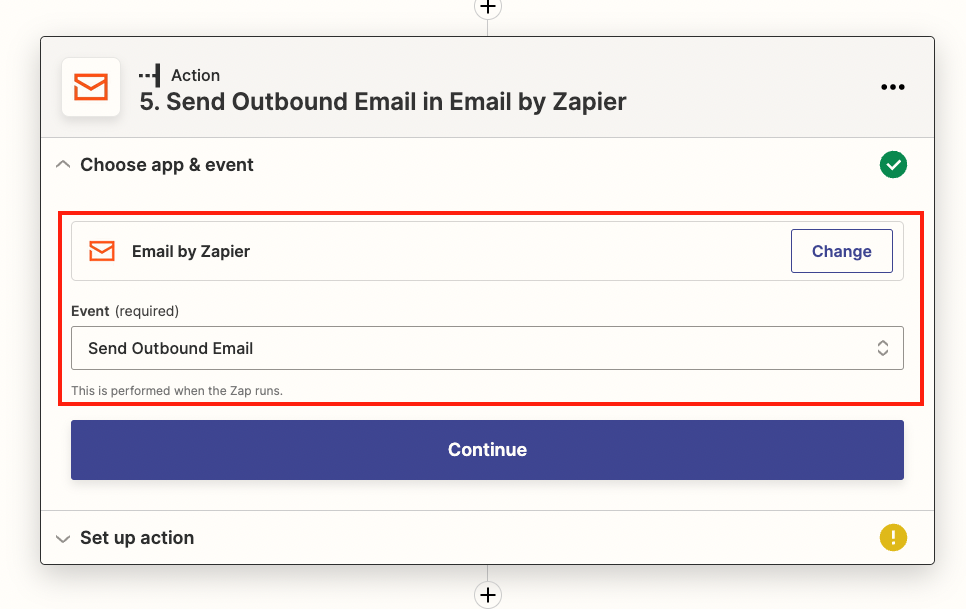
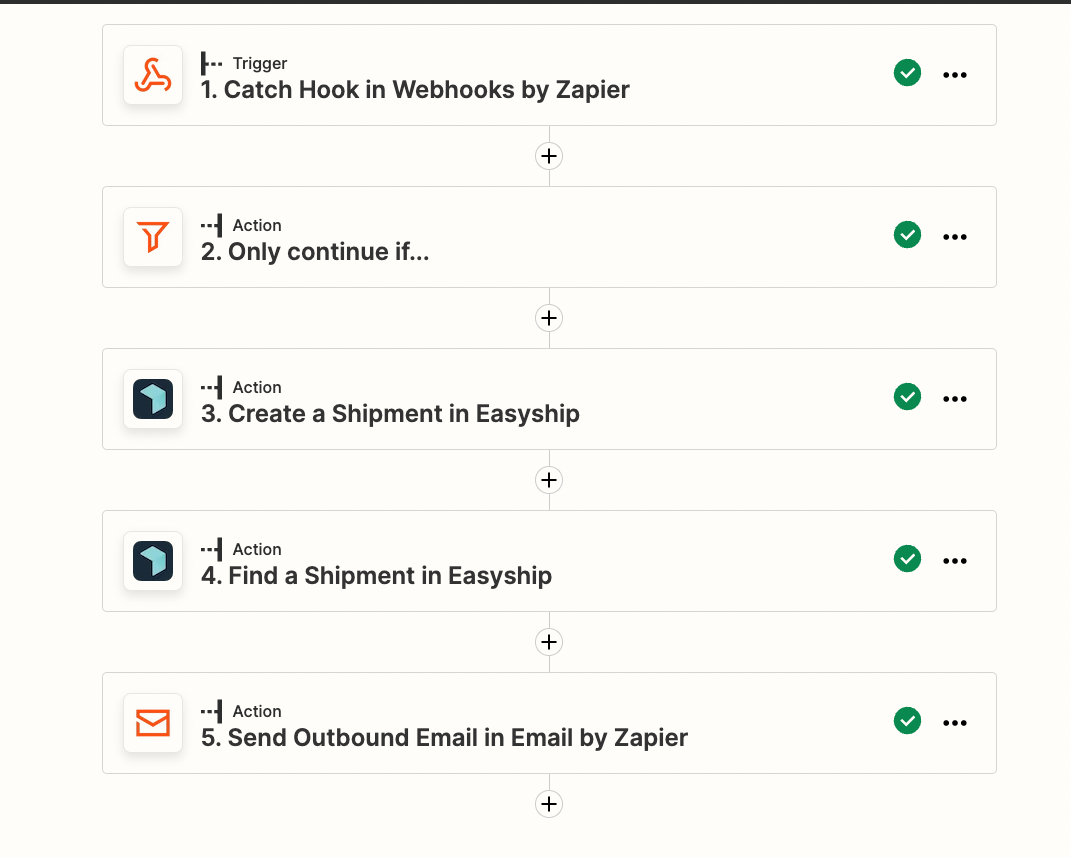
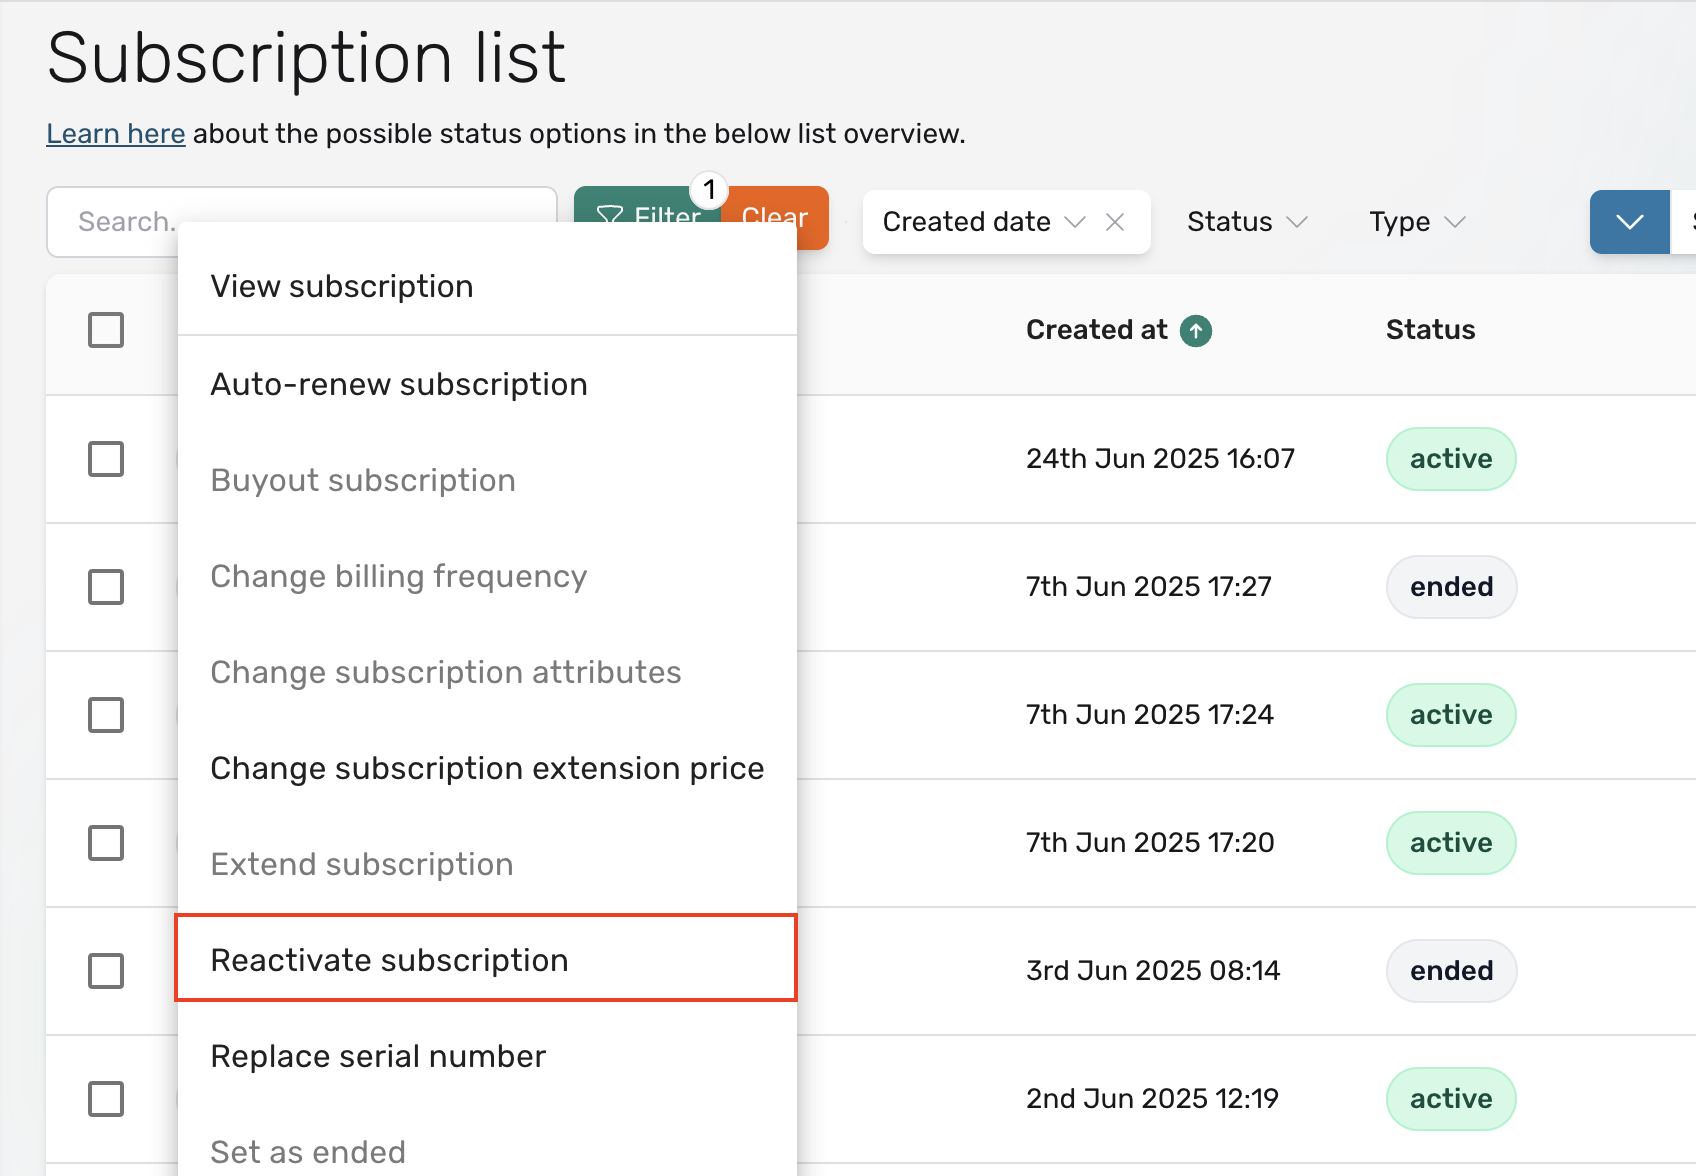
In circuly, subscriptions may automatically or manually move into an inactive state when they reach their end date or when a customer initiates a return or cancellation request. However, there are situations where a subscription needs to be restarted—for example, when the customer does not return the product on time, or when you want to reverse a cancellation. That’s where the Reactivate Subscription feature comes into play.
The Reactivate Subscription feature allows circuly users to manually restart a subscription that is no longer active but still eligible for reactivation. When a subscription is reactivated:
Setting to review:Settings > Subscriptions > Recurring Payments > Past billing dates
This setting determines if missed recurring payments from the time the subscription was inactive should be charged once the subscription is reactivated.
In a rental or subscription model, customers may eventually want to keep the product they've grown to love. Whether it's at the end of their subscription period or somewhere in between, circuly gives you the flexibility to manage buyouts efficiently—without disrupting your operations.
This article explains how to initiate and manage product buyouts from the circuly Hub, especially when you want to offer custom prices. It also covers what changes take place in the subscription and what happens after the buyout is processed.
There are two ways to initiate a product buyout in circuly:
The difference between the two options:
The key difference between the two buyout methods lies in how much control you want over pricing.
Note: If you have enabled the Only allow customer-portal buyout after minimum duration is reached setting, this restriction applies only to the Customer Self-Service Portal. Hub- or admin-initiated buyouts are not affected and can be processed at any time, regardless of how long the subscription has been active. This makes the Hub the right option for accommodating buyout requests from customers who have not yet reached their minimum contract duration.
What a product buyout changes in the subscription:
When a product buyout is initiated, several things happen in the background to update the subscription and inventory status:
In circuly, products are expected to be returned at the end of the subscription period. If a product isn't returned by the "Return until" date, the system automatically reactivates the subscription and resumes charging the customer for the unreturned product.
However, when a product is purchased through a buyout, no return is expected. That's why it's important to formally initiate the buyout process—so circuly can:
Skipping this step could cause confusion for your operations team and frustration for your customers.
If you wish to enable your customers to request buyouts on their own from their customer portal, follow this guide on Enable And Process Buyout/Purchase of Subscription Products.
For information on how to handle buyouts from the circuly Hub, continue reading this article.
Step 1: Check the retail price
Before initiating a buyout, make sure the retail price of the product is correct:
Step 2: Initiate the buyout
Make sure the email template you use includes the {{description}} variable so the custom message appears correctly in the customer communication.
Buyout payments can take some time to process when SEPA is chosen. This should be mentioned in the email communication with the customer. Example text you can include in your buyout email: "Thank you for your order. You will receive an order confirmation by e-mail shortly. Depending on the payment method, it may take several days to process your payment. As soon as the payment has been successful, your subscription will be changed to "{statusBoughtOut}" and you will receive an email with your purchase invoice. If your payment cannot be processed, we will also notify you by email."
Learn more about the buyout process.
In subscription-based businesses, renewing a subscription is a crucial process that helps maintain ongoing customer relationships and ensures continued access to your products or services. Renewing a subscription means extending its duration, typically after the initial subscription period ends, allowing the customer to continue using the service without interruption. Depending on the business model, subscription renewals can be handled in two main ways: either manually, based on specific customer requests or circumstances, or automatically, where the system renews the subscription at the end of the term.
This article will guide you through the different methods available for renewing subscriptions in your circuly system—whether you want to manually extend a subscription or automate the renewal process to save time and ensure consistency.
Typically, when customers place an order on your website, they agree to a specific subscription duration. This duration is considered both the minimum and the full length of the subscription by the circuly system. Once this period ends, several outcomes are possible, including subscription renewal, cancellation, product return, or product buyout. You have the flexibility to choose whether or not to have the Circuly system automatically renew a subscription at the end of the term. If preferred, you can manually extend the subscription contract based on your specific needs or individual customer cases.
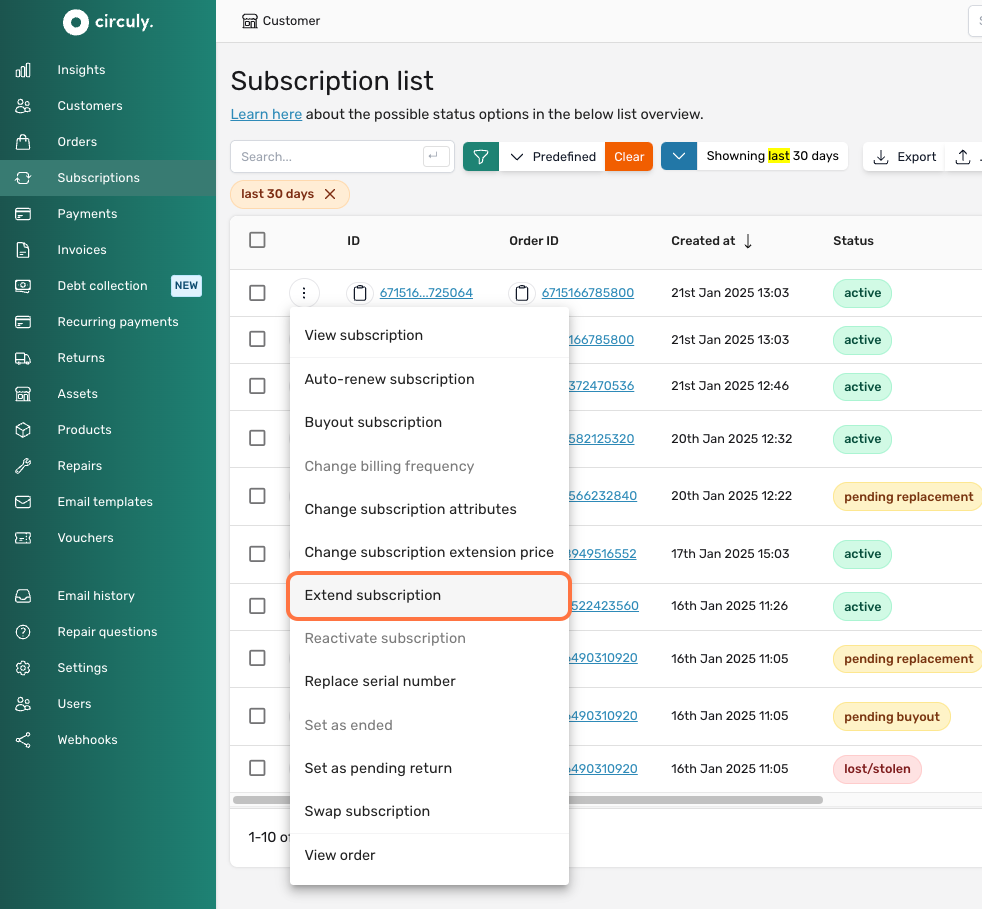
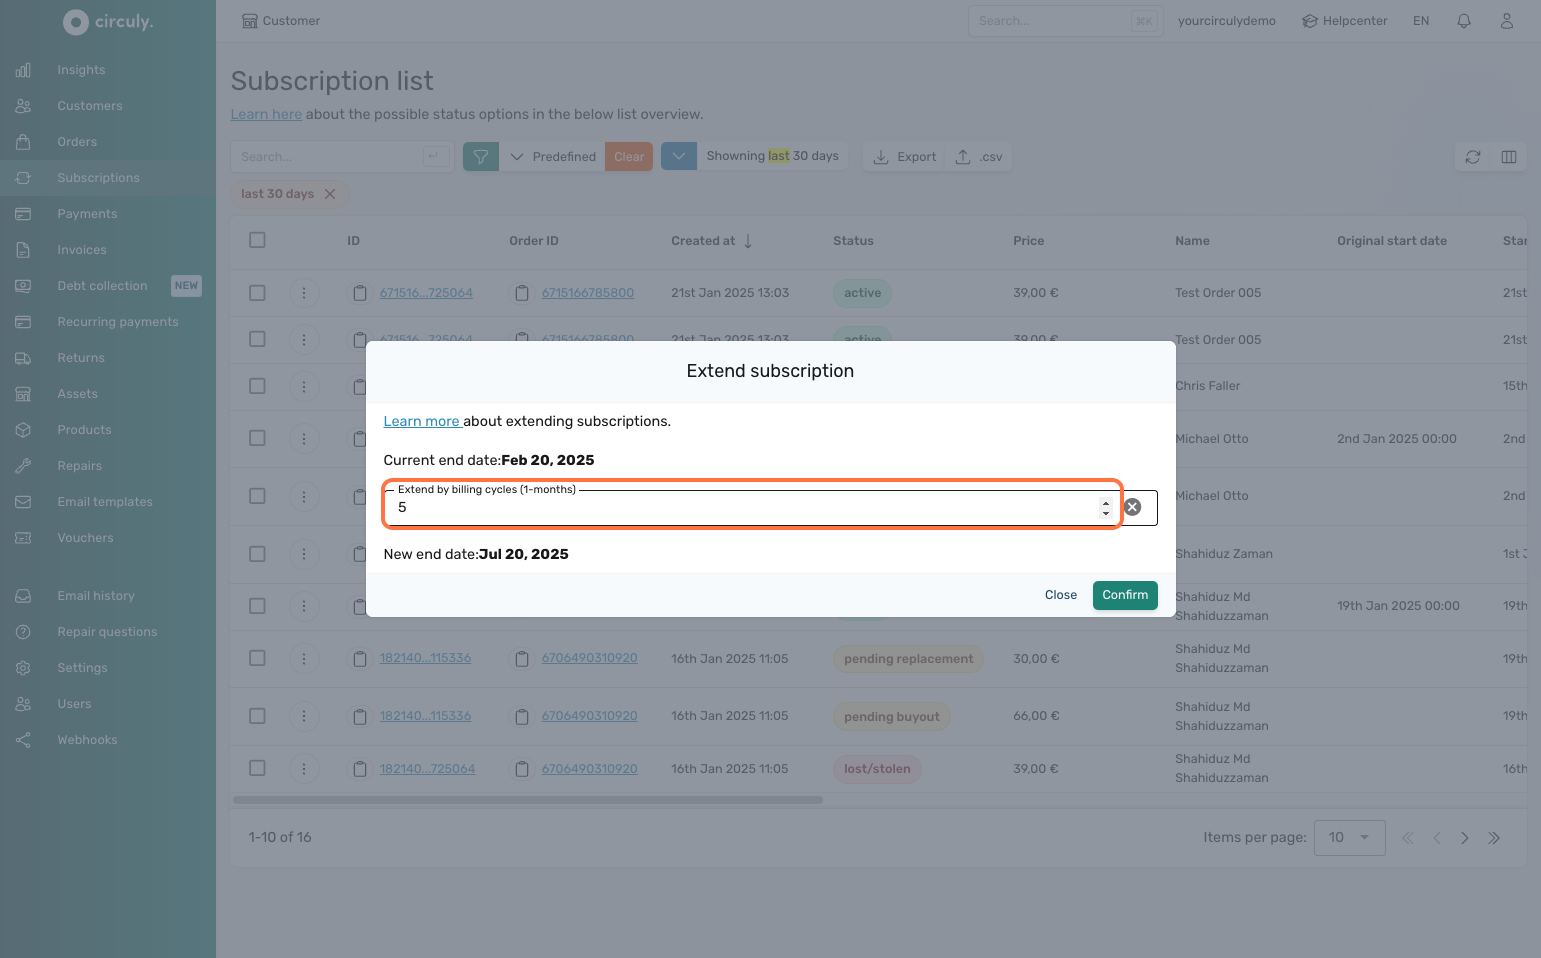
When you use this option to change the end date of a subscription, there is no impact of this action on the auto renew button in the subscription overview window.
If you want to renew or extend the subscription by its original duration then turn on the switch for the Auto renew subscriptions setting. From now on subscriptions will be renewed by the original subscription duration. For example if it was a 12 months subscription then towards the end of the subscription period it will be extended for another 12 months.

If you do not want to renew the subscription by its original subscription duration then you can define a custom value for the renewal. To do this > First go to the Auto renew subscriptions setting and turn on the switch > Next go to the Custom auto renew subscription setting and turn on the switch for this setting > Then add a numeric value in the Custom auto renew duration input field. From now on the subscription will be renewed by the value defined in this input field.
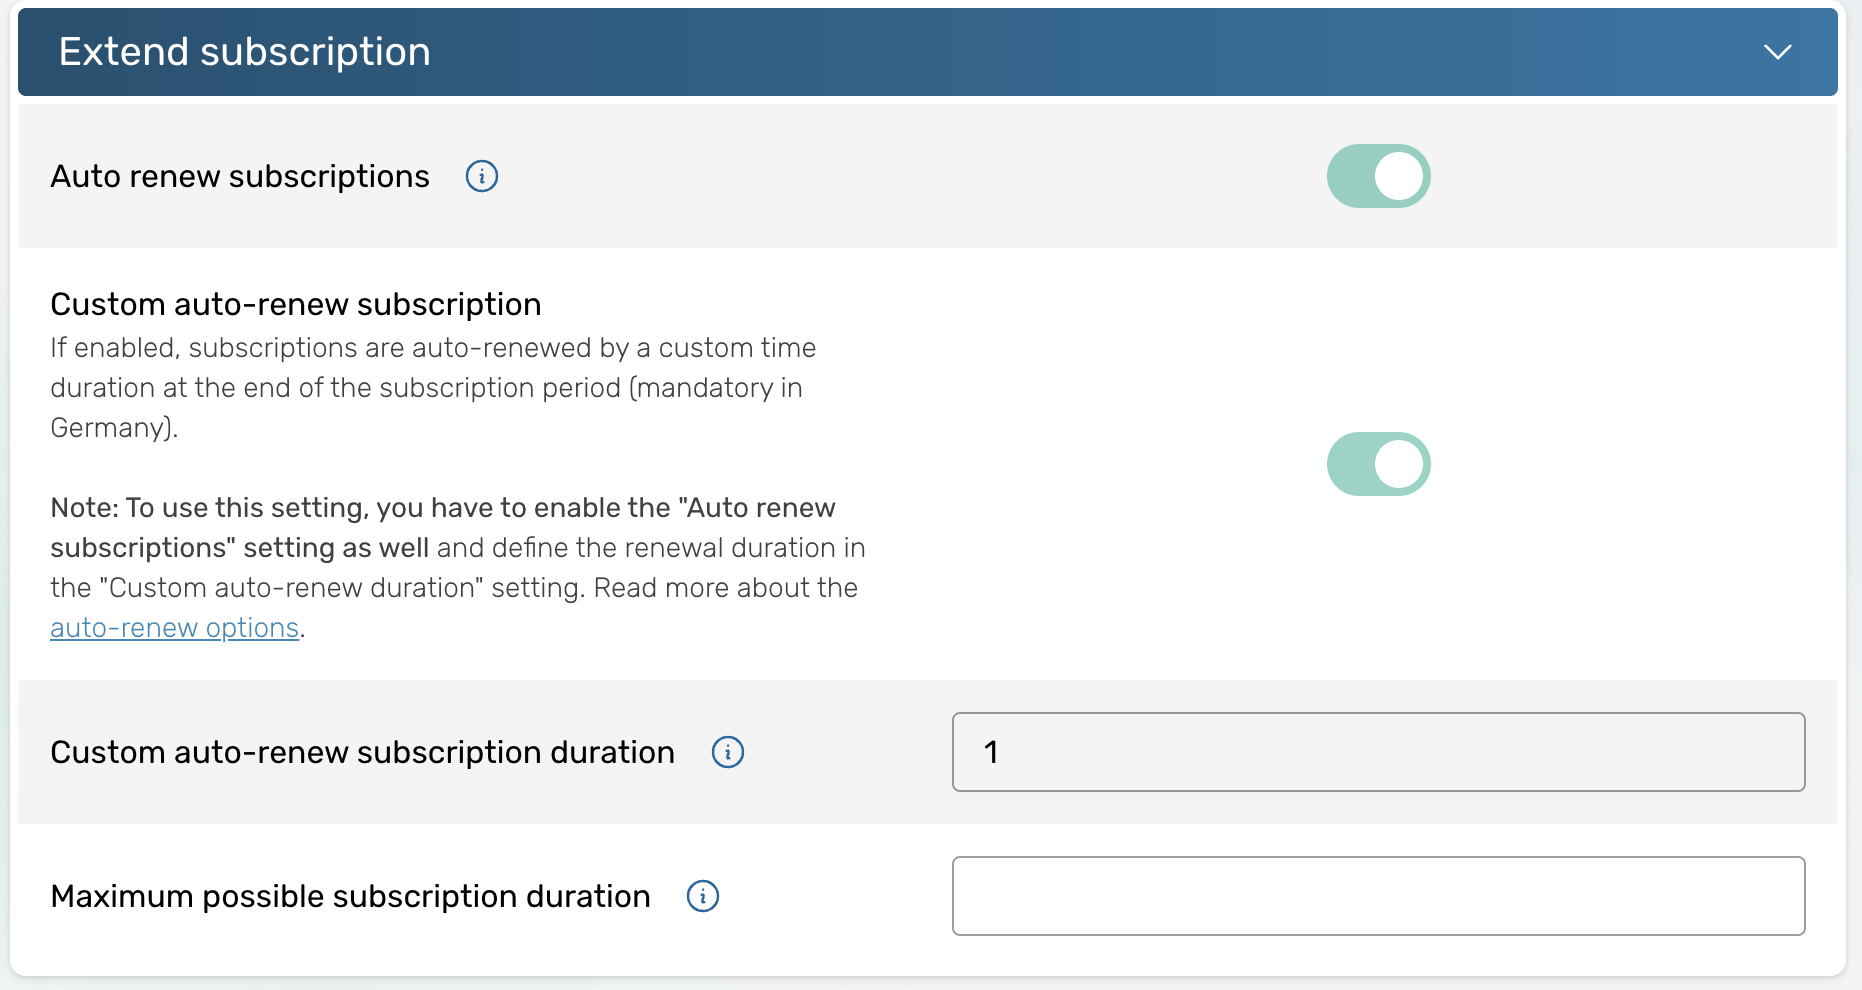
Important: Do not enable the switch for the Auto renew subscriptions setting if you want to renew subscriptions manually on on individual subscription level as every subscription will be renewed automatically at the end of the subscription period if you enable the auto-renew subscription setting.
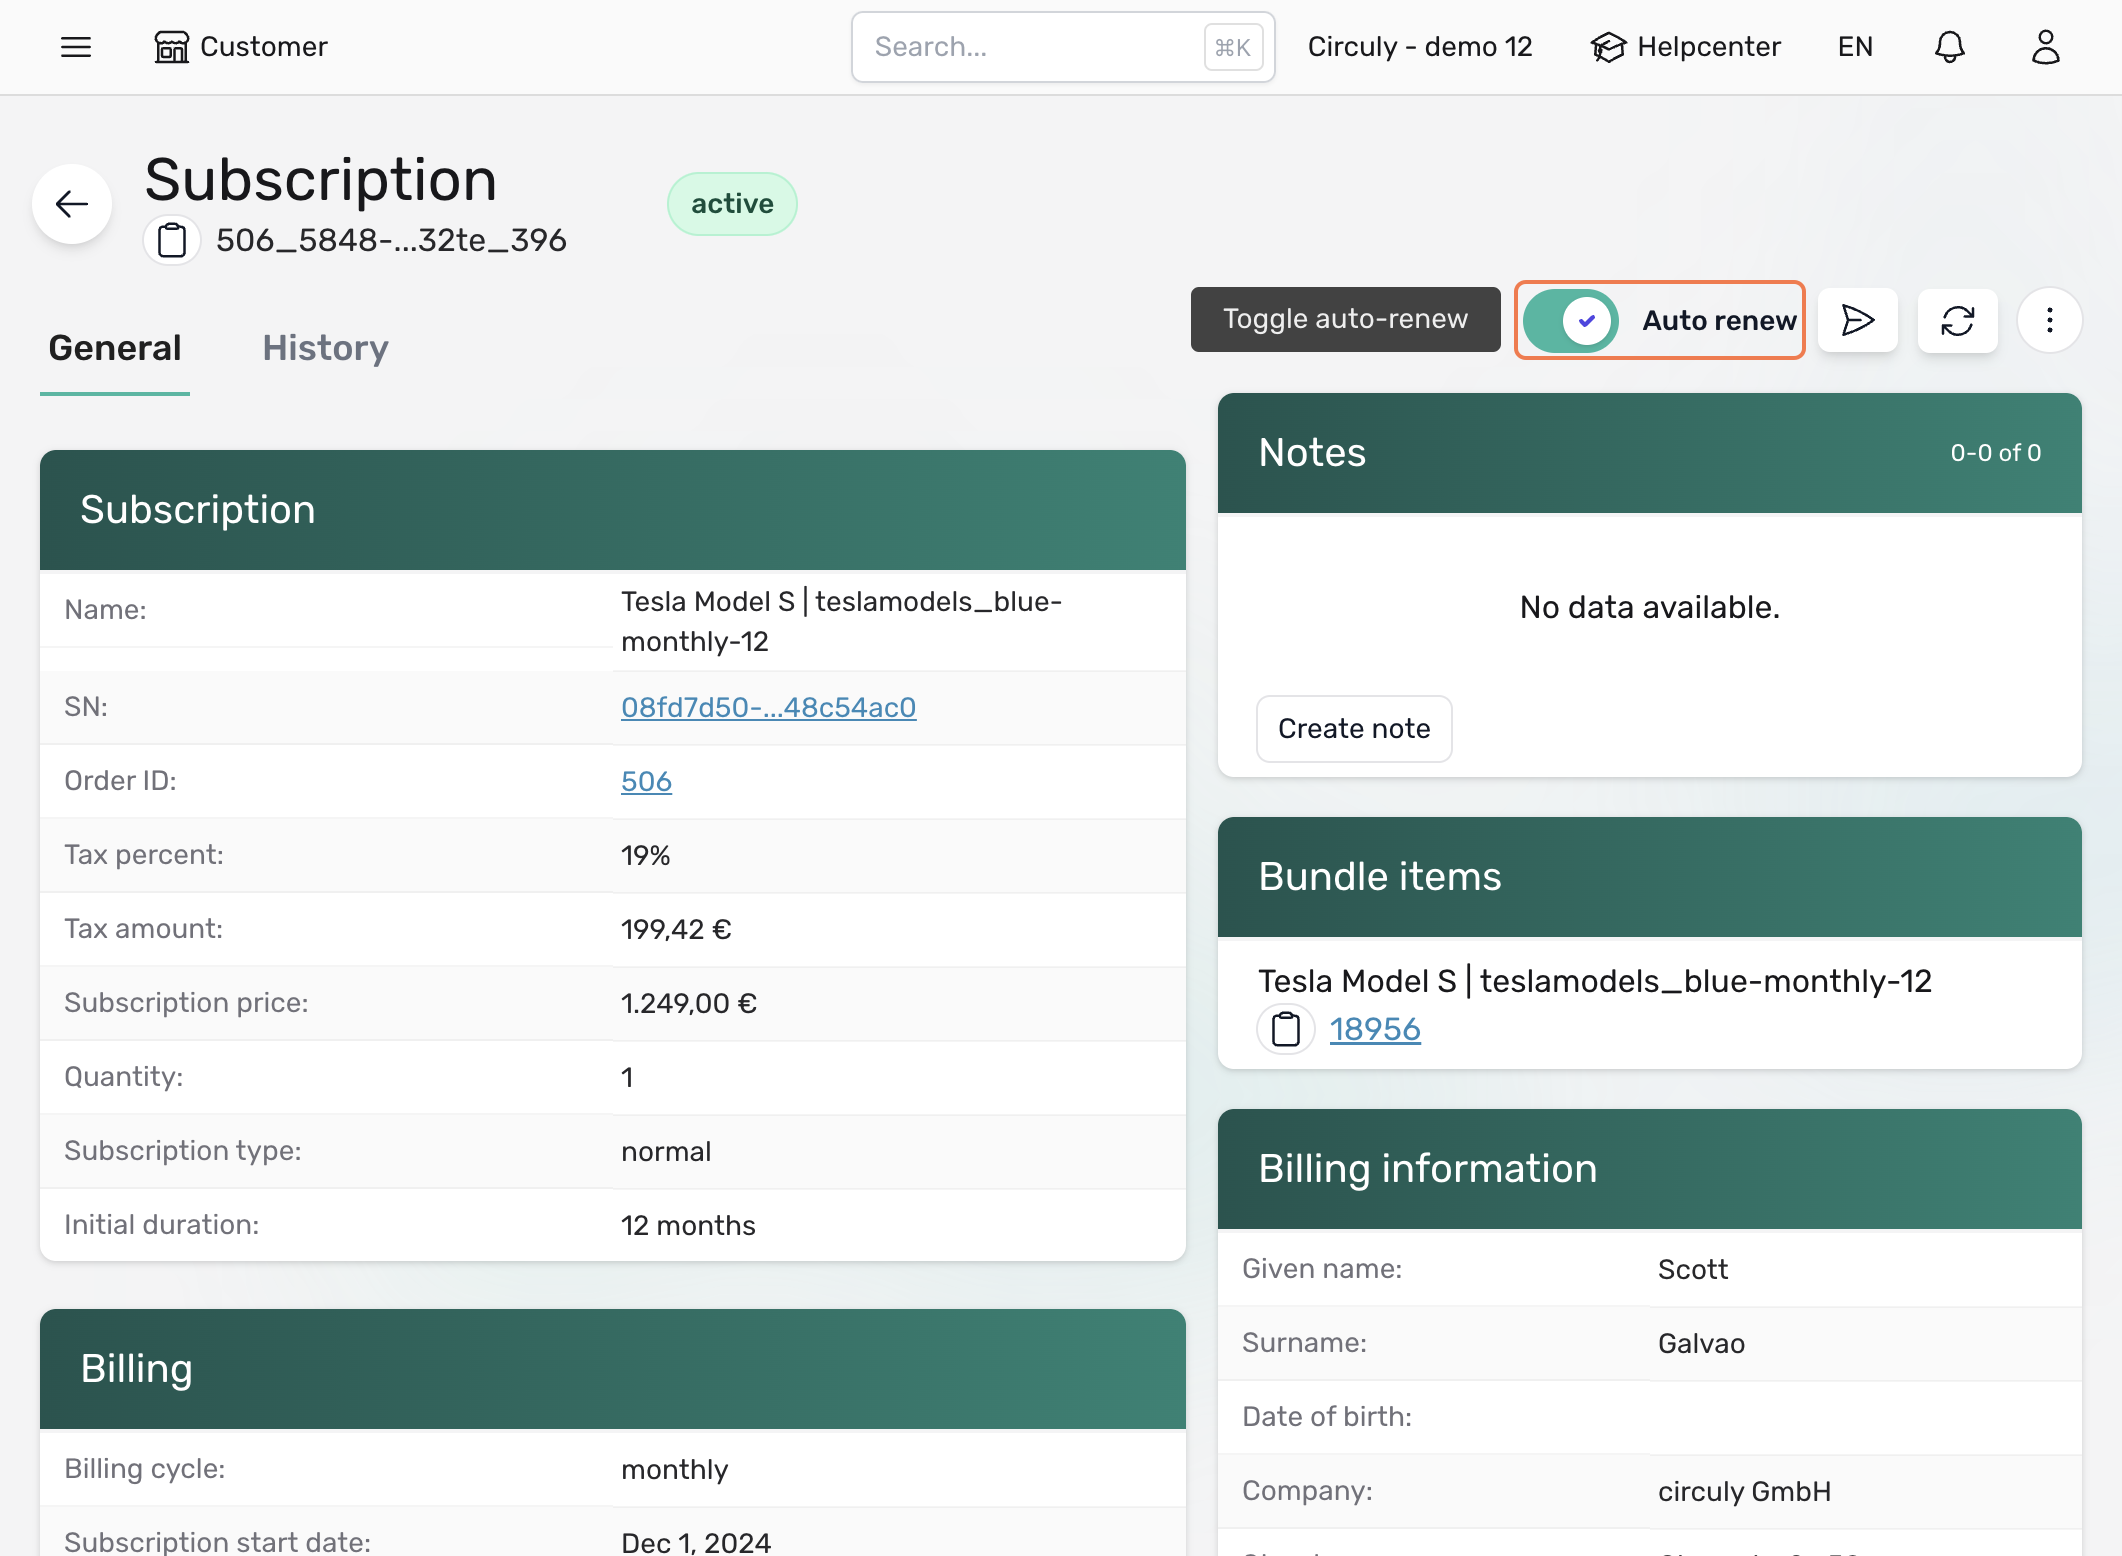
When a subscription has been auto-renewed because of the auto-renew subscription setting, the auto-renew switch in the subscription overview window will be enabled. The button provides a visual reference to determine which subscription is renewed and which is not.
If you use the Only allow customer-portal buyout after minimum duration is reached setting, the subscription's auto-renew status is used to determine whether the buyout option becomes visible in the Customer Self-Service Portal. Specifically, the buyout option is only shown once the minimum contract duration has passed (auto_renew = true).
This means that how you configure auto-renewal directly affects when customers can initiate a buyout from their portal. If you want customers to be able to buy out their subscription product before the minimum term is up, a Hub- or admin-initiated buyout remains available regardless of auto-renew status.
Customer information in Circuly can be updated in three ways:
Editing customer details is essential for keeping records accurate—whether it's correcting a typo, updating a phone number, or changing the delivery address for a specific order.
However, not all customer-related data is editable in one place. This is intentional: a customer might have multiple orders or subscriptions, and changes like address updates (shipping and billing) may apply only to a specific order—not their entire profile.
Tip: You can also update customer details using circuly's API. refer to the Update a customer endpoint for more information.
In B2C contexts, the email and phone number typically belong to the customer themselves. However, in B2B scenarios, one customer profile may be used to place orders on behalf of multiple individuals. In such cases, the contact information (email and phone) may reflect the person placing the order rather than the actual recipient. This information may need to be updated over time, especially when responsibilities shift within a company, while the shipping address remains tied to the end recipient.
When editing the address, you'll see separate fields for the shipping address and the billing address. Make sure to update the correct one based on what the customer needs changed—for example, the delivery destination versus the invoicing contact.
In many cases—especially B2B—orders are placed by one contact person but delivered to different recipients. For this reason, address and birth date updates are made per order rather than globally across a customer profile. This ensures the right delivery information is applied where it's needed without affecting other subscriptions or orders linked to the same account.
Customers can also update their own information through the Customer Self-Service Portal.
However, similar to how it works in the circuly Hub, address changes are made on a per-order basis. If a customer needs to change their shipping address, they must do so from the specific order view—ensuring that address updates apply only to the relevant order and not universally across all active subscriptions.
These updates are reflected directly in the circuly Hub.
For a detailed breakdown of how customers can update their information in the portal, refer to:
When processing a product swap within an active subscription, you can define specific reasons for the swap. These reasons serve internal communication purposes and help keep your operations team aligned on the context of product exchanges.
Swap reasons are shown in the Replacement Window when a swap is initiated. This makes it easy for your team to choose the appropriate reason for the product exchange and document it for future reference. Swap reasons are only visible internally and do not affect the customer’s view or experience.
replacement to automatically tag orders associated with this swap.In a typical eCommerce flow, a customer places an order, the product is shipped, and the seller estimates a delivery time—usually within a few days. The subscription is created, either manually or through automation, and a start date is assigned accordingly.
When creating a subscription manually, the circuly user has the option to select the subscription start date. By default, this field is pre-filled with a date influenced by the Subscription start date setting (e.g., “+3” to indicate a start date 3 days from today). If no such setting is defined, the field may default to a random future date. In automated flows (bulk upload or API), the start date is included in the incoming data and adopted directly by the Circuly system.
It's important to note: if a subscription has not yet been created for an order, the start date can be freely defined or adjusted during the subscription creation process. However, if a subscription already exists and the start date needs to be changed, then the approach is different—and that’s where the Edit Recurring Payments feature becomes relevant.
This is especially useful in scenarios where the initial billing plan—let’s say starting on the 2nd of the month—no longer aligns with reality due to delays (e.g., the product was only delivered on the 15th). Instead of canceling and recreating the subscription, you can shift the start date and all future billing to the 15th of each month going forward, while preserving the subscription structure.
The subscription’s billing will now align with the new start date, and the end date will shift accordingly to maintain the original contract duration.
circuly gives you the flexibility to correct subscription timelines when things don’t go as planned. By adjusting the start date after delivery delays or other operational reasons, you ensure billing fairness and maintain customer trust—without disrupting the overall contract terms.
We are constantly expanding and improving our knowledge loop to give you the information you need to make the best out of circuly.
You can request articles about features that you yet do not know how to best use.
Just tell us what you want to know and we’ll get our content ninjas right on it.
Since 19 June 2026, EU Directive (EU) 2023/2673 requires anyone selling online to EU consumers, subscription or one-off, to offer a "withdrawal button": a clearly labelled, easy-to-find way for customers to withdraw from a contract made online, without logging in.
circuly's Order Revocation feature lets you offer this directly from your Self-Service Portal environment, so you can meet the new requirement without custom development.
Order Revocation allows your customers to withdraw from an order by simply submitting their email address and order number, no login required. This is different from a normal cancellation made through the Customer Self-Service Portal, which requires the customer to log in first. Two things make this compliant with the new EU rule.
1. Easy accessibility
The withdrawal option needs to be visible and easy to find, not buried behind a login page.
We recommend adding a clearly labelled text (for example "Withdraw order") to your website footer and/or header.
The text has the link to the withdrawl form behind it.
circuly also adds a withdrawal link to the order confirmation page, so customers see it right after checkout as well.
2. No login required
The link points to a dedicated withdrawal form on your white-label circuly Self-Service Portal, not to the portal's login page. On this form, the customer only enters their email address and order number to check their order.
3. Withdrawal window
The withdrawal option is only available while the order is still within its legal withdrawal period. If a customer tries to withdraw after this period, the withdrawal simply isn't possible.
1. Fulfilled status for orders: Before you begin, please keep in mind that you should only use this feature if you use the "Fulfilled" status in circuly since the withdrawal feature relies on the Fulfilled status in the circuly Hub.
If you don't use the Fulfilled status in your workflow, we recommend not enabling this feature, as the withdrawal window can't be calculated correctly.
Without a reliable Fulfilled date, all orders, regardless of whether they're actually still within their legal withdrawal window, would remain eligible for revocation, which isn't correct.
2. Early cancellation period: Please make sure that you've set a value for the early cancellation period in your settings. Read the article on the early cancellation period if you haven't set it up yet.
To enable and configure Order Revocation, follow these steps:
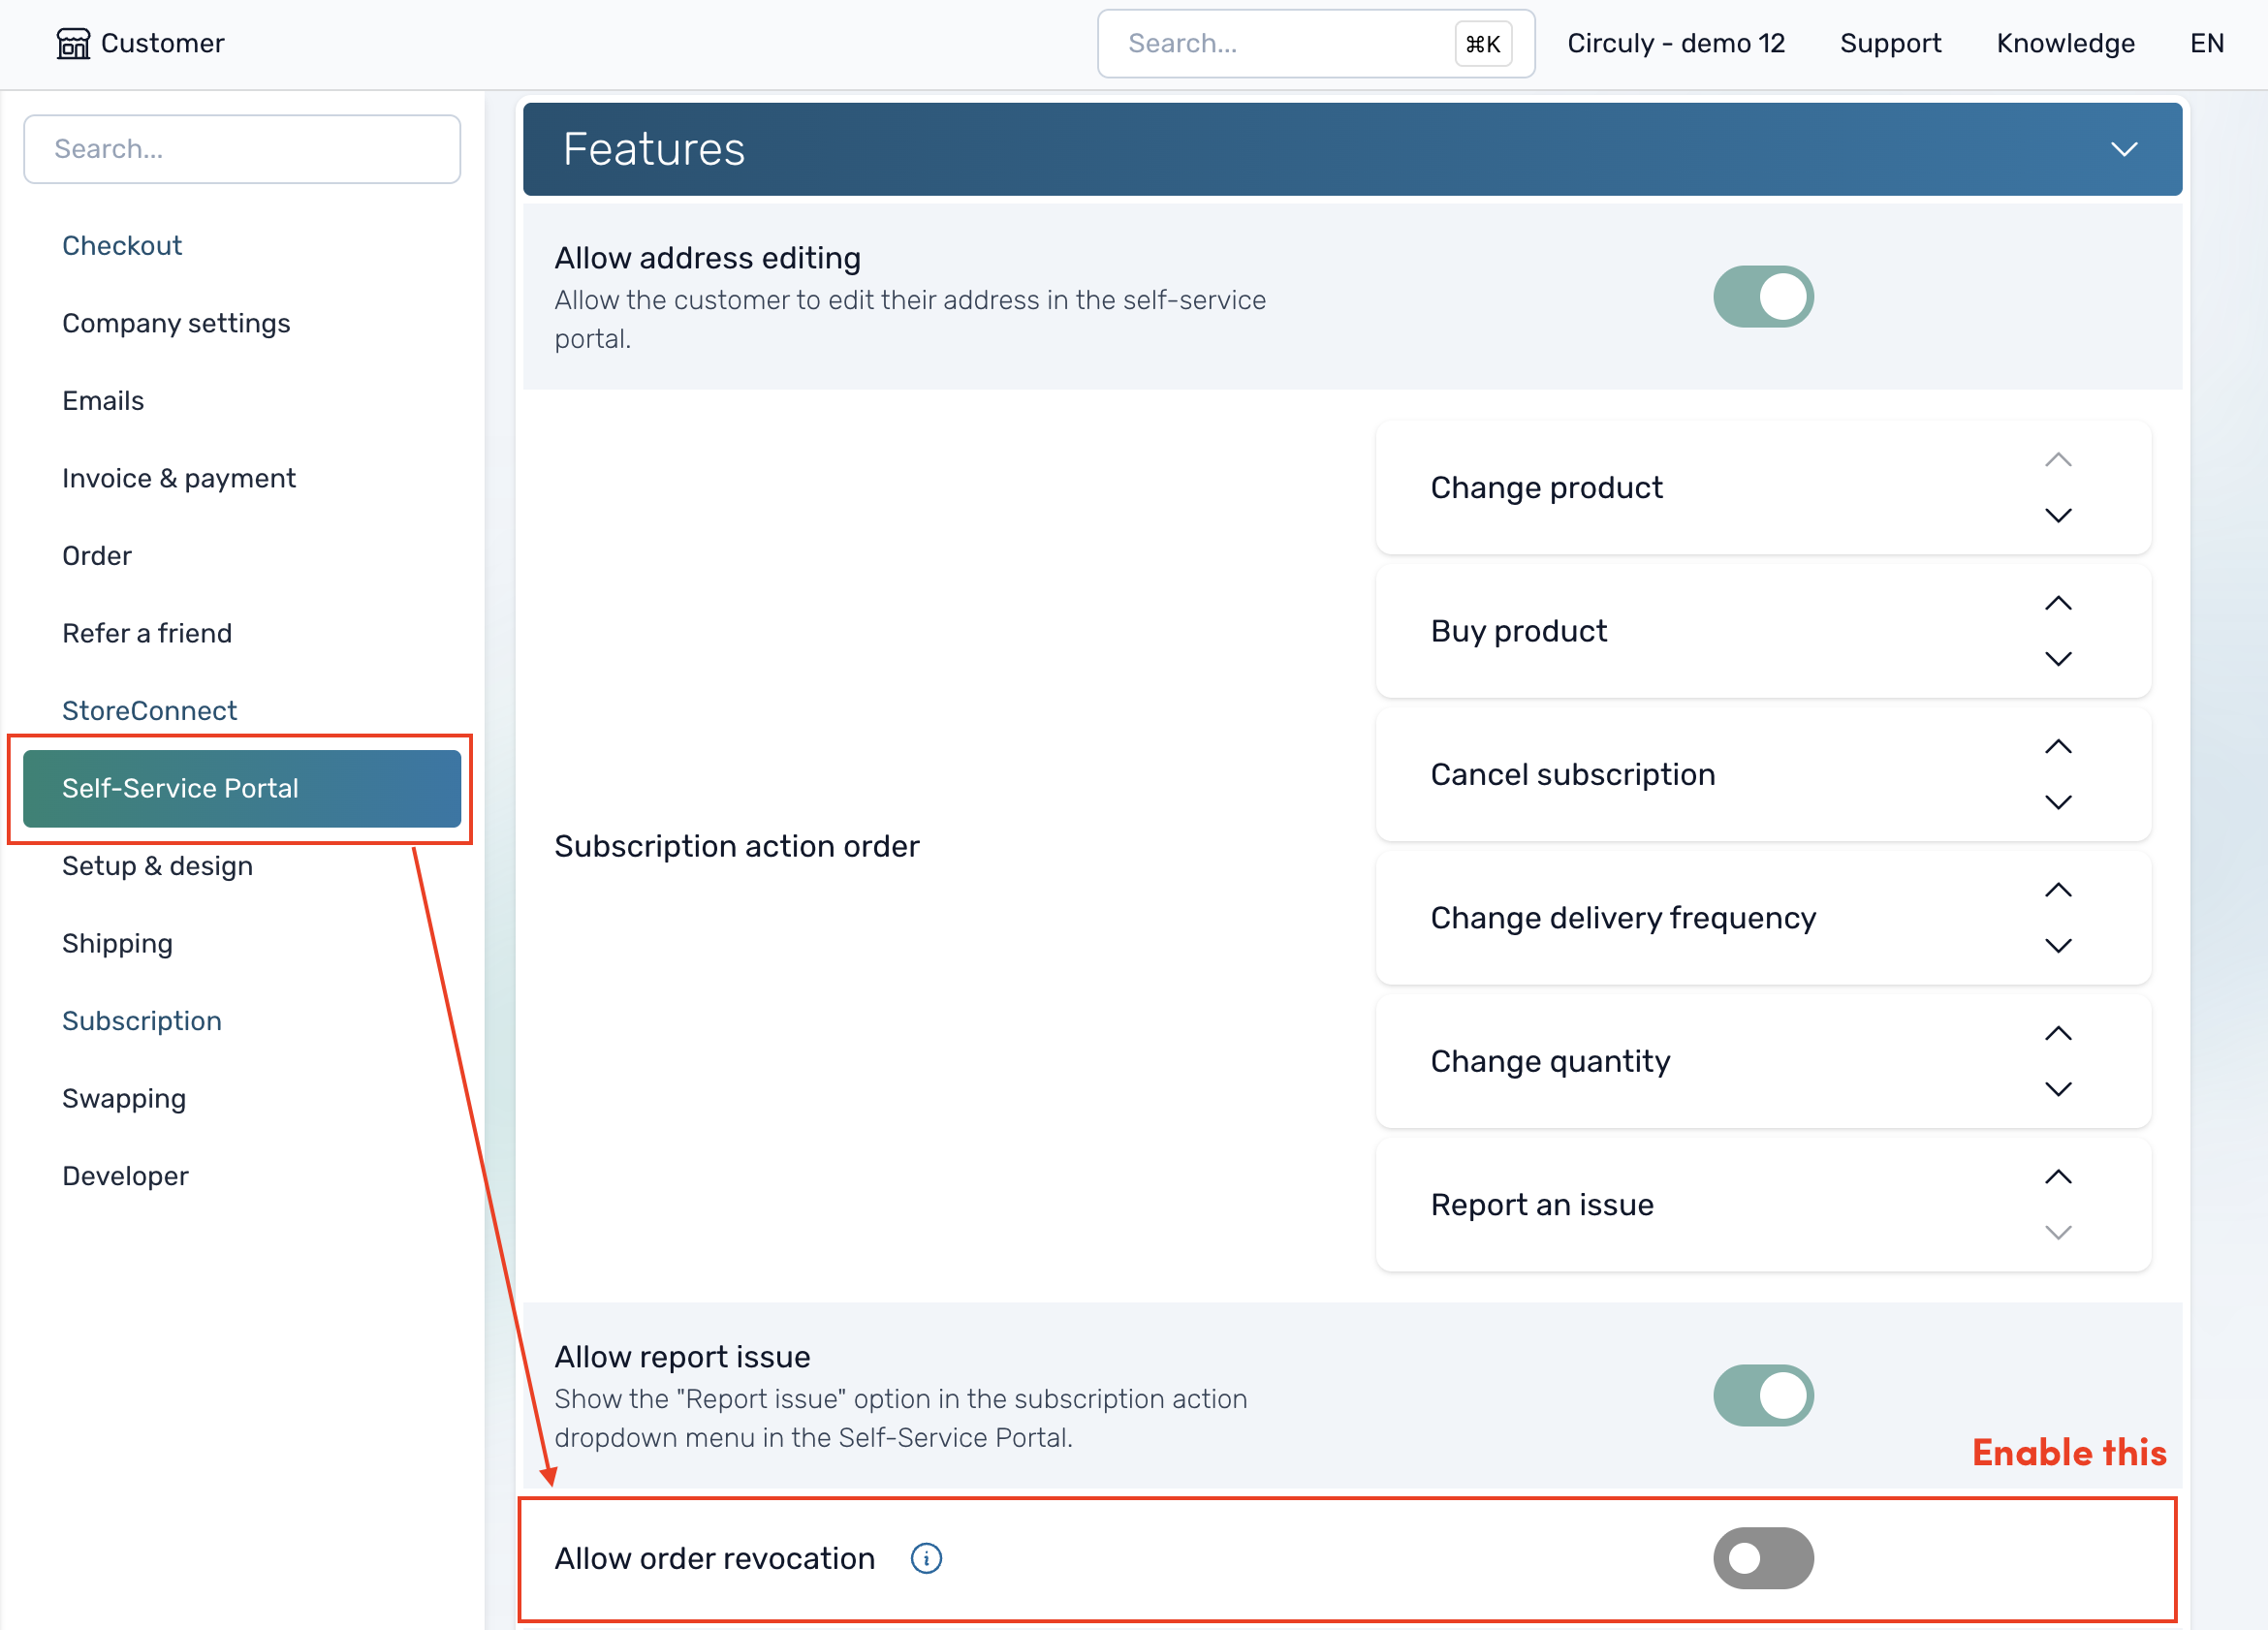
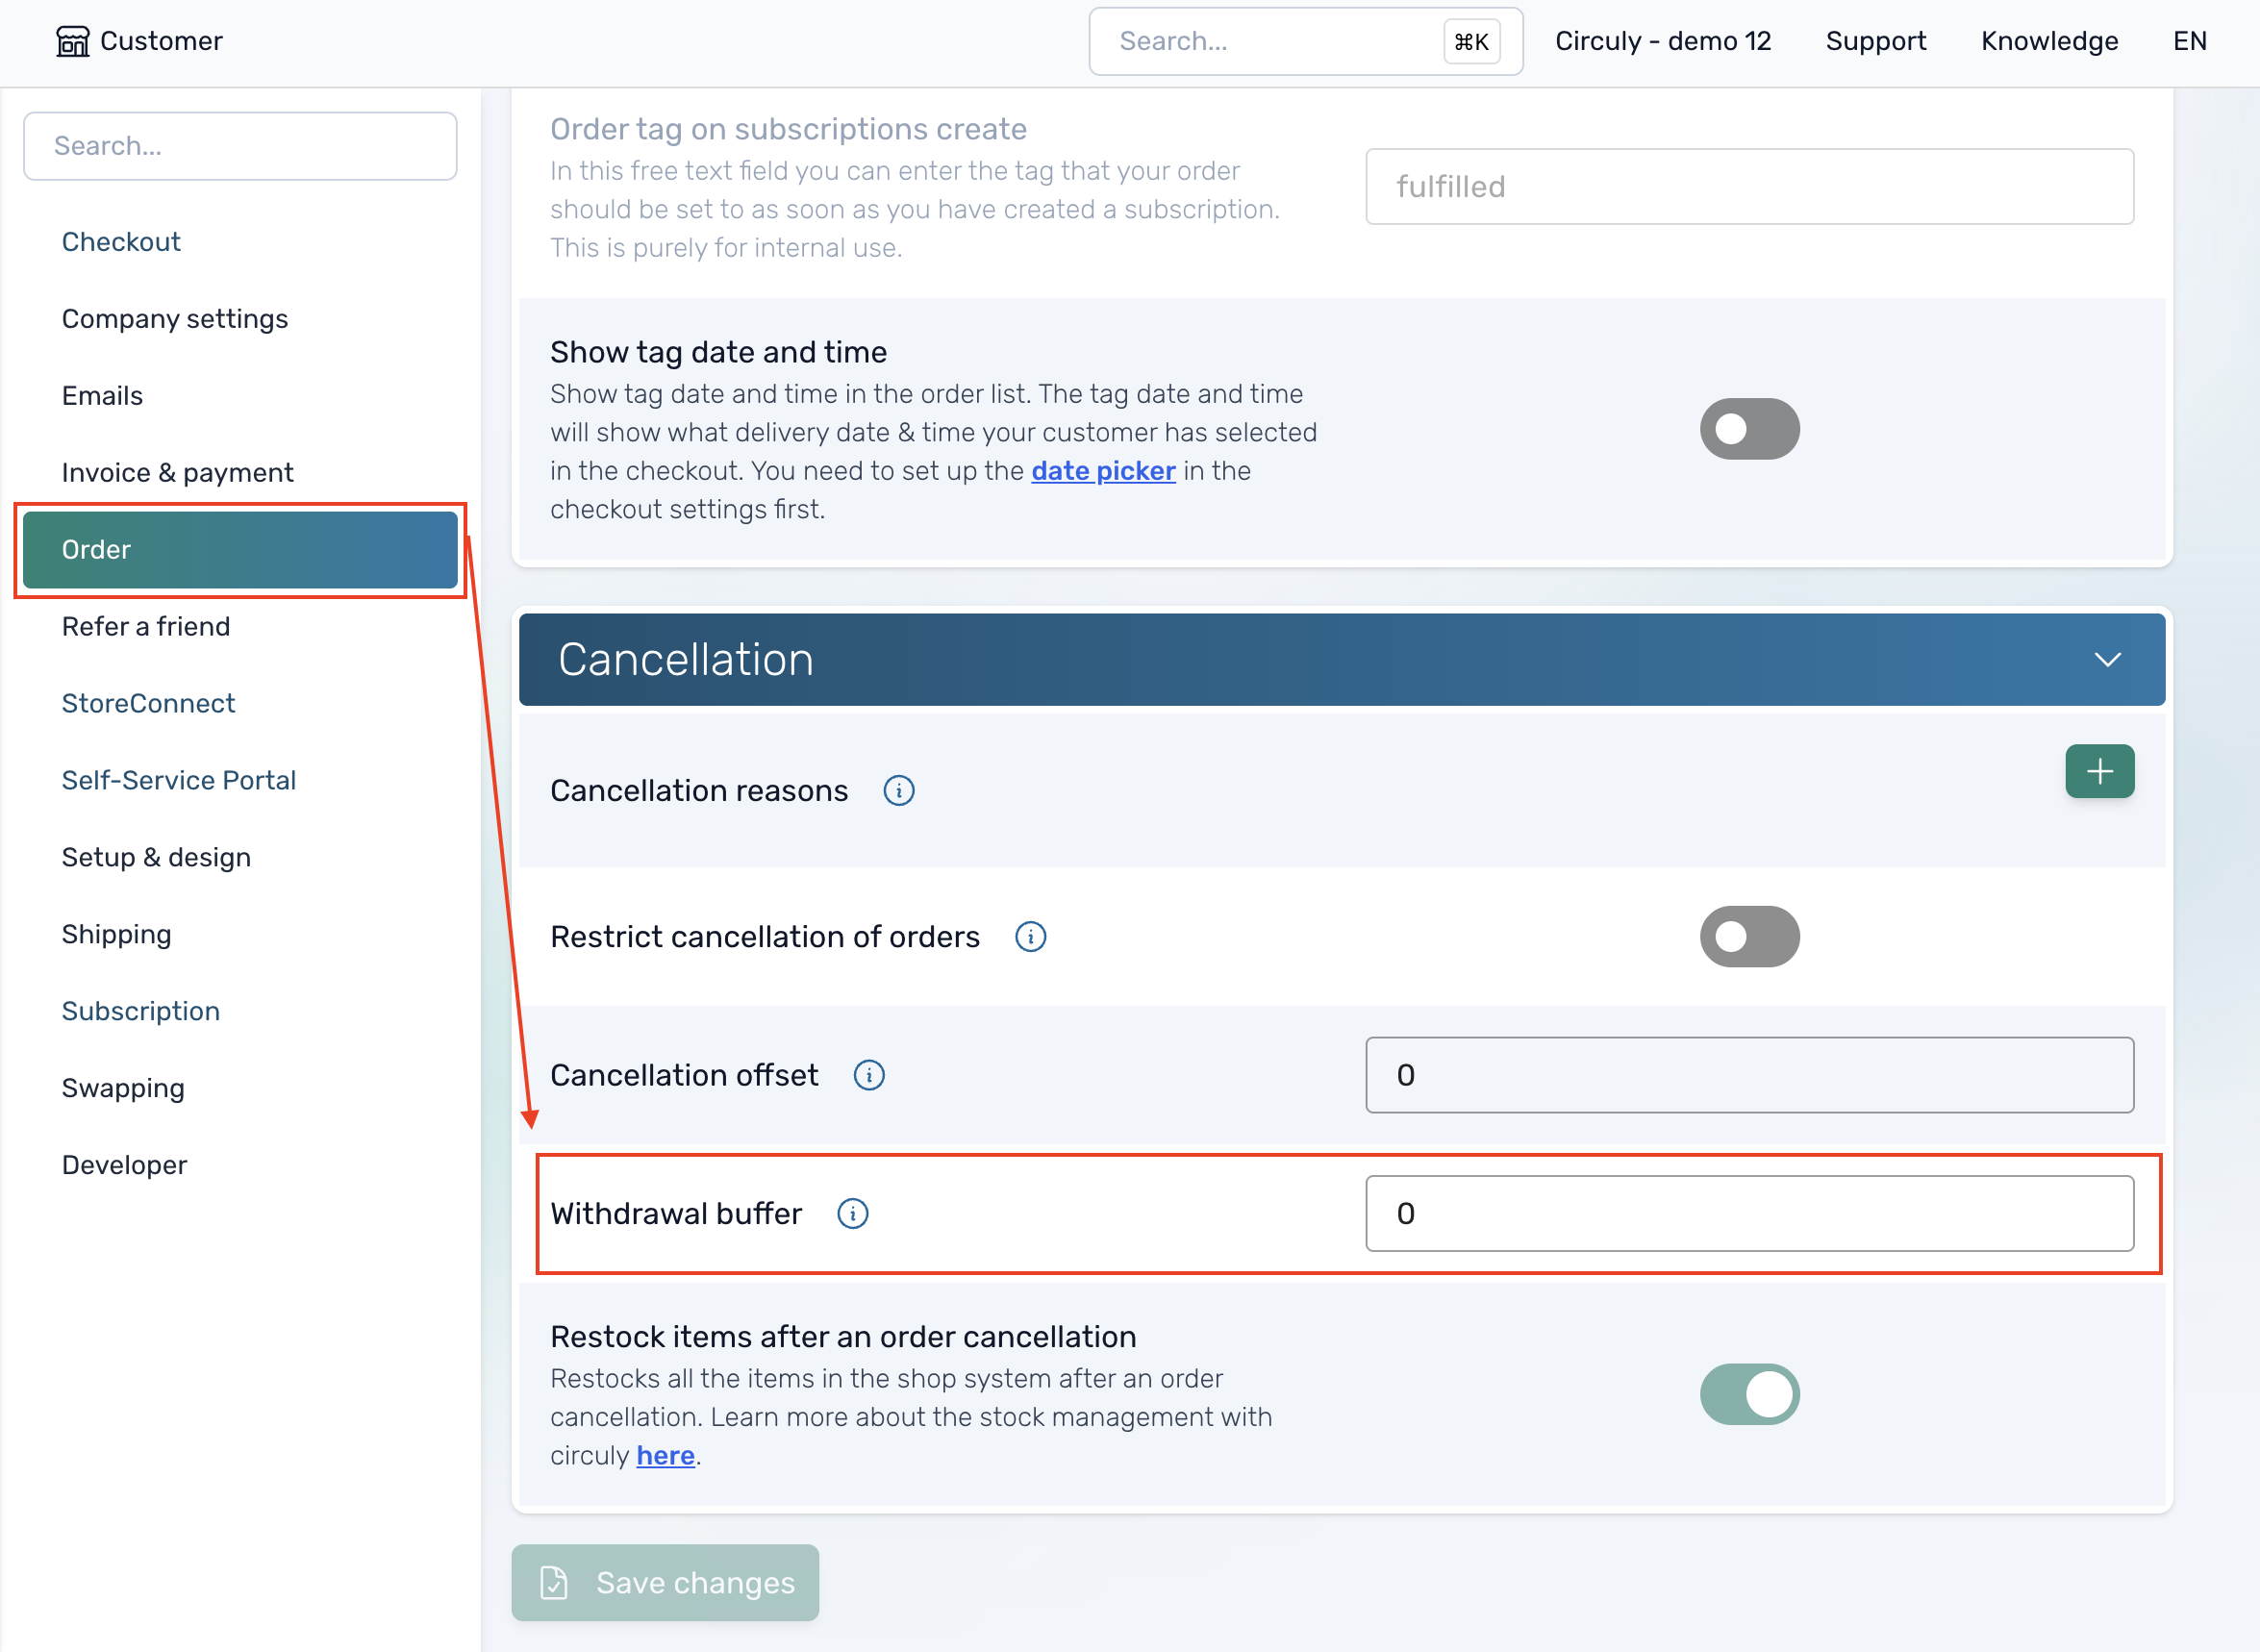
What is the withdrawl buffer?
The withdrawal buffer accounts for your delivery window.
Most merchants have a standard delivery time, for example 5–7 days. Since the legal withdrawal period only starts once a customer actually receives their order, and circuly doesn't track exact delivery dates, the buffer is added on top of your order's Fulfilled status to approximate when delivery happens.
In practice: withdrawal window = withdrawal buffer + statutory withdrawal period (your early cancellation period), counted from the date the order enters Fulfilled status.
Example: a 5-day buffer plus a 14-day statutory withdrawal period gives customers 19 days from the order's Fulfilled date to submit a withdrawal.
Alternatively, a simpler way to get this link is to take your Self-Service Portal login URL and replace auth/login with public/revoke.
For example, if your login URL ishttps://subscription.circuly.io/en/auth/login?company_id=5550-37496638dl, your revoke URL ishttps://subscription.circuly.io/en/public/revoke (with or without the company ID)
.png)
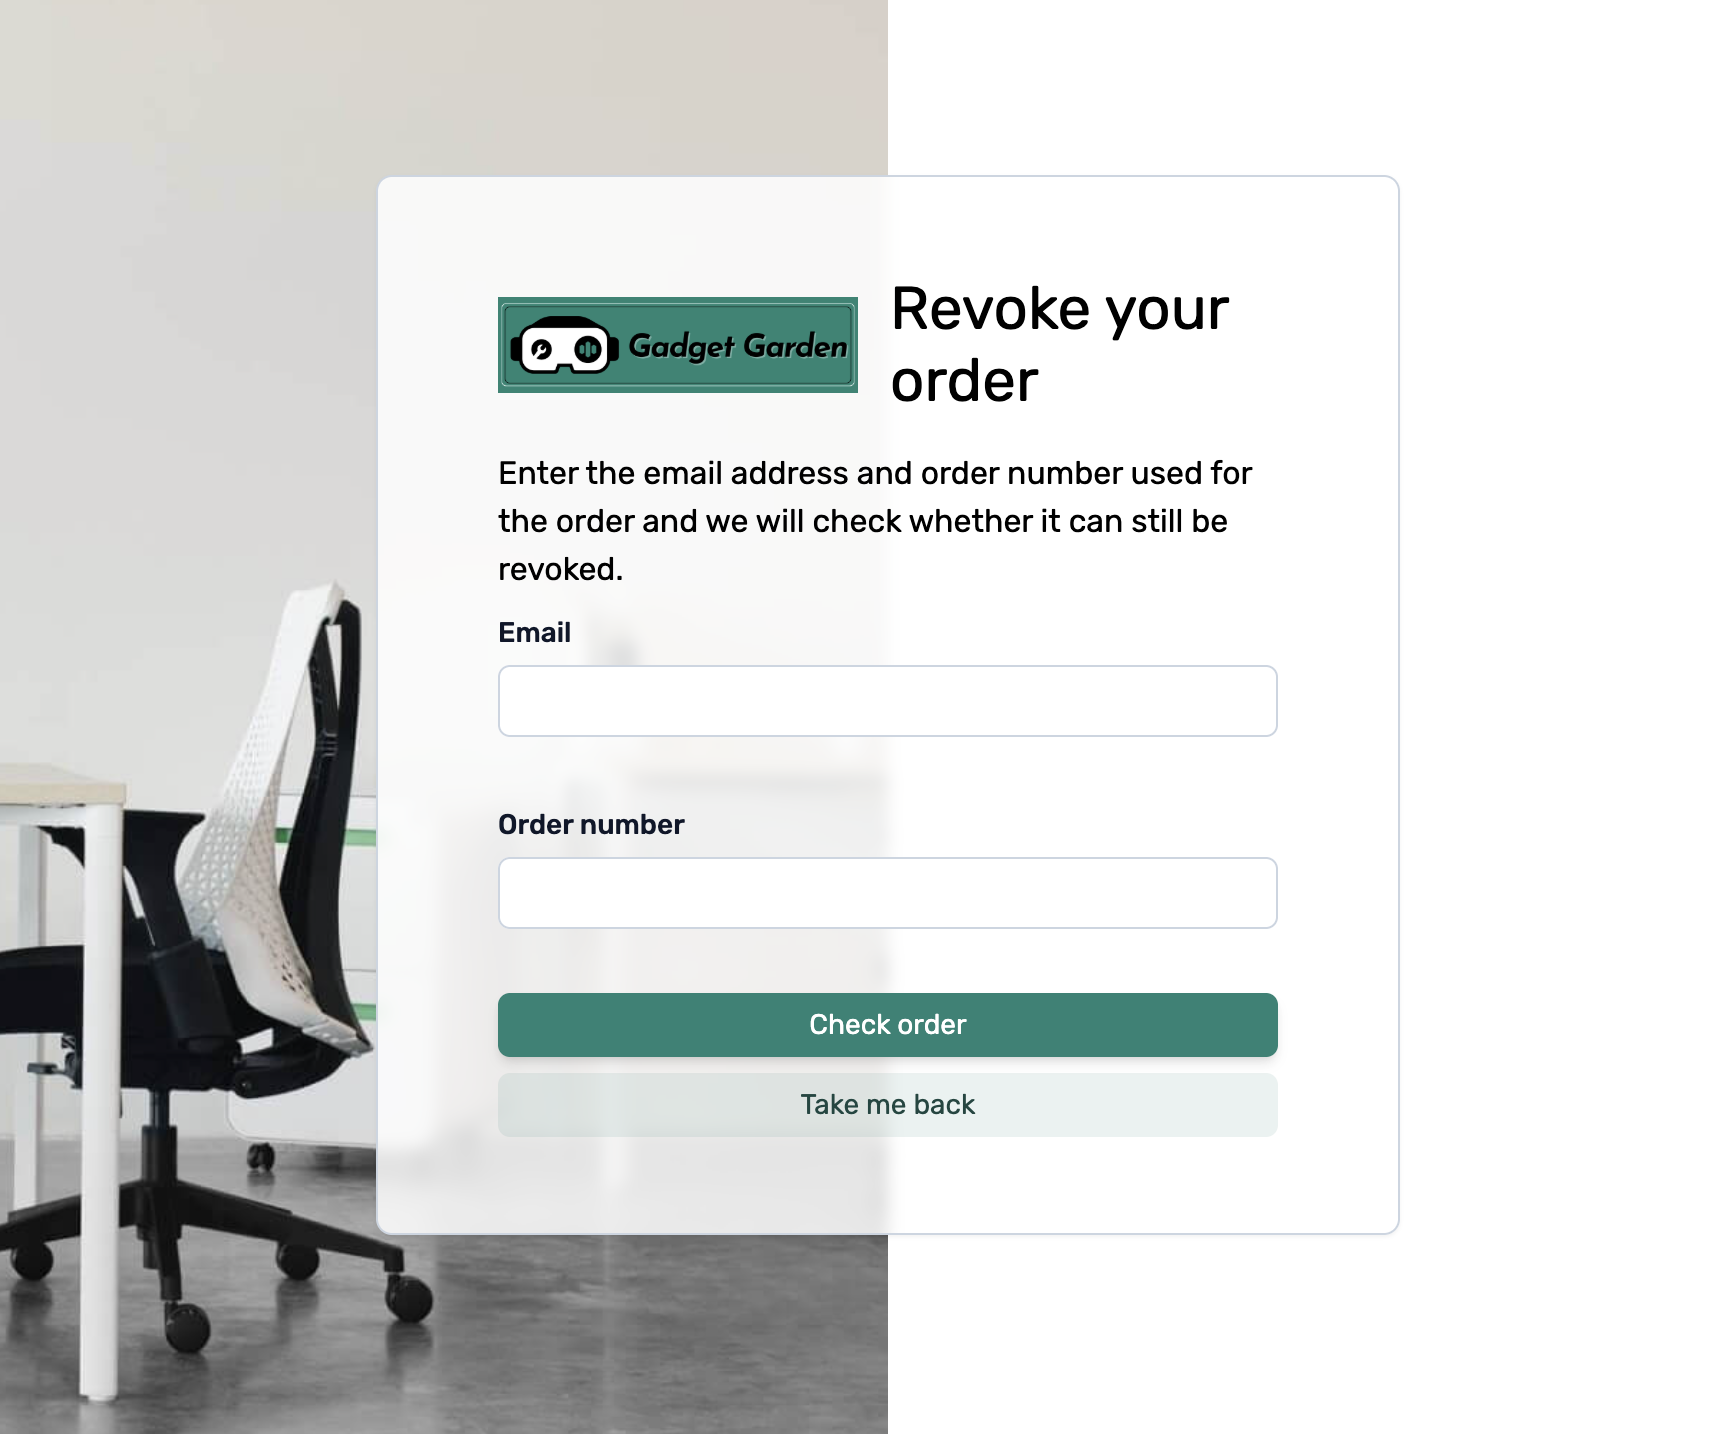
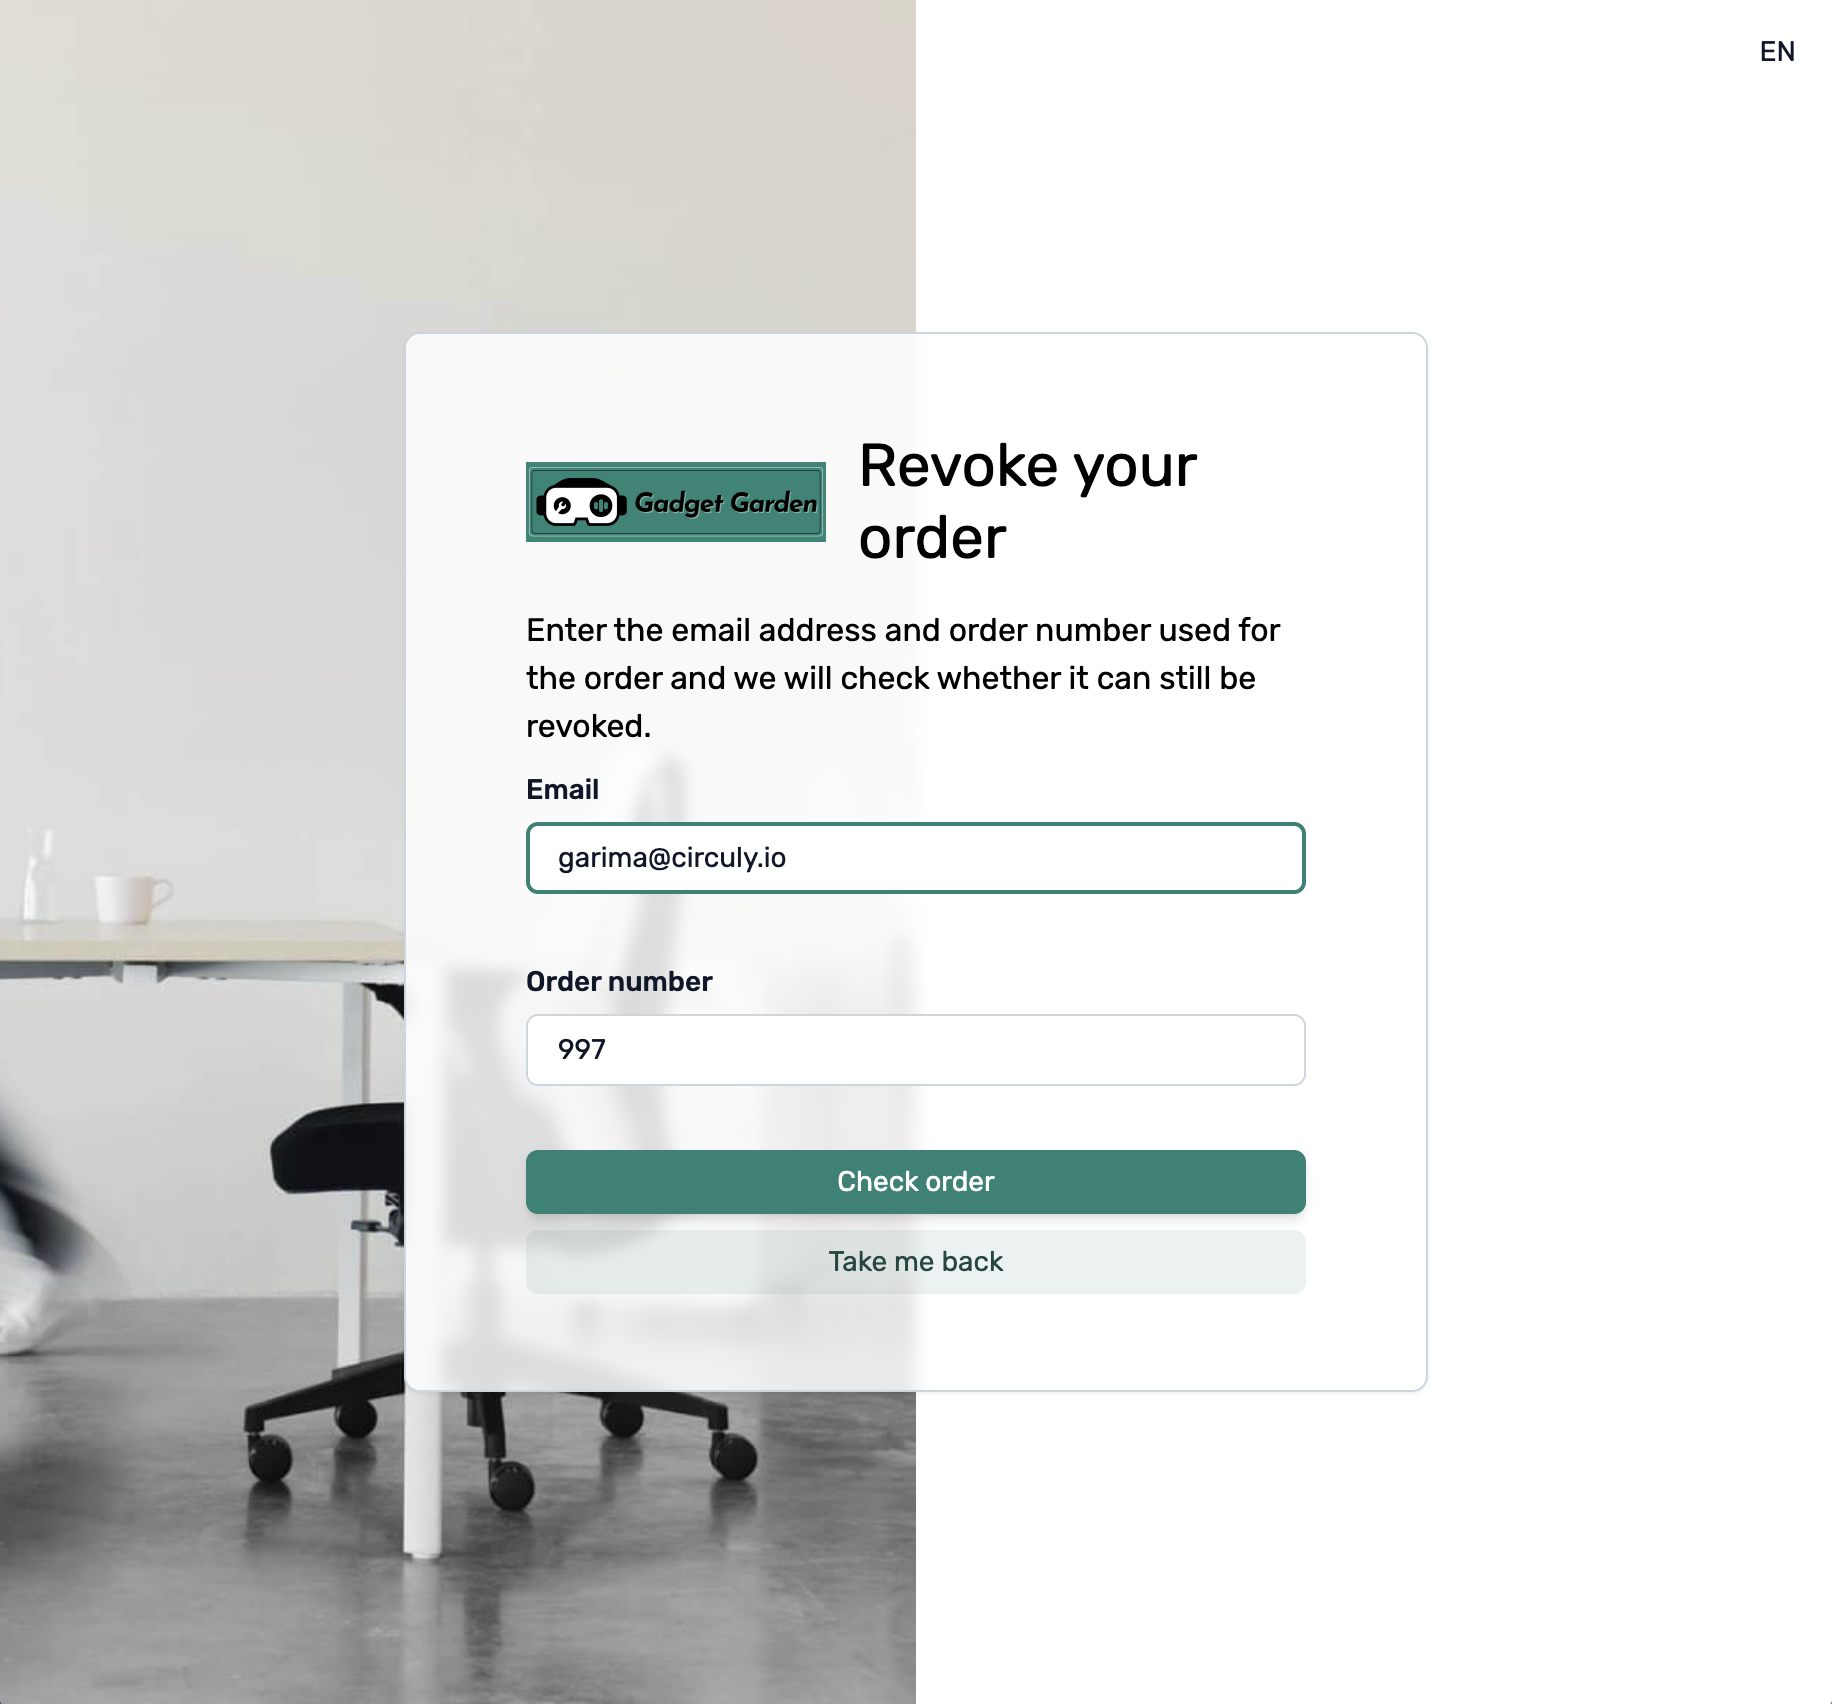
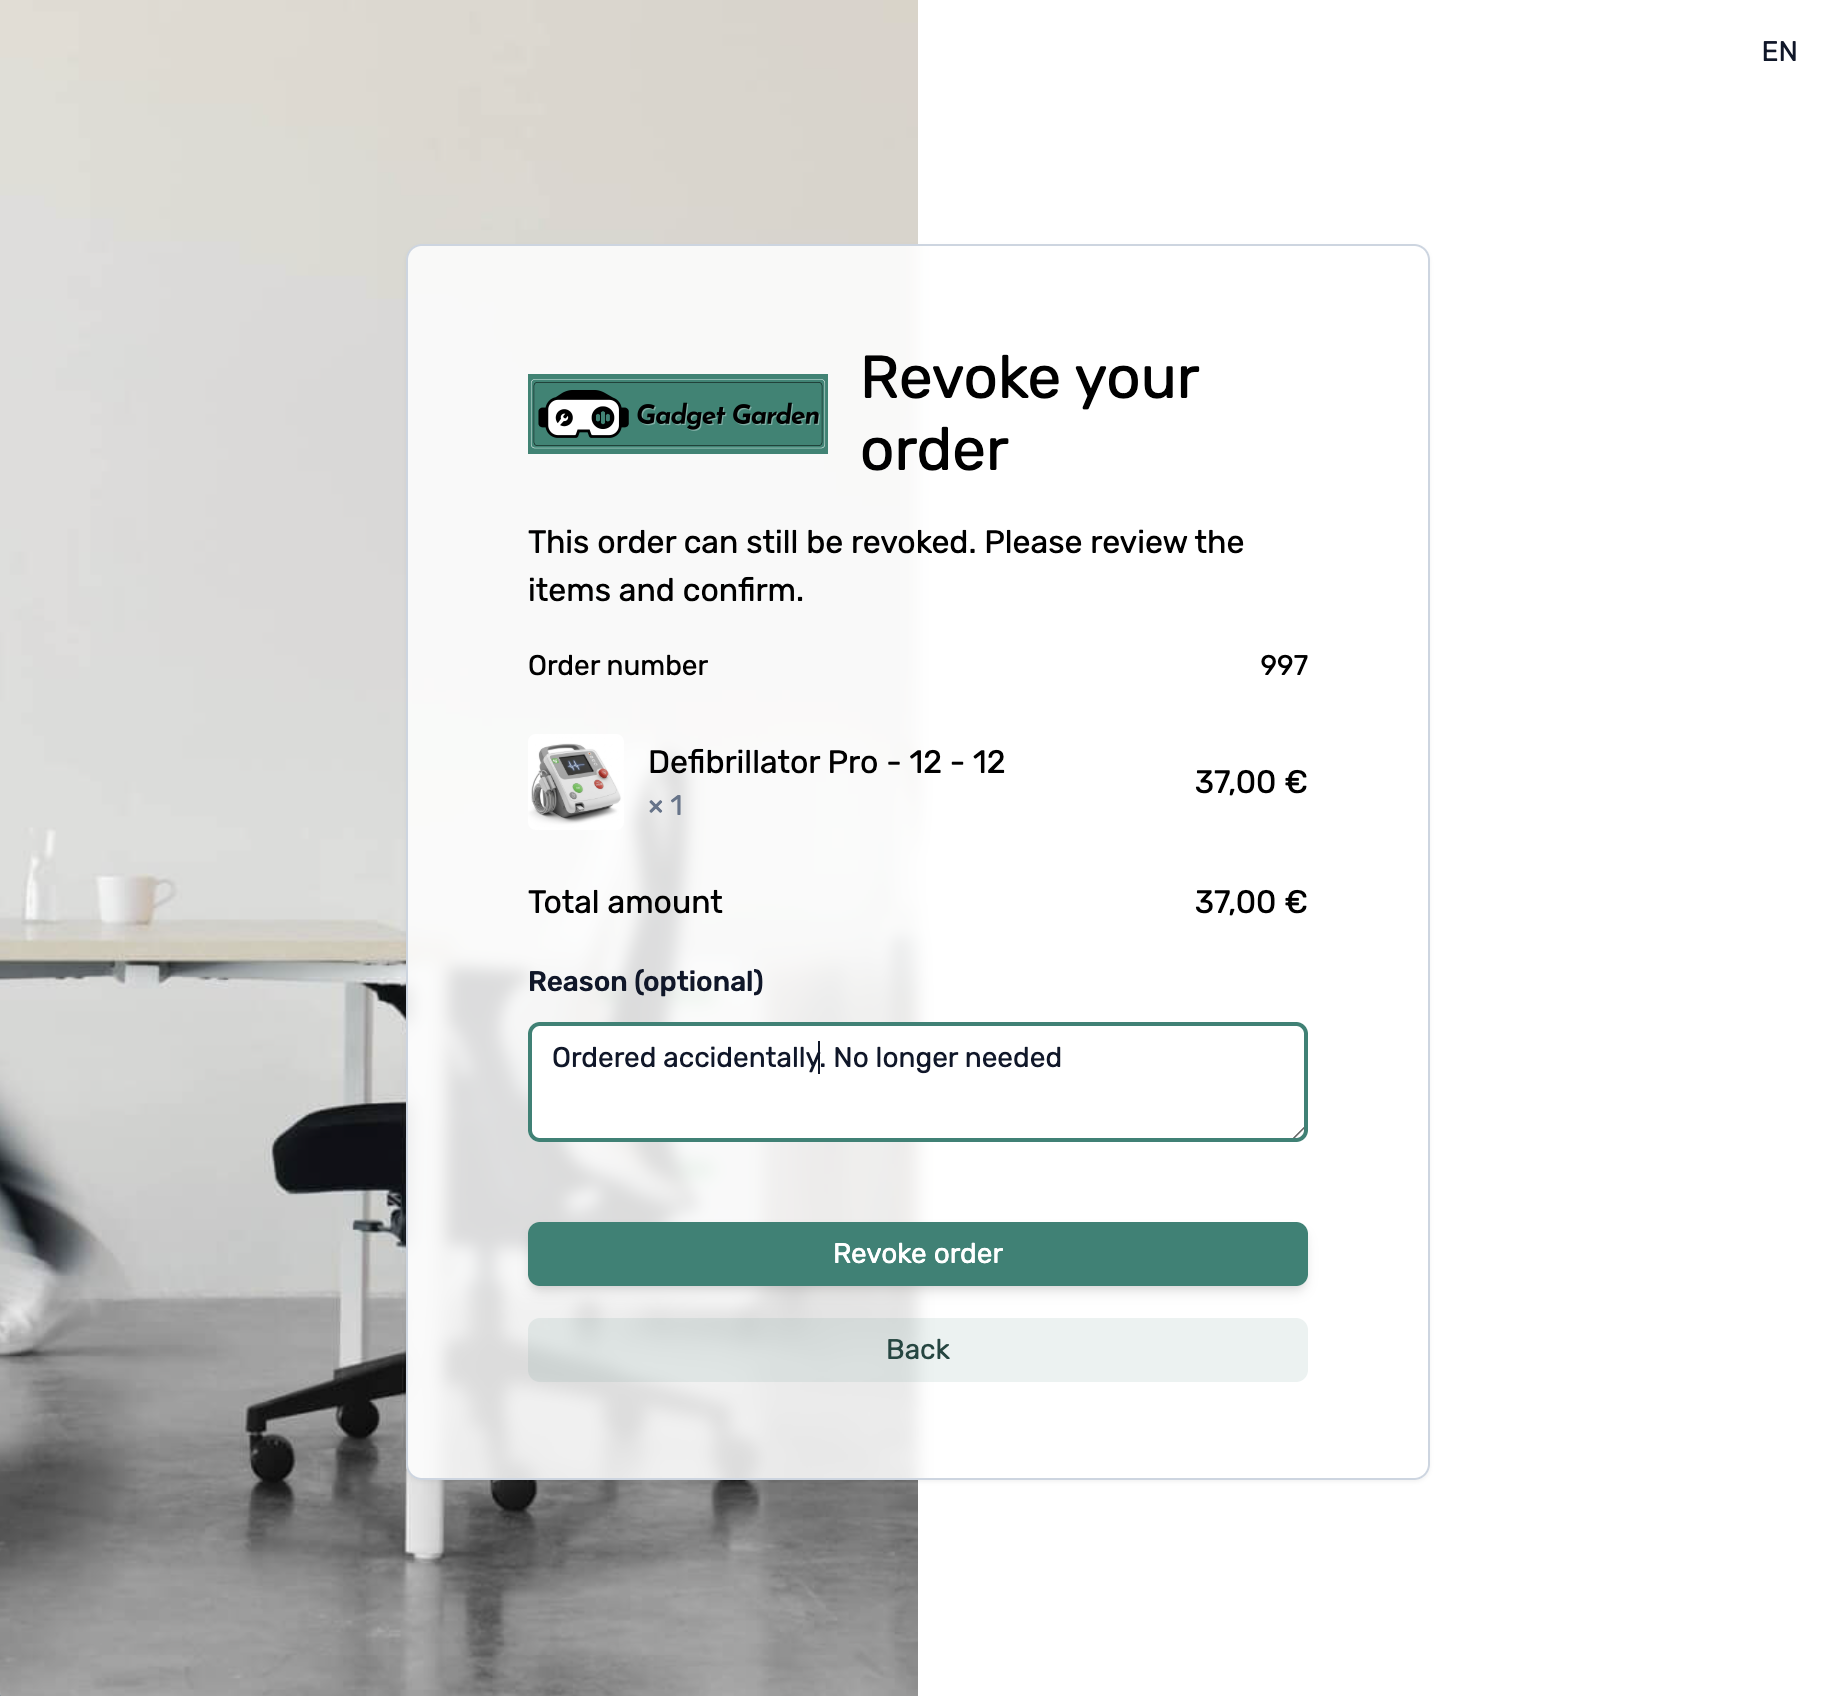
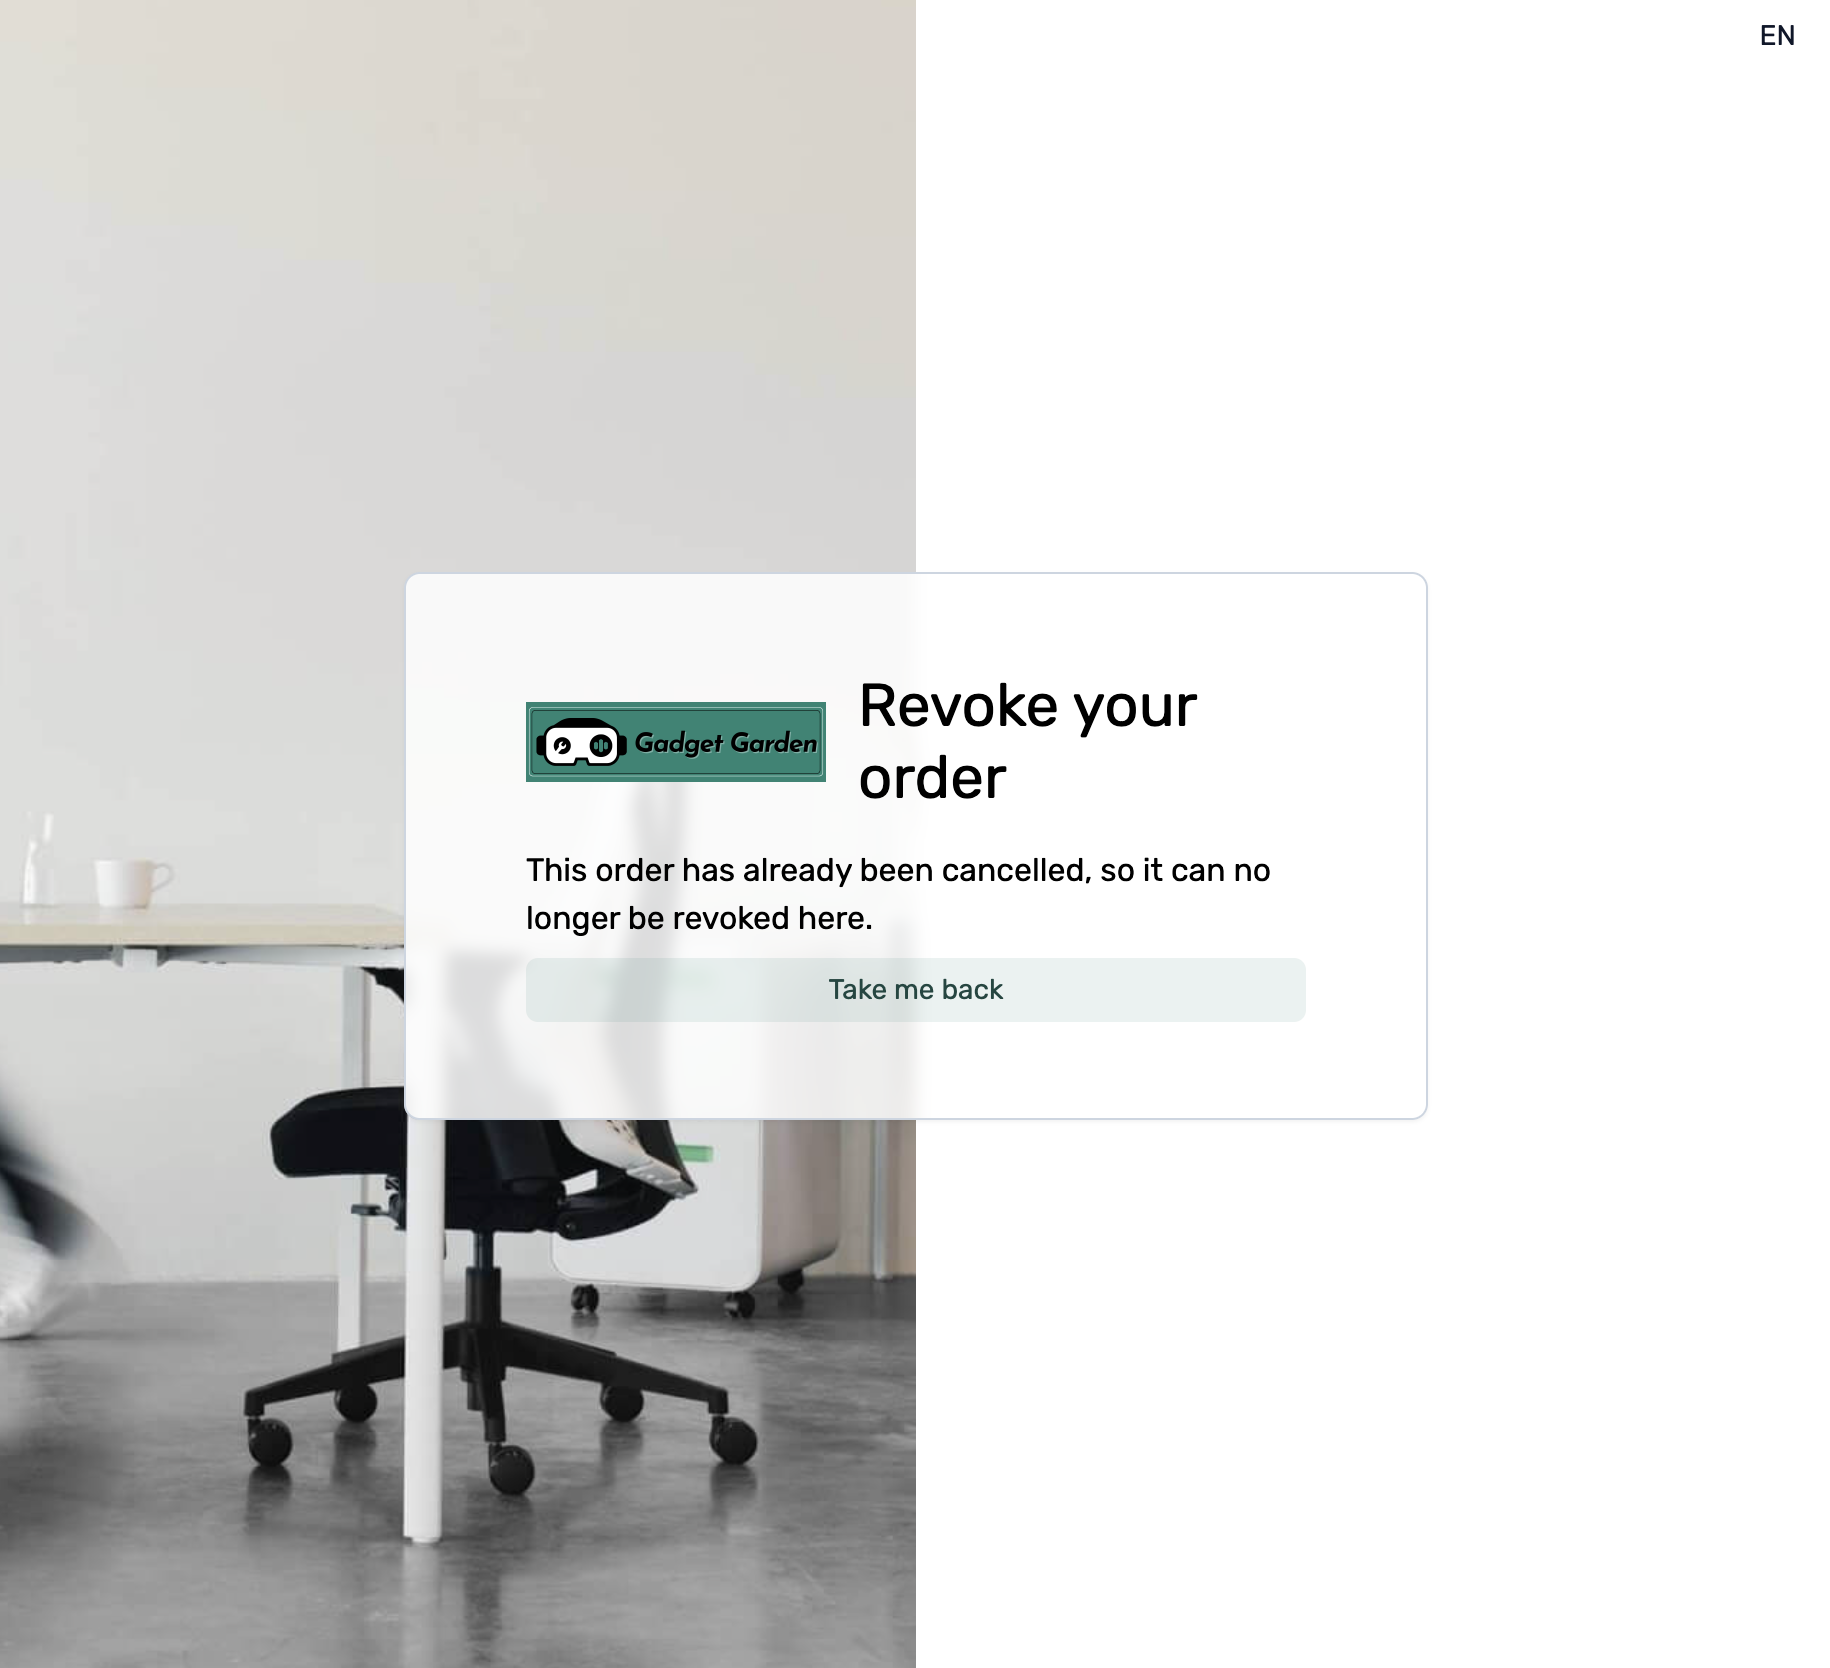
1. Validating the withdrawal request
When the customer clicks Check order after entering their email address and order number, circuly checks in the background whether the withdrawal request is valid.
Validity is based on the following calculation: withdrawal window = withdrawal buffer + statutory withdrawal period (defined in your settings as the early cancellation period).
2. Sending the order cancellation email
After a successful withdrawal, the customer receives the order cancellation email from circuly's email templates. If you've added the order cancellation reason and cancellation date variables to that template, the withdrawal reason appears in the email too. You'll also see the revoke reason on the order in the circuly Hub.
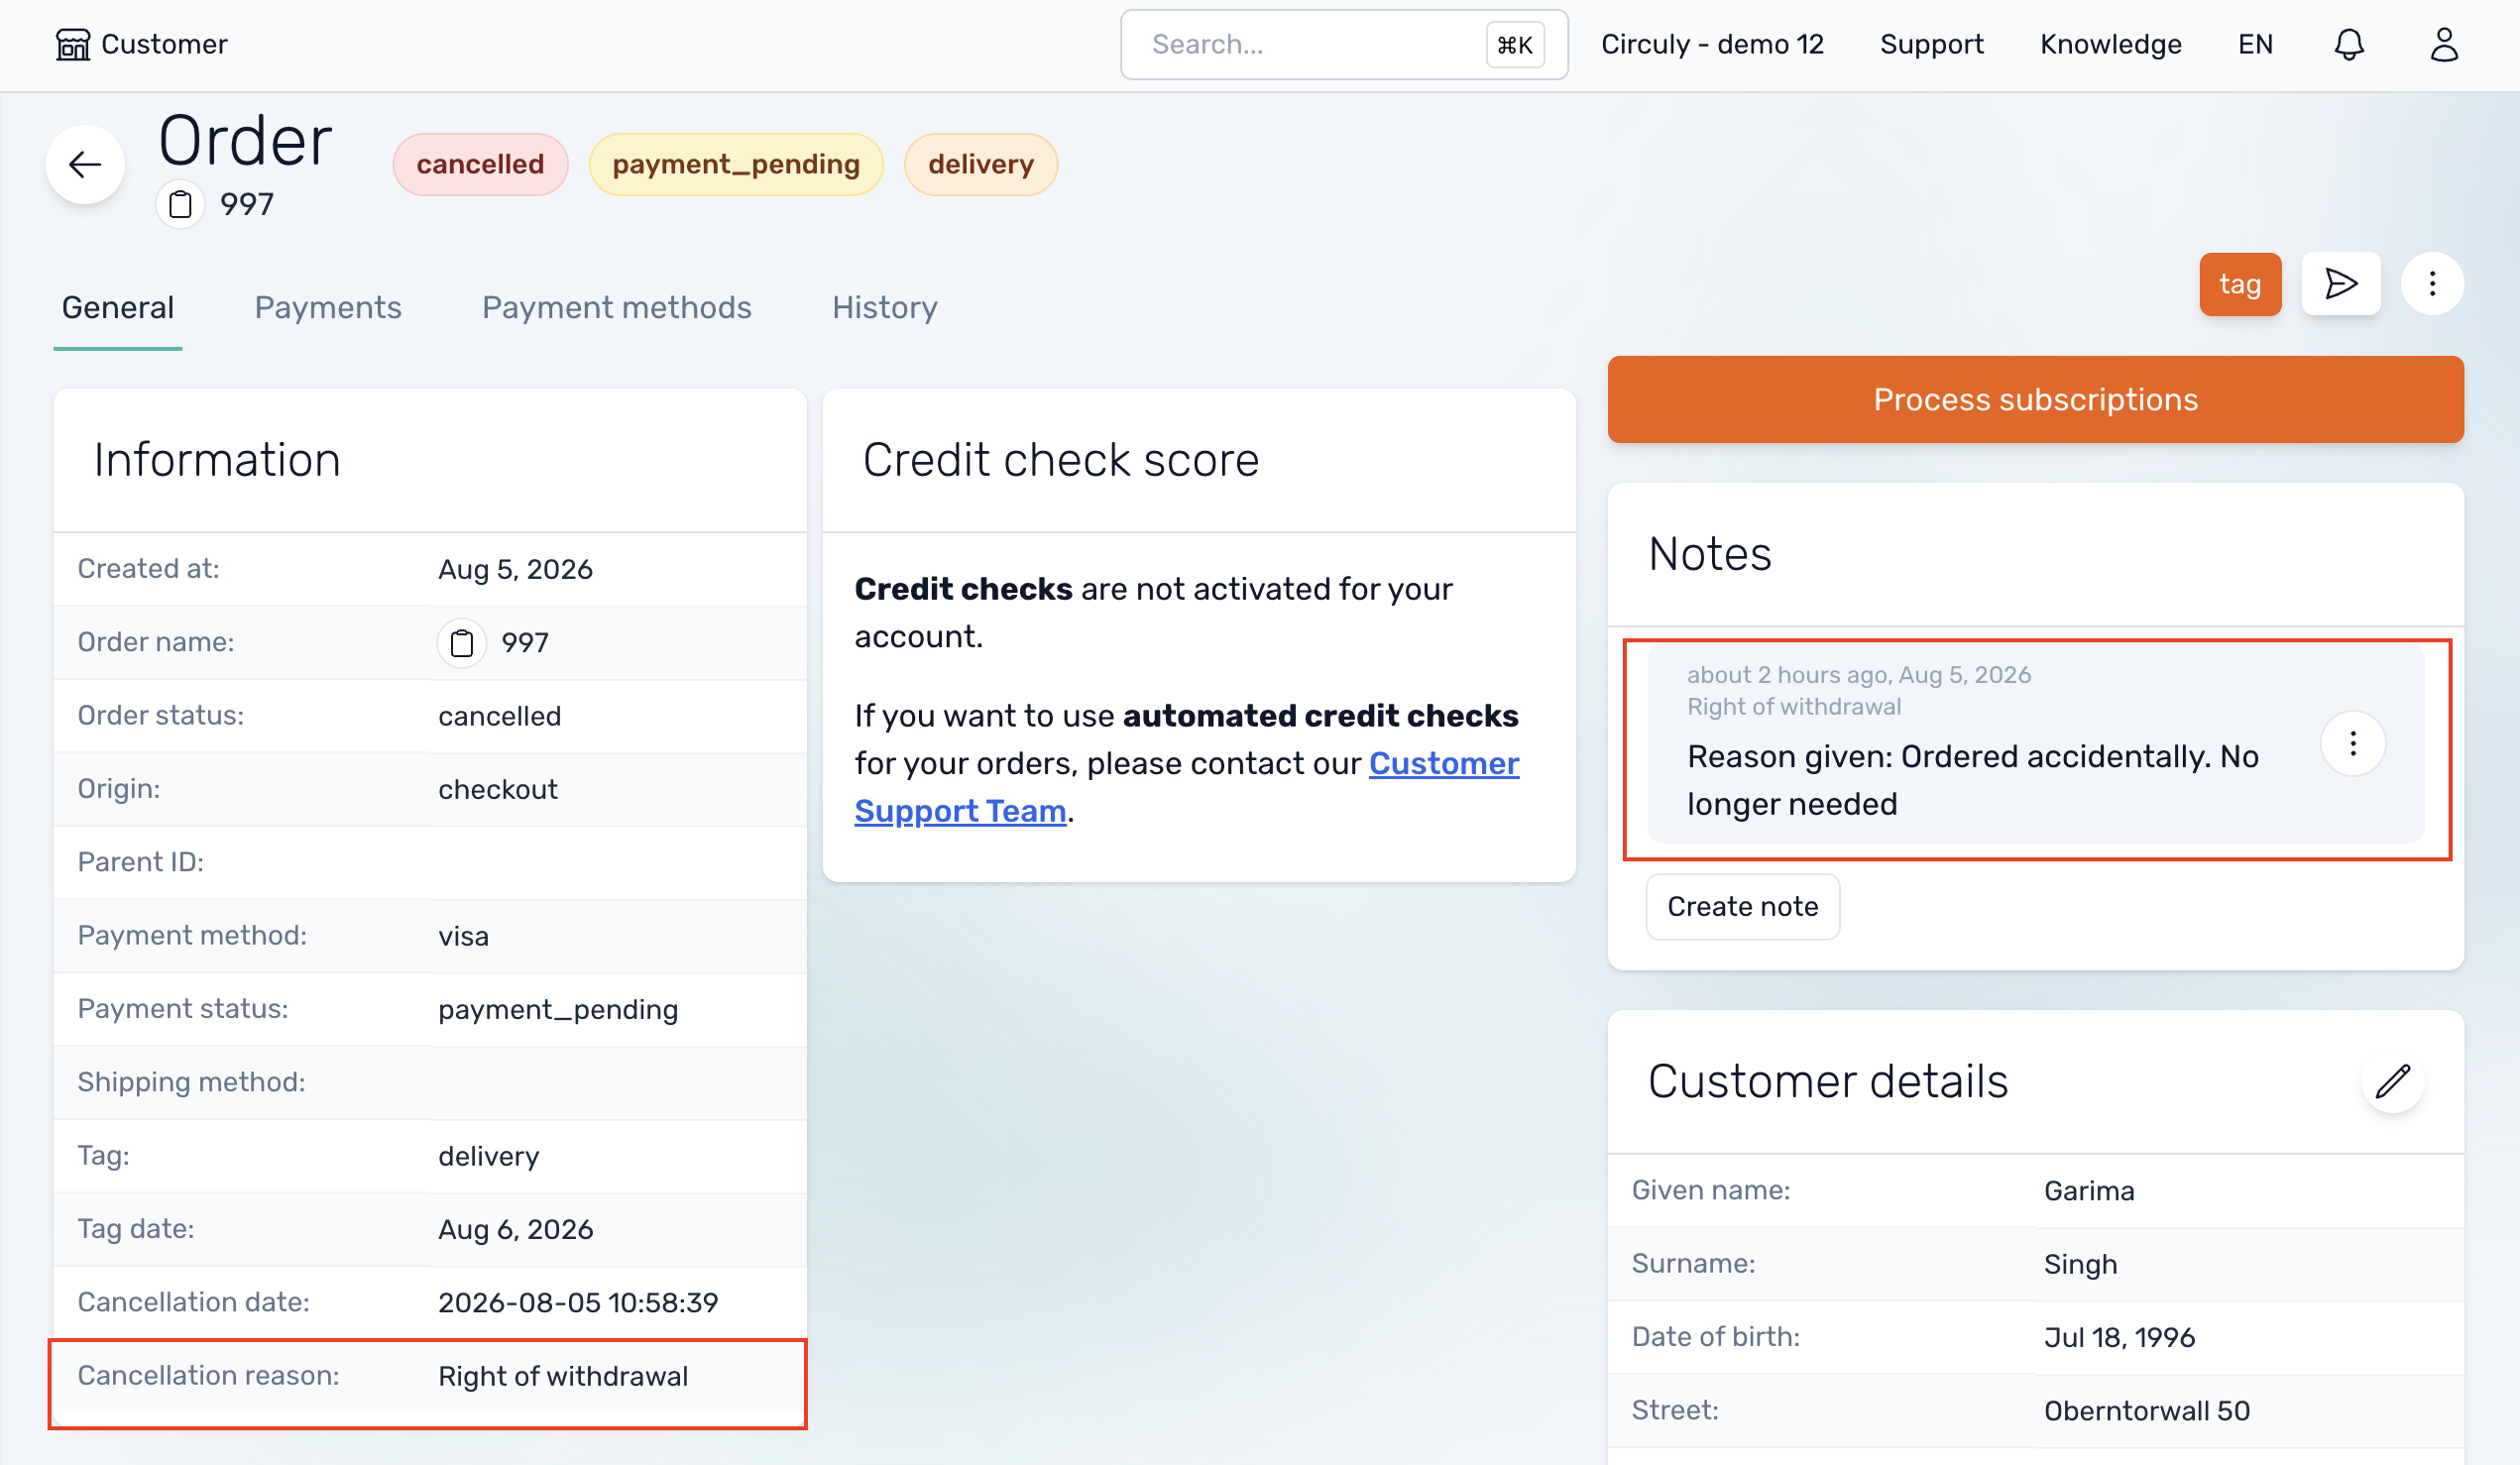
3. Refunding the payment
If any payments were charged for the order, they're automatically refunded to the customer's original payment method.
In circuly, cancellation requests can be processed in two different ways, depending on whether a subscription is already active for the order. Understanding the difference is essential to correctly manage product returns and maintain accurate records.
This guide explains:
Order cancellations in circuly follow two paths:
Subscription has been created: Do not cancel the order → Set status to Pending Return
No subscription has been created (e.g. change of mind, cancellation within return period): Cancel the order in circuly Hub
When a subscription is active, cancelling the order is not recommended—you’re expected to get the product back, and the return flow must be triggered. Use the Pending Return status instead.
To learn more about marking a subscription as pending return, refer to the linked guide: How to Set Subscription Status to Pending Return
You can cancel an order from two places in the circuly Hub:
OrdersUpon cancellation, the subscription status will automatically be set to Pending Return, and the return process will begin.
Returns tabThis skips the physical return flow and closes the loop. A success message will confirm the cancellation, and the order status will update to Cancelled.
CustomersOrders sectionA success message will confirm the cancellation, and the order status will update to Cancelled
This ensures both the customer and your team have clarity on the cancellation process, and all systems stay in sync.
Traditionally, circuly syncs product and variant information from a connected shop system such as Shopify, WooCommerce, Saleor and more.
This works well for businesses that rely on an eCommerce storefront to manage and display their product catalogue. However, the way businesses build and operate their digital infrastructure is changing.
More and more companies are going headless, decoupling their frontend experience from the backend, or building fully custom shops powered by their own tech stack.
In many of these setups, there is no conventional shop system acting as the source of truth for product data, which means the standard sync approach doesn't apply.
Beyond technical architecture, there is another common scenario: businesses that don't operate an online store at all.
This is especially true in B2B contexts, where subscription orders are created manually and on demand directly from the backend, with no customer-facing eCommerce flow involved. For these businesses, maintaining a separate shop system purely to feed product data creates unnecessary overhead.
The Create Product feature is built specifically for these use cases. It allows you to create products and their variants directly inside the circuly Hub no external shop system required.
With this feature, you can build and manage your product catalogue entirely within circuly.
Products created in the Hub behave the same way as synced products: they can be used for creating subscription orders, assigned to product collections, and managed from the circuly Hub.
This makes the circuly Hub a fully self-contained environment for businesses that operate without a traditional eCommerce storefront, or for teams that need to add products quickly without going through an external system.
Key things you can do with this feature:
To create a product in the circuly Hub, follow these steps:
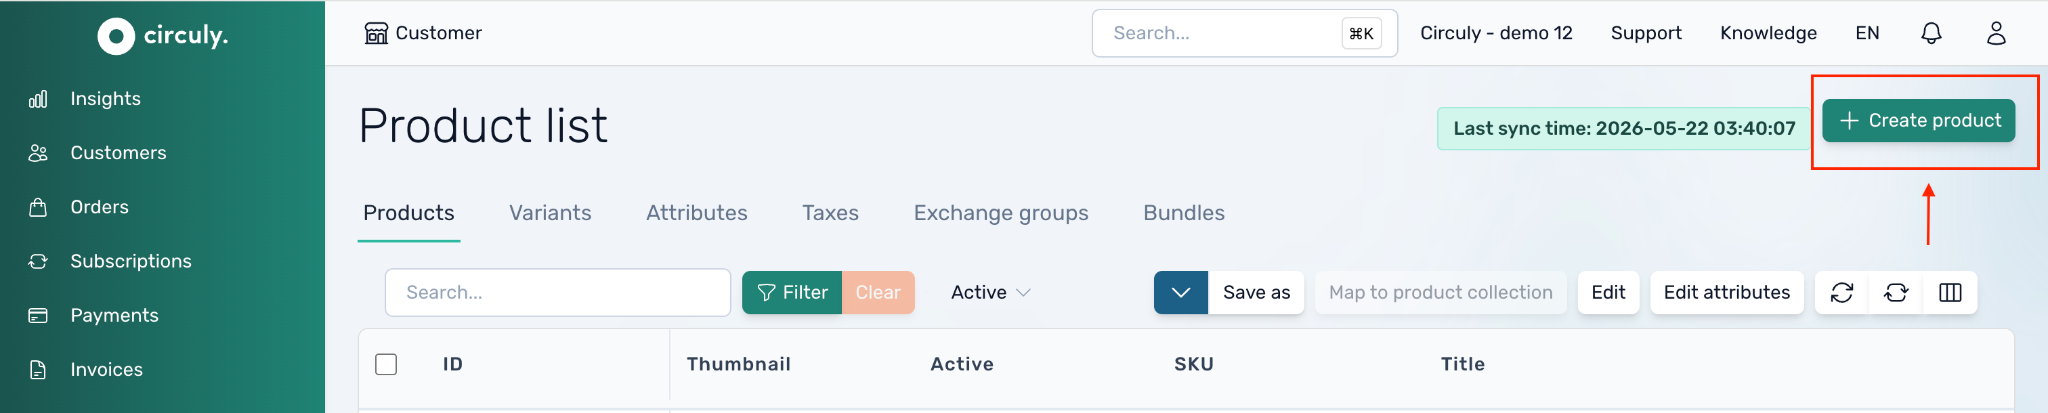

Title*
The name of the product. This is used internally and may also be visible depending on your setup.
SKU*
The Stock Keeping Unit identifier for the product. Each product and variant should have a unique SKU to ensure accurate tracking and order management.
Price*
The rental or subscription price for the product. This is the amount that will be used when creating subscription orders for this product from the Hub.
Thumbnail Image
You can add a product image by entering a valid image URL. The image will be displayed as a thumbnail in the product list and in the order creation view, making it easier to identify products at a glance.
Active
This toggle is enabled by default. When active, the product is available for use in subscription orders. Disabling this switch deactivates the product, preventing it from being selected when creating new orders — without permanently deleting it.
Allow Order Create
When this switch is enabled, it is possible to create a subscription order for this product directly from the circuly Hub using the Create Order feature. This is particularly useful for businesses that manage their subscription operations entirely from the backend. If disabled, the product exists in the system but cannot be selected during manual order creation. Learn more about creating orders in the circuly Hub.
Product Variants
Similar to how variants work with synced products, products created in the Hub can have multiple variants. A variant represents a specific version of a product, for example, different sizes, colours, or configurations, each with its own SKU and pricing.
Product Collections
Products created directly in the Hub can be assigned to product collections, just like synced products. Collections help you organise your catalogue into logical groups, which is useful for reporting, filtering, and order management within the circuly Operations Backend.
To assign a product to a collection, select the relevant collection when creating or editing the product.
Once a product has been created in the circuly Hub, it becomes available across several other circuly modules and workflows — the same way a synced product would behave.
circuly Store Connect
circuly Store Connect is the in-store module that allows store staff to create subscription orders on behalf of customers at any point of sale, without needing access to the full circuly Hub. Products created directly in the Hub are available for selection in Store Connect, making it possible for businesses without an online store to also equip their physical retail staff with everything they need to create orders on the spot.
Create Order and Create Quote
Products created in the Hub can be selected when creating an order or quote directly from the circuly Hub via the Draft Order feature. These two options work differently:
In both flows, the circuly checkout operates independently of any external eCommerce storefront, so customers can review their order and complete payment regardless of whether a shop system is in place.
Vouchers
Product-specific vouchers created in the circuly Hub can be applied to products created directly in the Hub, just as they would for synced products. This means discount campaigns and targeted promotions remain fully available even without an external shop system.
Self-Service Portal
Subscriptions tied to products created in the Hub are fully manageable through the circuly Self-Service Portal. Customers can view their subscription details, request cancellations, update payment details, and download invoices — all without any additional configuration required on the product side.
Headless and custom-built storefronts
If your shop frontend is built on a custom stack or a headless architecture, you may not have a traditional shop system managing your product data. Instead of setting up a third-party integration purely to sync products, you can create and manage them directly in circuly.
Businesses without an online store
If your business model involves creating subscription orders on demand — for example, in a B2B context or through direct sales — you likely don't need a customer-facing shop at all. This feature lets you build a working product catalogue inside circuly without any external system dependency.
Quick product additions
Even for businesses that do use a shop system, there may be cases where a product needs to be added to circuly quickly for a one-off order or a pilot run. Creating it directly in the Hub avoids the need to update the external system and wait for a sync.
Invoices in circuly are generated automatically based on the events and actions that occur throughout the subscription lifecycle. Different types of charges, from the initial payment at checkout to recurring billing cycles, ad-hoc fees, and end-of-subscription buyouts, each produce a distinct invoice type.
Understanding the different invoice types helps your finance and operations teams accurately interpret billing records, reconcile accounts, and handle exceptions such as cancellations, refunds, or corrections.
Below is an overview of each invoice type available in circuly and what it represents in a subscription context.
The initial invoice is created for the first payment of a subscription order when the charge occurs at checkout. Depending on your setup and the nature of the order, it can include a combination of the following:
Recurring payment invoices are generated automatically on each regular billing cycle — for example, monthly — for each active subscription. There is a one-to-one relationship between a recurring payment and its invoice, meaning each billing cycle produces exactly one recurring payment invoice per subscription.
A cumulated invoice is a consolidated invoice that groups multiple recurring payment invoices into a single document. This is commonly used to simplify billing and accounting by combining recurring charges into one invoice rather than issuing several separate ones.
A few requirements and configuration details to be aware of:
One-time payment invoices are issued for ad-hoc charges that fall outside the regular subscription billing schedule. Common examples include:
A delayed payment invoice serves the same purpose as an initial invoice, but is issued when the first charge for a subscription order does not occur at checkout. This invoice type is commonly used by merchants who want to verify or process orders before charging the customer — for example, to avoid issuing refunds for orders that may later be cancelled due to failed or invalid credit card checks.
A cancellation invoice is issued when an existing invoice is cancelled. It reverses the original invoice for accounting purposes.
A refund invoice is issued when money is returned to the customer. It acts as a credit invoice and is used to accurately reflect the reimbursement in your accounting records.
A replacement invoice is generated when an existing invoice needs to be corrected or superseded. Common reasons for issuing a replacement invoice include:
A buyout invoice is issued when a customer chooses to purchase the product out of their subscription. It covers the remaining buyout value owed for the product at the time of purchase.
The circuly Hub includes a dedicated Support tab, accessible directly from your navigation, where you can create and track tickets without ever switching tools. Whether you are reporting something that is not working, asking for help with a configuration, or suggesting an improvement, you can do it all from within the Hub.
This article explains how the support feature works, how to submit a ticket, and how to stay on top of any ongoing communication with the circuly team.

The Support tab is designed to centralise all communication between your team and circuly. Here is a quick overview of the key concepts:


Previously, when exporting invoices from circuly, you could only export the summary data — that is, whatever was displayed in the invoice list under the various column headings. This made it difficult to perform deeper revenue or product-level analysis.
Now, circuly makes it possible to export invoice line items directly. This means you can analyse your data in far greater detail — for example, by SKU, product type, or any other details included in an invoice line item.
Note: This feature is only available for invoices created in 2025 or later.
With invoice line item exports, you can:


If you’d like to receive invoice line item data automatically — without manually exporting every time — you can use circuly’s webhook functionality.

As with any webhook, data will be pushed to the destination URL whenever the event is triggered.
circuly Store Connect is the fourth module in the circuly ecosystem. It is a lightweight web app designed for one purpose: enabling store staff to create subscription orders on behalf of customers — from any device, at any point of sale.
It gives retailers everything they need to create orders without having access to the full circuly Hub. The interface is intentionally simple. Staff see only what they need to do their job: create orders, track them, and handle returns.
Store Connect works on any device — tablet, iPad, desktop, or shared POS terminal — and requires no installation.
In-store orders at physical locations
Multiple store locations
In-person verification before activation
circuly Store Connect is the fourth module in the circuly product family. All four modules are connected — data flows between them, and customers always have a unified view of their subscriptions regardless of where they were created.
circuly Hub: The backend where admins manage products, orders, subscriptions, retailers, returns, payments, and all operational workflows.
circuly White-Label Checkout: The online checkout through which customers subscribe to products on your website or ecommerce store.
circuly White-Label Customer Self-Service Portal: The portal where customers manage all their active subscriptions, update payment details, download invoices, and more.
circuly Store Connect: The simplified in-store tool that lets store staff create subscription orders on behalf of customers at any point of sale.
circuly uses the customer's email address as the linking identifier across the entire ecosystem. This means:
💡 This is why it is important for store staff to confirm the customer's email address carefully when creating an order. If a different email is used, the in-store subscription will appear as a separate customer profile and will not be linked to existing subscriptions.
→ See also: Everything about the circuly Self-Service Portal→ See also: Actions and operations your customers can do and see in the Self-Service Portal
Once an order is created through circuly Store Connect, it follows the same logic as all other orders in circuly — including cancellations, swaps, buyouts, payment retries, and returns — based on the settings configured in your circuly Hub.
Here is a brief overview of the end-to-end flow:
Here is an overview of the setup steps:
Customise how Store Connect appears to your staff and customers, so it reflects your brand.
Each store location needs its own profile with a unique location ID and password.
💡 Repeat this process for every store location. Each location gets its own location ID and password, which allows you to track orders by store.
→ See also: Create a User for managing user-level access in the Hub.
Products are not visible in Store Connect by default. You control which products appear there.
💡 Product availability applies globally across all store locations. You cannot restrict specific products to individual stores — it is an all-or-nothing setting per product.
All three pieces of information are required to log in: URL + location ID + password.
Once the order is created:
After receiving the link, the customer:
💡 The customer can complete this on their own device or on your device in the store. The payment method is saved for future recurring charges just as it would be for any online subscription.
Once payment is made, the order appears in the circuly Hub and the subscription is active.
→ See also: All Different Ways to Start a Subscription in the circuly Hub→ See also: Create a Subscription
Store staff can view and manage all orders created from their location directly within Store Connect.
StatusWhat it meansOpenThe order has been created and the checkout link has been sent to the customer, but payment has not yet been completed. The order is not yet visible in the circuly Hub.ActiveThe customer has completed payment. The order is now in the circuly Hub and the subscription is running.
If a customer has not completed the checkout — for example, they left before finishing — you can follow up without creating a new order.
Store staff can initiate a return for an active subscription from within Store Connect.
💡 Returns initiated from Store Connect follow the same return logic configured in your circuly Hub. If you are unsure about return conditions, check with your Hub admin.
→ See also: The Return Workflow and the Associated Settings→ See also: Process a Return Request Made by the Customer
Will the customer have access to the Self-Service Portal if the order was created in Store Connect?
Yes. All orders created through Store Connect are fully integrated with the customer Self-Service Portal. The customer can manage their subscription, update payment details, download invoices, and more — just like any other subscription.
What if the customer already has an online subscription?
As long as the customer uses the same email address for both the online and in-store subscriptions, both will appear in their Self-Service Portal and both will be visible in the circuly Hub under the same customer profile.
Can I control which products appear in Store Connect?
Yes. In the circuly Hub, go to Products, edit a product, and enable the Allow Order Create switch. Only products with this switch enabled will be visible in Store Connect. This setting applies globally — you cannot restrict different products to different store locations.
What happens if a customer doesn't complete the checkout?
The order remains visible in Store Connect with the status Open. It will not appear in the circuly Hub until the customer completes payment. Store staff can resend or copy the checkout link at any time to follow up with the customer.
Can a store create multiple orders for the same customer?
Yes. A store can create multiple orders for the same customer as long as each order is submitted separately through the Create New Order flow.
Can store staff cancel an active subscription?
No. Cancellations of active subscriptions are managed in the circuly Hub by Hub admins. Store staff can initiate returns from Store Connect but cannot cancel subscriptions directly.
Can I restrict which stores can access certain products?
No. Product availability is controlled globally across all store locations. You can control which products are available in Store Connect, but this applies to all stores equally.
Does the customer need to create an account for the in-store subscription to appear in their portal?
No. The customer simply needs to use the same email address when completing the checkout link. circuly links subscriptions by email address automatically — no account creation is required.
When creating a subscription manually, you have the option of selecting a start date for the subscription. selecting a start date is important because this impacts the end date of the subscription. By default, circuly only allows you to set a subscription start date in the future. However, in some operational scenarios—such as aligning with a shipment date or correcting delayed data entry—you may need to set a start date in the past.
circuly provides a setting that enables this flexibility, allowing you to manually create subscriptions with a past start date.
The setting to allow past start dates can be found in your circuly Hub. Once enabled, it lets you manually choose a start date that lies in the past when creating a new subscription. This setting only affects manual subscription creation via the circuly Hub.
Use Cases:
To enable the option to create subscriptions with a past start date:
Once enabled, the date picker in the subscription creation flow will allow you to select both past and future dates.
In the circuly Hub, you can manage user access with precision — deciding who sees what, and what actions they can perform. This helps keep your operations secure, focused, and aligned with your team’s responsibilities.
With Advanced User Management, you can define access per individual tab giving you full control over what each user can view or manage.
If someone in your team only needs to download invoices at the end of the month, you can give them access to just the Invoices tab — without exposing other sensitive data like customers or operations.
✅ The user’s access is updated immediately.
The Customer Balance is a flexible way to apply credits or discounts to a customer's next recurring payment. Whether you're offering a goodwill gesture or rewarding loyalty, the balance amount is automatically deducted from the next payment due.
In the circuly Hub, the customer balance can be manually customised for any subscriber.

20)-10)
The full balance (if available) will be automatically deducted from the customer's next payment.
Subscription-based business models have an increased exposure to payment failure due to the recurring nature of the business. Effective and efficient dunning and debt collection is needed at all costs but can often be messy, frustrating and time-consuming. Additionally, since Inkasso processes typically operate offline, they result in unsynchronised data and cumbersome post-collection tasks, like manually entering information into bookkeeping systems and other needed platforms.
To solve this problem, circuly has partnered with Debtist to offer debt collection natively within circuly so that you can save your time, nerves, internal resources and lost revenue.
A native integration for debt collection, offers the following benefits:
Our new debt collection feature (powered by Debtist) enables you to recover lost revenue easily and professionally, thus improving your bottom-line cash flow while eliminating the need to allocate additional time or human resources to manage unpaid invoices. The native integration ensures that you have a full and detailed overview within circuly of all your unpaid payments that Debtist is currently handling.
Additionally, our native debt collection integration eliminates the need for maintaining and checking two different systems and ensure that you have all the information you need in one system, that is circuly. The two systems speak with each other seamlessly to provide you a smooth and consistent user experience and clean data for bookkeeping purposes.
Once you have enabled the integration and completed the setup, all unpaid invoices will be transferred to the Debt Collection tab for collection by Debtist as soon as the maximum number of payment retrials have been made. Debtist then works fully automated to bring the unpaid invoices to a resolution.
circuly collects recurring payments according to the defined schedule. If the payment is successfully collected, you’ll see its status marked as “settled." If it fails, you’ll see its status marked as “failed.”
When a payment fails, the circuly system retries the failed payment according to your payment retrial settings and sends the “payment failure” email.
IMPORTANT: In the circuly operations backend, you can define how many times a payment should be retried, what should be the time interval between each attempt and if the customer should be informed on each attempt or only on the final attempt.
As soon as circuly has made the last payment retrial attempt and if the payment still has the “failed” status, the payment and the connected invoice are transferred to the Debt Collection tab. The payment is also assigned the status "in debt collection" to indicate that the connected invoice and payment are in the debt collection process.
When an invoice is transferred to the debt collection tab, it is also transferred to Debtist for debt collection. Debtist then starts with the pre-judicial collection process via email and/or letter and other communication channels to obtain the particle or full payment.
90% of the unpaid invoices come to a resolution in the prejudicial phase.
If the payment is still outstanding, Debtist begins judicial proceedings. At this stage, Debtist may get in touch with you if additional charges are to be incurred.
IMPORTANT: Judicial proceedings typically involve additional costs. However Debtist will always get in touch with you before proceeding with any step that incurs additional charges for you so you can decide whether or not you'd like to proceed.
If the payment is successfully collected, the status will change from "in debt collection" to “debt collected” in your circuly Operations Backend.
See the image below for a process overview

There are two steps to enabling and setting up the debt collection feature:
IMPORTANT: After you send the activation request, the debt collection feature will be activated on the 1st day of the month following your request.
For example, if you submit the activation request on August 15th, the debt collection feature will be automatically activated for your account on September 1st.


A popup box will open where you can see the pricing list from Debtist and. The pricing list outlines the debt collection charges from Debtist for different countries.

Additionally, you can read the privacy policy and terms & conditions.
Click on the NEXT button to trigger the activation request and to start creating your Debtist account.

What is the Max. Payment Plan Option?
When setting up your Debtist account, you can choose how your customers will repay their debt—either as a single payment or in multiple installments.
This option gives you control over how repayments are structured to suit both your needs and those of your customers.
Why is the IBAN needed?
Any payment collected by Debtist on your behalf is transferred to this account.
The debt collection feature will be activated on the 1st day of the month following your request. For example, if you submit the activation request on August 15th, the debt collection feature will be automatically activated for your account on September 1st.
Once you've sent the activation request and created an account, go through the debt collection settings and decide how you'd like to hand over unpaid invoices for debt collection, that is manually or via the automated process.
In your circuly Operations Backend, head over to the Settings tab > Invoice & payment > Scroll down to DEBT COLLECTION to configure the settings associated with debt collection.

In the beginning the Debt Collection tab will be empty (see image below).

You will see data as soon a payment has been retried by the circuly system as per your payment retrial settings and transferred to Debtist for Debt Collection. When there are some claims and invoices under the process of debt collection, this is how the Debt Collection tab will appear (see image)
.png)
Require action column
The require action column tells you whether there is any action needed from your side. When you see a GO TO ACTION tag under the Requires action column you can simply click on it to see what action is required. You can then add your decision as a comment and Debtist will proceed accordingly. You can even upload files if needed. See example image below.
.png)
Status column
The status column reflects the phase the unpaid invoice is in when it under the debt collection procedure.
A fixed fee of 49€ will be charged monthly upon activation for everything, including the integration + implementation + continued debt collection-*
*Additional costs may apply based on the region of debt collection. Additional costs are incurred ONLY IF the debt is successfully collected. There are no costs if the debt is not collected, that is if the claim is unsuccessful.
Additional costs based on region
DACH - no additional costs
Europe (excluding DACH) - 20% of the success claim
Outside Europe - 30% of the success claim
When managing subscriptions, failed recurring payments are a common challenge. The circuly system helps automate your response to these failures with flexible settings—allowing you to define retry logic, communication flows, and what actions to take if multiple payment attempts fail.
This article explains each of the settings available to manage failed payments, so you can configure a process that suits your operations.
In the circuly Hub, you can configure:
To access the settings:
Go to: Settings > Invoices & Payments > Failed Payment
Learn more: What is a payment cycle?
To access the settings:
Go to: Settings > Emails > Payment Notifications
Important: An email can only be sent if the corresponding template exists and is activated in the Email Templates tab.
Learn more here about how to retry a failed payment manually.
Not all payments in your subscription business are processed automatically through your Payment Service Provider (PSP). In cases where payments are handled manually—such as invoice-based payments or offline transfers—you can use circuly’s “Mark as Settled” feature to keep your payment records accurate and transparent.
This article explains when to use the feature, what it does, and how to mark a payment as settled from two places within the circuly Hub.
The Mark as Settled feature allows a circuly user to manually mark a payment or invoice as paid, even if the transaction occurred outside the circuly system (e.g., bank transfer, invoice payment).
Key points:
For payments processed by circuly through your PSP, there's usually no need to mark them manually. These are automatically settled once charged.
You can mark a payment as settled from two places in the circuly Hub: the Subscriptions tab and the Recurring Payments tab.
Option 1: From the Subscriptions Tab
⋯ next to the relevant payment to open the action menu.
Option 2: From the Recurring Payments Tab
⋯ next to the payment.
Once confirmed:
The "Mark as Returned" function in circuly is used to finalise the return process when a product physically arrives back in your warehouse. It changes the subscription status from "Pending return" to "Ended", indicating that the customer has fulfilled their return obligation and the subscription is complete.
This feature can also be used in edge cases where the subscription is marked as pending return but the product was never delivered, and you want to close the subscription manually.
You can automate the return handling process using the circuly Customer API.
Use this option when:
In both cases, marking the product as returned updates the subscription status to "Ended", which signals that the subscription is complete and the product is no longer in circulation.
Once confirmed, you’ll see a message that the subscription has been ended.
If you’ve set up the Repair workflow in circuly:
The “Delete future recurring payments” checkbox determines whether upcoming charges should be canceled when processing a return.
This checkbox appears in two places:
If the subscription ends automatically (e.g. due to no auto-renew), and no manual interaction occurs, circuly will continue charging unless you’ve configured it otherwise.
You can control how returned products affect your stock levels.
Go to Settings > Subscriptions > Return subscription > Enable Update stock on SKU level after return
If you do not want circuly to update your stock at all, please contact us via the Service Desk.
A "bundle" refers to a collection of products grouped together to offer a comprehensive service or package. In subscription terms, a bundle enables you to categorise multiple products under a single subscription.
Examples
1. Bike + lock + helmet + basket
2. Baby Stroller + stroller rain cover + cup holder
3. Motor + spring cradle + attachment
Circuly’s Bundle Collection Feature simplifies the process of managing and presenting bundles. While each product in a bundle can have its unique serial number for internal tracking purposes, customers experience the bundle as a single, unified subscription.
With this feature, you can:
Note: Bundles are predefined, meaning customers cannot swap individual items in a bundle. They will only see and manage the bundle as one complete subscription.
1. Your products and product variants are always set up in your individual shopsystem. circuly only takes over the product information (product name, price etc.) from your shopsystem via a product sync and displays the information under the Product tab in the circuly Hub.
2. The product prices are also taken from the shop system, and the bundle collection feature makes use of the default shop system prices (as set up by you). However, it is also possible to have the same price for the entire bundle collection, irrespective of the product selected. If you would like to have this logic, kindly get in touch with us via service desk.
3. The possibility to select products from a predefined collection is only available for new orders. If you want to make the feature available for your old subscriptions, get in touch with circuly via service desk.
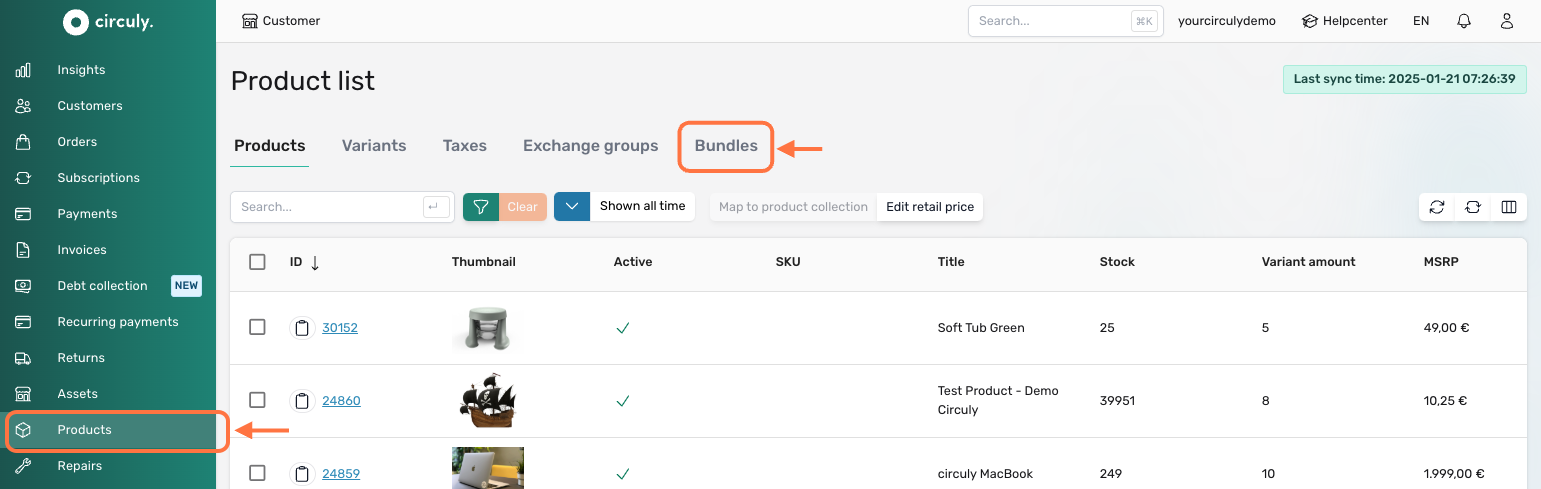
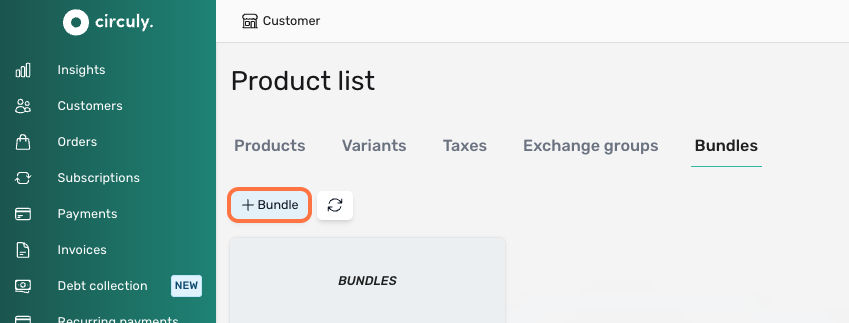
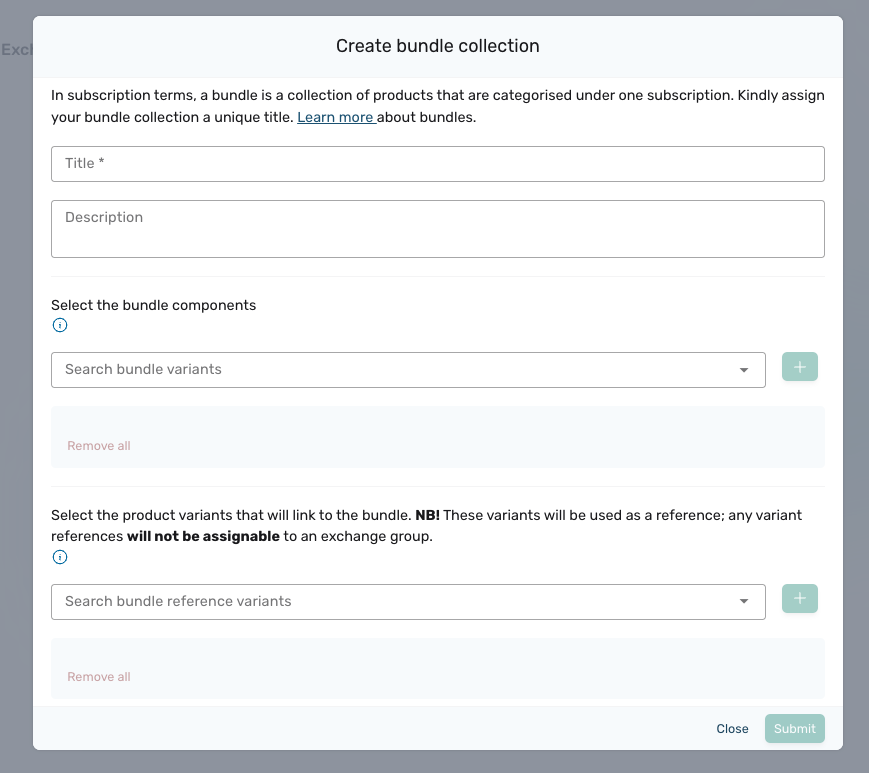
Note: Each bundle can only have a maximum of 10 items.
You can view all your created bundles under the Bundles tab, where they can be easily edited by clicking the pencil icon.
When a customer completes checkout, an order is created both in your shop system and in the circuly Operations Backend. But to begin charging recurring payments, a subscription needs to be created for that order.
circuly provides multiple ways to create subscriptions—both manually and automatically. This article focuses on using the “Mark as Fulfilled” function to trigger automated subscription creation.
You can automate this process via our Customer API.
The Mark as Fulfilled action is generally used to indicate that an order item has been shipped or delivered. In circuly, this action can also be configured to automatically start a subscription.
What Happens When You Mark an Order as Fulfilled:
Enabling Auto-Activation
To automate subscription creation when fulfilling an order, turn on the relevant setting in the backend.
How to Enable:
Important: Define the offset for the subscription start using the Auto activate offset setting. This value will be used to calculate when the subscription should begin.
If you want every order to be automatically marked as fulfilled once all subscriptions are created, enable:
This setting ensures the order status changes to fulfilled without manual action once the required subscriptions are in place.
Before using the fulfilment function to trigger subscriptions, ensure the following:
For an overview of all available ways to create a subscription, check out the article:
All Different Ways to Start a Subscription in the circuly Operations Backend
The extension price determines the subscription fee that applies once the minimum subscription duration is over and the subscription continues through auto-renewal. This price ensures that your business charges customers correctly beyond the initial contract period.
The extension price is especially important for:
The extension price is configured per product variant in the circuly Hub It is used when:
Once set, this price will be automatically applied when the subscription enters its extension phase.
Q: Can I leave the extension price blank?
A: No. It’s strongly recommended to define an extension price to avoid disruptions or errors in billing after the minimum subscription period.
Q: Does the extension price override the initial monthly price?
A: Only after the minimum contract period ends. The initial monthly or upfront price remains in effect until then.
Q: Can the extension price be changed later?
A: Yes. You can return to the Variants list at any time and update the extension price.
When a payment fails in circuly, you can retry the payment manually or automate the retrial process. However, even after retrying, the payment may still fail. At this point, it’s recommended to reach out to your customer to resolve the issue. Once the customer confirms that they’ve resolved the problem on their end, you can use the Charge Invoice feature to attempt the payment again.
Charge invoice is a feature available in the circuly Hub that enables you to manually charge an invoice with the "failed" payment status. An invoice has the "failed" payment status if a payment attempt was made but failed.
Tip: You can user the filters options to filter the Invoice list and only display payment that have the "failed" payment status".
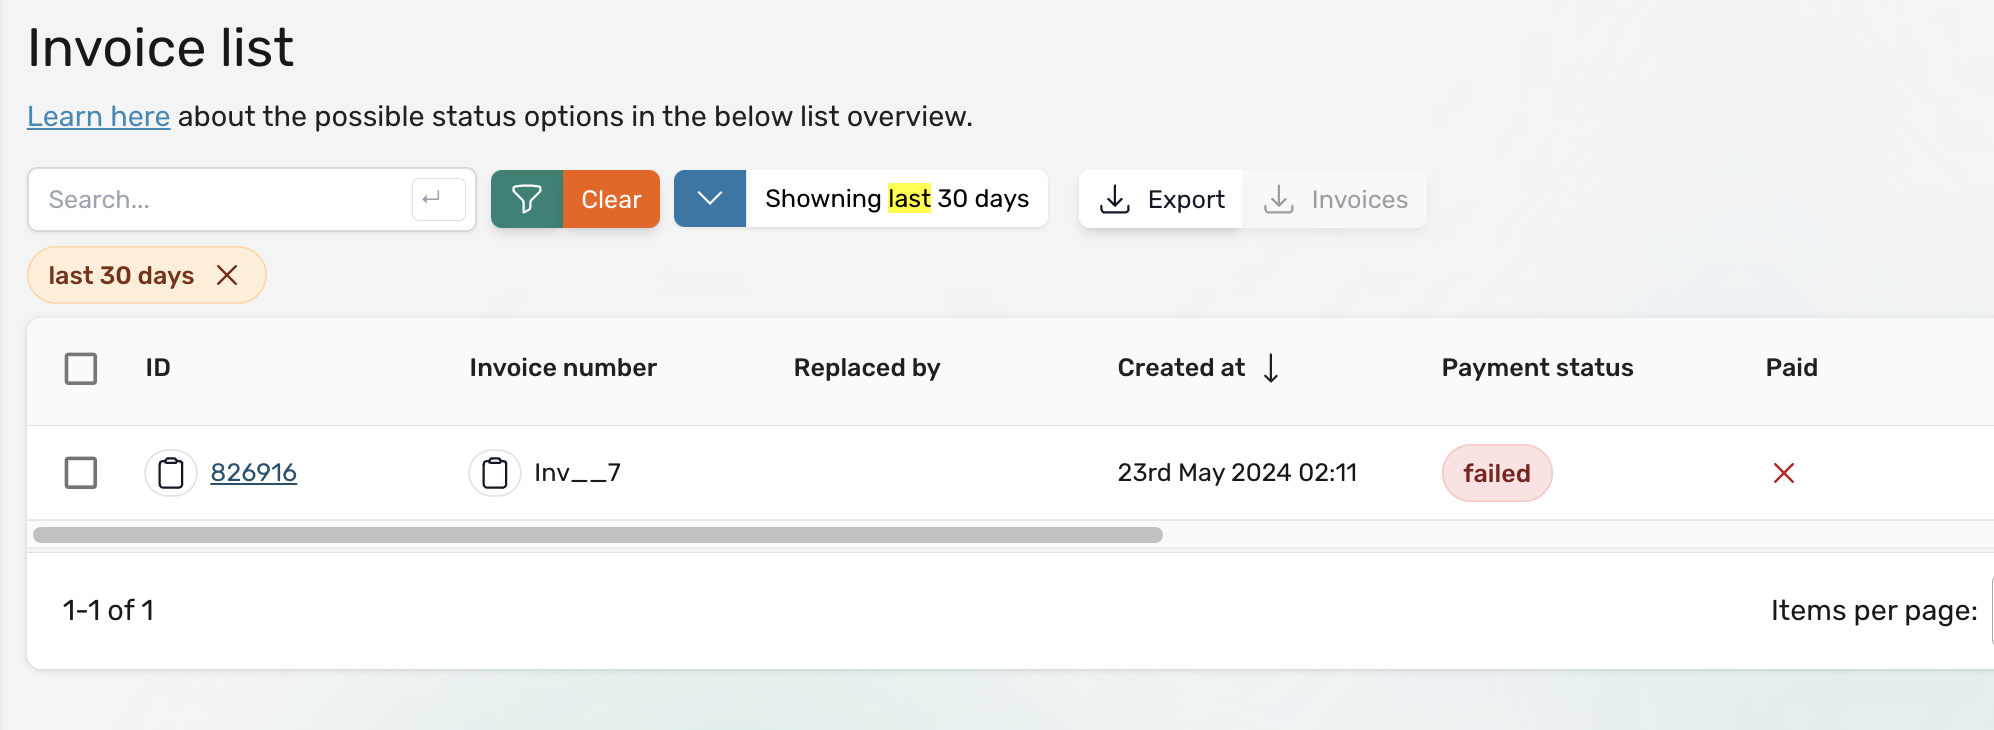

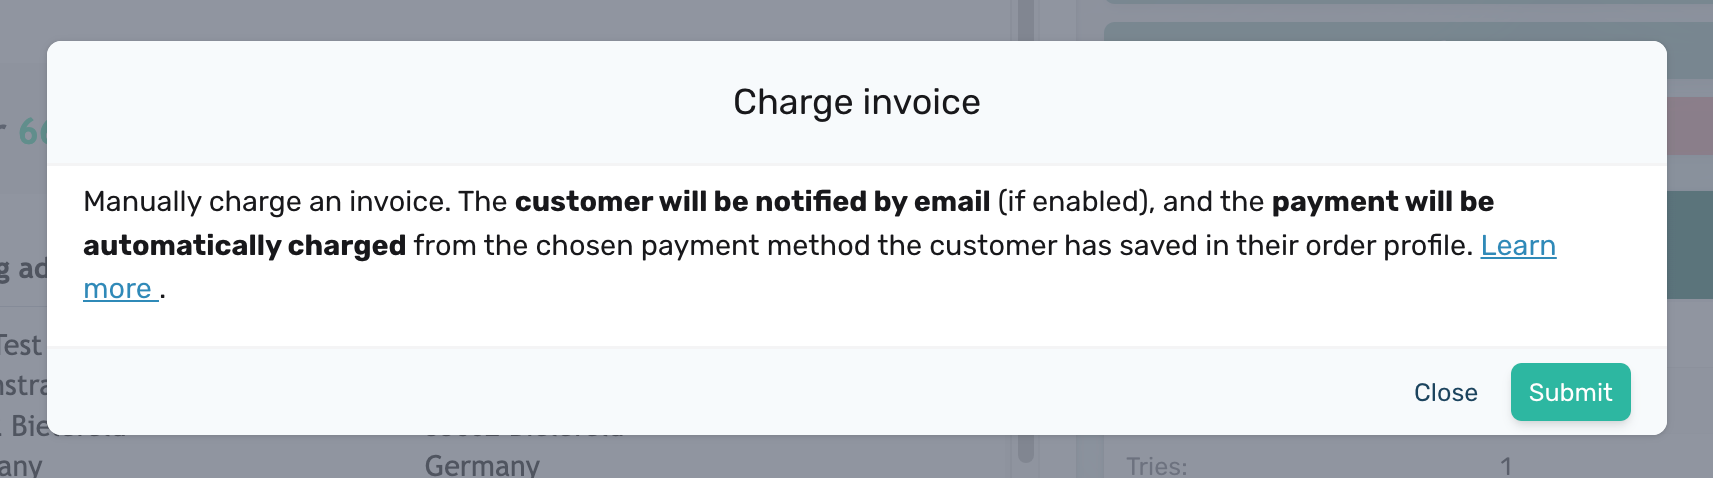
The circuly system attempts to charge the invoice.
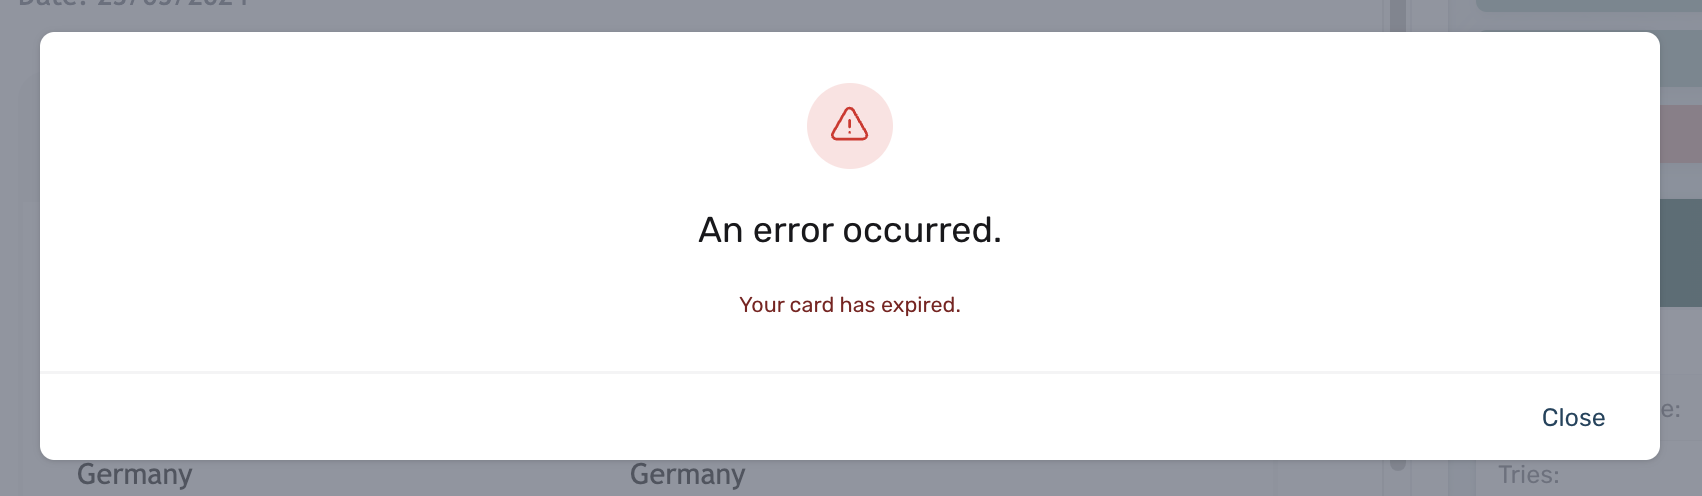
Billing frequency refers to the interval at which your business charges customers for a product or service, defining how often payments are collected. In circuly, you can adjust the billing frequency for both consumer durable and consumable products. However, the process for modifying billing frequency differs based on the product type. This article focuses specifically on changing the billing frequency for consumable products.
The option to change the subscription frequency is only available for consumable subscriptions and will be greyed out for all other subscription types. To change the billing frequency for consumer durable products, follow this guide on changing subscription attributes.

Prepaid Subscriptions are subscription orders where the customer pays the full subscription fee upfront instead of in monthly intervals. This model is beneficial for both you and your customer — it supports predictable cash flow on your end and often comes with incentives (like discounts) for customers who commit to paying in advance.
With prepaid subscriptions:
Prepaid subscriptions are set up in your shop system by creating a variant with an upfront payment plan. During the variant creation, define whether the payment should be charged monthly or in full at once.
To continue charging monthly after the prepaid period:
This price will be used when the auto-renewal activates after the prepaid term.
In circuly, you can edit orders—such as changing products, addresses, or prices—before a subscription has been created. Once a subscription is attached to an order, the order becomes locked and can no longer be modified. This edit functionality is especially useful when handling last-minute customer requests or internal adjustments, such as correcting details or switching products before finalising the subscription.
The Edit Order feature allows you to update key components of an existing order directly from the circuly Hub. When you select “Edit Order,” circuly creates a draft copy of the original order, preserving all items, customer details, and payment info. You can then adjust the draft as needed and confirm it as a new, active order.
Key things you can do during editing:
Once confirmed, the edited order is treated as a new order in both circuly and your shop system. The original order must be cancelled and, if applicable, refunded manually.
Editing an Order
Customer journey
If the updated order is sent to the customer:
If the order is processed internally:
In both cases, the updated order becomes active, and the original order should be cancelled and refunded manually if needed.
Cancelling and refund the original order
You need to cancel (and refund) the old order manually with a suitable message so that your customer understands why he / she is charged (again).
To do so open the order > click on the three dots at the top right > select cancel order to do so and select the checkbox "full refund". If you only want to partially refund an order, please learn more about refunding an order here.
Charging the initial payment of the updated order
Once the updated order is created, you have to charge the initial payment manually.
To charge the initial payment open up the updated order > click on the three dots at the top right > select Charge Initial Payment.
When charging the initial payment, you can add a custom message to explain why your customer is charged. Make sure to click on charge xx,xx so that the payment will be initiated through your payment service provider. The customer will then also automatically receive an invoice.
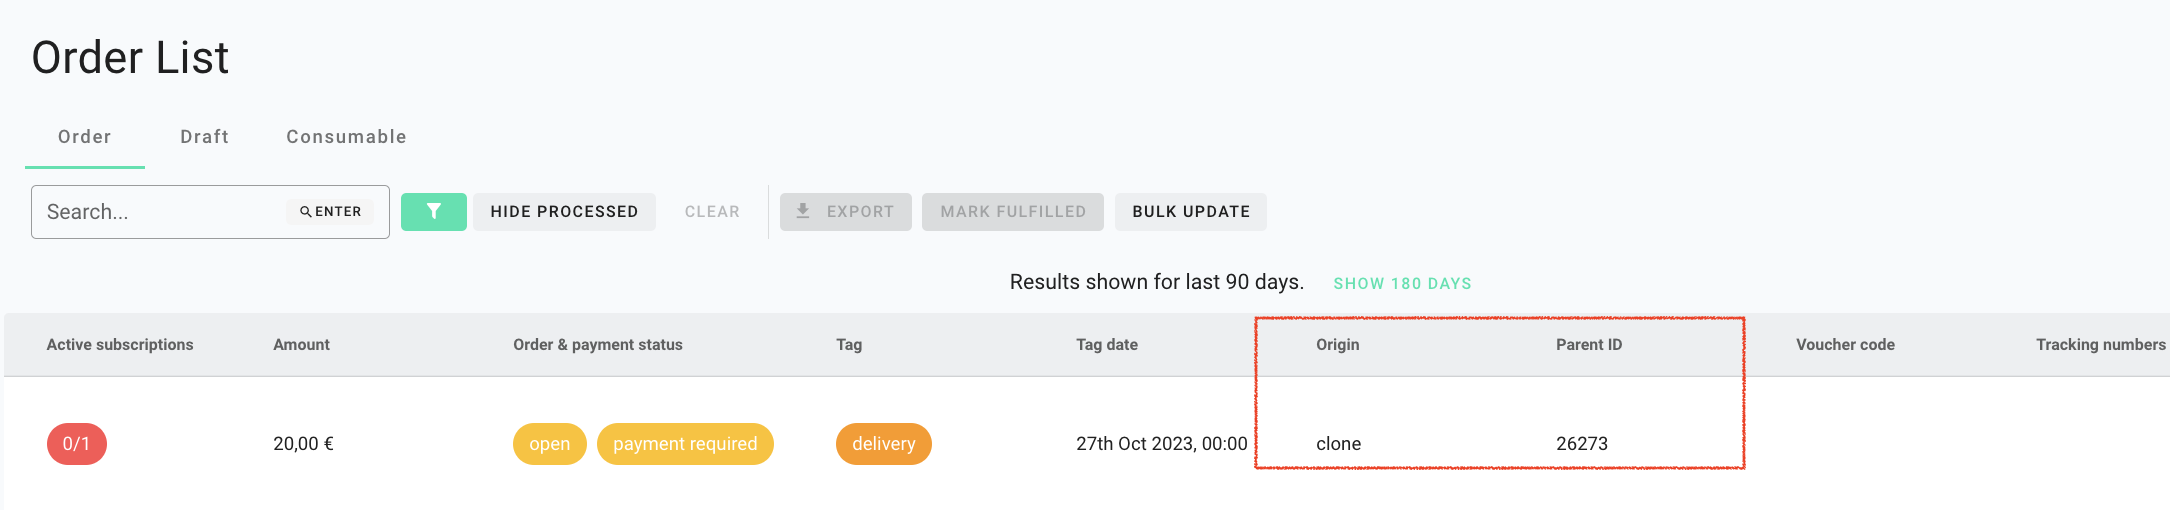
You can identify edited orders easily since they marked as Origin: Clone. You can always find the original order by copy / pasting the parent ID in the order search (for example if you want to cancel and refund the original order).

You will also find this information in the order list:
By default, circuly generates its own Order ID when a customer completes checkout. However, if you’re using Shopify as your shop system, each order also has a separate Shopify Order Name (often referred to as Shopify’s order ID).
To avoid confusion—especially in email communication or when syncing data across platforms—you can choose to replace circuly’s Order ID with the Shopify Order Name.
There are two common reasons to use the Shopify Order Name instead of the circuly-generated Order ID:
The circuly-generated Order ID appears in:
If not changed, this is the value customers will see by default.
You should consider replacing circuly’s Order ID with Shopify’s Order Name if:
To use the Shopify Order Name instead of circuly’s Order ID:
{{order_ID}} with the Shopify order name variable.Once updated, customers will see the Shopify Order Name in their emails and in the Self-Service Portal.
Subscription fatigue poses a growing challenge for consumers juggling multiple recurring payments and contract renewals. While auto-renewals are a great sign of retention, they can also lead to frustration—especially when customers forget about upcoming charges.
circuly helps you tackle this issue by enabling you to send automated reminder emails before a subscription ends and giving you full control over whether a subscription should renew automatically. In this article, we’ll explain how to set up reminder emails, configure auto-renewals, and make your subscription experience more transparent and customer-friendly.
circuly enables you to:
The result: A smoother customer experience and fewer support tickets related to surprise charges.
Step 1: Navigate to Email Settings
Step 2: Enable Reminder Email Option
Step 3: Define Timing for the Reminder Email
Step 4: Understand When the Email Triggers
Step 1: Navigate to Subscription Settings
Step 2: Enable Auto-Renew
Step 3: Manually Enable Auto-Renew for Specific Subscriptions (if needed)
📝 Note: Simply activating the switch manually does not renew the subscription unless the global auto-renew setting is enabled.
Optional Settings: Enhance Your Reminder StrategyI
If you'd like to send reminder emails in edge cases, toggle these additional settings in Settings > Emails > Subscription Information:
These options help you stay flexible and customer-friendly across different use cases.
By combining automated renewal reminders with clear subscription policies, circuly helps you reduce subscription fatigue, avoid customer frustration, and strengthen long-term customer relationships. Use these step-by-step guides to customise your renewal flow and keep your customers informed and satisfied.
circuly gives you the flexibility to decide how your system-generated emails are sent to your customers. You can either use your own SMTP server or take advantage of circuly’s built-in Mailgun SMTP integration. This guide explains both options and outlines all the necessary steps for setup.
You can configure your outgoing email setup in two ways:
Each approach ensures that all automated customer communication (order confirmations, subscription updates, etc.) is delivered reliably under your brand identity.
Settings > Setup and Design > Email Server SettingsThis method gives you full control over email authentication and deliverability using your company’s own email infrastructure.
This is a fully managed option handled by Circuly, ensuring professional-grade deliverability while still allowing emails to appear as if sent from your domain.
Settings > Emails > Generalservice@yourcompany.com)Circuly will use these to set up your email identity in Mailgun.
Even though emails are routed via Circuly's Mailgun SMTP server, your customers will only see your company's branded email addresses.
Circuly will generate TXT and MX DNS records that you must add to your domain provider’s DNS settings.
Explanation of DNS Records:
⚠️ Verifying your MX records is highly recommended to prevent email delivery failures and improve authentication reliability.
Circuly’s technical team will:
These credentials ensure that emails are securely sent via Mailgun with the correct authentication.
You will receive DNS entries (TXT & MX) from Circuly. Here’s how to add them:
DNS propagation may take anywhere from a few minutes to several hours to reflect globally.
Conclusion
Whether you choose to manage your email delivery through your own SMTP provider or use Circuly’s Mailgun setup, both options ensure reliable, branded communication with your customers. For most businesses, the Mailgun integration offers a hands-off, secure, and scalable solution. If you need help or would like Circuly to configure this for you, simply contact our service desk.
If you allow your customers to make cancellation requests from the Customer Self-Service Portal, they will be required to select a reason for their cancellation during the process. Collecting cancellation reasons allows you to gain valuable insights, make informed decisions, and improve your offerings. It also demonstrates that you value customer feedback and are committed to enhancing their experience, ultimately fostering stronger customer relationships.
Some of the reasons to consider adding cancellation reasons to your cancellation process are:
When using the circuly's Self-Service Portal to make cancellations, the process includes selecting a "type of cancellation" and providing a cancellation reason. The "type of cancellation" is standardised and consists of two fixed options: normal and extraordinary. However, the cancellation reasons within these categories are fully customisable. You can define and tailor these reasons to suit your business needs, directly in your settings.
The process of terminating a subscription within the standard terms and conditions set forth by the service provider.
Extraordinary cancellation refers to the termination of a subscription under exceptional circumstances that deviate from the regular terms and conditions.
The cancellation reasons that you as a circuly user add under normal and extraordinary cancellation.
While adding cancellation reasons, you also have the option to enter translated versions of the reasons. The available language options in the "Add Cancellation Reason" window are based on your Allowed Language settings. Only the languages selected in the Allowed Language dropdown will be available for defining the cancellation reasons and its translation.

To add cancellation reasons, follow these steps:


Reserving a serial number (asset) means that a specific product unit is pre-assigned to an order and will automatically be linked to the subscription once it's created. This ensures better inventory control, traceability, and operational efficiency.
Enabling this feature in circuly allows serial numbers to be automatically reserved—removing the need for manual assignment during subscription creation.
Here are a few key reasons to reserve serial numbers in circuly:
1. Inventory management
Reserving a serial number ensures the specific product required for the order is set aside and not mistakenly allocated to another customer. This helps maintain accurate inventory levels.
2. Product traceability
With unique serial numbers assigned to each order, you gain clear traceability. If there’s ever an issue or product recall, you can easily identify and track the affected items.
3. Warranty & support
A reserved serial number simplifies support. When a customer needs assistance, your team can quickly retrieve relevant order and product details using the serial number.
Overall, it contributes to operational accuracy, faster service, and better organisation throughout your order and subscription processes.
To enable automatic reservation of serial numbers:
Once this switch is enabled, circuly will:
When you create a subscription, the serial number will already be pre-assigned to the order item—saving you an extra step.
To use the serial number reservation feature, your assets need to be added to circuly and marked as “in stock”.
Once imported, circuly will use these assets to fulfill orders with automatic serial number reservation.
There can be various reasons for swapping subscription products, such as product breakage, product loss, upgrades, downgrades or simply because of the nature of your business.
The set up and the process of changing products in a subscription also depends on the reason why the product needs to be changed.
The set up process based on the use case for exchanging a product.
If you have a business model that allows your customers to exchange products from a predefined group, continue reading this article about Exchange Groups.
What are exchange groups?
When you want your customers to select a product for exchanging from a predefined group, you can set up exchange groups in the circuly Operations Backend. Typical use cases include an exchange group for consumable subscription products such as protein powder, where the customer can change between the different flavours, an exchange group for kids bike, where the customer can select a bigger size, or an exchange group for toys, where your customer can swap between toys.
Since lost products are not expected to come back, the swap process for such products looks slightly different than the regular swap process.
The reason why Lost product swaps are treated differently from other product swaps is because Lost products are not expected to come back. Speaking in technical terms, Lost products will not have a Pending Return status. This essentially means that normally you would expect a product to come back and if the customer doesn't send the product back, you can keep billing them. But in case of Lost products there is no possibility to get the product back hence no reason to bill the customers for two subscriptions.
In order to utilise the swap feature within the circuly Operations Backend, it is important to go through the following steps:
Step 1: Review and configure the swap settings.
Step 2: Add swap reasons. Swap reasons are used for internal communication.
Step 3: Learn how to process a swap request for missing products.
Make sure you’ve configured the swap settings and added the swapping reasons.
Continue reading this article to learn more about swapping broken products.
As the name suggests, the Delete recurring payments setting can be used if you want to delete future recurring charges after a subscription status is set to pending return via a cancellation request made from the Self-Service Portal. The recurring payments are deleted until the subscription is reactivated.
User actions in the circuly Operations Backend that set the subscription status as pending return do not interact with the Delete recurring payments setting.
Important: The payments are deleted irrespective of whether or not you’ve received the product back from the customer.
No, the recurring payments are not deleted permanently. In case the customer does not return the product, the subscription can be reactivated and the recurring payments will continue to be charged.
When this setting deletes the recurring payments, you can ideally avoid a situation in which a customer is charged for an additional month while the customer is in the process of returning the product.
To access the setting > Go to Settings > Customer Login > CANCEL OPTIONS > Delete recurring payments.
If you offer pickup services for your products, you can enhance the customer cancellation experience by allowing them to select a preferred pickup date via a calendar. This feature is available directly within the cancellation window of the Self-Service Portal.
A smooth and flexible return experience is key to customer satisfaction, especially in a subscription-based business. Allowing customers to schedule a product pickup date makes the return process more convenient for them and more predictable for you.
The pickup calendar is an optional feature in the circuly Self-Service Portal. It functions similarly to the delivery date picker used in the checkout process. If enabled, the calendar appears during the cancellation process, allowing the customer to choose a specific pickup date for their subscription product.
Here’s how the pickup calendar is displayed in the self-service portal.

To enable the pickup calendar, you need to access your circuly settings and activate the relevant switches under the cancellation options.
There are two main configurations:
Step 1: Enable Pickup Date Selection
Step 2: Make Pickup Date Mandatory (Optional)
Activating the pickup calendar improves your logistics planning and gives customers more control over their return process. If your business offers pickups, enabling this feature is a simple way to provide a more user-friendly and efficient experience.
If your customers decide they want to keep a product they’ve been renting, circuly makes it easy for them to buy out the subscription directly from the Self-Service Portal.
Whether it’s a bike, baby product, or another consumer durable, customers may grow attached to the product during their subscription. circuly allows them to seamlessly transition from renting to owning by initiating a buyout directly in the Self-Service Portal.
The buyout feature lets customers purchase their currently subscribed product. The system automatically calculates the buyout price based on the product’s retail price and subtracts previous payments (e.g., the initial fee and monthly subscription payments).
Key highlights:
Note: The buyout option may not be visible if a minimum contract duration hasn't been reached yet.
You can provide these step-by-step instructions to your customers:
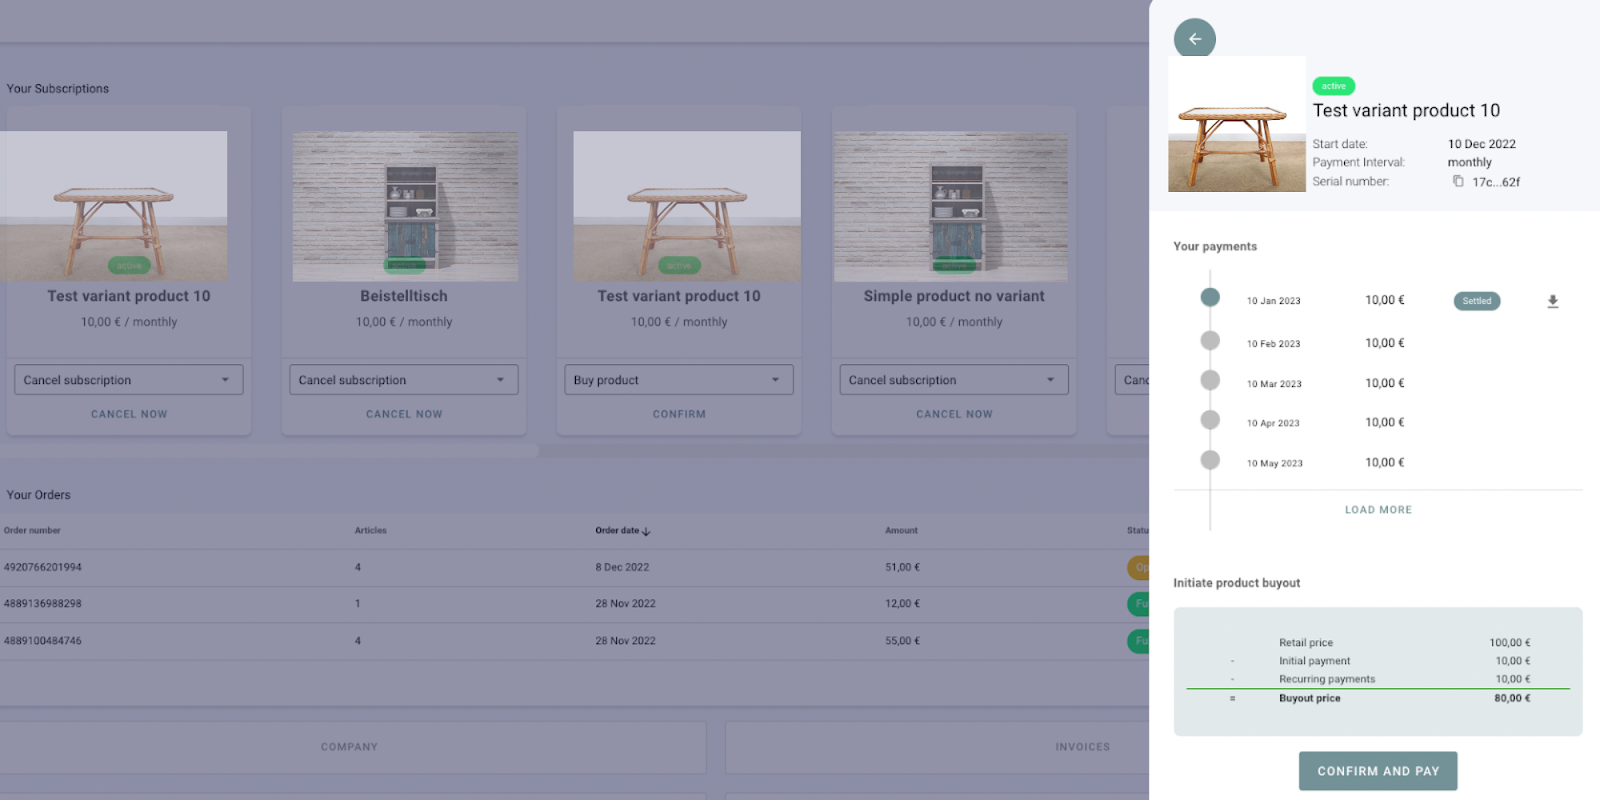
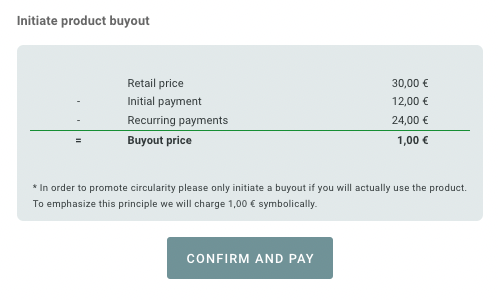
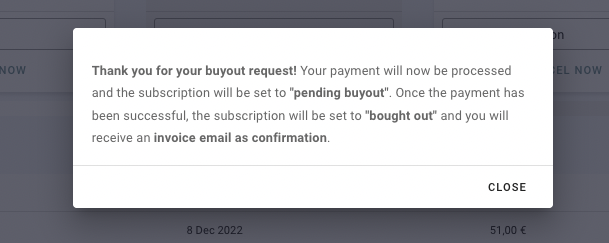

The buyout process in circuly is simple, transparent, and efficient—ensuring that customers who love your product can keep it without hassle. The real-time status updates, automated payment handling, and clear communication ensure a seamless transition from subscription to ownership.
circuly gives your customers the flexibility to change their subscribed product directly from the Self-Service Portal. This article explains how the product change experience looks for your customer and what happens in the background once the request is submitted.


Once the change is submitted:

circuly enables you to reward loyal customers for helping you grow your customer base. With the Refer-a-Friend feature, customers with an active subscription can share a unique code with friends and receive credit when that code is used for a new order. This article explains how your customers use this feature and how the process works behind the scenes.


Note: Credit cannot be transferred to a bank account and is strictly applied to future subscription payments.
circuly gives your customers the option to cancel their subscriptions directly via the Self-Service Portal. This article outlines the cancellation process, types of cancellations, and what your customers can expect depending on the timing of their request.
There are two main types of cancellations your customers can make:
Note: The key difference between these two types is that if the cancellation is within the Early Cancellation Period, customers will see the option to return the product—either immediately or after the minimum subscription duration. In contrast, if it's a Regular Cancellation, the return option is not shown; customers can only request cancellation.
If a customer’s subscription is still within the early cancellation period, they can cancel as follows:

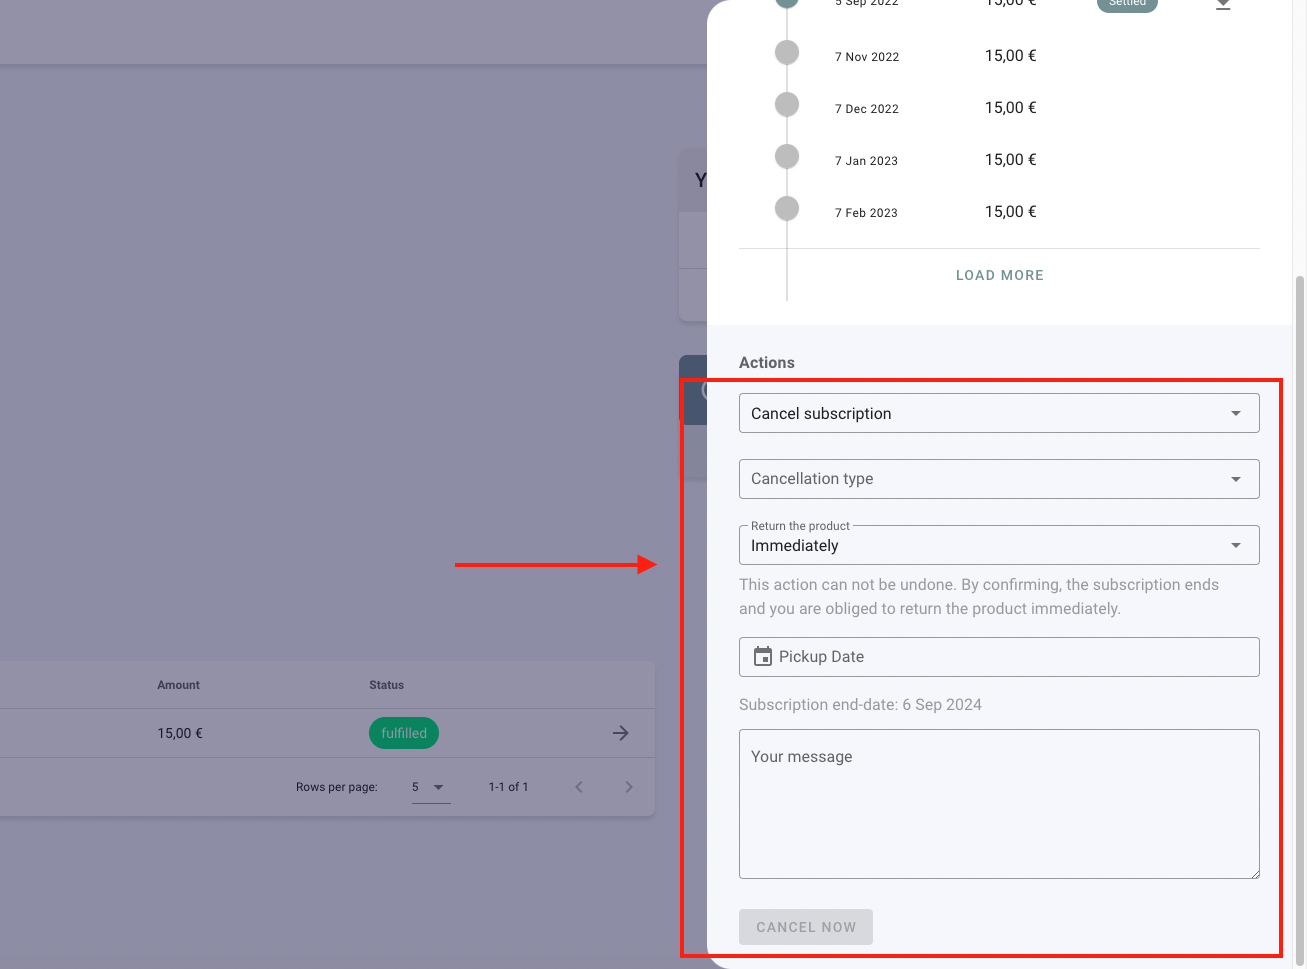

Customer Journey: Regular Cancellation (Outside Early Cancellation Period)
%20(2).png)
%20(1).png)
Processing Rules:
Note: In both cases, subscriptions will not renew again, but the actual cancellation depends on timing.
Your customers can download invoices for payments that have already been charged.
Given below are steps you can share with your customers or add to your FAQ section:
To download an invoice > Go to Your invoices > Click on the download icon > Your invoice will be downloaded and available for you to view in your browser > To view your invoice click on the downloaded file > The invoice will open up in a new window > From there you can download and/or print your invoice.
Tip: This process can be automated via our customer API. This is the GET request you can use https://api-docs.circuly.io/docs/customers-api-docs/tyvbuteuftq44-get-the-order-s-update-payment-link that you can use to get the link for updating the payment details. You can forward the link to your customer via email.
Your customers can change their payment details in the Self-Service Portal in the same window as their address.
Given below are the instructions you can pass on to your customer about updating their payment details from the Self-Service Portal:
To change payment details > Go to Your Orders > Choose an order and click on the arrow icon > You will be taken to your order overview page > in the order overview page scroll down to Current payment method > Click on UPDATE PAYMENT METHOD.
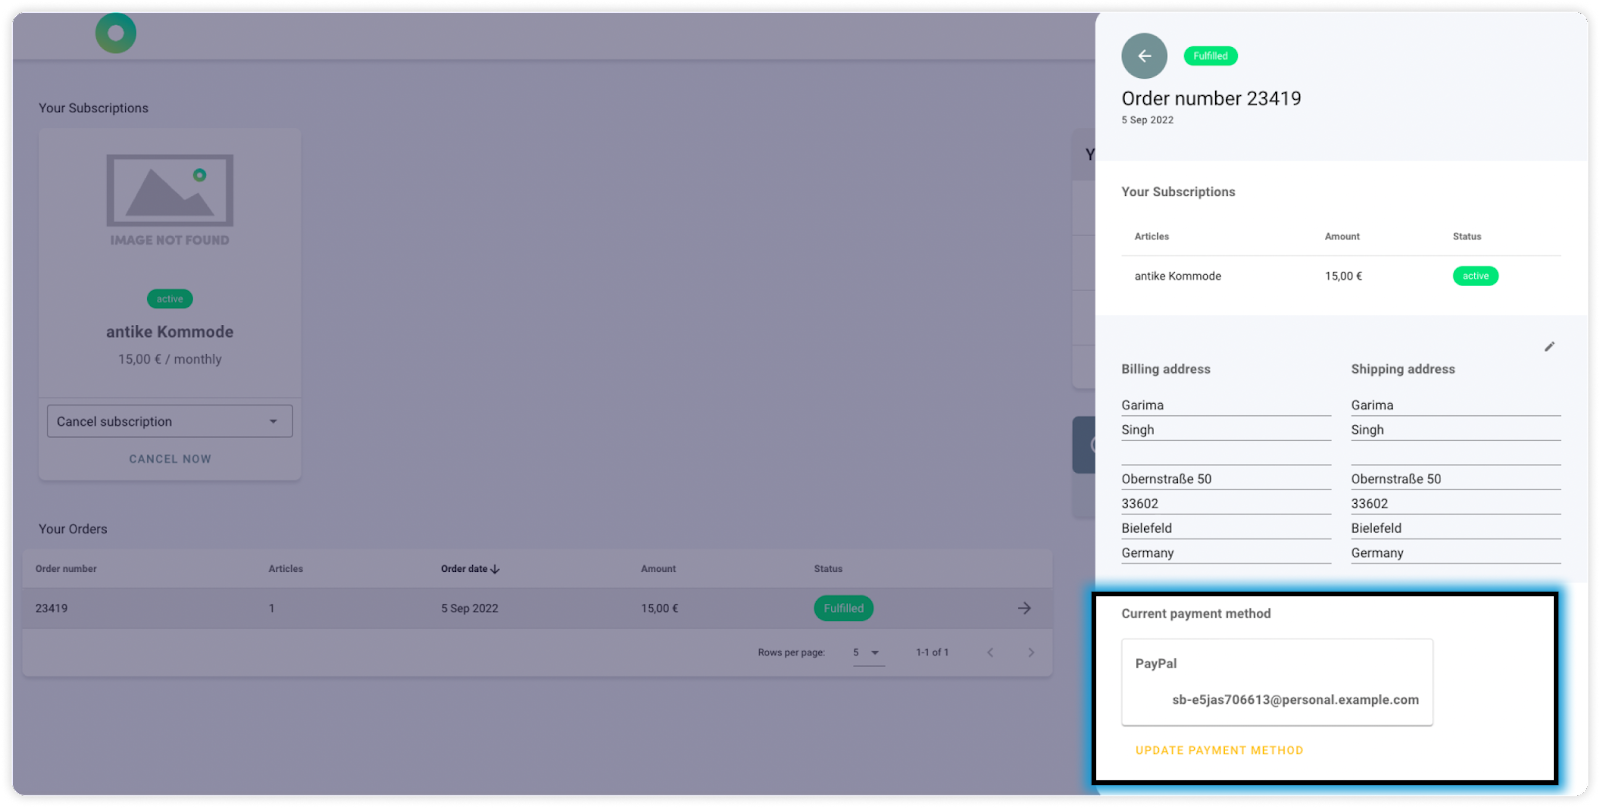
Note: If you wish to add a custom description to this window, you can write us a service desk ticket, with your desired text.
You will be taken to a new browser window where you will have the option to update your payment method > Click on your desired option > Fill in your payment details > Confirm your selection.

Your payment method will now be updated.
circuly enables your customers to independently update their personal details through the Customer Self-Service Portal. This article outlines how the experience looks for your customers when they update their contact details or address, and why the process differs slightly for each type of information.
Your customers can change their name, email, and phone number by following these steps:

These changes are sent to the Circuly system and updated accordingly.
To update the shipping or billing address for a specific order:
The updated address is saved in the Circuly system and associated with the selected order.
Why Contact Details and Address Are Handled Separately
Customers may use a single email ID to place multiple orders—for themselves, family, or colleagues—each potentially with a different delivery address. To avoid conflicts or incorrect data changes across orders, addresses are managed separately at the order level.
circuly allows you to offer a localised experience for your customers by supporting multiple language options in the Customer Self-Service Portal. This article explains how language preferences are managed and how they influence customer communication.
As an admin, you can control which languages are available to your customers. For details on configuring language options or troubleshooting issues, refer to the language settings article.
The language selection feature in the Customer Self-Service Portal allows customers to choose the language in which the portal is displayed. This preference not only affects the interface language but also determines the language of transactional email communications sent to the customer.
Here’s how your customers can change their preferred language:
Implication: Once changed, all future transactional emails will be sent in the selected language. The circuly system automatically saves this preference.
For more details on configuring language options or troubleshooting issues, refer to the language settings article.
By embracing the power of the circuly Customer Self-Service Portal (CSS), you're not only empowering your customers with more control and transparency but also freeing your Customer Success team from repetitive operational tasks.
Transparency isn’t just a nice-to-have – it’s essential for building trust and enhancing the customer experience. The CSS provides exactly that: a simple and intuitive interface where customers can manage their subscriptions, invoices, and personal data independently.
This article is written for your customers. Feel free to copy and paste this guide onto your website. Just be sure to use your own screenshots to align the look and feel with your brand.
Note: If you do not provide one or more of the options listed below, you can customise this content accordingly.
The Customer Self-Service Portal offers an overview of all relevant account and subscription details. Through the portal, customers can:
Customers will find the following sections in their CSS:


The CSS allows customers to perform multiple self-service actions without needing to contact customer support. Here's what customers can do:
Availability of some features depends on your specific Circuly configuration. If certain features (e.g., Refer a Friend or Change Product) are not visible in your CSS, it's likely they are not currently enabled in your system.
Once the portal is live:
To fully benefit from the CSS, consider embedding a link to it prominently in your website's account or support sections, and customise it visually with your branding and screenshots.
In subscription businesses, customer cancellations are inevitable. When customers cancel early—especially within the legally mandated early cancellation period—it’s often expected that their initial payment will be refunded. To streamline this process, circuly offers a setting that automates refunds for qualifying cancellations. This helps reduce manual effort and improves customer experience by ensuring timely refunds.
The Auto refund immediately cancelled subscriptions setting automatically refunds the initial payment for subscriptions cancelled via the Self-Service Portal under the following conditions:
Once these two conditions are met and the setting is enabled, the payment will be refunded—even if the product has not yet been returned.
Note: If you prefer to refund only after the product is returned, keep this setting disabled and handle refunds manually.
To enable the Auto refund immediately cancelled subscriptions setting:
Once active, the circuly system will take care of refunding payments under the specified conditions without any manual input from your team.
When enabled in your circuly Hub settings, the 'Check system stock' setting performs a stock check in the background as soon as the customer arrives on the checkout page. This check uses the stock level data stored in the circuly Hub as its base which is in turn based on an automatic sync between your shop system and the circuly Hub.
Product is available: if the product is available the customer can proceed with the payment and finalise the order.
Product is not available: If the selected product is not in stock, an error message is displayed on the checkout page and the customer is prevented from proceeding to the payment page.
To access the setting > Go to Settings > Checkout > PRE CHECKOUT > Check system stock.
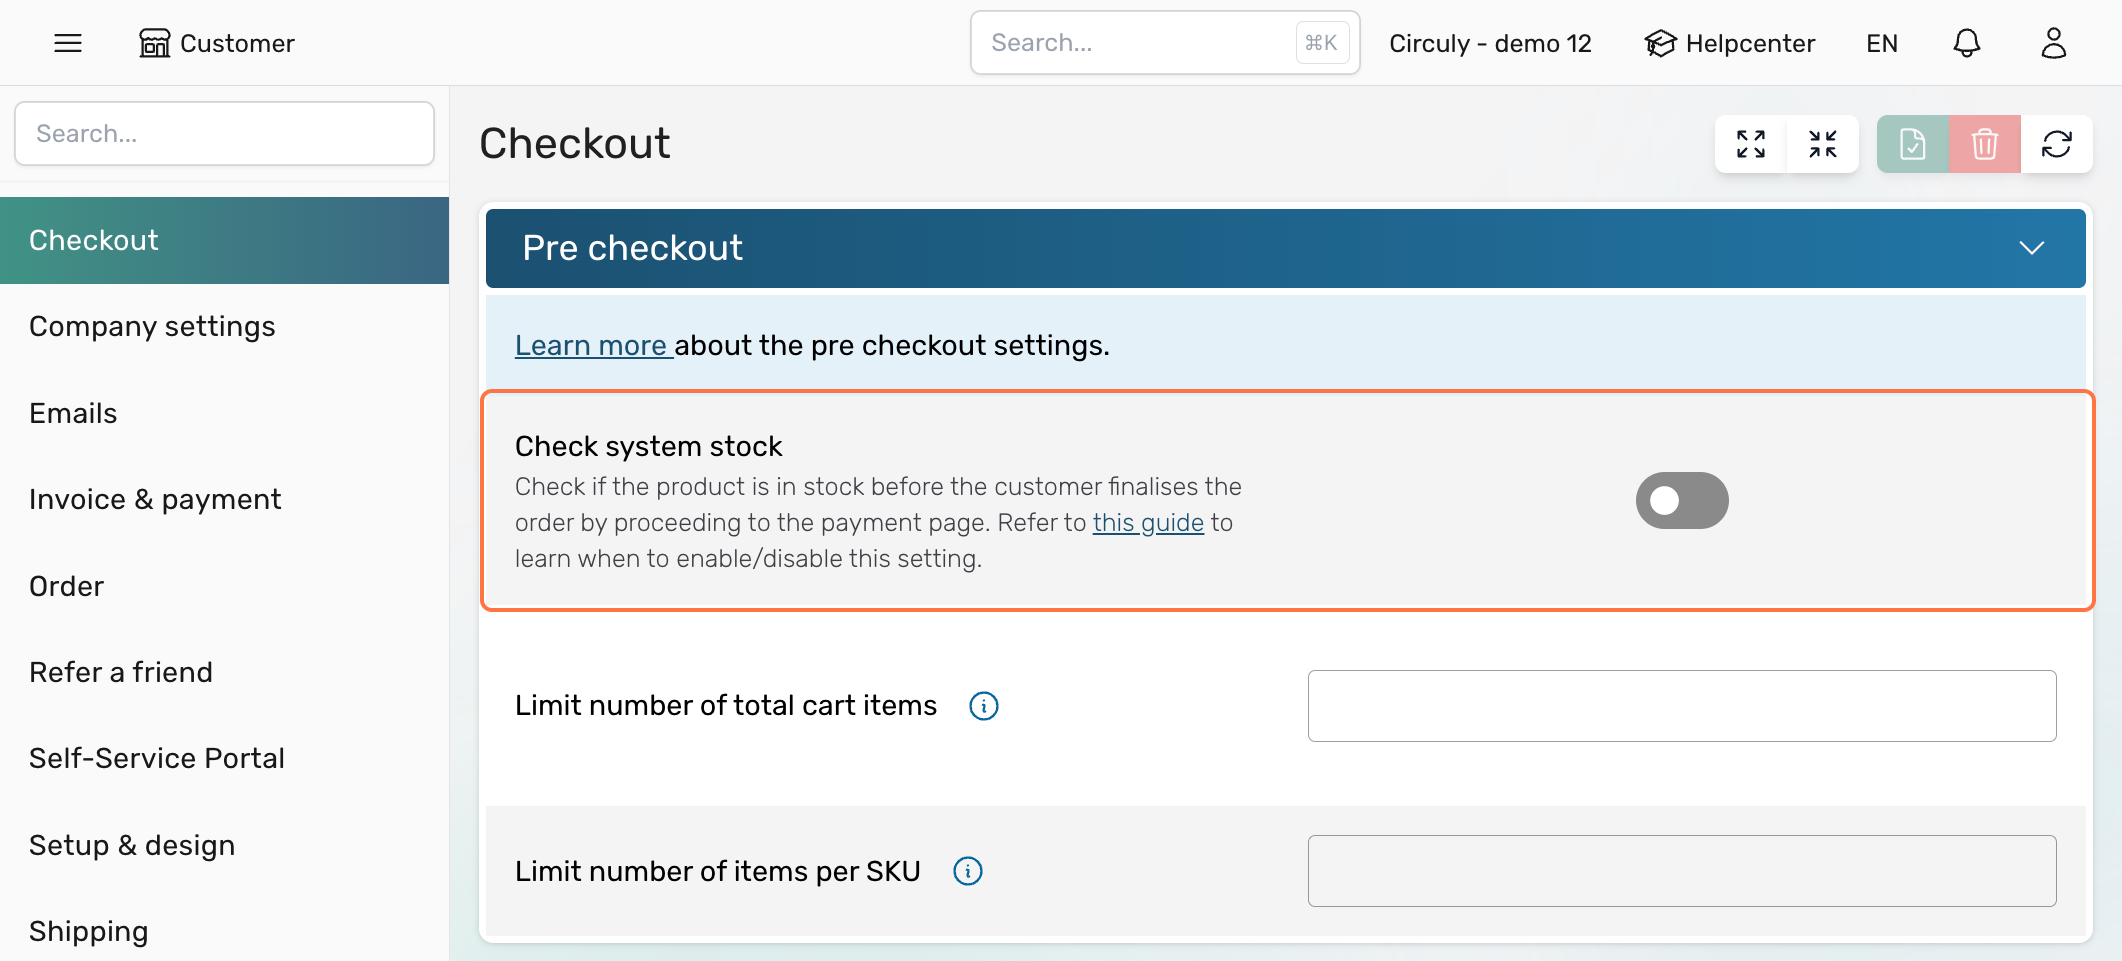
In circuly, a payment cycle refers to the complete process of retrying a failed payment the maximum number of times you've configured in your settings.
When a recurring payment fails, circuly will automatically retry the payment based on your defined settings. This retry process is called a payment cycle.
A payment cycle =
1 failed recurring payment
retried automatically up to the maximum number of times (e.g. 3 retries)
Once all retries have been attempted and the payment still fails, the payment cycle is considered completed—but the payment is still marked as failed.
Settings > Invoice & Payment > FAILED PAYMENT > Maximum number of payment attemptsExample:
If Max attempts = 3 and a payment fails, circuly will retry it 3 times.
That’s 1 payment cycle.
If another payment fails and is also retried 3 times, that’s a second payment cycle.
In circuly, you can designate a specific customer care email address to receive automatic notifications when key customer-related events occur. These notifications help your internal team stay informed and take timely action when needed.
The email address you define in your circuly Hub will receive alerts for the following types of events:
This setting ensures that your customer service team is always in the loop and can respond quickly to customer needs or potential problems.
Settings > Company Settings > Base Setup✅ Tip: Use a shared customer support email (e.g., support@yourcompany.com) so multiple team members can monitor incoming alerts.
Below are examples of the kinds of notifications your team might receive:
Setting up the Customer Care Email Address in Circuly ensures that your team receives critical updates without delay. With automated notifications for cancellations, payment failures, and other key events, you can proactively manage customer support and maintain high service standards.
circuly supports multiple languages to help you deliver a localized experience across your Checkout, Self-Service Portal, and email communication. With just a few settings in your circuly Hub, you can configure the languages available to customers and how those language preferences influence the user experience and system communication.
This guide walks you through the languages supported, how to activate them, and how the system handles language preferences.
To see the languages currently supported by circuly, go to your Settings in the circuly Hub and check the available options under Allowed Languages.
circuly is constantly expanding the list of supported languages to help you offer a localized experience to your customers across different markets. If your desired language isn’t listed yet, feel free to reach out to us via the service desk—we’re always improving and updating language support based on customer needs.
Step 1: Define Allowed Languages
Allowed languages are the ones your customers can choose from during checkout or in the Self-Service Portal.
To enable them:

When you select an allowed language, a new column is added in the Email Templates tab for that language—so you can configure email templates accordingly.

Step 2: Set Up Email Templates (If Needed)
Selecting a language under “Allowed Languages” does not automatically create translated email templates. You’ll need to:
Step 3: Define a Default Language
The default language acts as the fallback language for all communications when a customer's preferred language is missing or email templates aren't set up in their chosen language.
To set the default language:

Note: You can only set one default language.
Allowed Language
Languages made available to customers in the Checkout and Self-Service Portal, selected via the "Allowed Languages" setting.
Preferred Language
The language selected by the customer during checkout or in the portal. This preference is saved and used for all communication (emails, invoices, etc.).
Default Language
Used when:

What language is shown to customers the first time they access checkout?
The checkout language is based on the browser language. If the browser is set to English, the checkout and communication will start in English—even if your default language is different.
What changes the customer’s preferred language?
If the customer switches languages in the Self-Service Portal, circuly automatically updates their preferred language and uses it for all future communications.
What language is used when I manually resend an email?
The email will be sent in the customer’s saved preferred language, regardless of whether it’s triggered manually or automatically.
Tip If you don’t see a specific language in the Default Language dropdown, make sure it’s first added under Allowed Languages.
circuly offers multiple language options for the Checkout and Self-Service Portal to ensure a seamless experience for customers across different regions. This article outlines the languages currently supported, how to enable language options, and how the system uses language preferences to communicate effectively with customers. It also explains the importance of setting up a default language and answers commonly asked questions about language selection and email communication.
The Checkout and Self-Service Portal are available in multiple languages and can be displayed in the following options:
Note: While translations of the checkout and self-service portal are available in the languages mentioned above, the email templates are only available in English and need to be translated for all other languages.
To better understand how language settings function in Circuly, it's important to define the three main types of language settings used within the platform: Allowed Language, Preferred Language, and Default Language. Each plays a key role in ensuring effective and seamless communication with customers.
The Allowed Language refers to the list of languages that you, as a business, make available for your customers to choose from on the Checkout page and in the Self-Service Portal. These languages are configurable in the circuly Hub, allowing you to select which languages should be accessible for customers based on their region or preferences. Only the languages selected from the Allowed Languages dropdown are available for customers to select.
The Preferred Language is the language chosen by the customer from the Allowed Languages list during their interaction with the Checkout page or Self-Service Portal. It can also be based on their browser language settings. Once selected, the customer’s Preferred Language is saved in the circuly system and used for all future communications, such as emails, invoices, and notifications.
The Default Language serves as the fallback language in case no Preferred Language is selected, or if there are no email templates available in the customer's selected language. It is the language Circuly will use for all communications (emails, invoices, etc.) when no language preference is provided or when the customer’s Preferred Language is unavailable. This ensures there are no gaps in communication and that customers always receive the necessary information, even if their selected language is not available.
Example: You have three language options available on your webshop; English, German, and Dutch. A prospect lands on your webshop and proceeds to the checkout page in Dutch. The preferred language of this customer is saved as Dutch in the circuly operations backend. If you have email templates set up in Dutch then the circuly operations backend will use Dutch as the language of communication with your customer. If you do not have email templates set up in Dutch then the circuly operations backend will use the default language and the email templates set up in the default language.
As you can see setting up a default language is important to avoid any communication gaps and operation hassles.
Follow the steps given below:
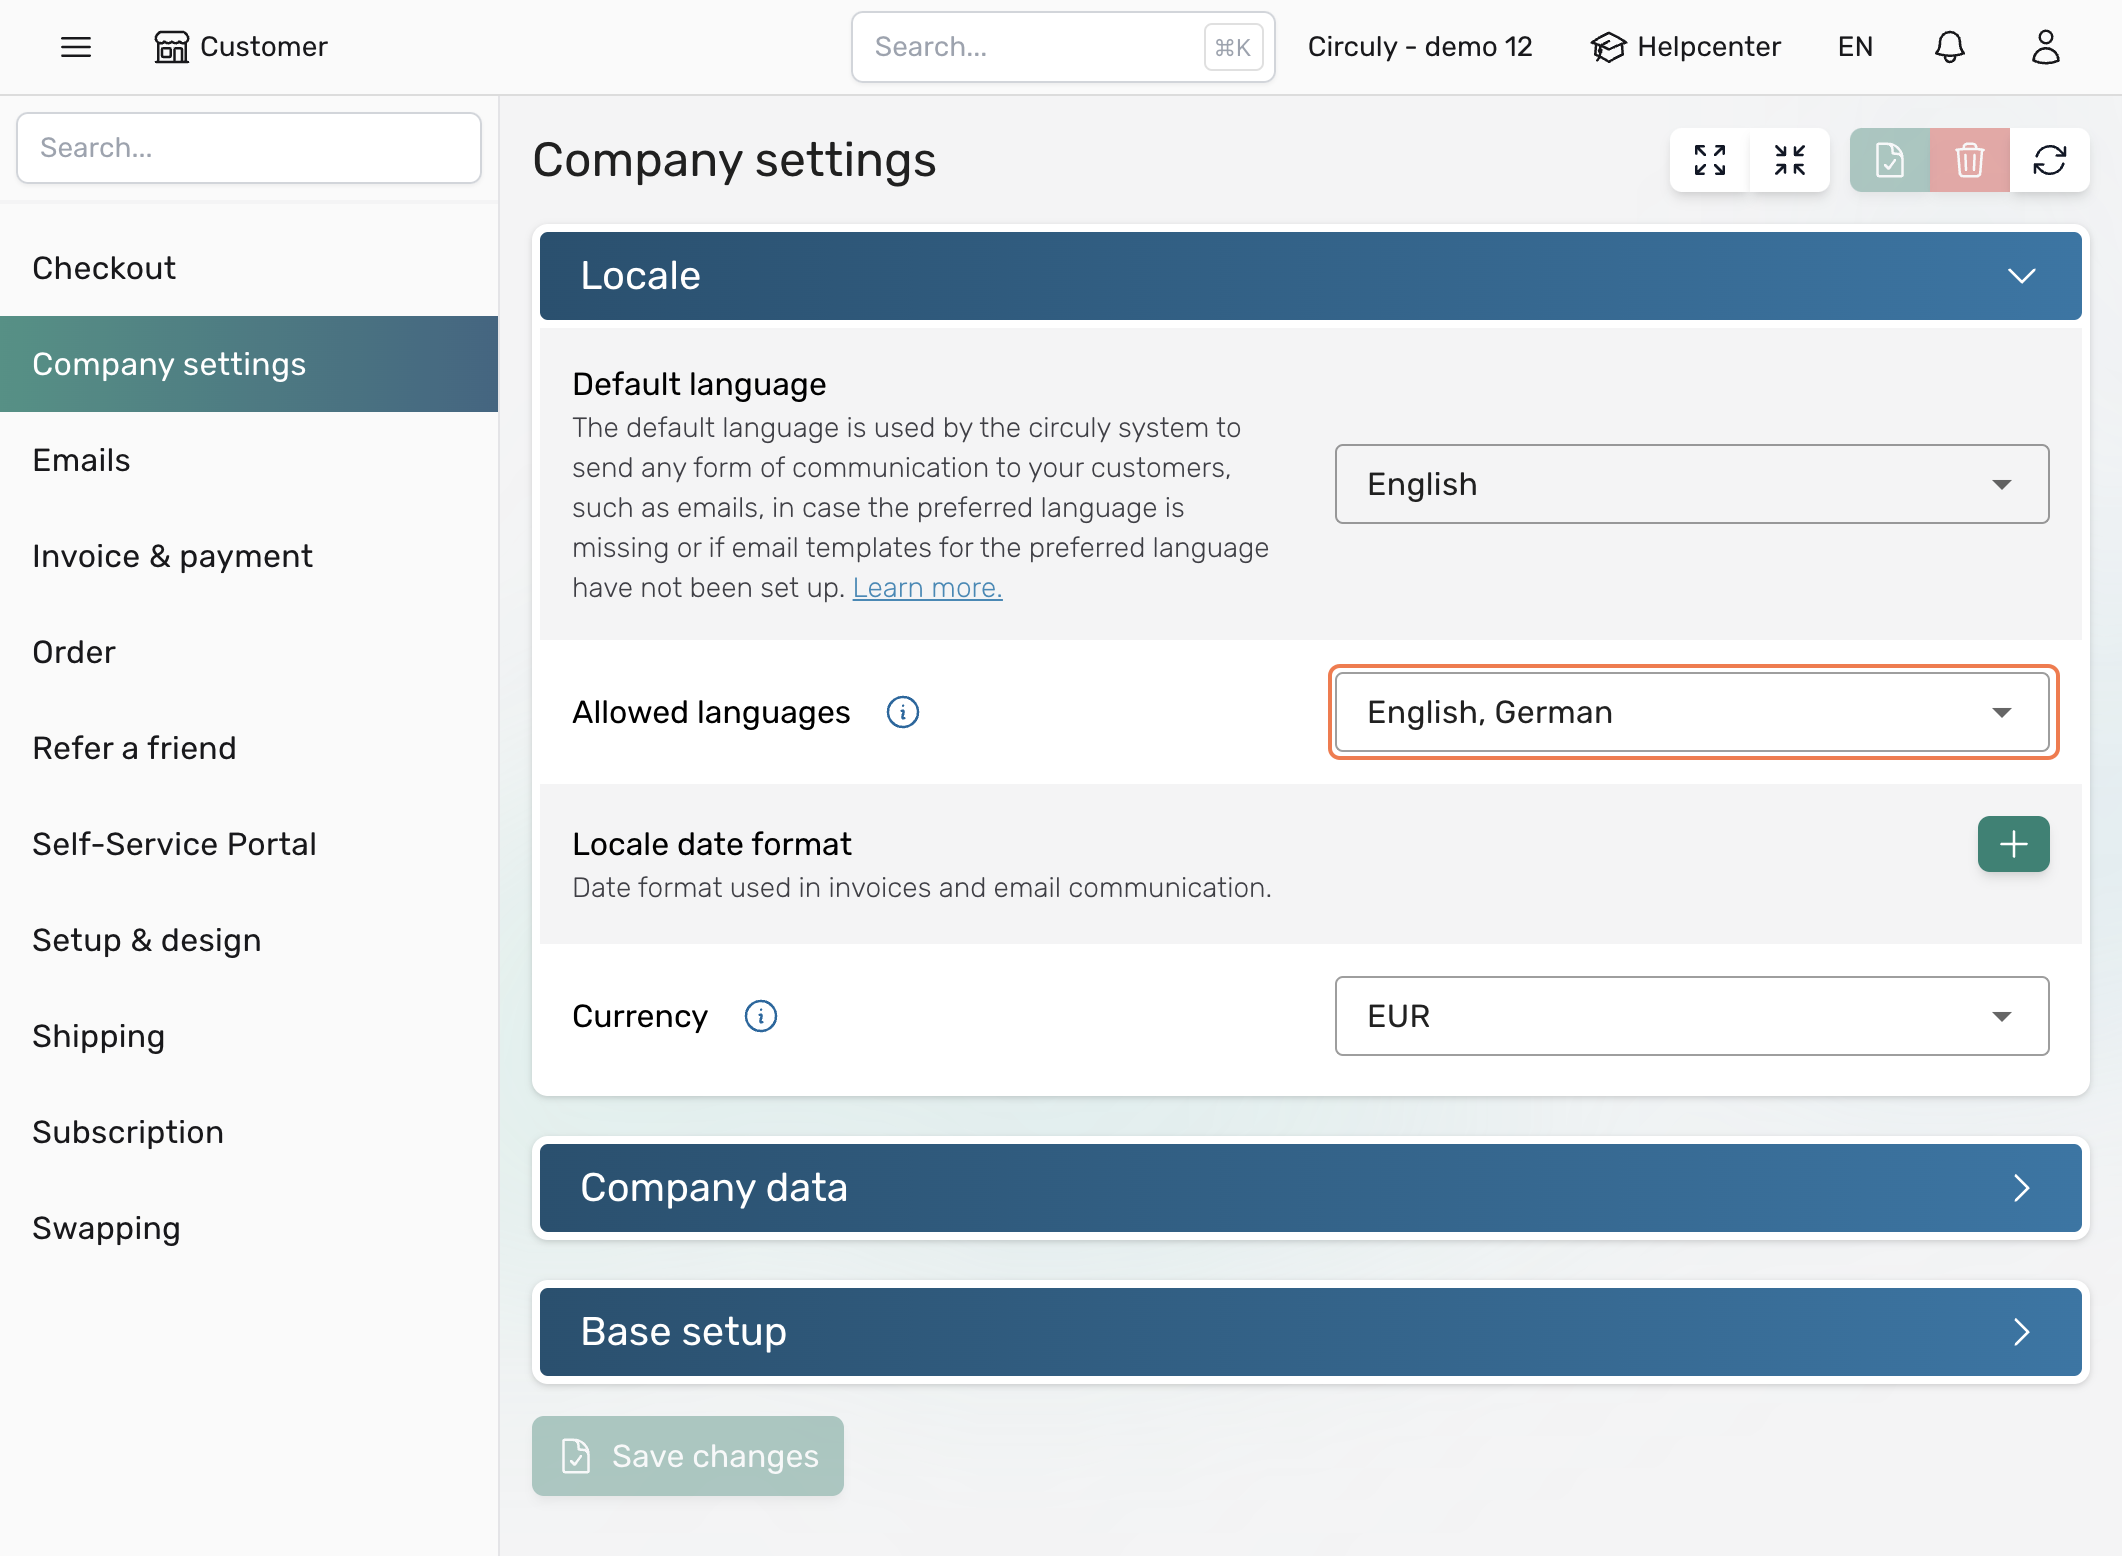
Once selected, these languages will be displayed in the language switcher, allowing your customers to switch between the available options.
Note: When you update the Allowed Languages settings by adding or removing languages, a corresponding language tab will appear or disappear in the Email Templates tab. Please note that emails for newly added languages are not automatically created; you will need to manually configure the email templates for these languages.
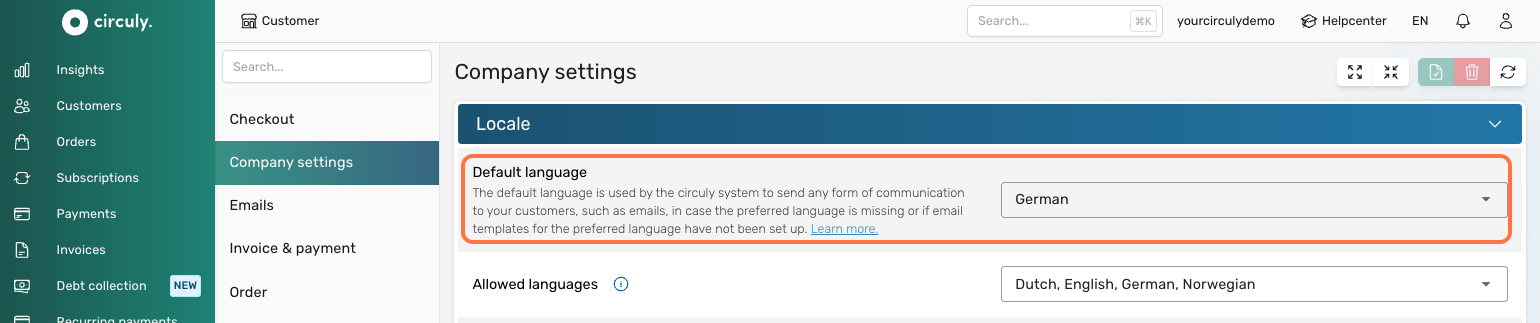
There is no separate setup guide for Preferred Language, as the Preferred Language is automatically based on the language selected by the customer during the Checkout process or in the Self-Service Portal. When a customer chooses a language from the available Allowed Languages, their selection is saved as their Preferred Language in the system, which is then used for all subsequent communications.
1. What language will be shown to the customer when they access the checkout for the first time t?
The language shown in the checkout is based on the browser preference. Hence if your browser preference is English but your default language is German, the checkout would still be shown in English and also the email sent in English.
2. What triggers the email to be sent in a different language?
If the customer changes the language after checkout in the Self-Service Portal, this will also change the selected email language.
3. In what language will be the email sent if I trigger the email manually again from the circuly Hub?
The email will be always sent out in the saved preferred language that the customer selected.
In a world where consumer choice is abundant, guiding your customers with curated selections can dramatically improve their decision-making experience. Research shows that 87% of customers appreciate curated product experiences that reduce decision fatigue and support confident choices.
circuly’s Exchange Groups feature enables you to deliver this experience. By allowing customers to choose a replacement product from a pre-defined, tailored group, you empower them to swap products without being overwhelmed by irrelevant options.
Exchange Groups is a feature in the circuly Hub that lets you:
Step 1: Create an exchange group collection
Step 2: Map variants to the collection
Step 3: (Optional) Go over the swap settings in the Settings tab
Step 4: Enable the "Check System Stock" setting
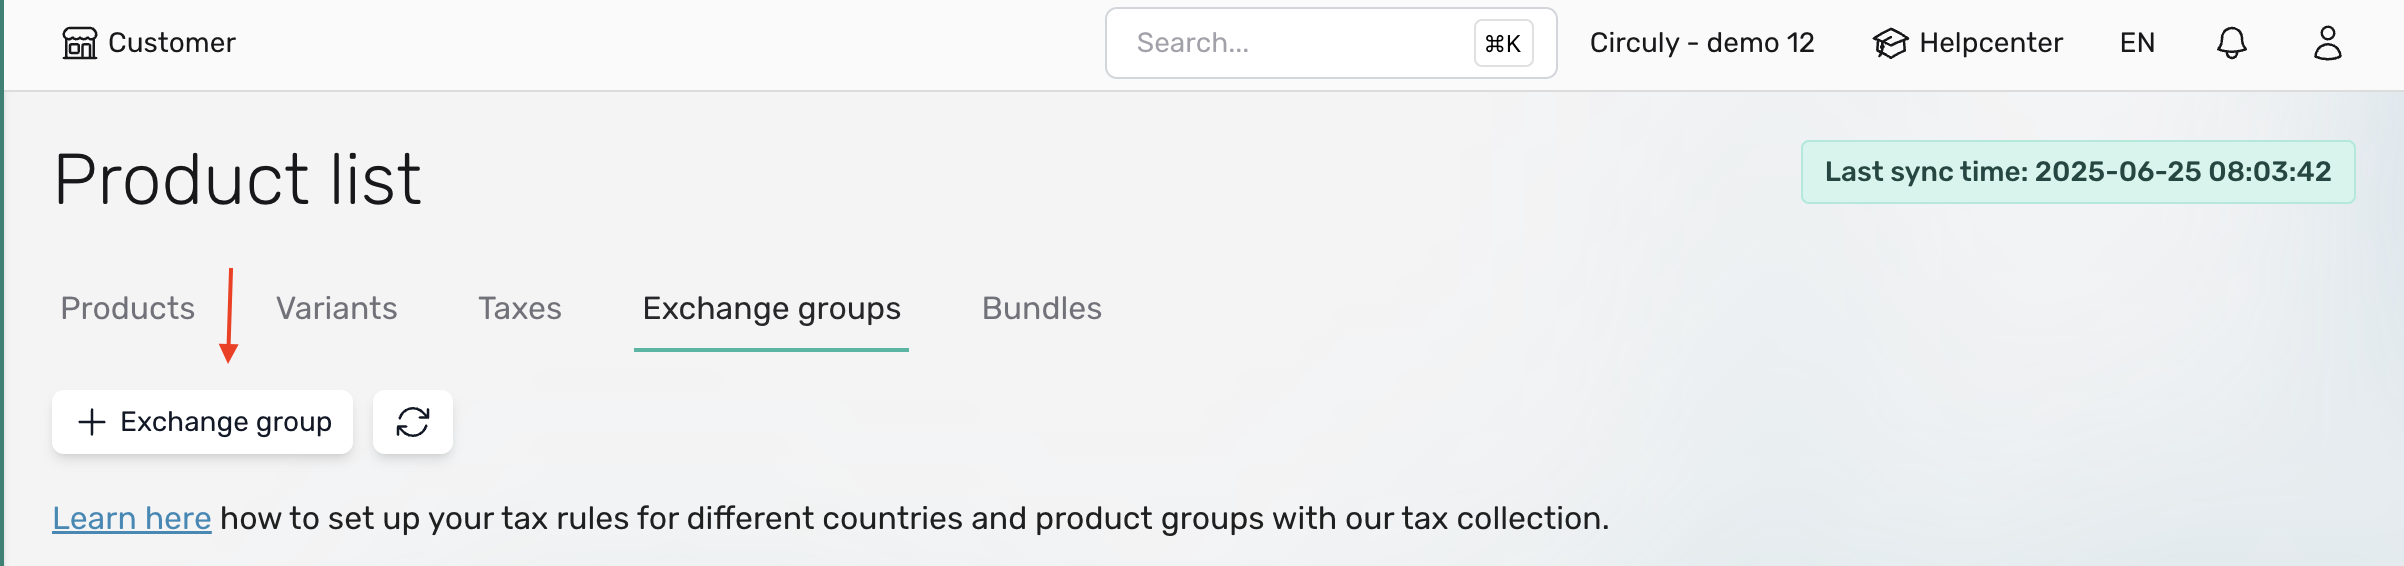
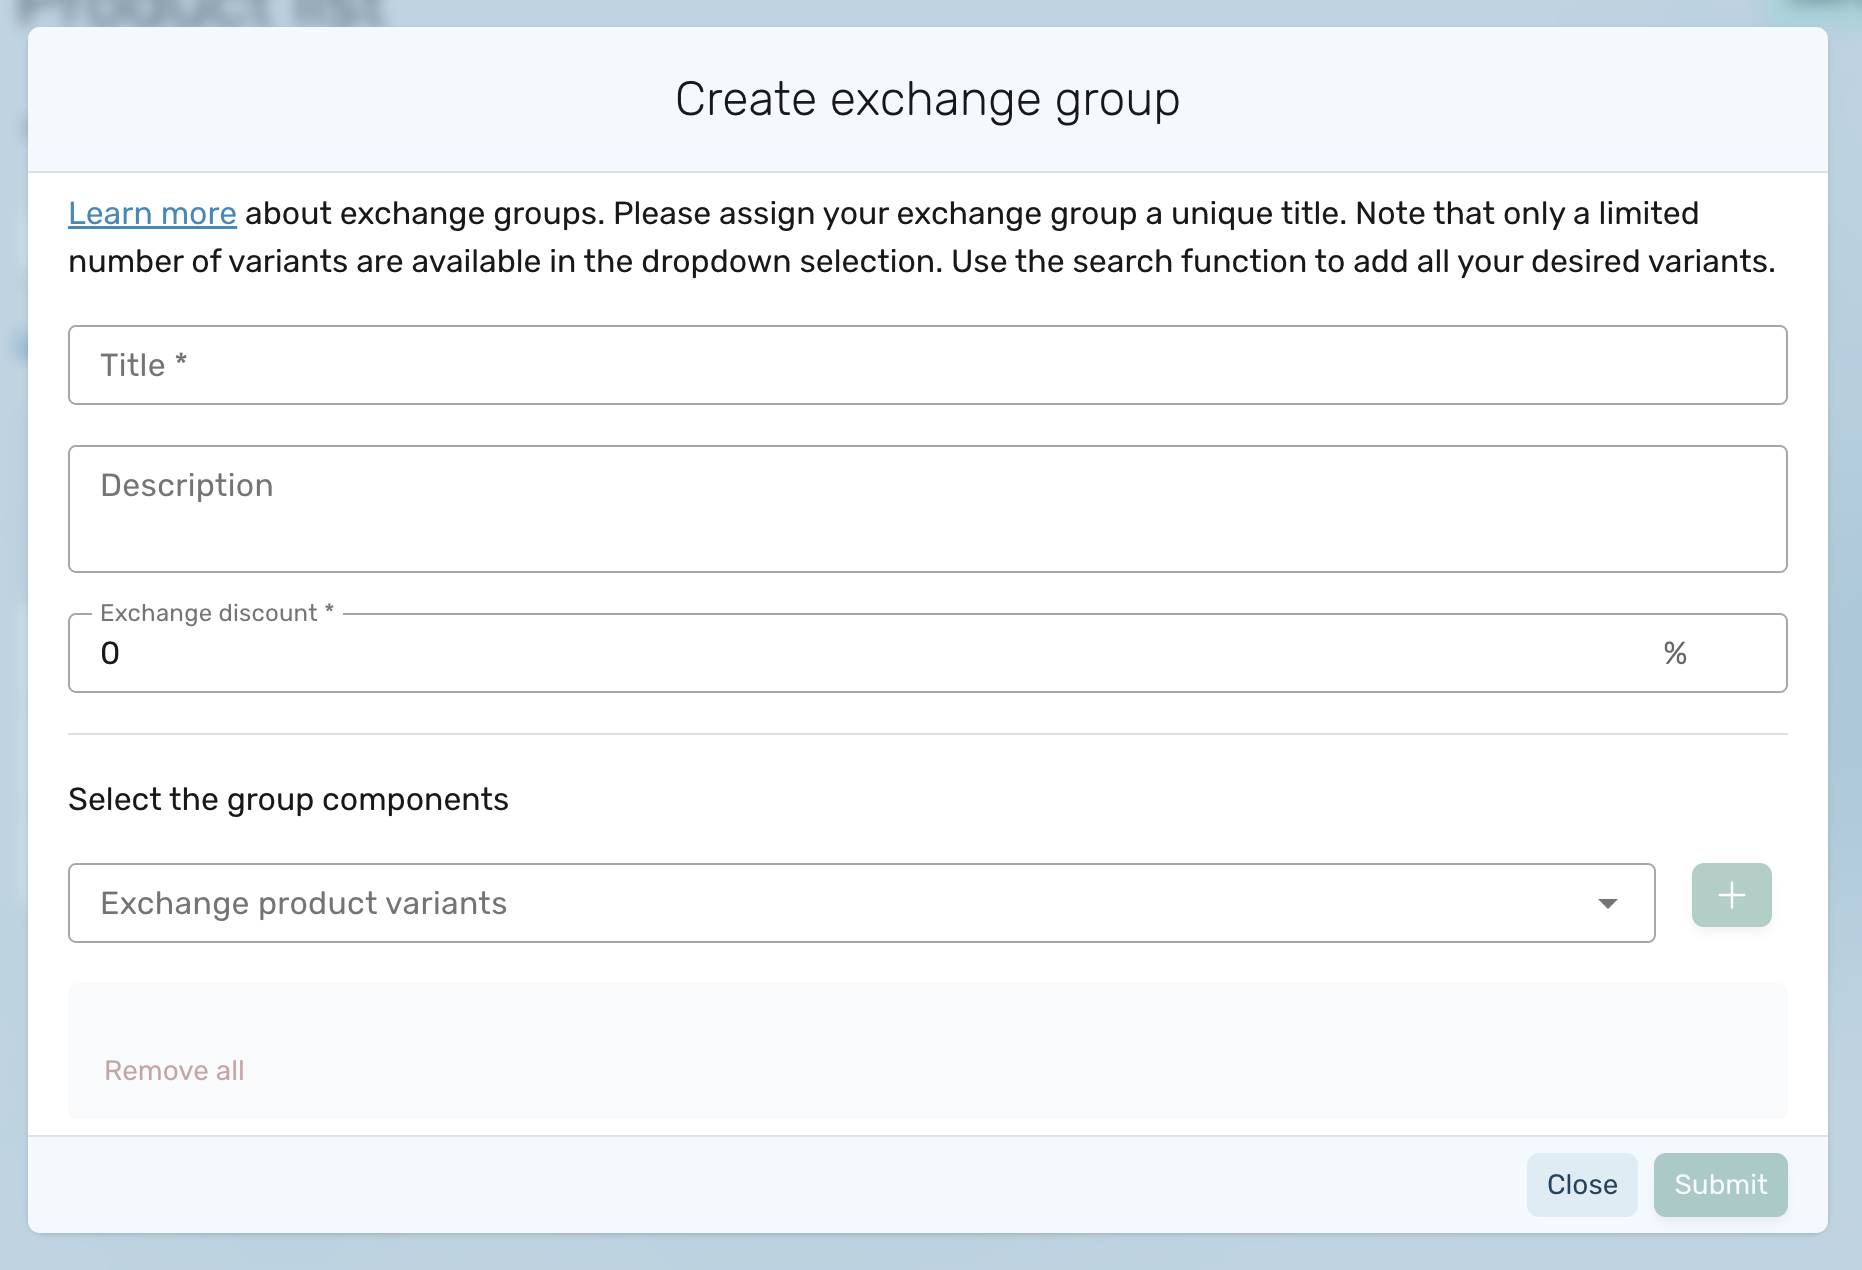
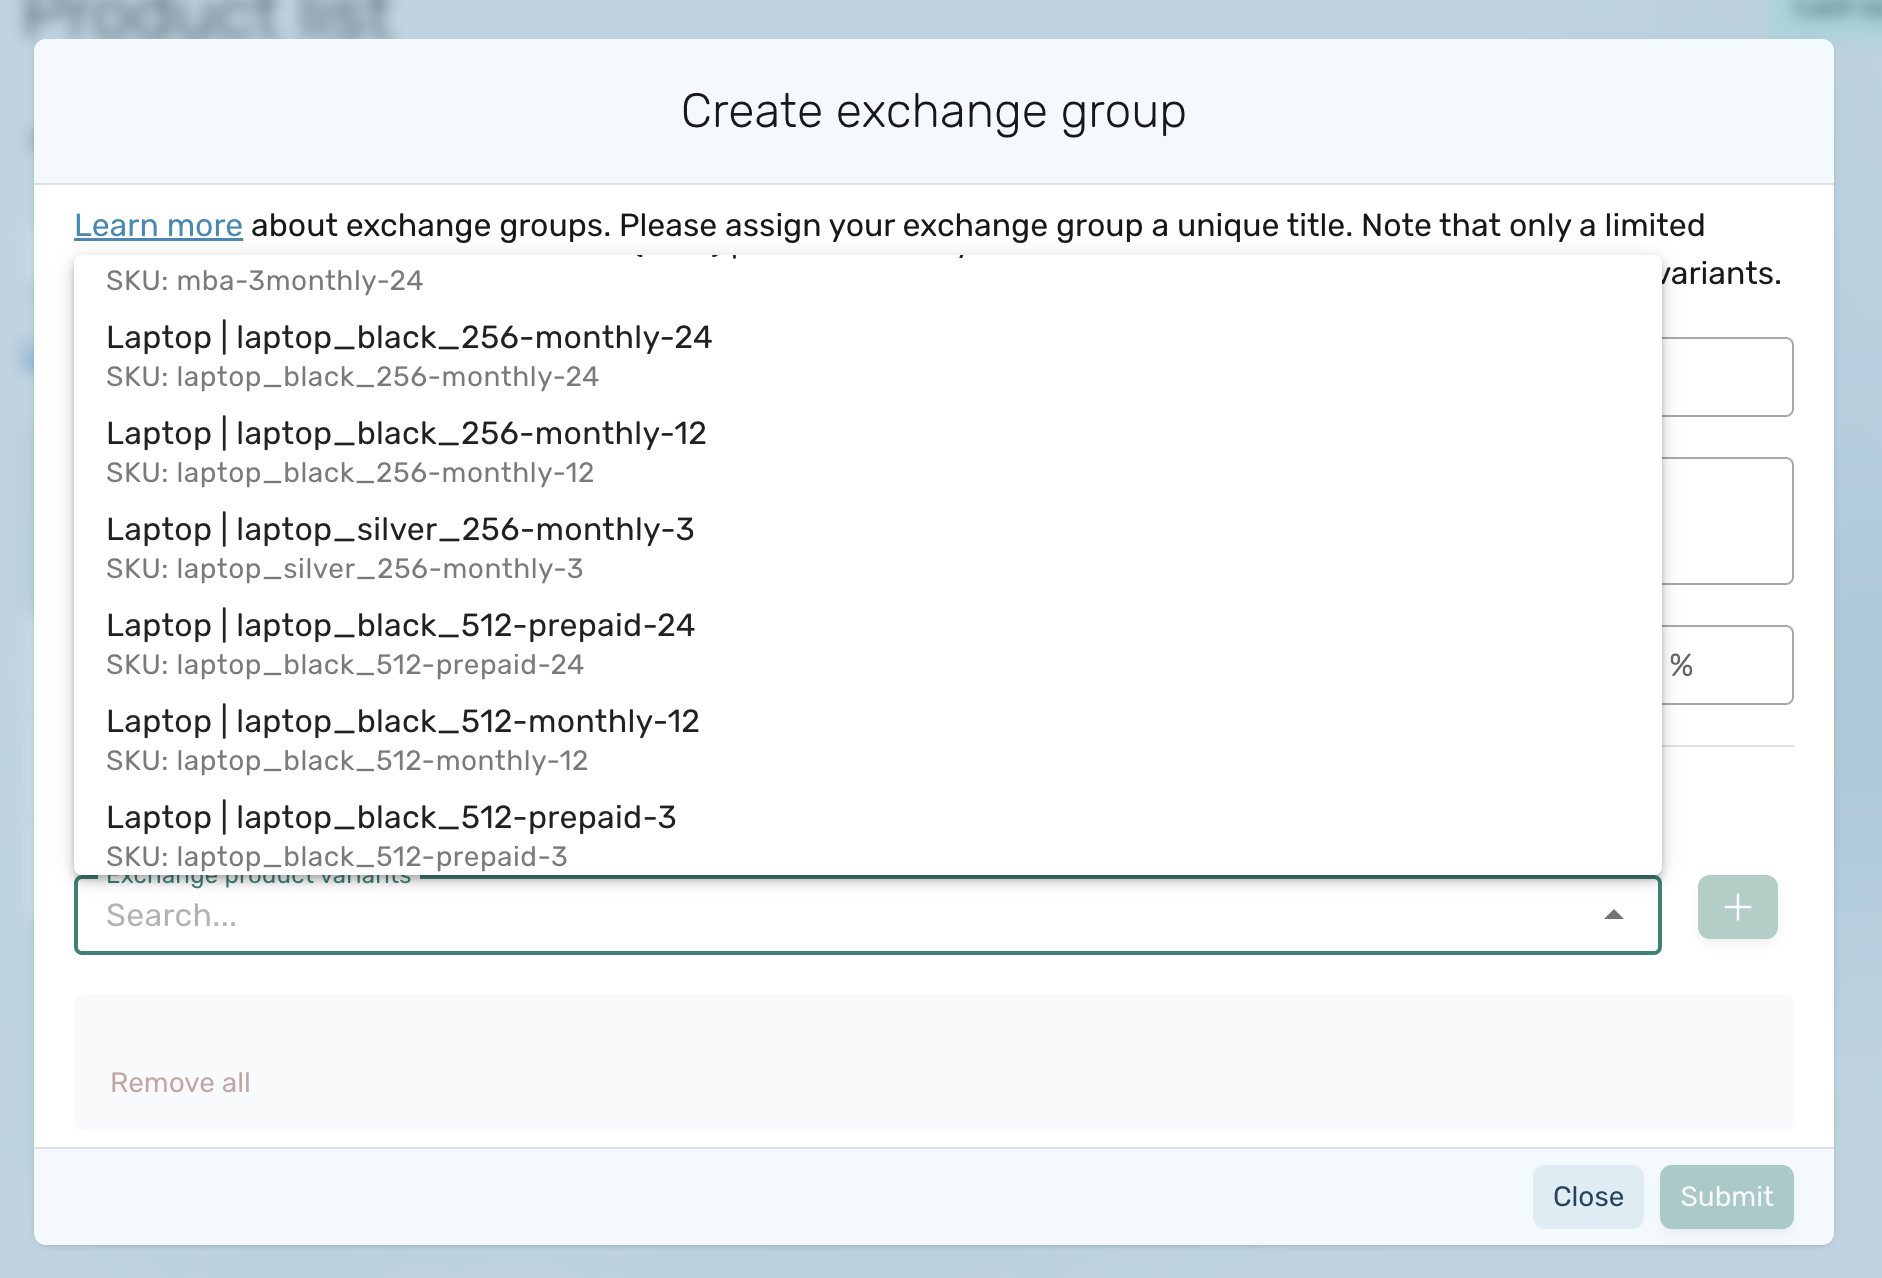
Note: An exchange group can include up to 1000 product variants.
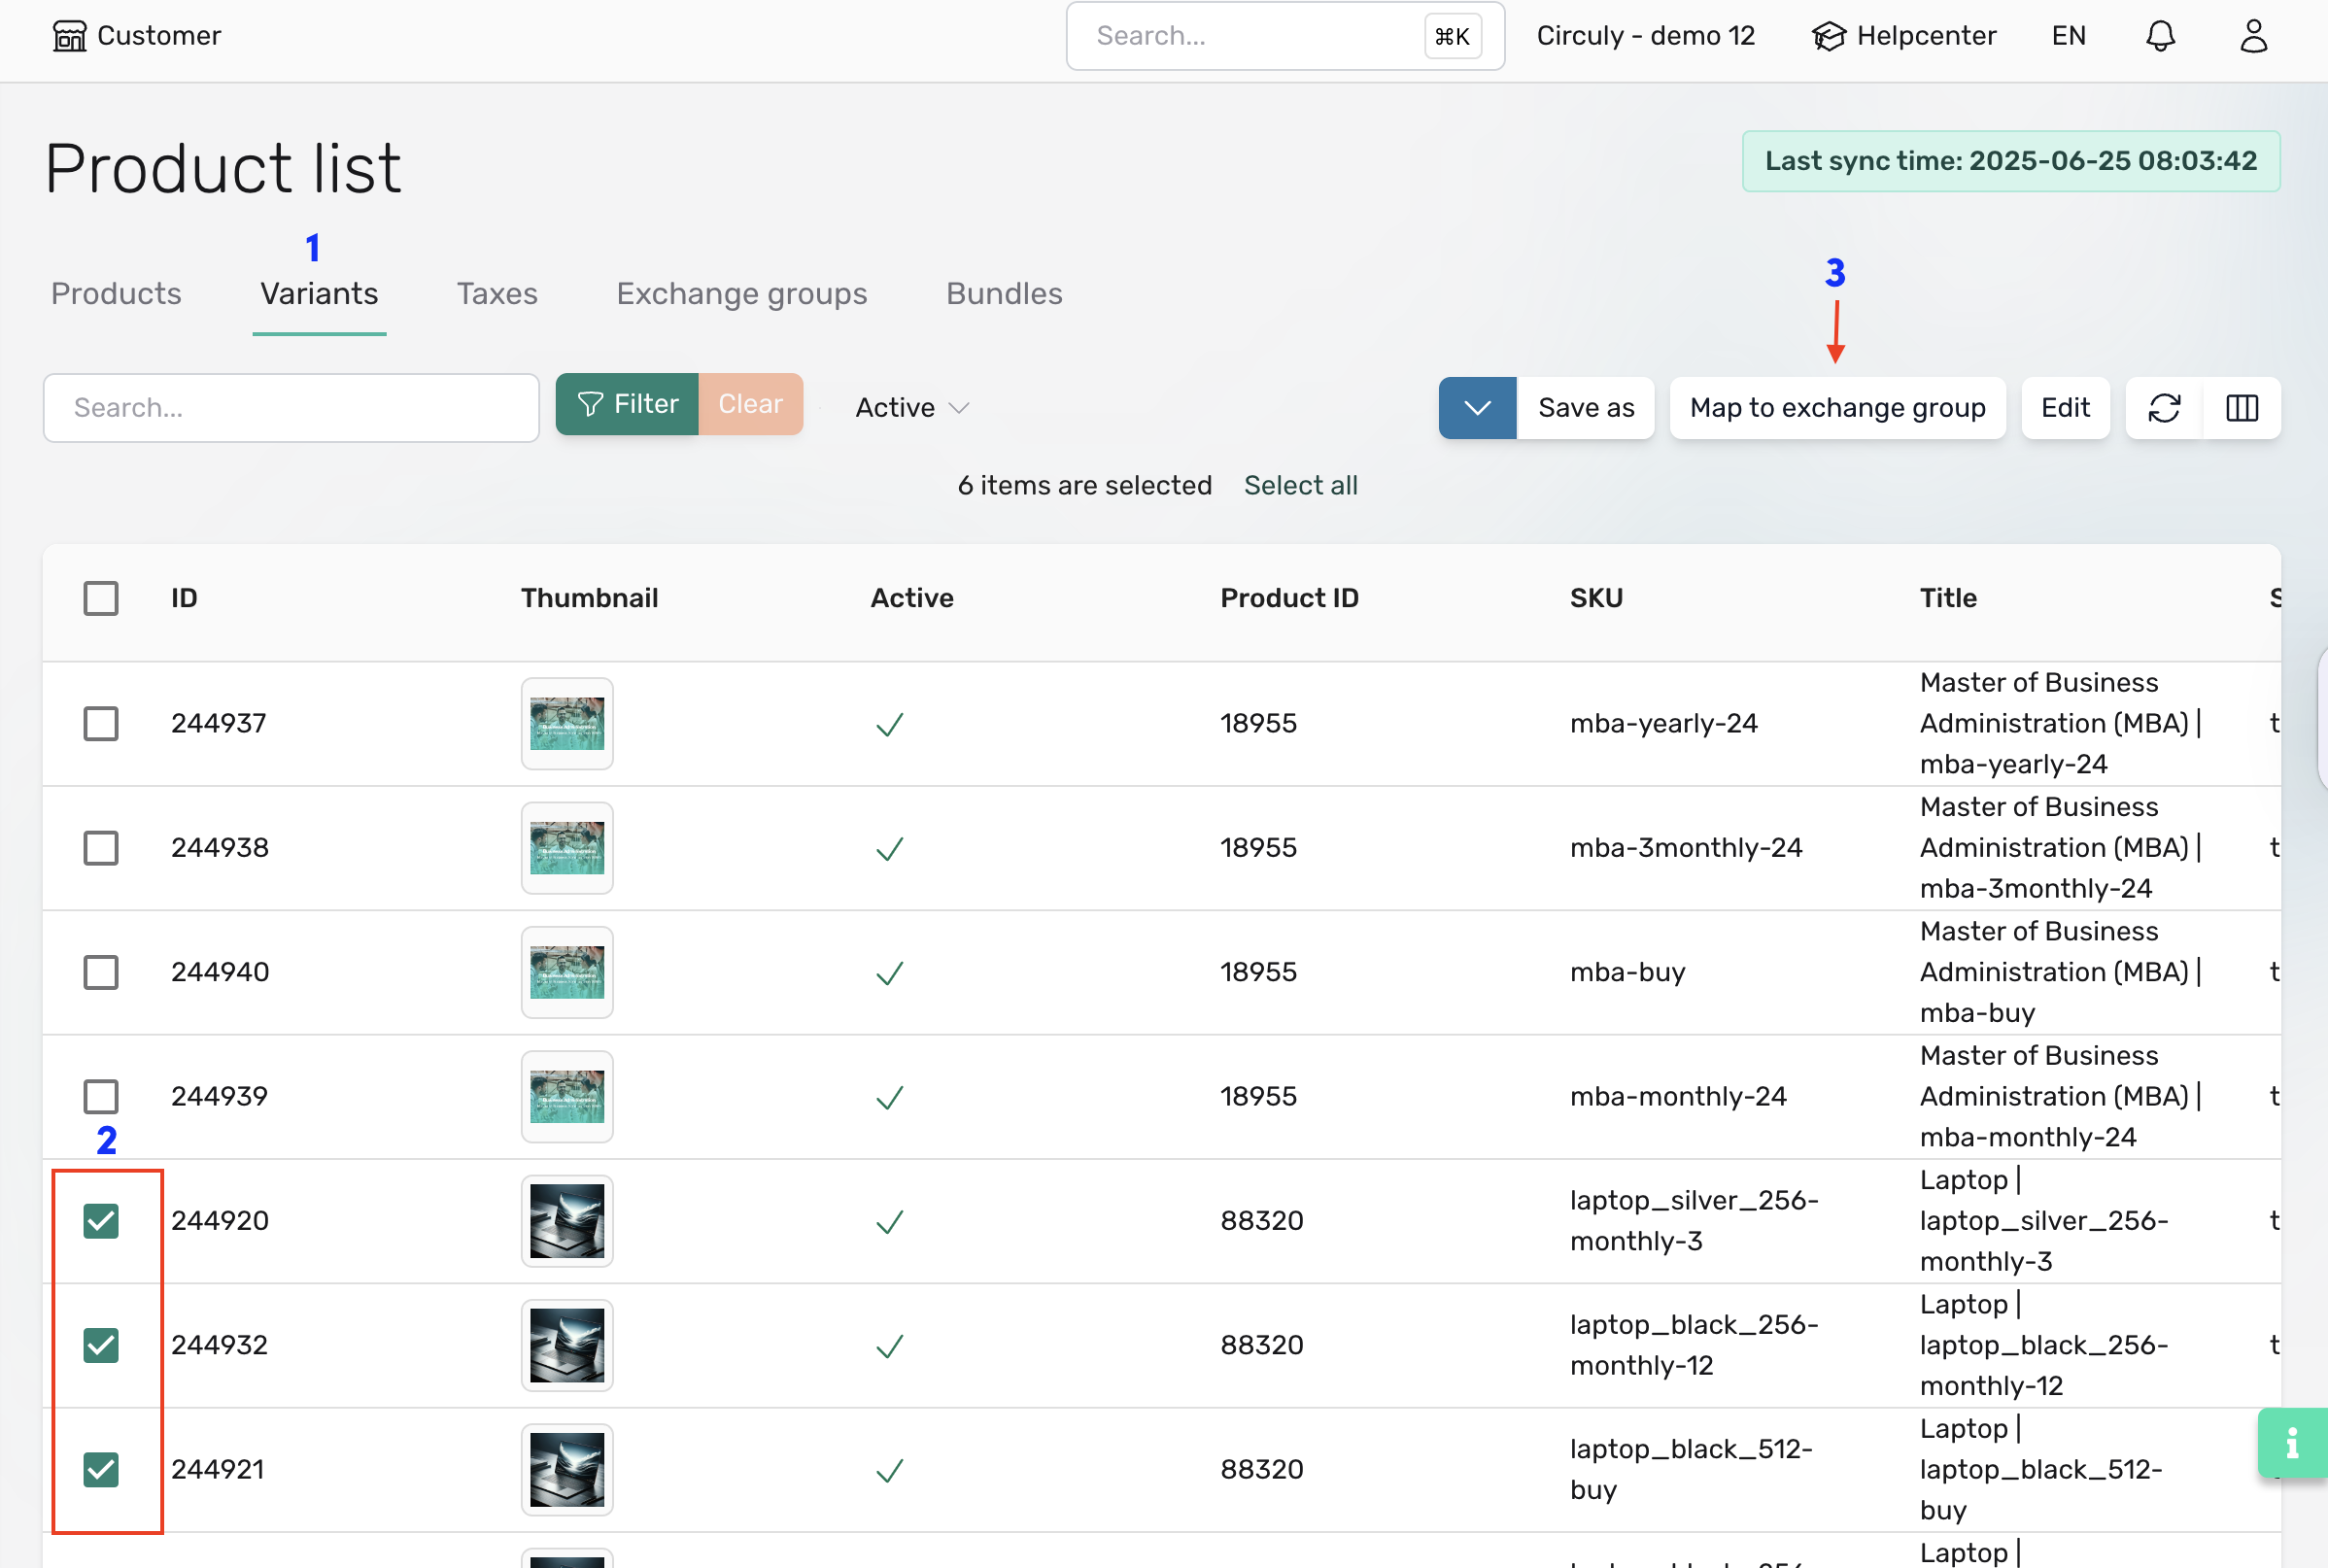
To verify, scroll horizontally in the Variants tab to view the Exchange Group column.
Exchange Groups use the swap logic and associated settings. Ensure your swap settings are configured under Settings > Swaps.
To avoid offering out-of-stock products, activate the stock validation feature:
Note: Update your collections regularly if you have stock-sensitive items like refurbished products.
Here’s how the exchange process looks for your customers:
Stock validation is triggered at this point. If the selected product is out of stock, an error is displayed.
The subscription status changes from active to pending replacement.
Note: To display your custom terms and conditions, share the desired text with circuly to include in your white-label Self-Service Portal.
Learn more about manually creating subscriptions or using the bulk update feature to update orders.
Also applicable to coffee, baby diapers, wine, and other consumables.
In a subscription-based business model, customers don’t just purchase products—they use them for a defined period, often with the option to return, upgrade, or replace them. That’s where product swapping comes in.
Swapping allows customers to exchange one product for another during their subscription term. This can be due to breakage, loss, dissatisfaction, or a change in needs—like upgrading to a newer model or switching to a more suitable product. It's a critical feature in making a subscription model work smoothly, especially for physical products that require flexibility and long-term use.
To support this, circuly provides a swap feature within the circuly Hub and the Self-Service Portal. With the right configuration, businesses can streamline how swaps are handled—ensuring a smooth experience for both customers and operations teams while preventing misuse and managing logistics efficiently.
circuly supports product swaps through two main channels:
Both methods integrate into your subscription flow and trigger a series of backend processes depending on how the swap settings are configured.
Here’s a breakdown of the key swap-related settings in the circuly Hub:
To configure the swap settings, navigate to the Settings tab in your circuly Hub. Under the settings menu click on Swapping and configure the settings you need.
Learn more about exchanging and swapping products.
Each tab in circuly Hub (Orders, Subscriptions, Customers, Invoices) has an index page that displays a list — such as the Order List, Subscription List, or Customer List. You can use filters to segment these lists and display exactly the information you want. The filter functionality in the circuly Hub helps you quickly narrow down data so you can focus on what matters most.
Note: if you don’t actively click this button, the filter won’t be applied.
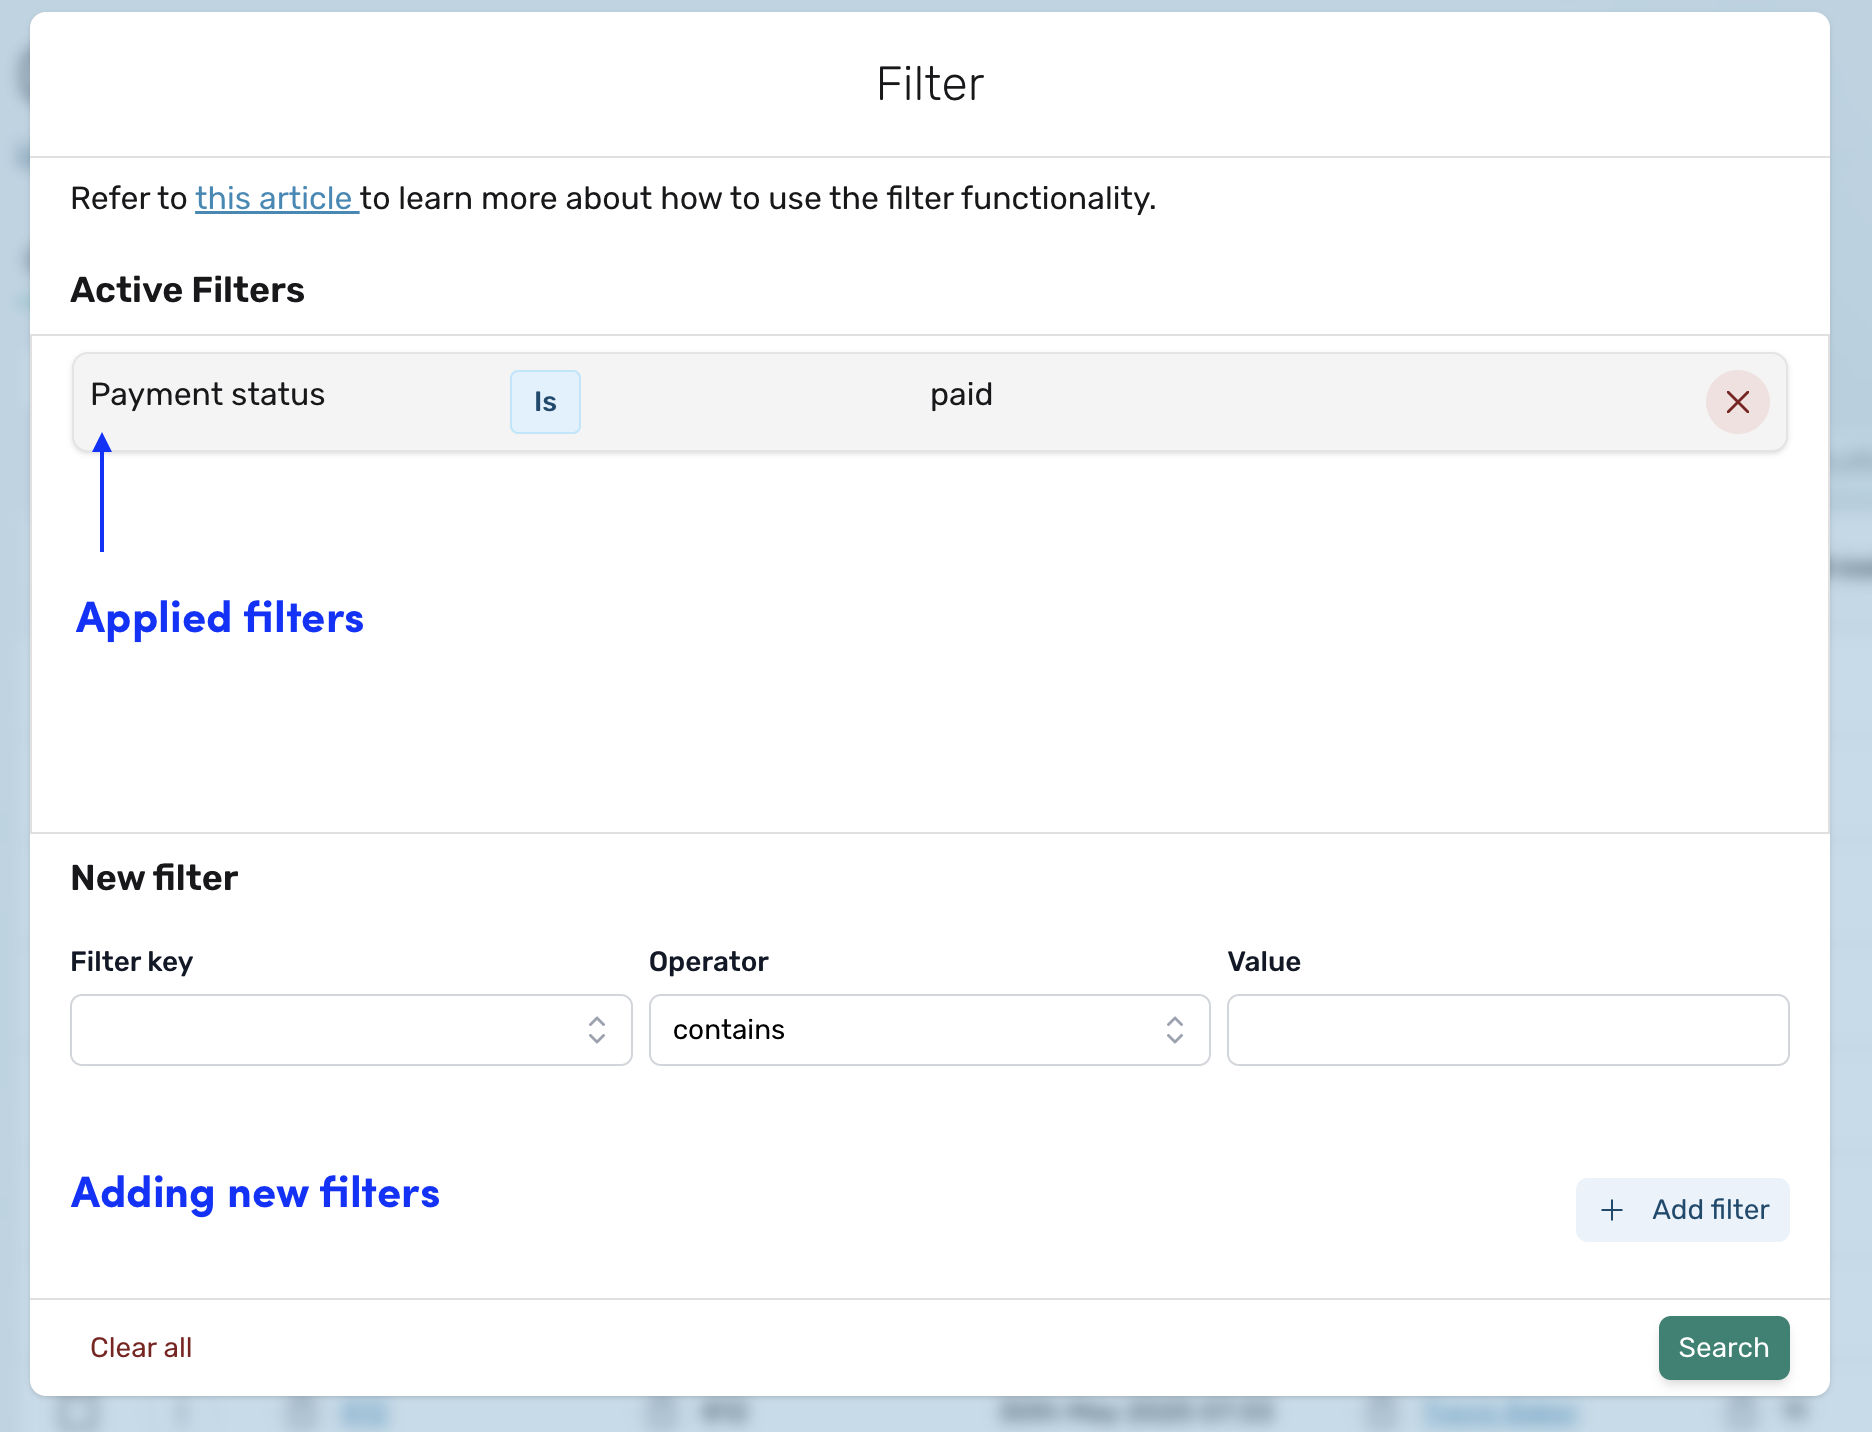

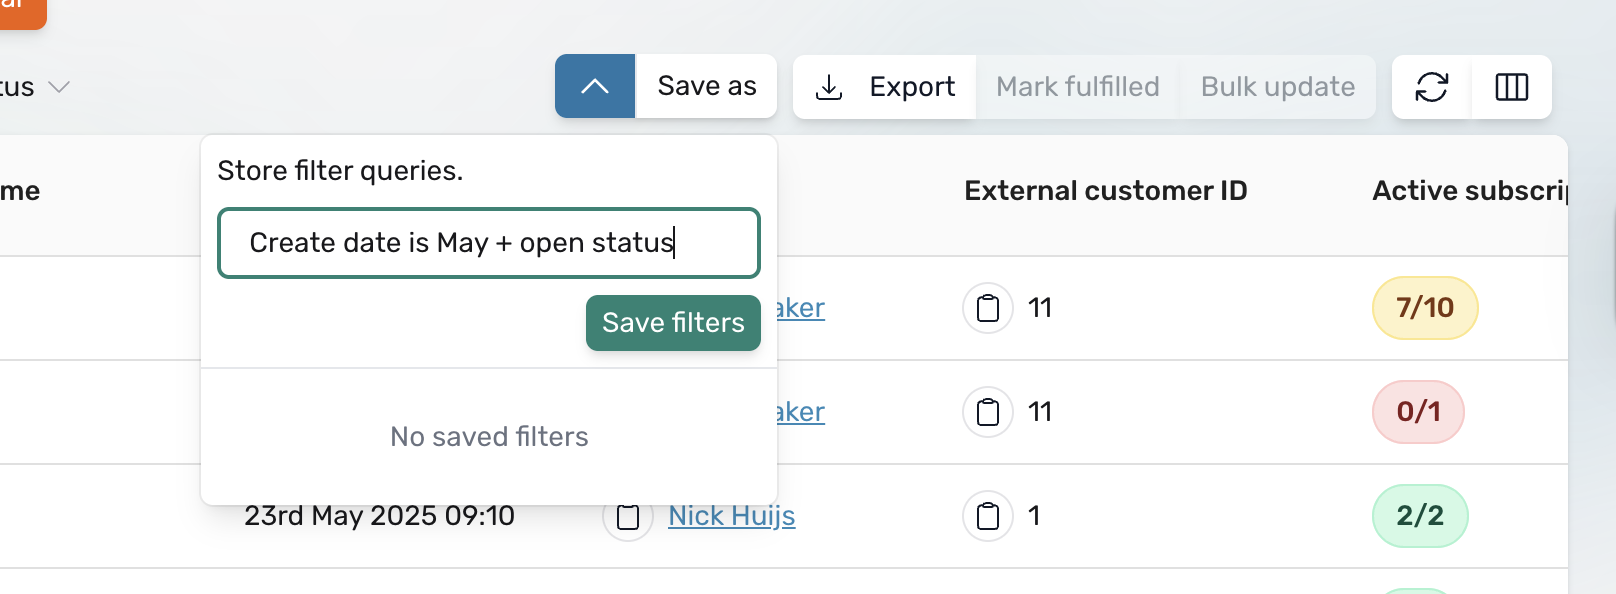
If you’ve saved more than one filter view, you’ll see a list of saved filters under “Saved Filters.”
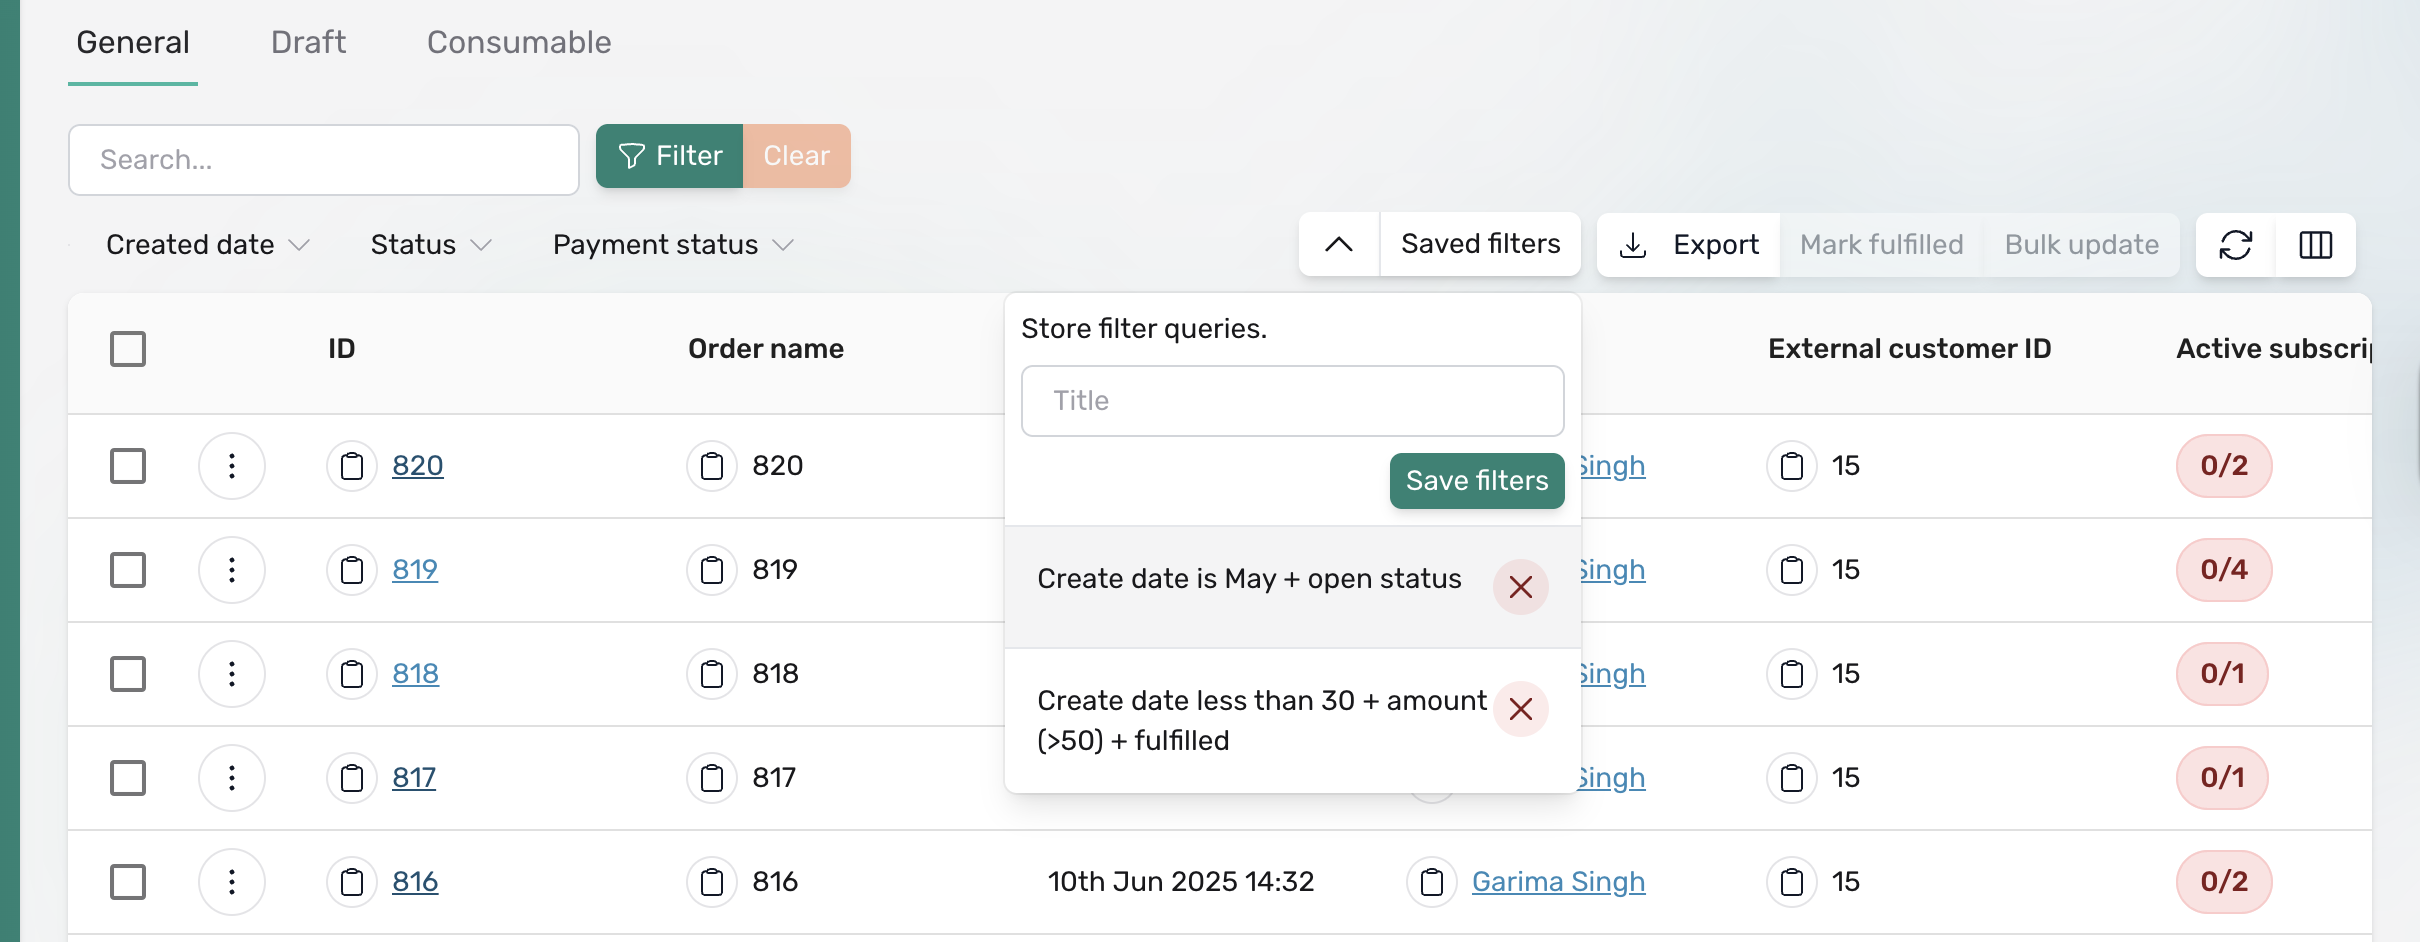
To switch between different filtered perspectives:
Important: Clicking on the cancel (×) icon next to a saved filter will permanently delete that saved filter.
You can always tell which saved filter is currently applied by checking the highlighted or selected filter under the Saved Filters section. This clearly shows which conditions are filtering your displayed list.
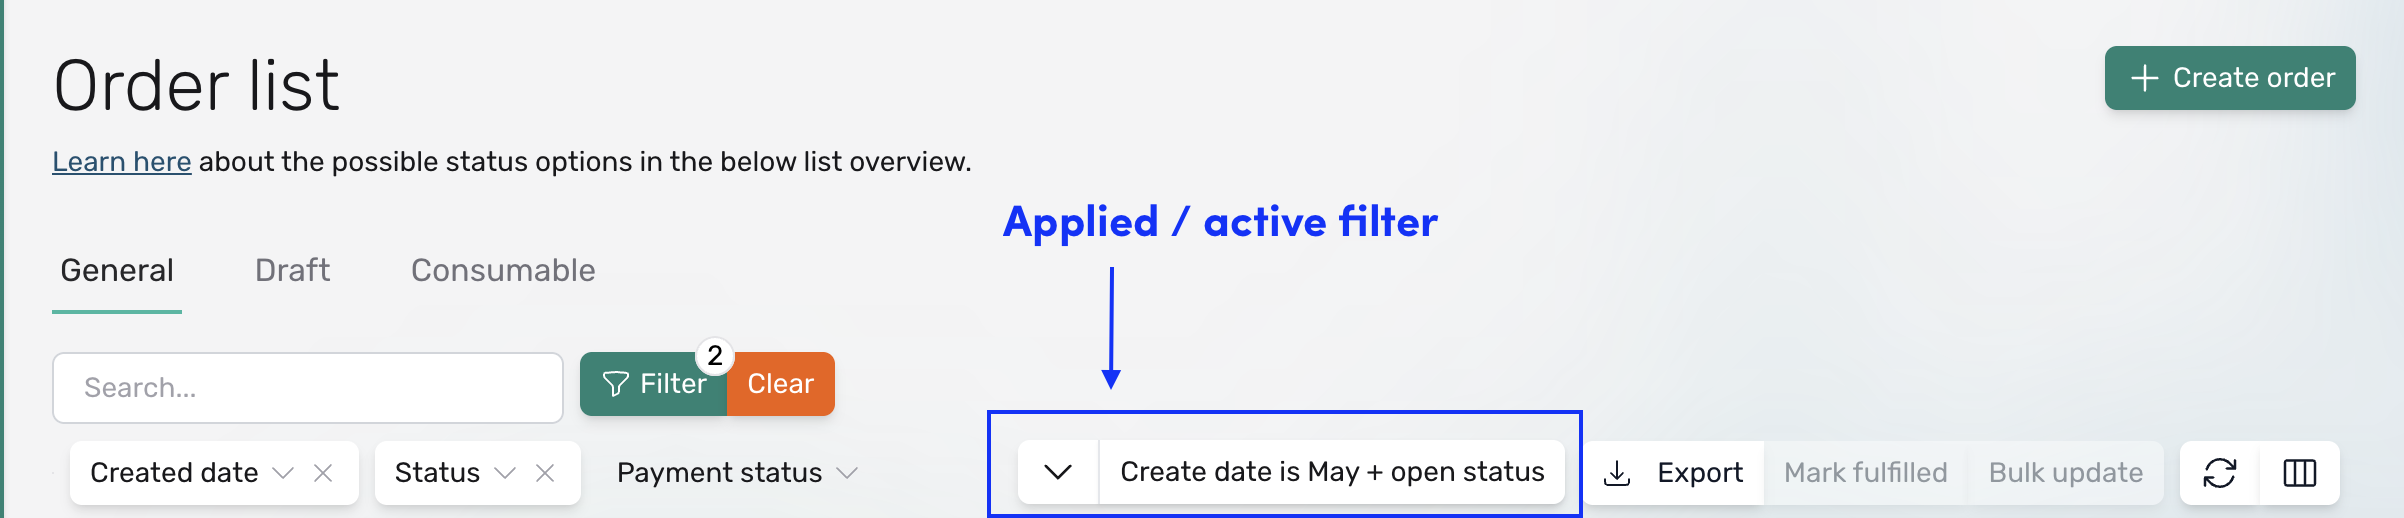
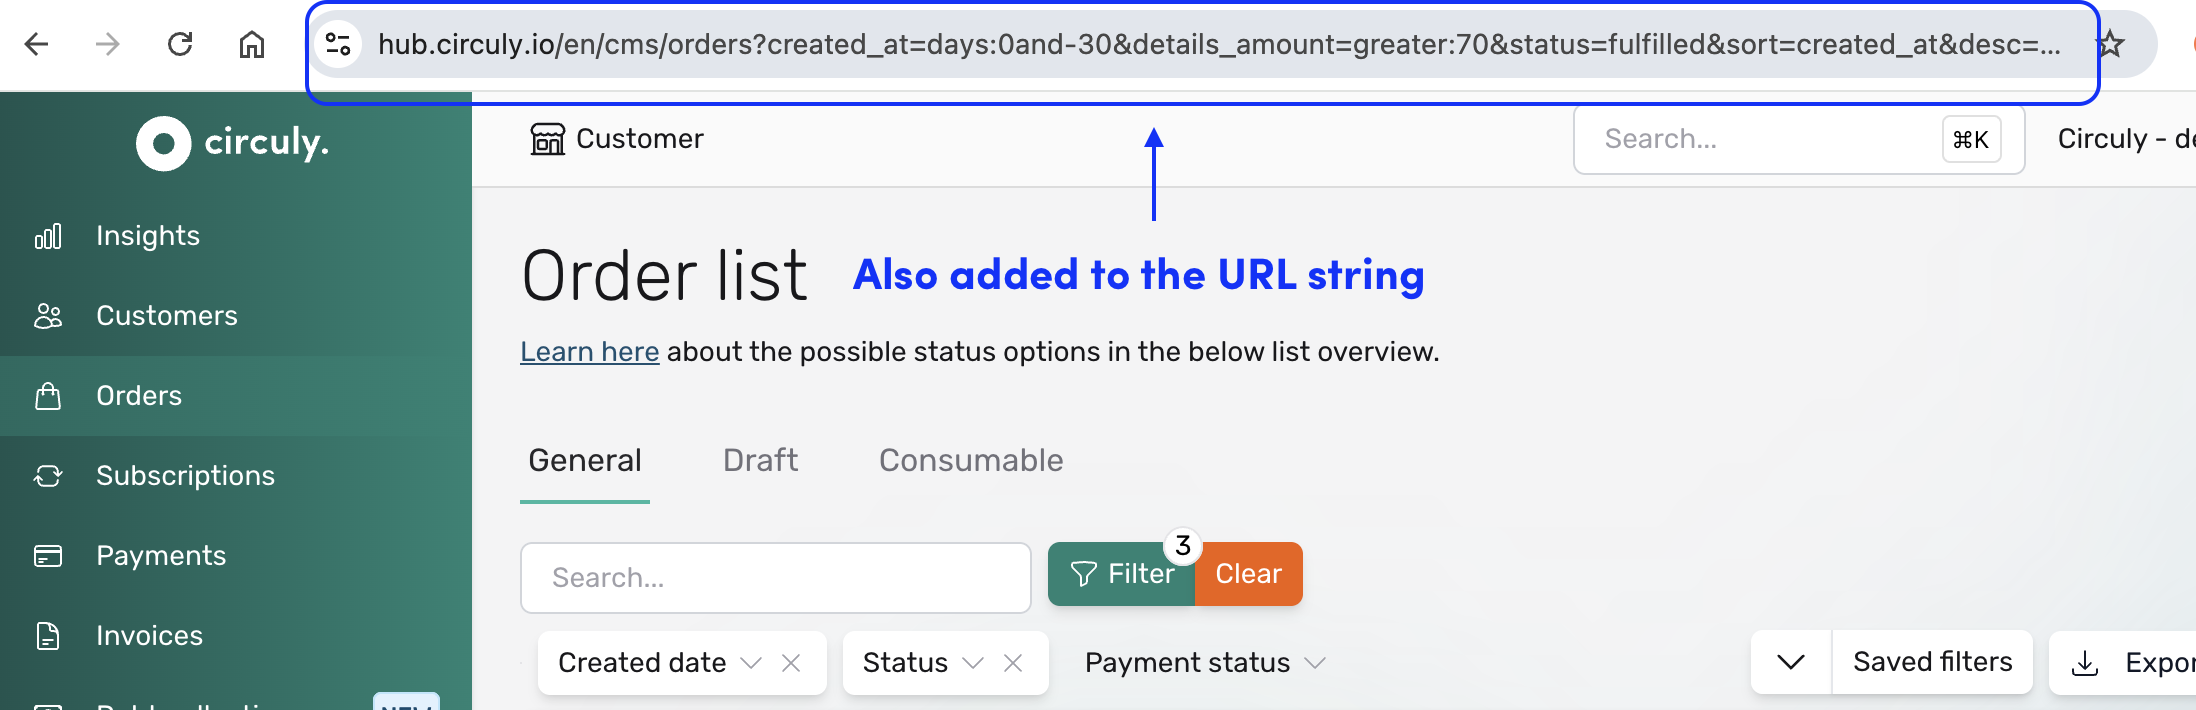
You’re all set to start using filters in the circuly Hub. Try out different combinations and save your favourite views to make your work even easier.
If you have any questions or run into something unexpected, our team is always here to help.
If you have access to the Admins section in the circuly Hub, you can add users to your company and customise their permissions.
With advanced user management in circuly, you can:
This gives you full flexibility to tailor permissions to each person’s role — without giving more access than needed.
Admin - when you give a user the role on an “Admin”, the user is able to see the Admins section in the left navigation bar and access everything that comes under it, such as Settings, Repair Questions etc.
User - when you give a user the role of a “User”, the user is only able to access the non-admin tabs in the circuly Hub.
Once invited, the user appears in the list. You can adjust their permissions at any time by clicking on their name and checking/unchecking access to specific tabs.
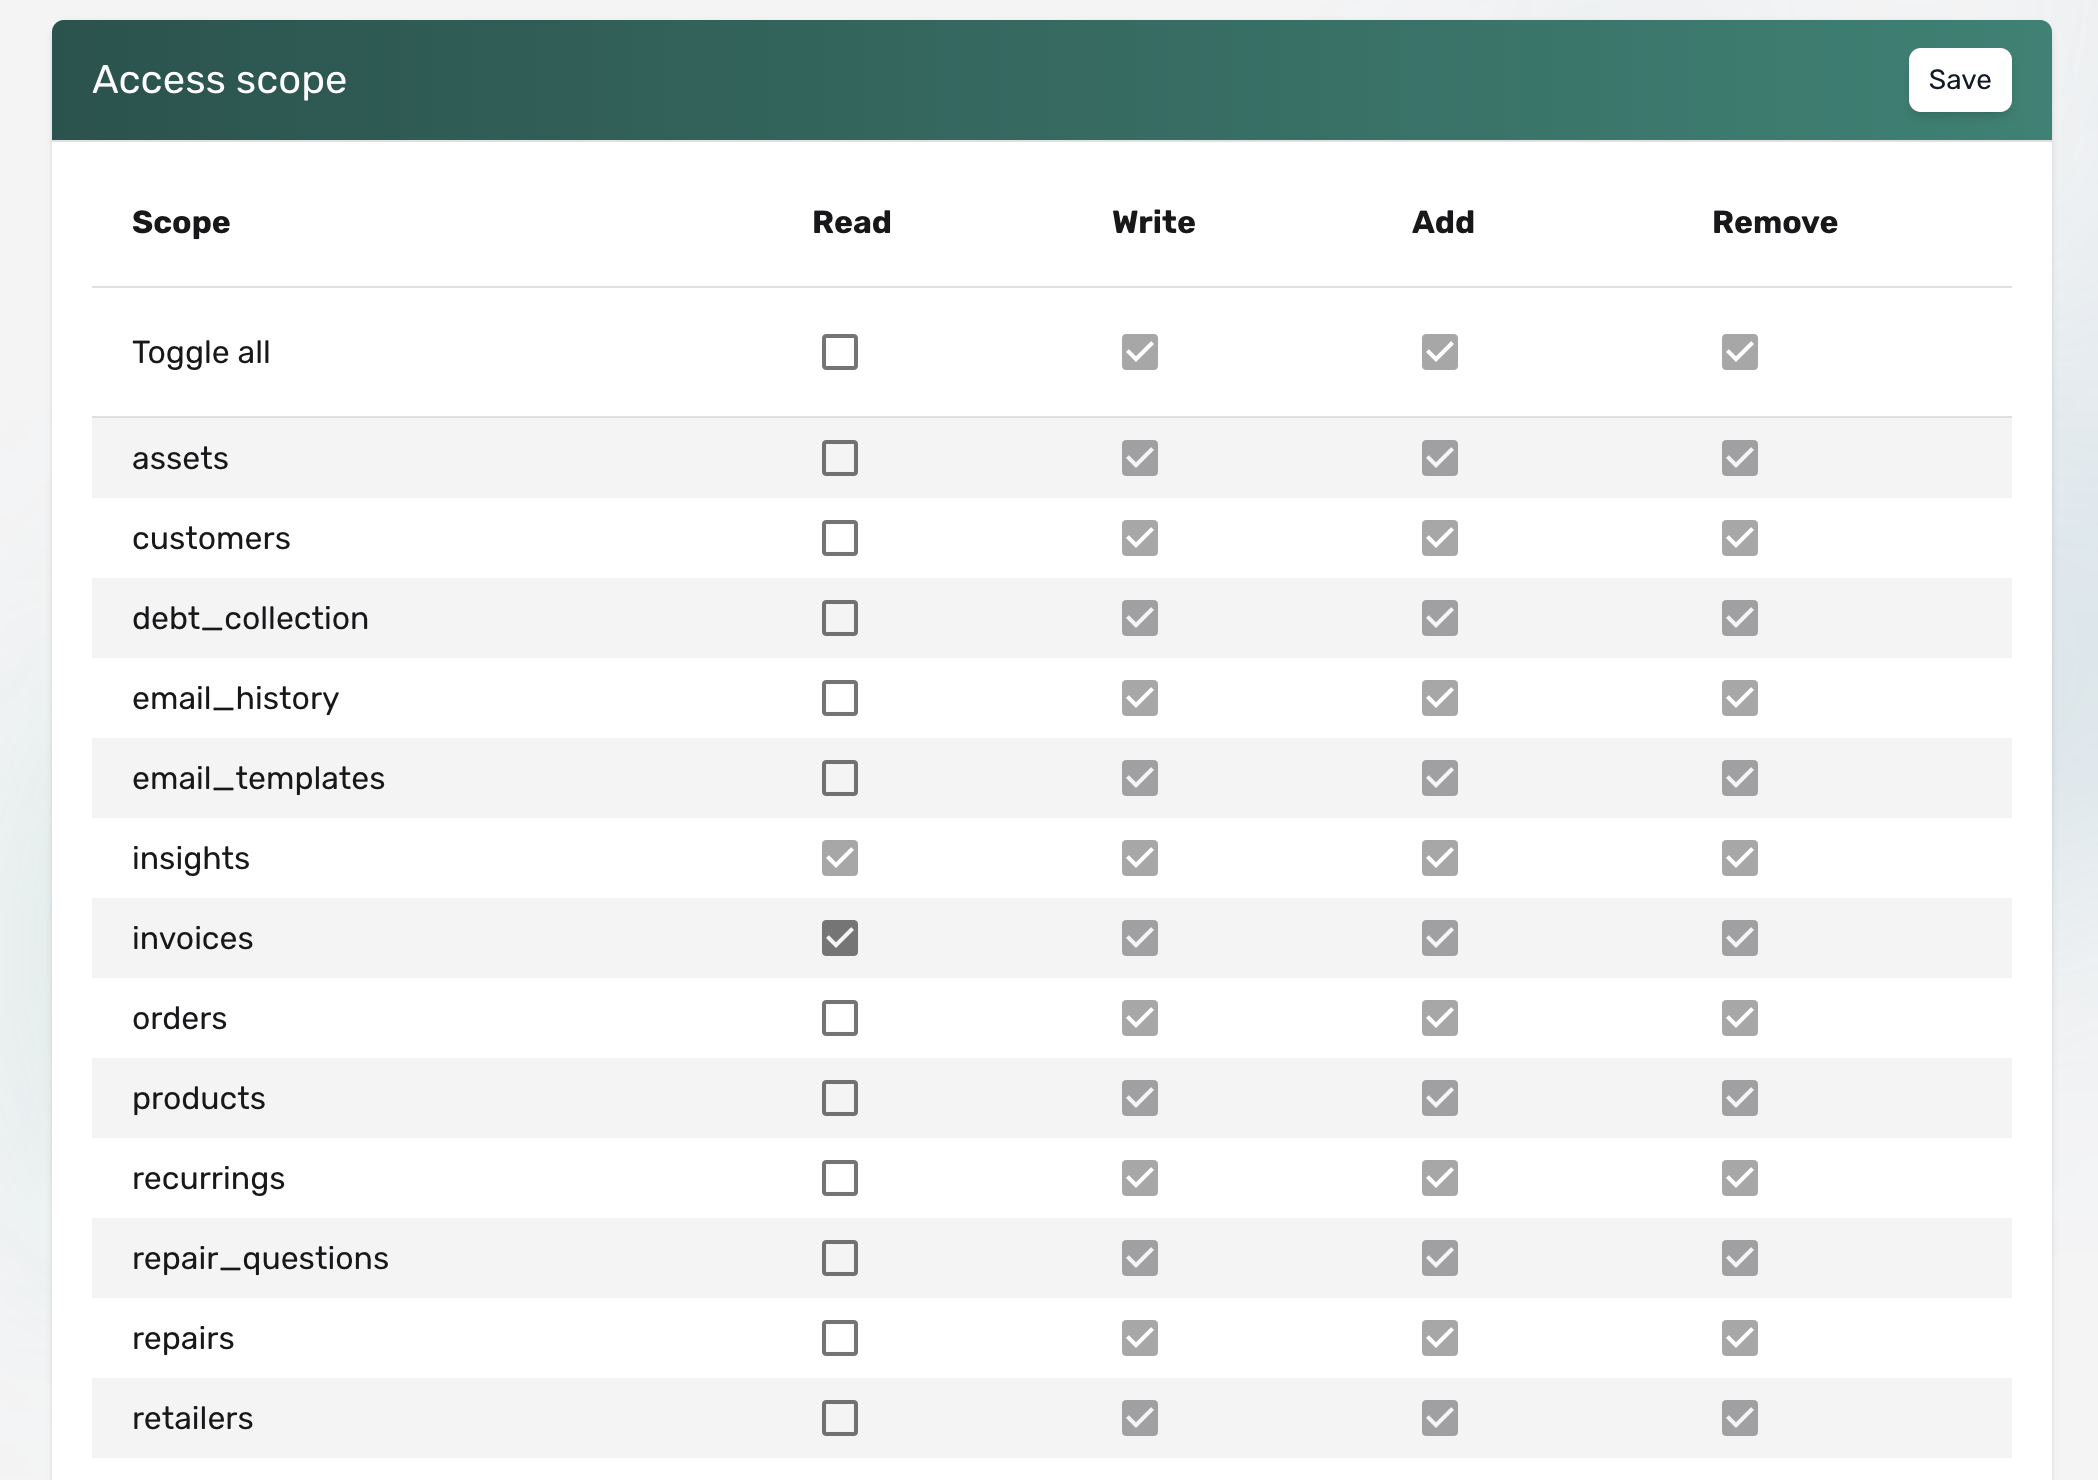
Login options:
The most common reason is an expired invitation link.
If the user doesn’t create a profile within 24 hours, the link becomes invalid.
➡️ In this case, please create a ticket in the Support tab in the circuly Hub to resend the invitation.
To avoid login issues, ensure users complete their sign-up promptly.
When customers request to cancel a subscription, circuly provides two paths: manual cancellation by your support team or self-service cancellation by the customer via the Customer Portal. To reduce manual handling and improve automation, circuly offers a setting called Auto cancel subscription. This setting controls what happens after a customer initiates a cancellation—especially in relation to the subscription status and return workflow.
Understanding how this setting behaves in different scenarios is essential to ensure you meet both operational needs and customer expectations.
The Auto cancel subscription setting determines whether the circuly system should automatically update a subscription’s status after a cancellation request is made via the Self-Service Portal.
When enabled, the system can automatically:
When disabled, these actions may require manual input depending on the scenario.
To enable the Auto Cancel Subscription setting:
Once activated, the circuly system will take automated actions during cancellation requests as per the scenario.
Below is an explanation of how the Auto Cancel Subscription setting behaves in various scenarios, both within and outside the early cancellation period.
By understanding and configuring the Auto cancel subscription setting properly, you can better control your cancellation workflows while staying compliant with legal requirements—especially regarding early cancellation rights.
Early cancellation refers to a customer's legal right to cancel their subscription shortly after it starts—commonly within 14 days in countries like Germany. circuly supports this process through the Customer Self-Service Portal and allows you to automate nearly every step while remaining fully compliant.
This article explains how early cancellations work, what your customer sees, and how you can set up the logic and communication behind the scenes in the circuly Hub.
When early cancellation is enabled in circuly, customers who cancel within the defined period are presented with two return options:
Each choice leads to a different flow within circuly, affecting subscription status, customer communication, and return handling.
Early cancellation requests can be made directly in the Customer Self-Service Portal, provided that the "Cancel now" button is visible.
How early cancellation works for customers
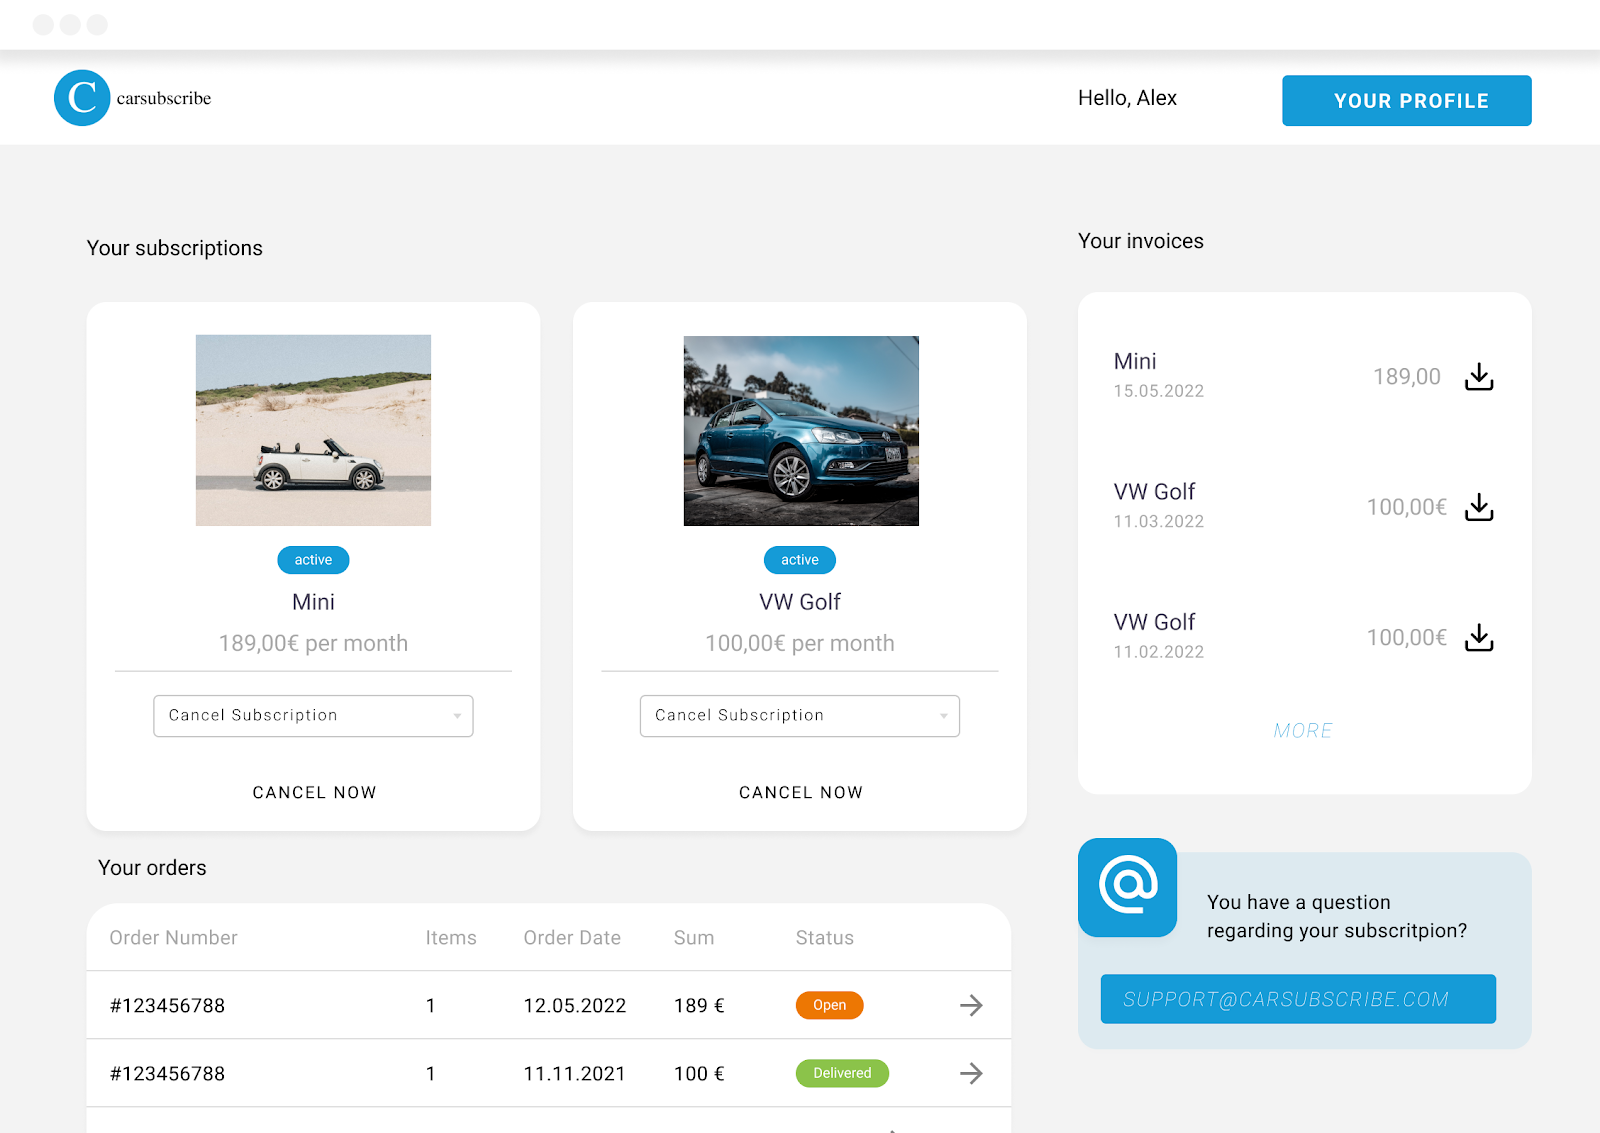
%20(1).png)

1. Define the Early Cancellation Period
This defines the time window (e.g., 14 days) during which early cancellation options are available.
How to set it:
Settings > Subscriptions > Cancel subscription > Early cancellation periodcirculy will use this value to determine whether the customer is still within the allowed period when they initiate a cancellation.
2. Set Up Cancellation Reasons
Customers must select a cancellation type and reason when cancelling.
How to configure:
Settings > Subscriptions > Cancellation reasons+ icon to add reasons under:These reasons help you understand customer churn and can be used for internal reporting or churn prevention efforts.
3. Show the “Cancel Now” Button in the Self-Service Portal
If the “Cancel now” option is hidden, customers won’t be able to start the cancellation process themselves.
How to enable:
Settings > Customer login > Features > Hide cancel nowIn Germany, a cancellation button is legally required.
4. Add a Support Email Address (Optional)
This email is displayed in the Self-Service Portal as a way for customers to reach out.
How to set it:
Settings > Customer login > General > Support email addressThis address is only for display. It does not trigger automation if customers send a cancellation request via email.
5. Add a Customer Care Email Address
This email address receives system notifications, including cancellation requests.
How to set it:
Settings > Company Settings > Base setup > Customer care email addresscirculy will use this to notify you whenever a cancellation request is submitted.
6. (Optional) Enable Pickup Date Selector
If you offer product pickup, show a calendar so the customer can select a date.
How to enable:
Settings > Customer login > Cancel options > Pickup dateTo make it mandatory:
7. (Optional) Automate Refunds for Early Cancellations
If a customer cancels within the early cancellation period and chooses to return the product immediately, you can refund them automatically.
How to activate:
8. (Optional) Restock After Cancellation
To automatically update inventory in your shop system after a cancellation:
Initial payment is the payment that is due when an order is placed. The initial payment often refers to the first recurring payment plus any other payment (setup, shipping, additional products) you charge when a customer places an order on your checkout page. You can choose not to charge the initial payment in the checkout and delay the charge, (delayed charge) until a later point in time.
Delayed charge - delayed charge is a feature available in the circuly operations backend that you can use if you do not want to charge the initial payment in the checkout and instead delay the charge until a later point in time.
Currently the option to delay a charge in your white-label checkout or the initial payment is only available if you use the following Payment Service Providers:
Here's when you might want to delay a charge:
Learn more about delaying initial payments in this article.
Charge initial payment is a feature available in the circuly operations backend that lets you manually charge the initial payment. The reason why you may want to manually charge an initial payment could be because you use the delayed charge feature.
The process of charging the initial payment can be automated via our customer API. This is the POST request you can use https://api-docs.circuly.io/docs/customers-api-docs/3ouxo0e215vwt-charge-initial-payment-by-id that you can use to charge the initial payment.
One time payment is a feature available in the circuly operations backend that you can use, as the name suggests, to charge non-recurring, one-time payments to your customers payment method. The reason why you need to charge a one-time payment can be anything from product buyout to product repair charges.
Refunds are a common part of any e-commerce business—whether you're dealing with cancellations, product issues, or customer dissatisfaction. With circuly, refunds can be managed efficiently while giving you full control over what gets refunded and how much.
circuly not only handles the transactional communication triggered by the refund but also allows you to customise the refund amount, taking into account factors like delivery costs, usage time, or repairs.
Tip: This process can also be automated using circuly’s API. See our API docs for more.
Refunds can be processed for:
You can only refund payments that have already been charged. If a payment is uncharged or scheduled for the future, the Refund option will be disabled (greyed out).
To check charge status:
Look at the "Paid" column in the Invoices tab.
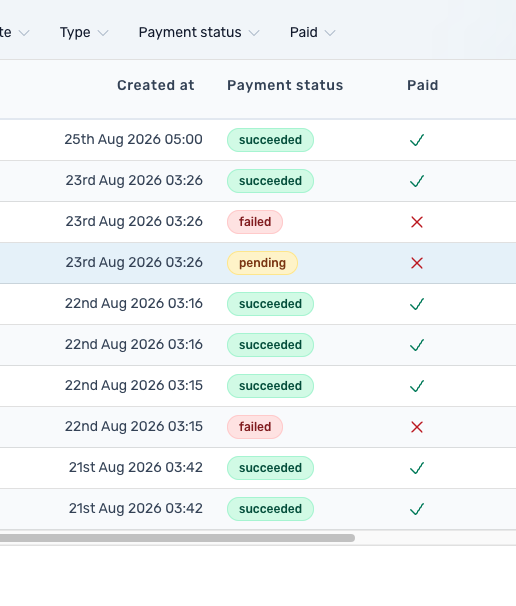
If the column isn't visible:
Once the refund window is open, every line item on the invoice—the product itself, shipping, insurance, and so on—is listed separately, with its own quantity, price, and refund amount field.
Option 1: Full refund
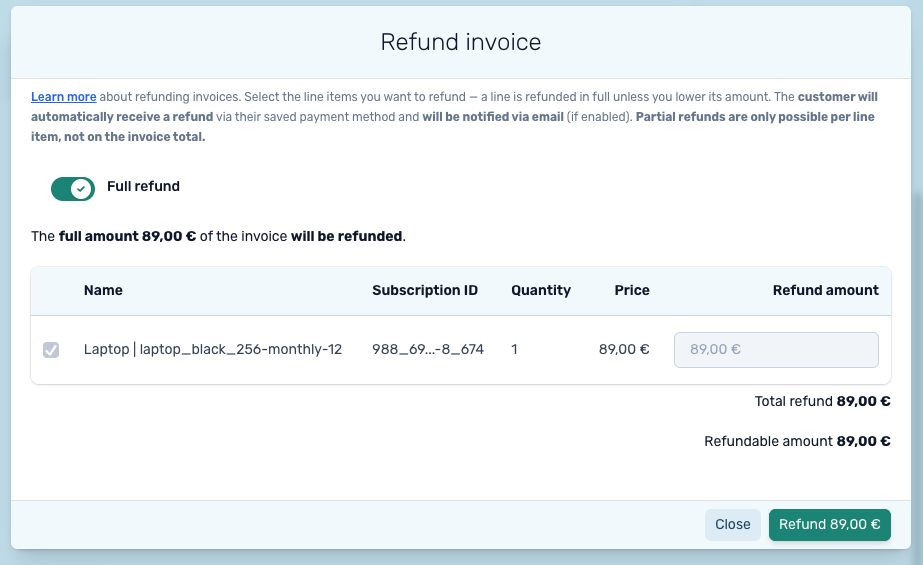
Option 2: Refund specific line items
Option 3: Custom (partial) amount
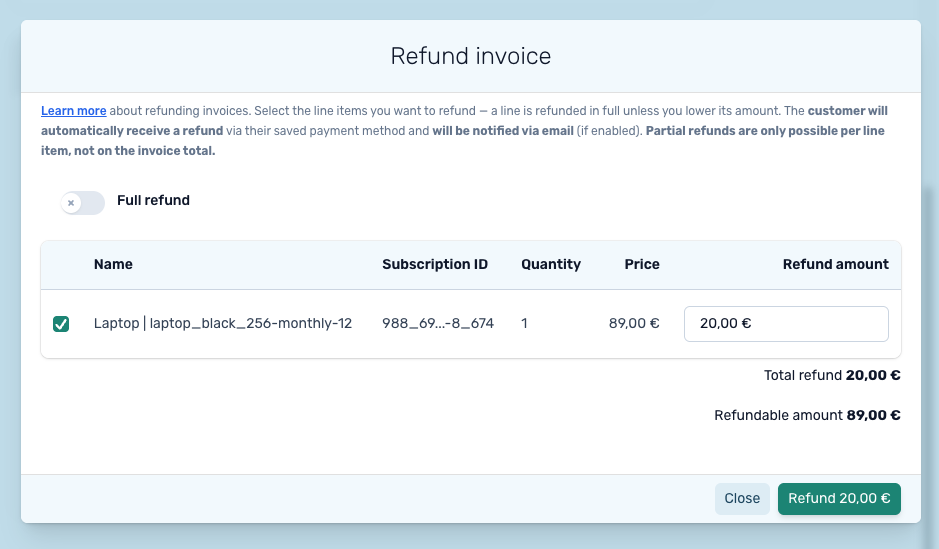
The window totals show:
If you need to do another refund on the same invoice you can do so as long as there is an amount connected to it that hasnt already been fully refunded.
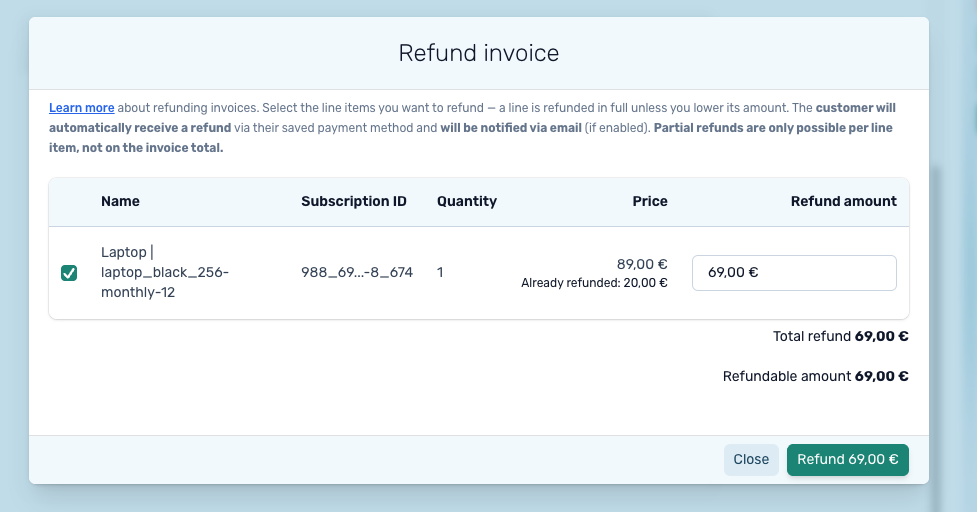
Use the Message to customer field to add a note for the refund email.
Note: This will only show in the refund email if your Refund Invoice email template includes the variable {{description}}.Once processed:
In any subscription business, it's common for customers to update their payment methods — whether due to an expired or stolen card, switching banks, or simply wanting to manage payments more efficiently.
circuly simplifies this process by allowing both internal users and customers to change the stored payment method. Once an order is placed and a payment is successfully processed, circuly creates a payment profile. This profile stores the payment method in the circuly Hub and is used for all future charges — including recurring and one-time payments.
circuly supports two ways to update payment methods:
This dual-option setup ensures flexibility and reduces support overhead.
To initiate a payment method update from the backend:
Orders in the circuly Hub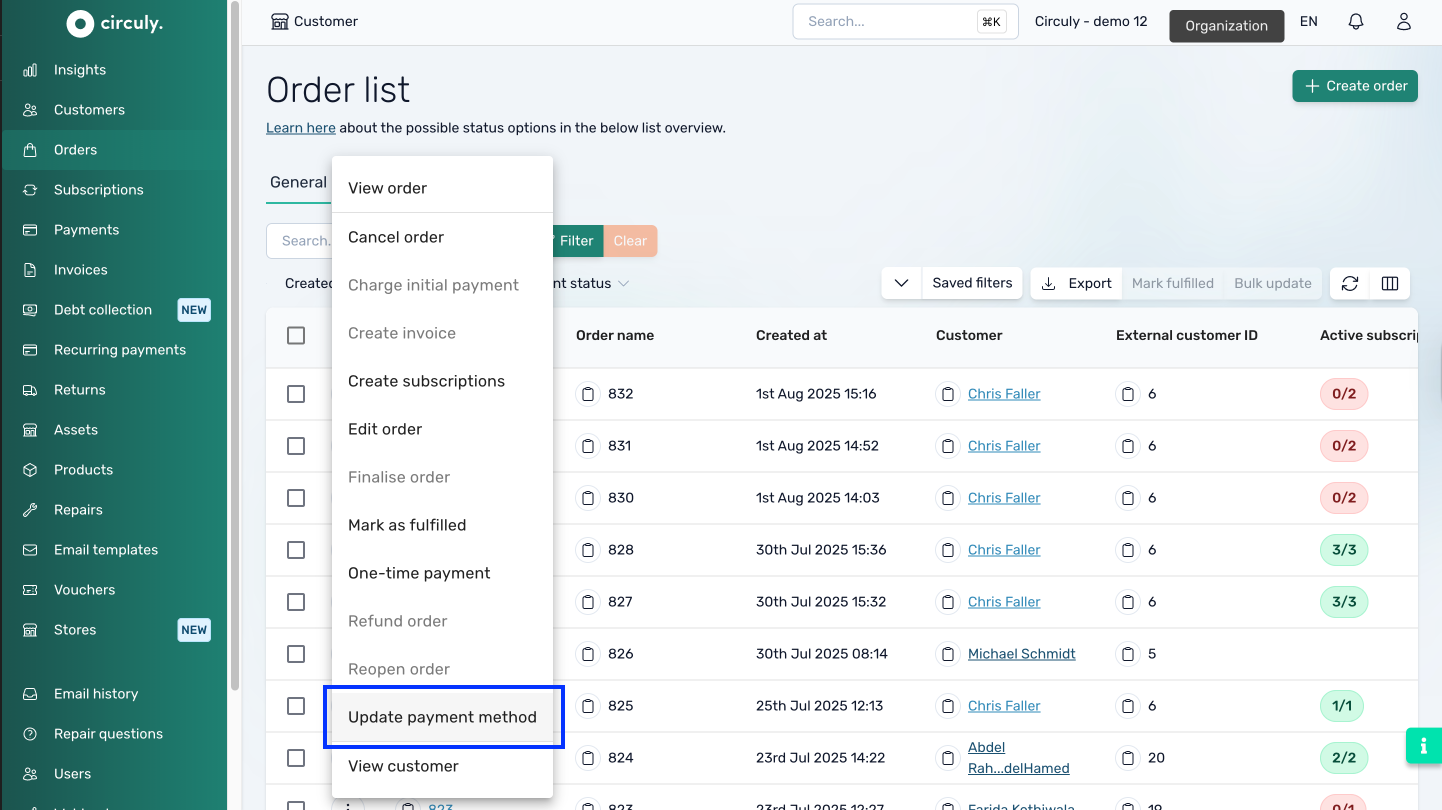
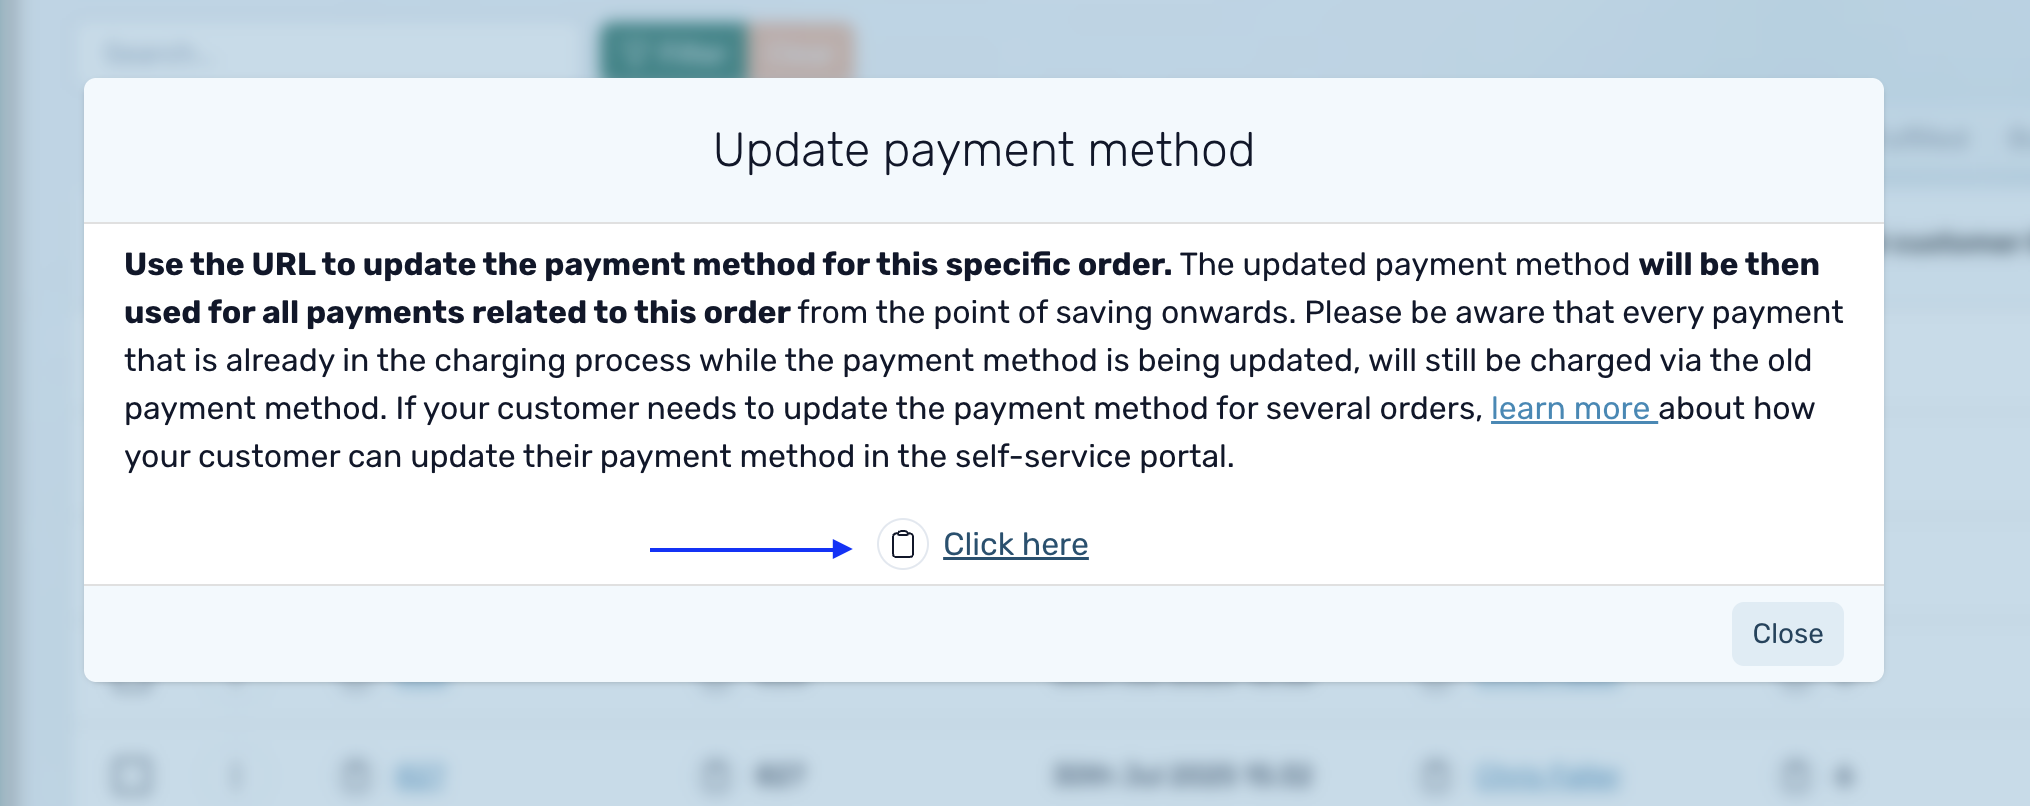
Review this article to see how customers can change the payment method on their own from the self-service portal.
There are no special settings required to enable this functionality. However, make sure:
Once a new payment method is saved:
Orders tab in the circuly Hub. If a payment fails due to an outdated method, prompting the customer to update it via the CSS can prevent churn and reduce failed transaction rates.
Downloading invoices in the Customer Self-Service Portal
Your customers can download their invoices from the Customer Self-Service Portal thus eliminating the need for them to get in touch with your customer support.
To enable your customers to download their invoices make sure that you have the right setting enabled.
Go to Settings > Customer login > FEATURES > Make sure that the Hide invoice download switch is disabled.

When enabled the icon to download the invoices is not available in the Self-Service Portal.

Educate your customers on how they can download invoices from their Self-Service Portal by writing an article on including a FAQ section on your website.
Here’s how the process looks for your customers:

Note: Only invoices that have been settled can be downloaded. Upcoming invoices are not displayed in the Customer Self-Service Portal.
The checkout is perhaps one of the most important step in any online shopping experience. With circuly you can not only customise the branding of the checkout but you can also decide how your checkout behaves.
The available customisations are categorised into two groups: Options and Limitations. As the name suggests, Options allow you to enhance the checkout experience by adding features such as use of Google places, credit check, stock check etc. Limitations let you set specific restrictions in the checkout process such as minimum cart value to be reached for free shipping, maximum number of items per SKU permitted to proceed to payment page etc.
Let's understand each of these options and limitation in detail.
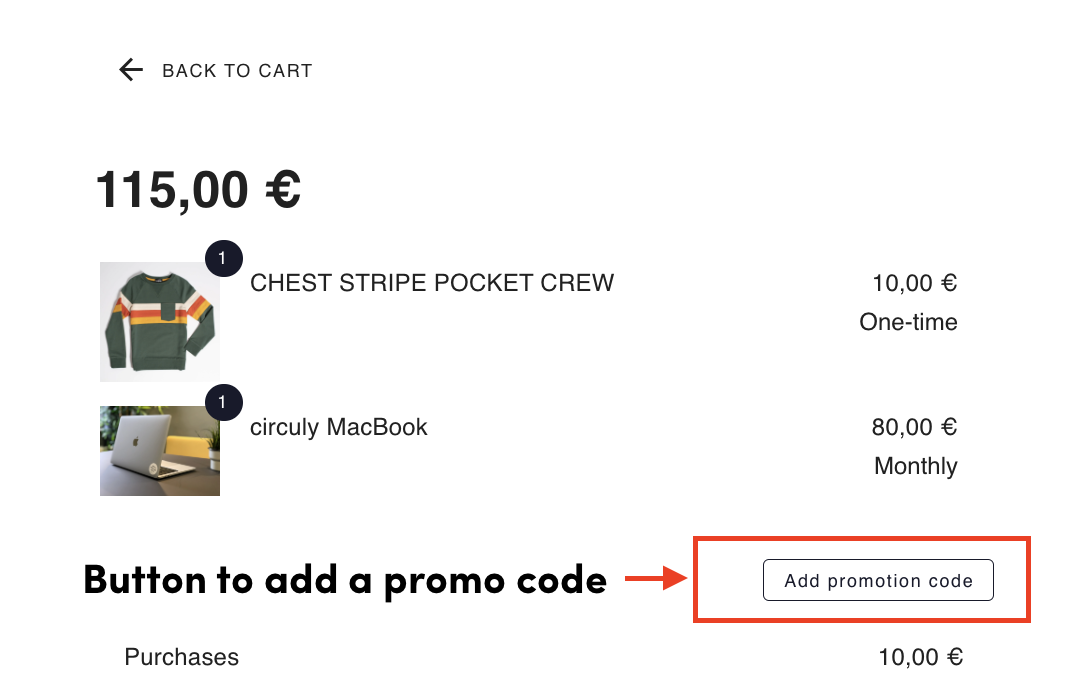
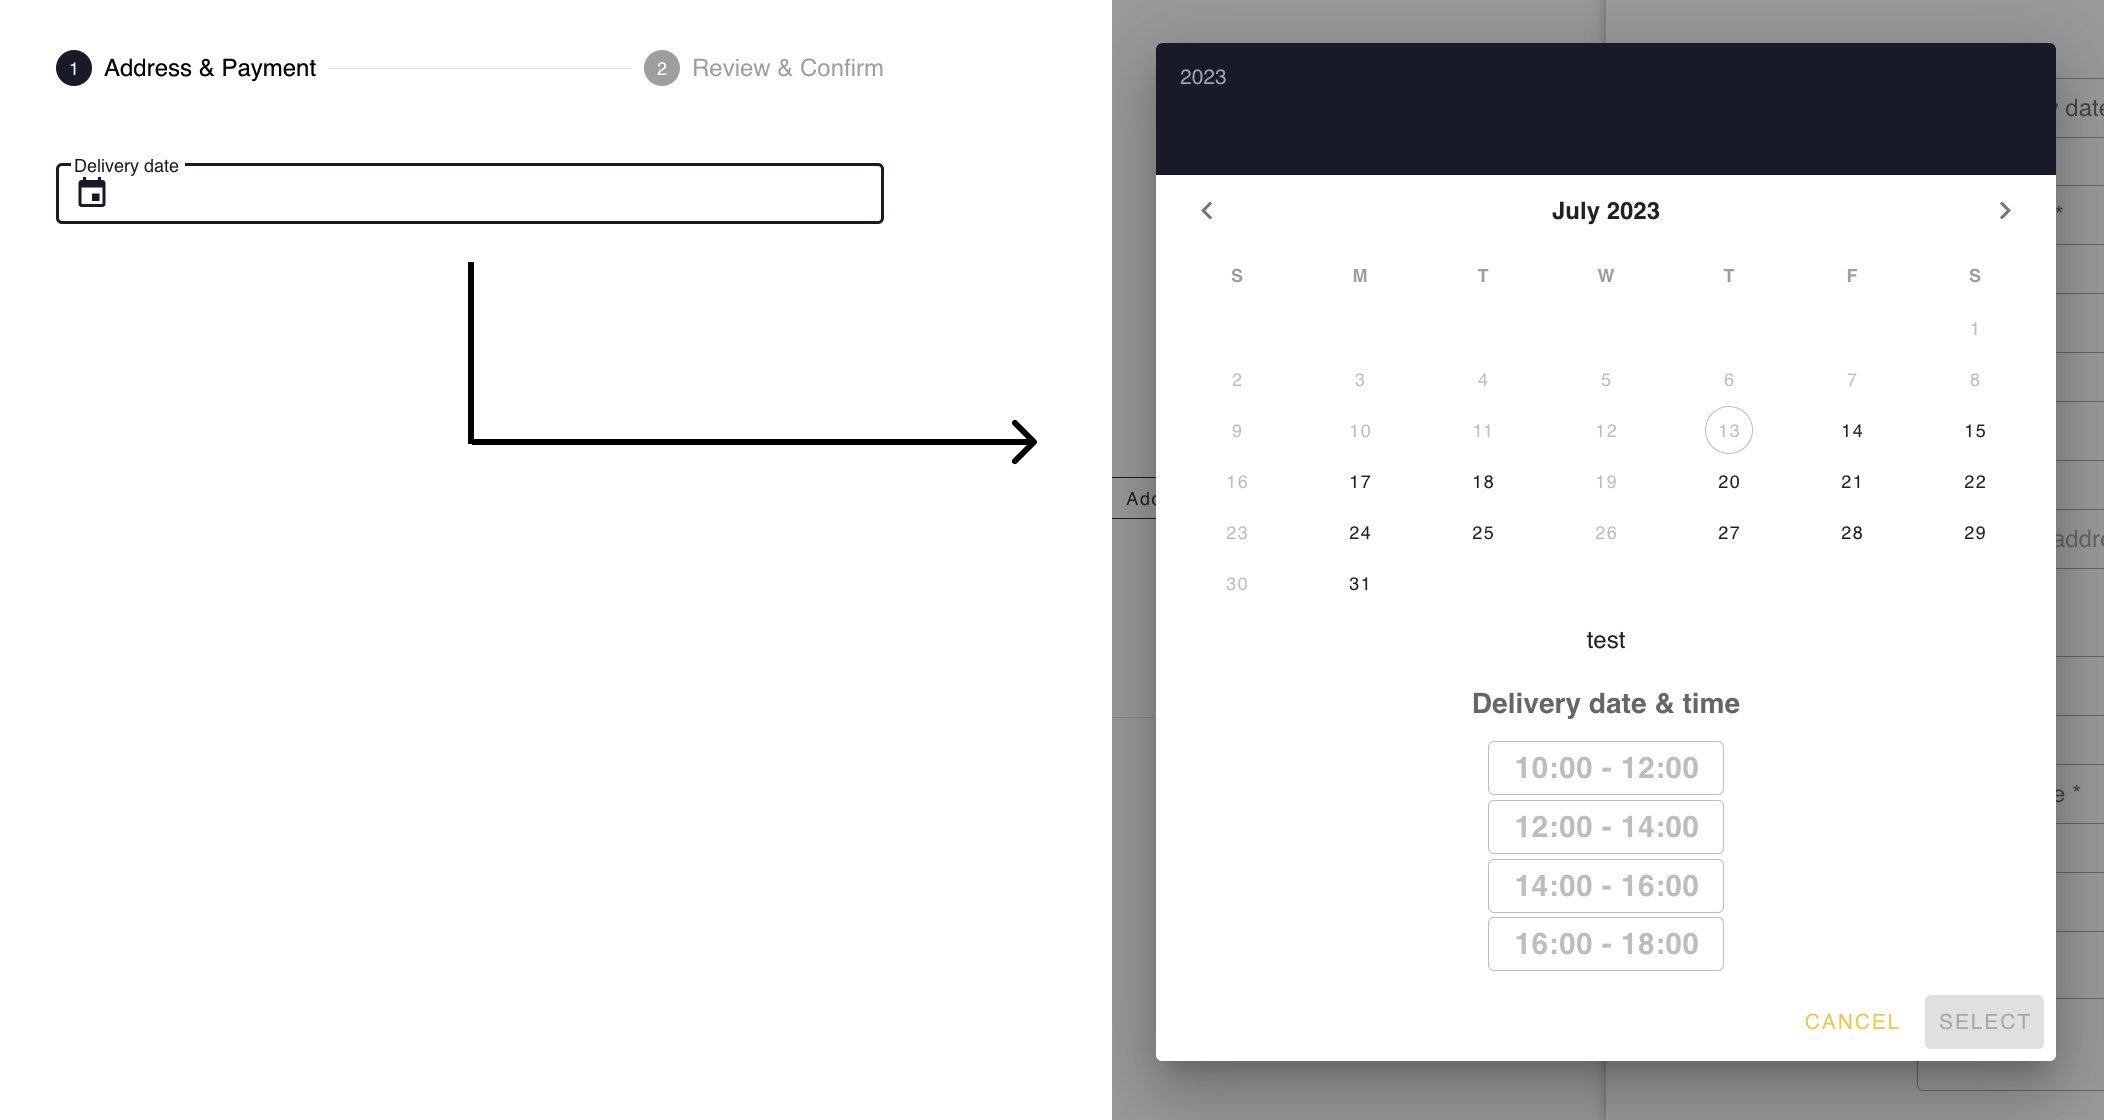
Displaying information on the checkout and checkout Overview page. You can choose to display or hide information on the checkout page. Given below are few options that can be customised.
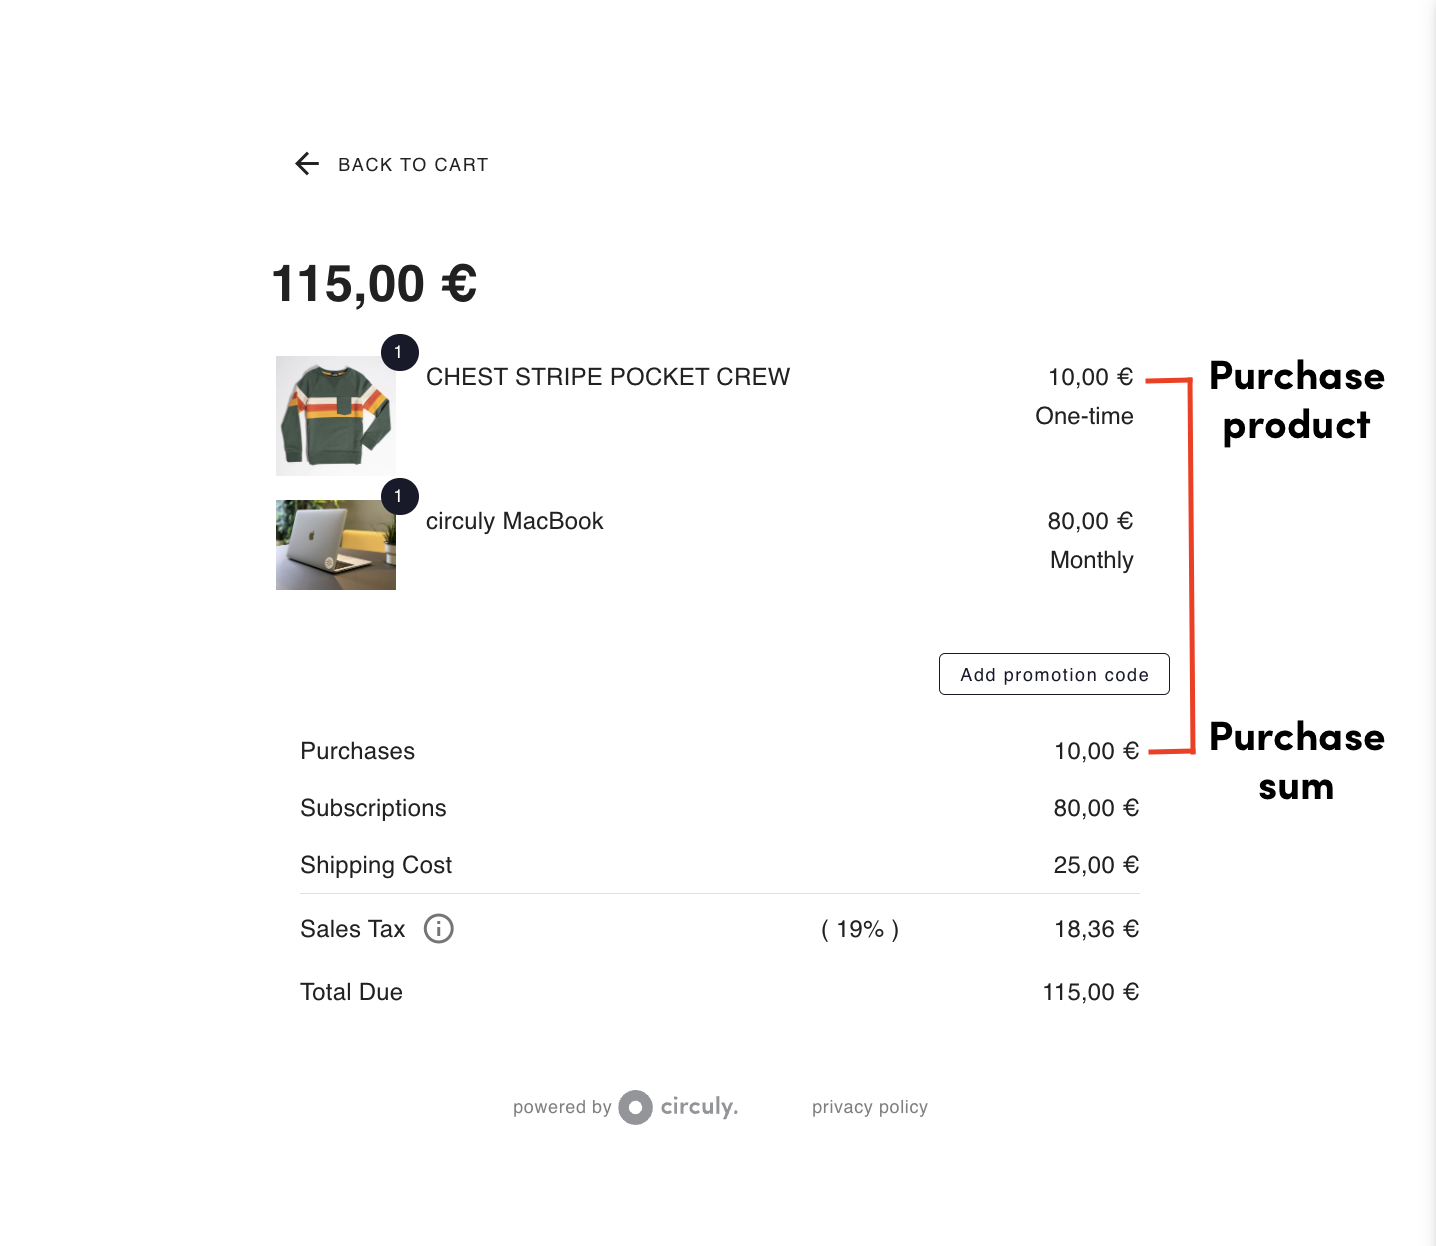
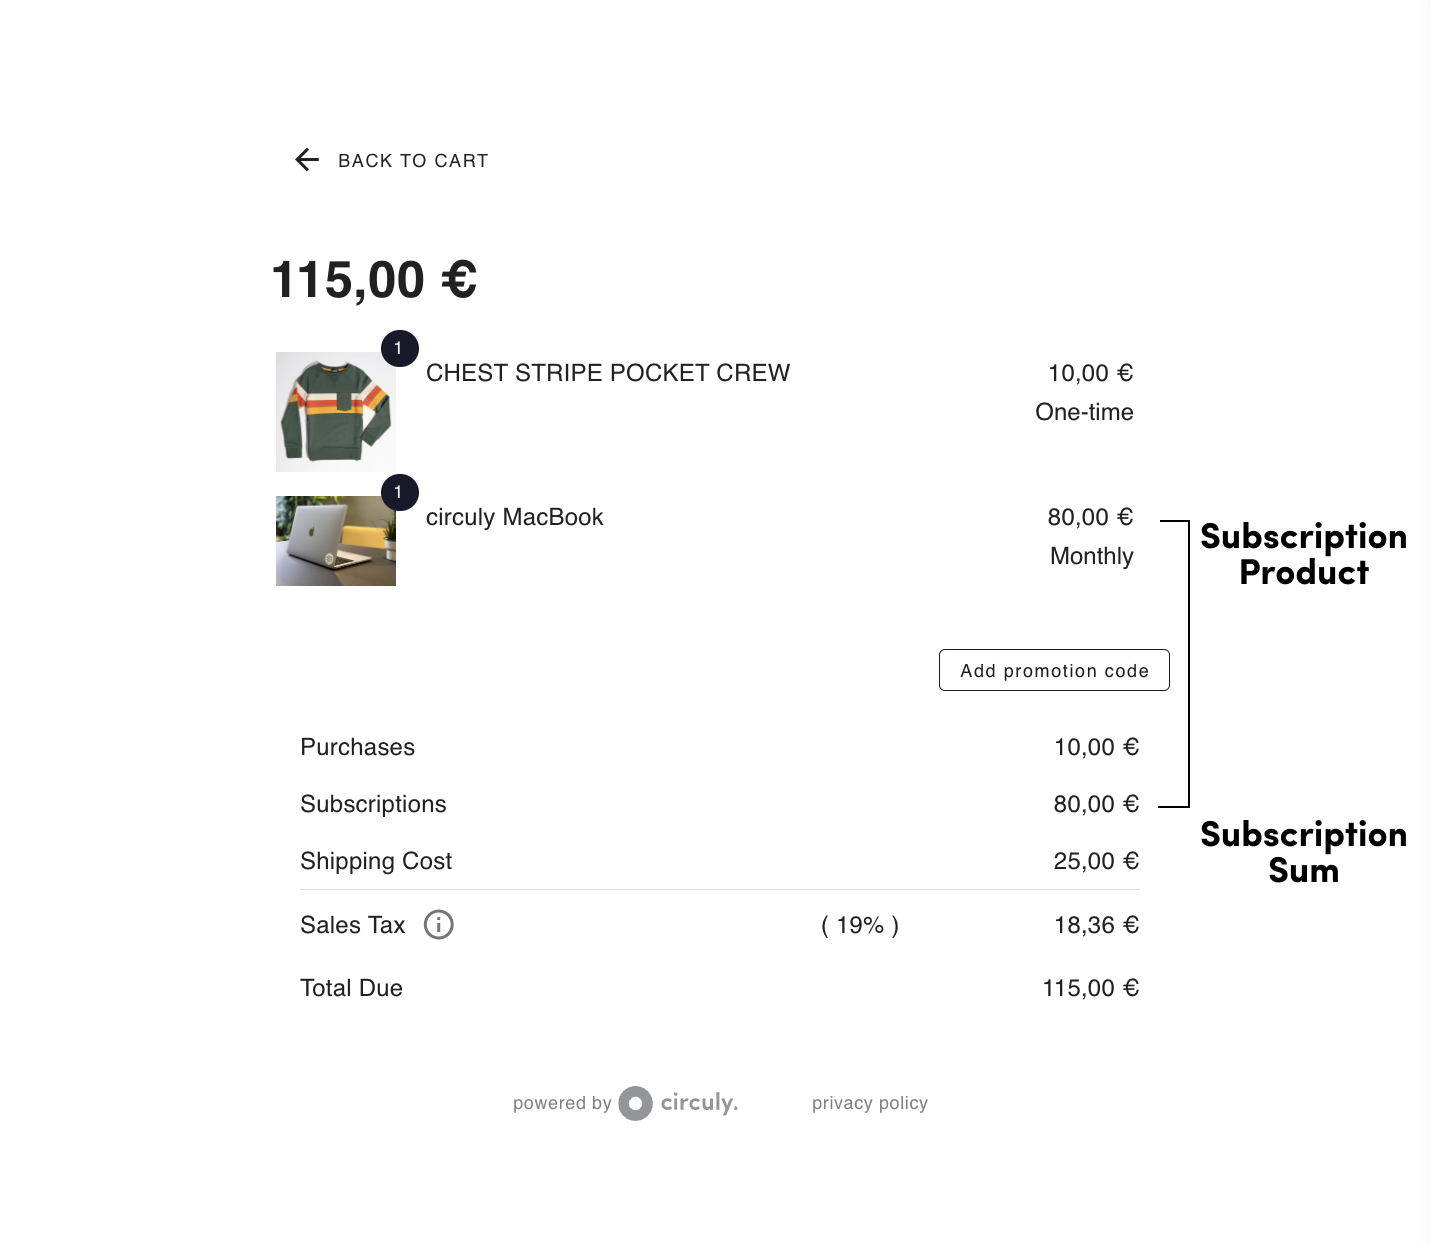

Checkout options
Options for cart limitation
If you would like to limit your cart and have some limitation logics, we recommend doing so on the product page level with the support of your developers if you do not use the circuly cart.
NOTE: You still may want to apply the above mentioned visual suggestions on your product page to avoid confusion.
There are several options and settings available in the circuly Operations Backend to customise your checkout page.
To access the checkout limitation and options, in your circuly Hub > Go to Settings > Checkout and customise the given settings as per your business needs.
Given below are common reasons why your customers are prevented from placing an order
A prospective customer is prevented from completing the checkout if they do not fill the date of birth input field even if you have the setting for making the date of birth as a mandatory field disabled.
Explanation: One of the many custom checkout field options available on the circuly white-label checkout is Date of Birth. You can decide to make the field a mandatory or an optional field depending on your business case.
The date of birth custom field option is by default disabled and can be enabled If you want to ask for the date of birth of the customer on the checkout page in the Settings tab.
However you might have noticed that your customers are prevented from proceeding to the payment page if they do not add their date of birth in the date of birth input field, even though it is not mandatory (that is the setting for making date of birth a mandatory field is disabled).
This happens if you use CRIF to do credit checks on your checkout page to prevent fraud and to check the credit worthiness of the customer.
Date of birth is a mandatory piece of information that CRIF needs to perform the credit check.
That is why it is recommended to make the date of birth field mandatory, if you use CRIF to do credit checks.
Your customer is prevented from completing the checkout and advancing to the payment page if they have reached the limit of the maximum number of allowed items in the cart.
Explanation: Your customers will be prevented from completing the checkout if they have reached the limit for the maximum number of items allowed in the cart.
This happens when you’ve defined a value for the maximum number of cart items that a customer can proceed with to the payment page in your Settings.
Your customer is prevented from completing the checkout and advancing to the payment page if they have reached the limit of the maximum number of allowed items per SKU in the cart.
Explanation: Your customers can be prevented from completing the checkout if they have reached the limit for the maximum number of items allowed in the cart per SKU
This happens when you’ve defined a value for the maximum number of items allowed in the cart per SKU that a customer can proceed with to the payment page.
The customer is unable to place an order if there are problems with the payment method of the customer such a insufficient card balance, wrong card details etc.
Explanation: when your customer adds their payment details in the payment input field and clicks on the checkout button, circuly sends a payment token to your connected payment service provider to charge the payment.
The payment service provider then tries to charge the payment. If the payment service provider is unable to do so the customer is not able to place an order due to problems with their chosen payment method.
The reason why the payment service provider is unable to charge the payment can vary from insufficient balance to wrong information.
When a payment fails, the customer gets either of the following prompt:
When an order fails due to payment reasons, you will not be able to see it in the circuly Operations Backend. You can however see an overview of your failed orders in connected your shop system.
The customer is unable to place an order and gets an error message of insufficient stock.
Explanation: circuly enables you to prevent your customers from proceeding to the payment page if they have a product in the cart that is not in stock.
There is a setting available in the Settings tab that can be enabled if you want to prevent customers from placing orders that you cannot fulfils due to stock limitations.
The setting is by default disabled and can be enabled.
A customer will be prevented from proceeding to the payment page if you set a minimum age for placing the order in your Settings tab.
When a customer enters their date of birth on the checkout page, the circuly system checks the year of birth against the minimum age setting. If the age is below your defined number, then the customer is prevented from proceeding to the payment page.
A customer can be prevented from proceeding to the checkout if they’ve inserted an invalid number in the phone input field. Enable the setting for validating phone number under Checkout in the Settings tab.
Certain fields like Name, address and contact details are mandatory fields. In order to advance to the payment page, these fields must be filled.
There are additional fields such as company name and VAT number that can be added to the checkout and can also be converted into mandatory fields.
When these fields are converted into mandatory fields, the customer on the checkout will be prevented from proceeding to the payment page if these fields are left blank.
To access the additional fields > Go to Settings > Checkout > PERSONAL INFORMATION > Enable the switch for the additional fields you would like to add to the checkout > Then decide if you would like to convert them into mandatory fields.
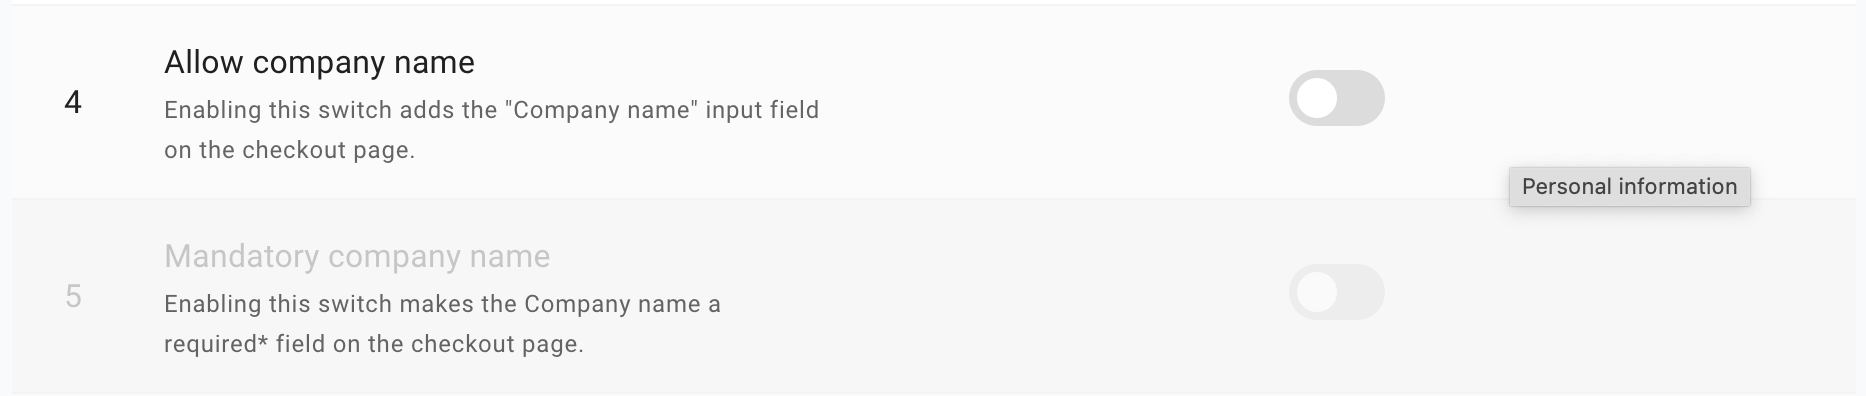
9. Checkout not possible due to payment failure.
Customer doesn't get to the order confirmation due to payment failure.
E-commerce businesses rarely sell just one type of product as a subscription. As soon as different product categories come into play, various factors—like tax rates and shipping costs—start influencing the final price a customer pays. For example, smaller bike components might qualify for standard parcel delivery, while larger items like bike tires or the bike itself may have different tax rules and higher shipping costs. Manually managing these variations for each product can quickly become complex and time-consuming.
To simplify this process, circuly introduces a feature that allows businesses to group products based on shared rules, logic, or actions. Instead of setting tax rates and shipping costs individually for every product, they can be applied at the group level. This ensures that when a customer reaches checkout, the correct taxes and shipping costs are automatically calculated based on the product collection—streamlining setup, reducing errors, and making it easier to manage large inventories.
In this article, we’ll explore how this feature works, how to set it up, and how it helps businesses optimise their pricing calculations effortlessly.
In circuly, products can be grouped together into a Product Collection. This allows businesses to apply shared tax rates, shipping costs, and other relevant rules to multiple products at once, rather than configuring them individually.
By structuring products into collections, businesses can automate tax and shipping calculations, making pricing management more efficient and reducing manual effort.
In your circuly Hub > Go to the Products Tab > Navigate to the Taxes tab > Click on the + PRODUCT COLLECTION button.
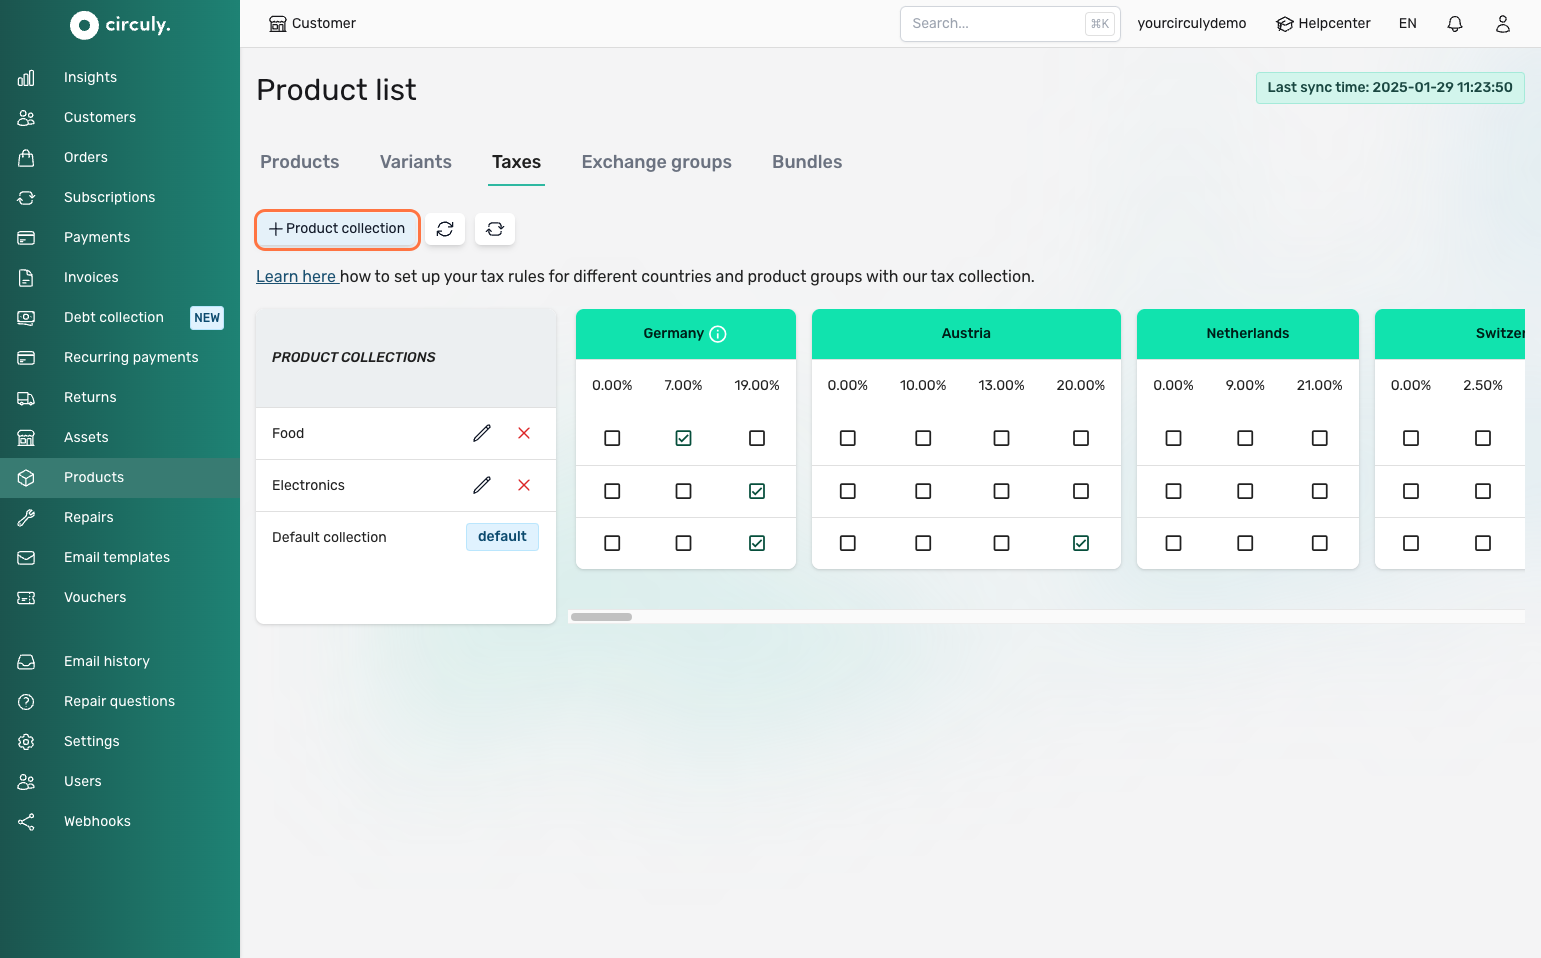
In the Create product collection window > Give a Title, and a description to your collection so that you can differentiate it from other collections > Click on the Submit button to save your collection.
Note: You do not need to define the Tax code as it is only relevant for you if you are based or operate in the US and use the Taxjar integration.
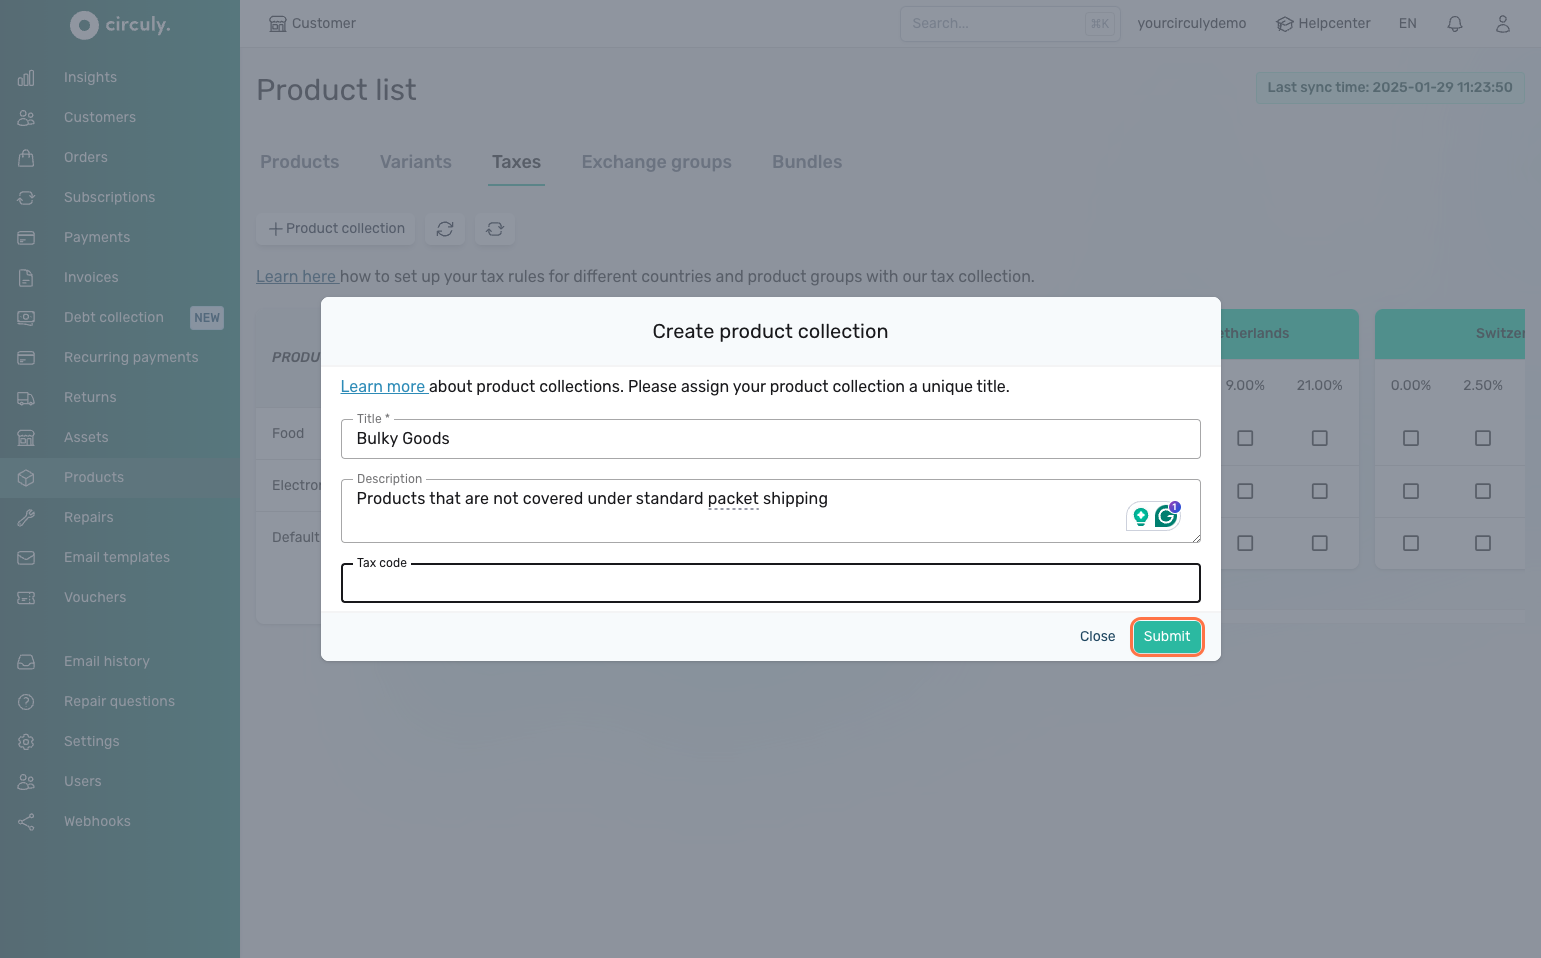
The collection is then added to the Product Collections list along with the option to assign the tax percentages.

By default all products are mapped to the default collection.
To reassign products to a different collection > Under the Products tab > Navigate to the Products > Select products to map to a collection by checking the check box > And click on the Map to product collection button.
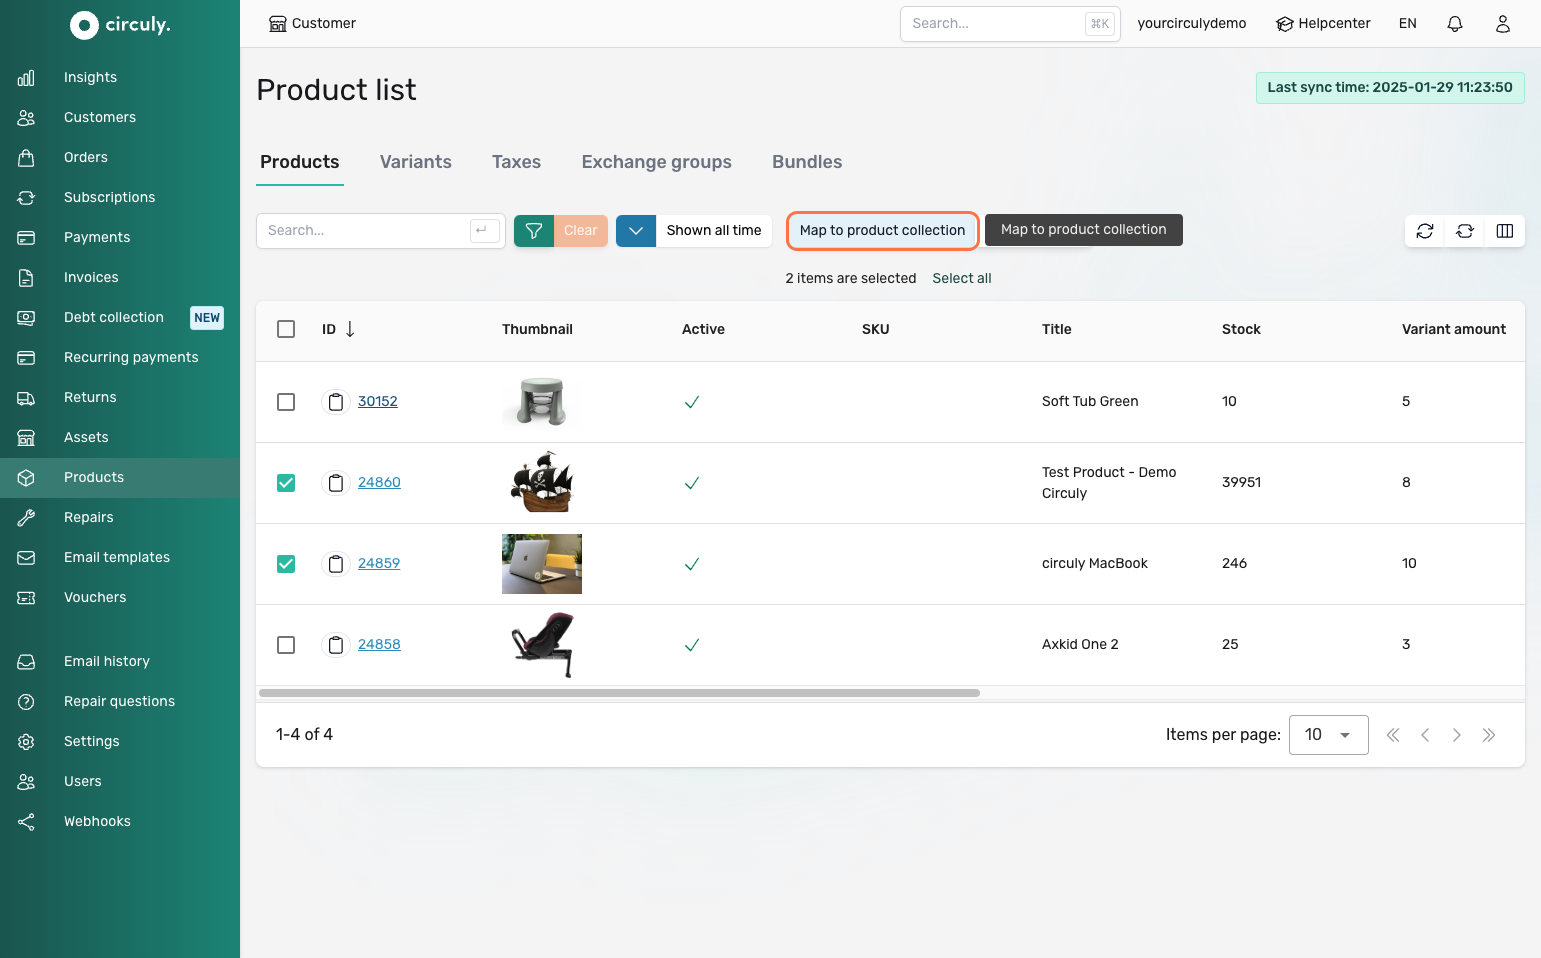
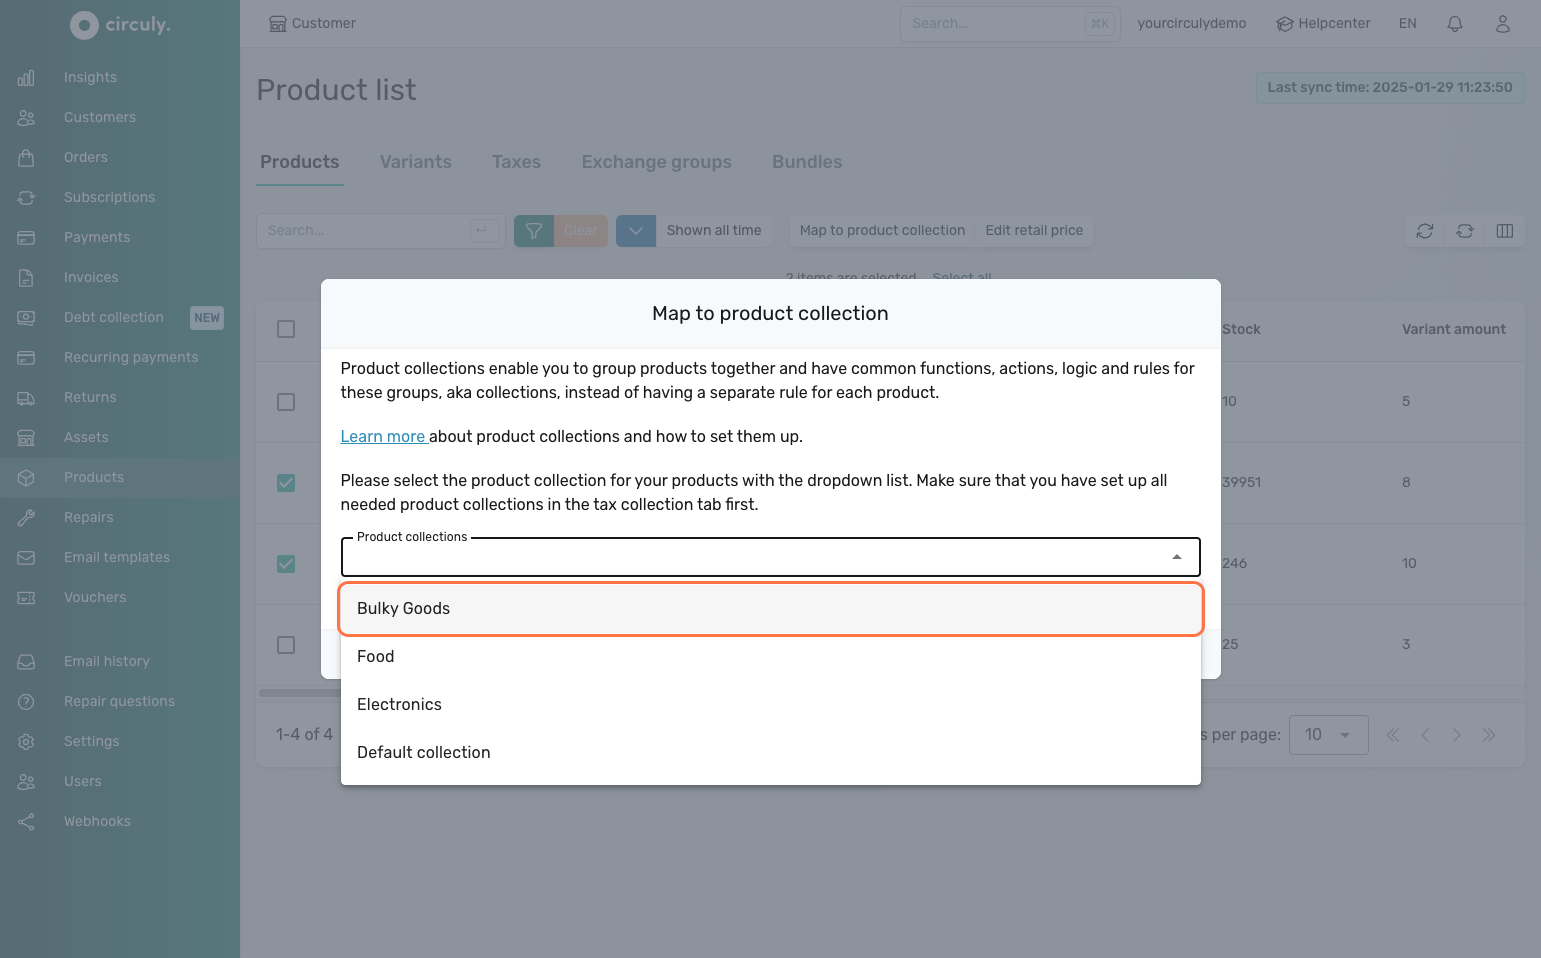
The selected products are now mapped to your chosen product collection.
If you want to define the tax rules and shipping costs for each collection, follow these guides:
Once you've set up your shipping methods in circuly, your customers will see the appropriate options directly on the checkout page. This ensures a smooth and tailored experience for every customer based on their country and language preferences.
When a customer reaches the checkout and selects their shipping country, circuly dynamically displays the available shipping methods associated with that country.
How it works:

This allows you to provide region-specific options (e.g., DHL Germany, PostNL Netherlands) and costs.
If your checkout page is available in multiple languages, shipping information will be shown in the language selected by the customer.

When configuring Shipping Methods in the circuly Hub:
If translations are missing for a selected language, the shipping method might not display correctly or may appear in the fallback/default language.
To ensure a seamless multilingual checkout experience:
For help setting up shipping methods and logic, check out the article:
How to Configure Shipping Methods in circuly
The circuly Self-Service Portal (CSS) gives your customers full control over their subscription—allowing them to manage payments, view invoices, update details, and more.
To maintain security, access to the portal is limited to the email address used during checkout or order placement.
Step 1: Access the Self-Service Portal
Customers can access their portal by visiting your company’s URL and clicking on a link that indicates that its a portal for the customer.
Example: See how Strollme guides customers to their Self-Service Portal below.

Step 2: Enter Email Address
On the login screen, the customer enters the same email used at checkout in the email input field.

Step 3: Receive One-Time Password (OTP)
If the email matches a subscription in your system, the customer receives a one-time password via email.
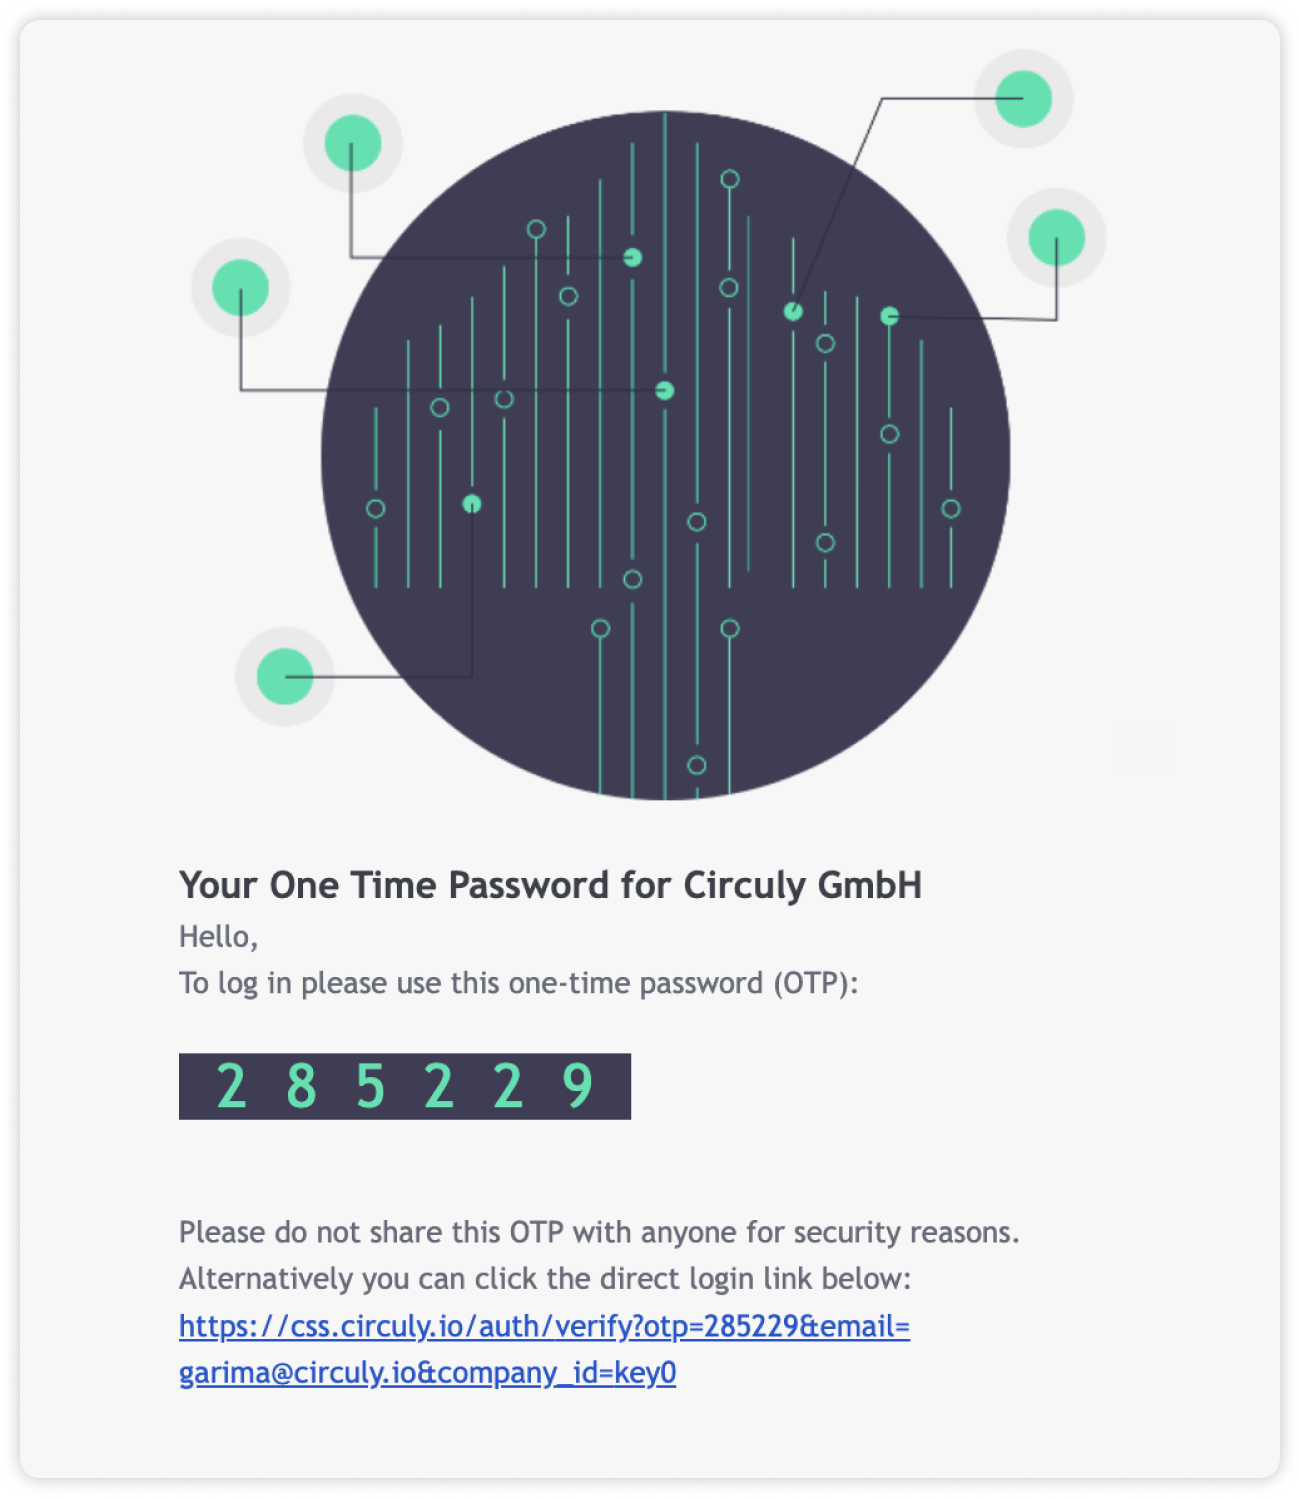
Step 4: Log In with OTP
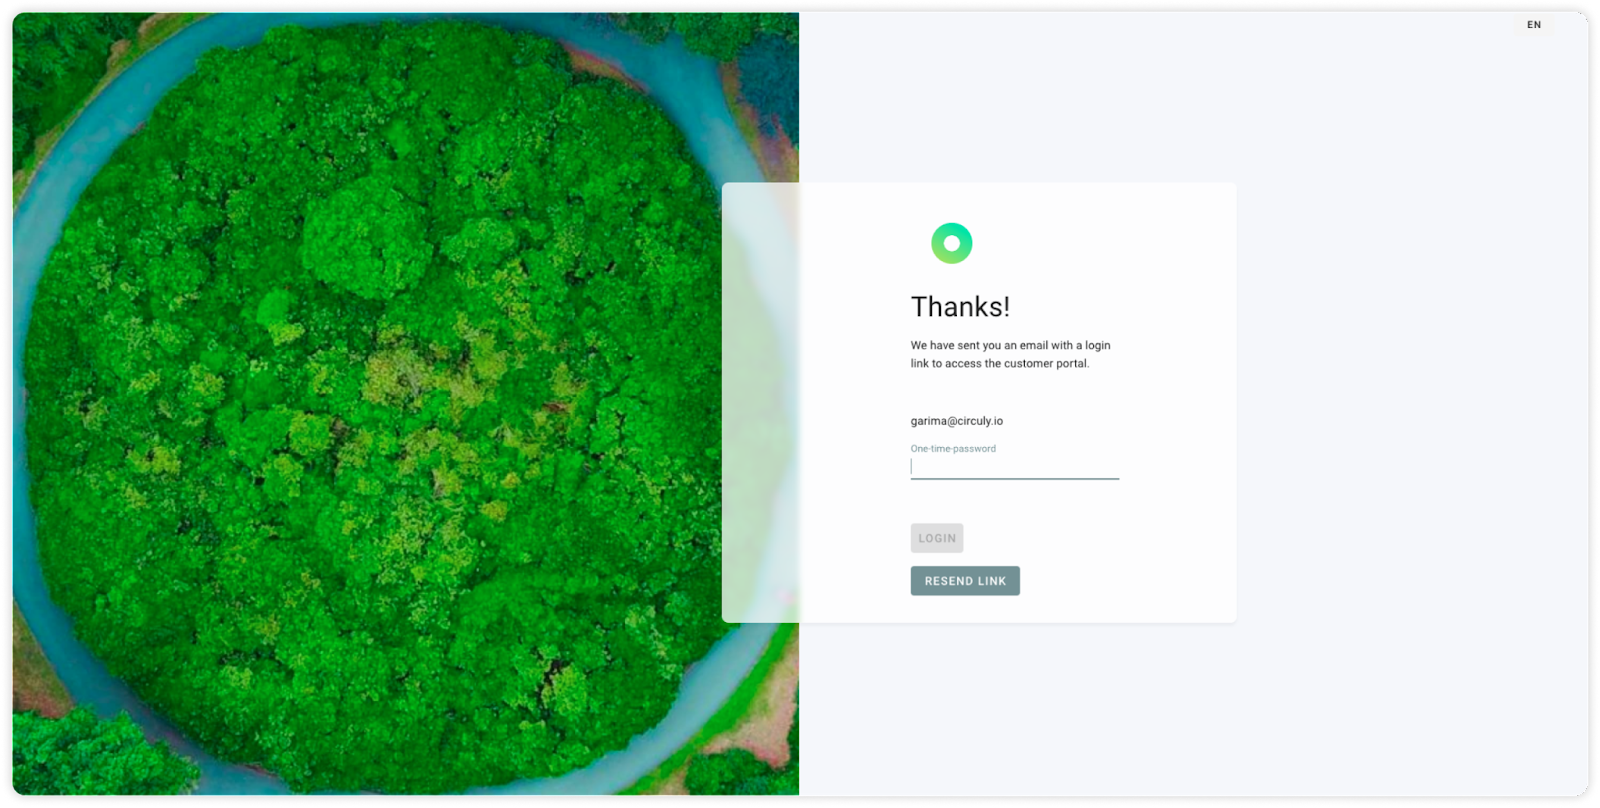
Step 5: Explore the Portal
Once logged in, the customer will see an overview of their subscriptions, payments, and more.
The circuly Self-Service Portal enables customers to independently manage various aspects of their subscriptions — from downloading invoices and updating personal information to submitting cancellation requests. Among these features, one essential function is the ability to report issues directly through the portal.
This functionality creates a clear line of communication between the customer and your support team without requiring manual outreach via email or phone.
The Report an Issue feature allows customers to send a support request directly from their subscription view. The request is forwarded to your team’s support email address, ensuring you’re notified and can respond promptly.
Key highlights:
Note: The inline confirmation message that appears after sending the issue report is hard-coded. If you would like to change this message, you can request it via a service desk ticket to the circuly Customer Success team.
Here’s how the issue reporting process looks from a customer’s perspective:
No further action is needed from the customer unless your team follows up for more information.
The Report an Issue option in the Self-Service Portal provides a convenient and direct way for customers to get help with their subscription. By routing the message straight to your support inbox, it ensures quick visibility while keeping the experience frictionless for the customer.
Let me know if you'd like to include troubleshooting tips or add internal response suggestions for your support team.
The Customer Self-Service Portal (CSS) empowers your customers to manage their subscriptions with ease—and that includes the ability to report product issues directly, without needing to contact your support team manually.
This feature not only improves the customer experience but also reduces operational load on your Customer Success team by automating issue intake and tracking.
By default, the option to report an issue is enabled and visible in the subscription action dropdown in the CSS. If you prefer not to offer this functionality, you can disable it in your circuly Hub settings.
Here’s what happens when a customer reports an issue through the CSS:
In the Customer Self-Service Portal, there are two ways a customer can report a product issue. For full instructions and screenshots, refer to your guide on how customers can use this feature.
By default, this option is:
If you do not wish to allow customers to report issues via the CSS, you can toggle the feature off:
Settings > Self-Service Portal > FeaturesTo ensure you're notified when a customer submits an issue:
Company Settings > Base Setup > Customer care email address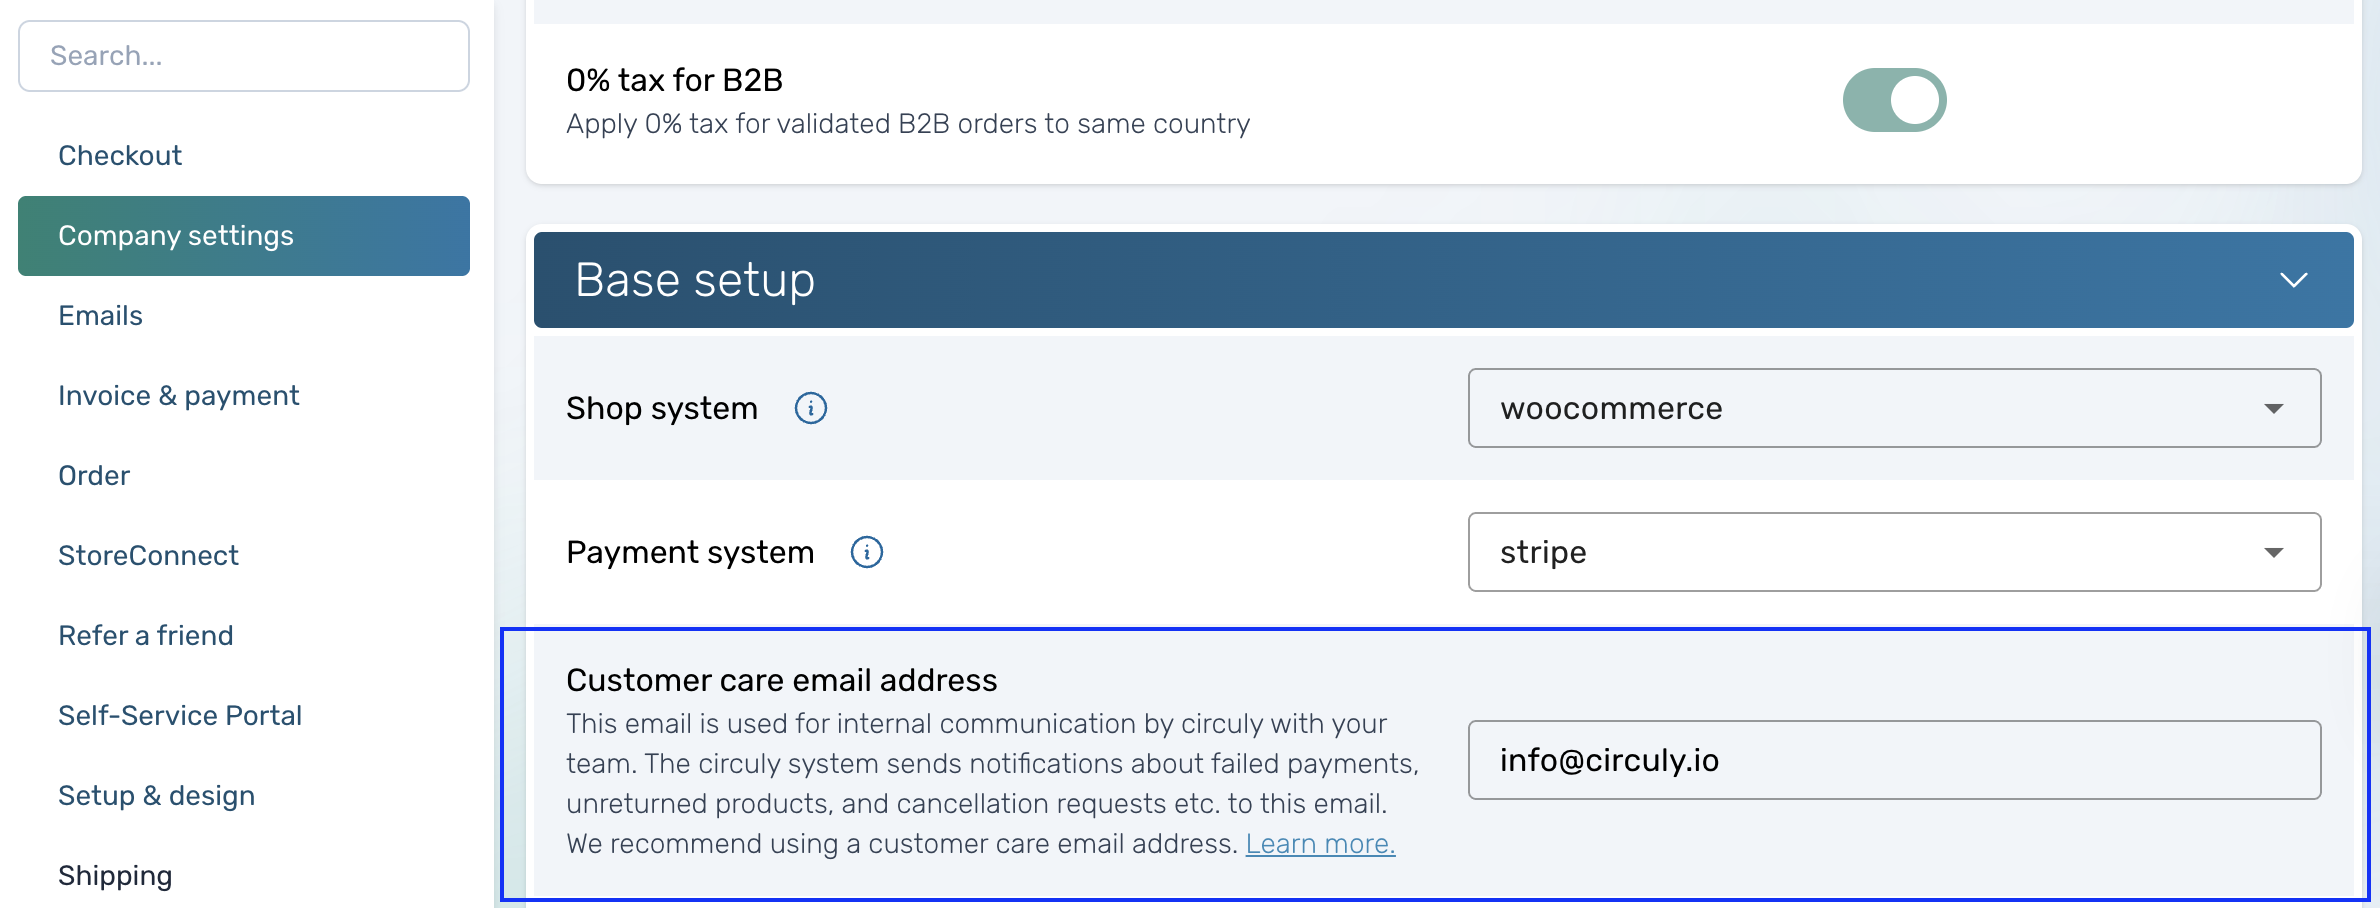
Important: If no email is added here, you won’t receive issue alerts.
Email History Tab in the circuly HubTo find reported issues:
"Customer reported an issue"Customer care email Receives system-triggered notifications like reported issues
Support emailShown to customers in the CSS as a visible contact option
Note: If customers email the support address to request a cancellation, no automated flow is triggered.
To update the Support email address:
Settings > Customer Login > General > Support email addressTo receive copies of all system-generated emails:
Settings > Email > General > BCC list+ icon to add each addressThis is especially useful for monitoring communications or archiving.
Once everything is set up:
To encourage usage, we recommend proactively informing customers about this feature—e.g., via onboarding emails, FAQs, or in-app prompts.
The Date Picker feature in circuly enables you to provide your customers with the ability to select a delivery or pickup date when finalising their subscription product order on your checkout page. This feature allows for greater flexibility, helping customers schedule deliveries or pickups according to their preferences. Whether you use the calendar for delivery, pickup, or both, the Date Picker enhances customer experience by streamlining the ordering process.
The Date Picker feature allows you to integrate a calendar on your checkout page, where customers can choose their preferred delivery or pickup date. This feature can be customised to suit various needs, including specifying which days are available for delivery, setting limits on the number of deliveries per timeslot, and defining specific times for delivery or pickup. You can also include custom messages to guide your customers through the selection process.
Key options include:
Follow these steps to set up the Date Picker and customise the options for your customers:
See the image reference below to see how the time slots are displayed when the timeslot duration is 2 hours.
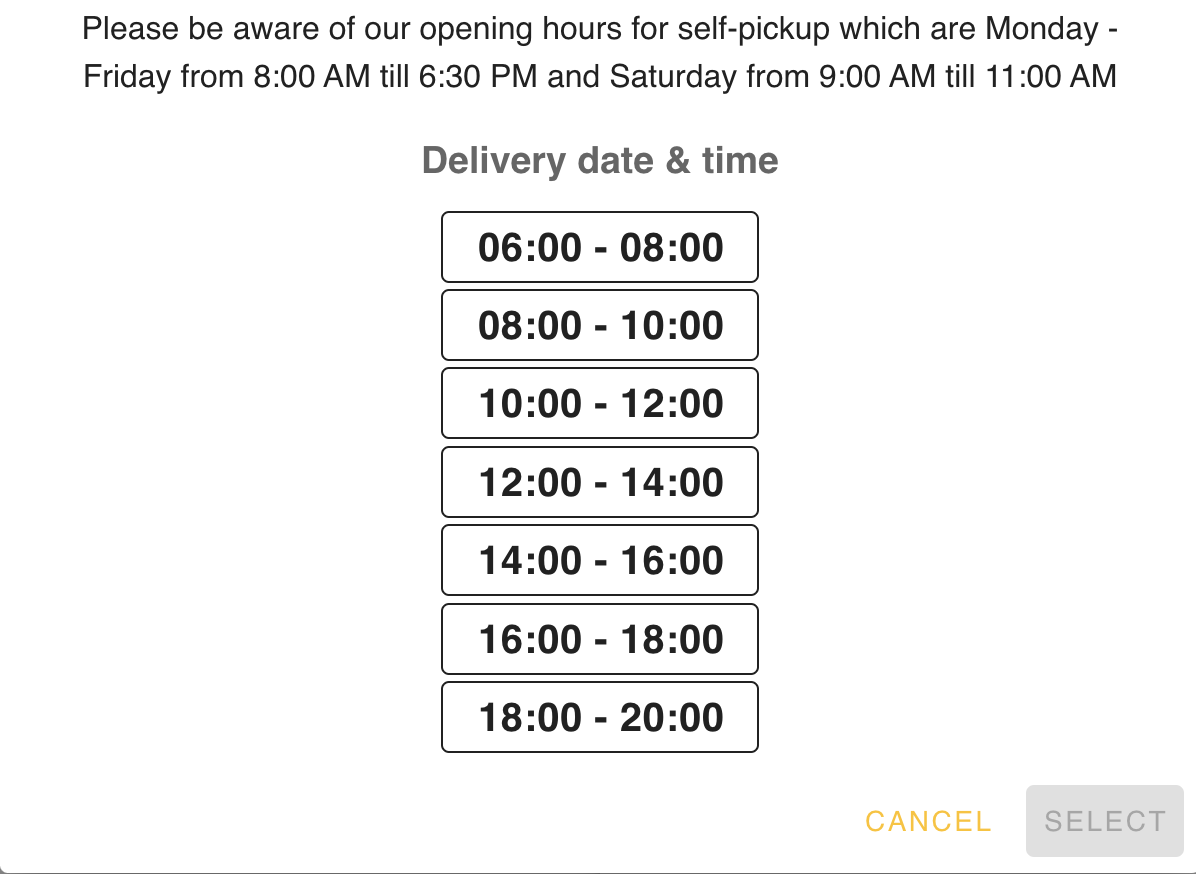
You can customise the checkout page by adding custom input field to it. Custom fields can be used to collect additional information from your customer besides payment, address and contact details.
Possible custom field option in the circuly Operations Backend include:
Custom fields are hardcoded into your checkout. If you want to add custom fields to your checkout, get in touch with your customer success team by creating a ticket in the Support tab.
All data from custom fields can be accessed from the Orders tab.
In your circuly Operations Backend > Go to Orders > Select an Order from the Order List > Scroll down to DETAILS > You’ll find all your custom fields in this section.

Examples of custom fields:


Typically an order appears in the circuly Hub when a website visitor goes over your checkout page and places an order. The next step is to create a subscription for the order to start collecting recurring payments. However you also have the possibility of creating orders from the circuly Hub. The Draft order feature in circuly allows you to create an order manually from the circuly Hub. This is especially useful in B2B transactions where you may operate on order-to-quote basis, in-store purchases, or customer service teams placing orders on behalf of customers.
In the Orders tab of the circuly Hub, you now have two options to create an order:
Create Quote
Create Order
This flexibility lets you decide whether you want the customer to complete checkout themselves or create a confirmed order on their behalf.
Creating a order or quote
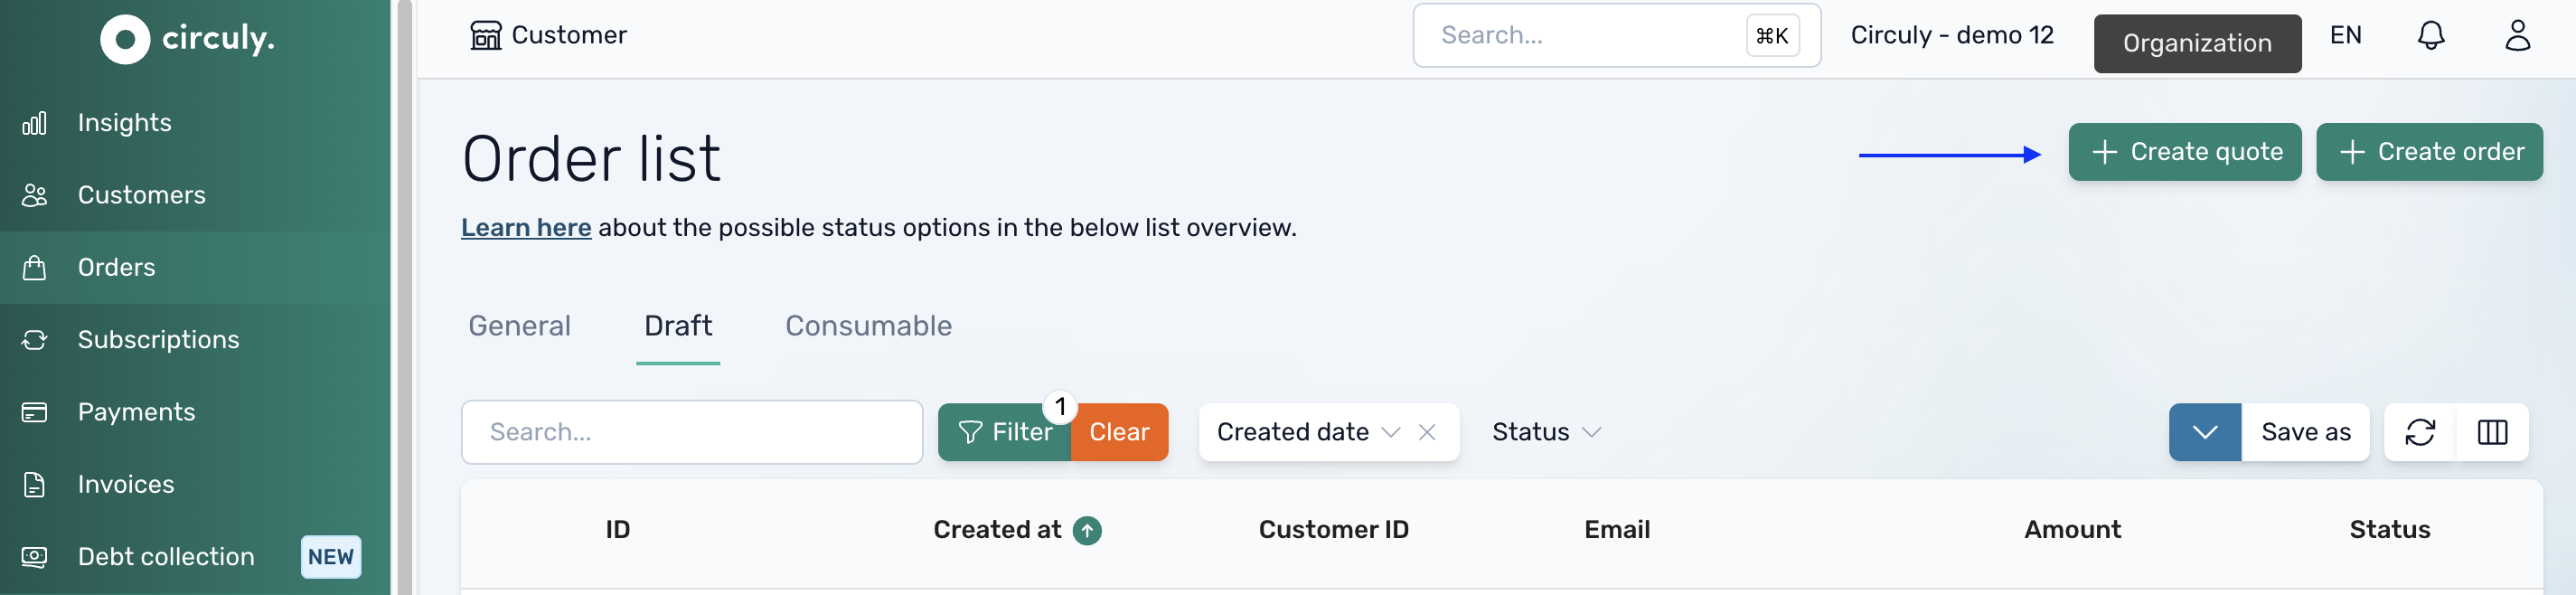
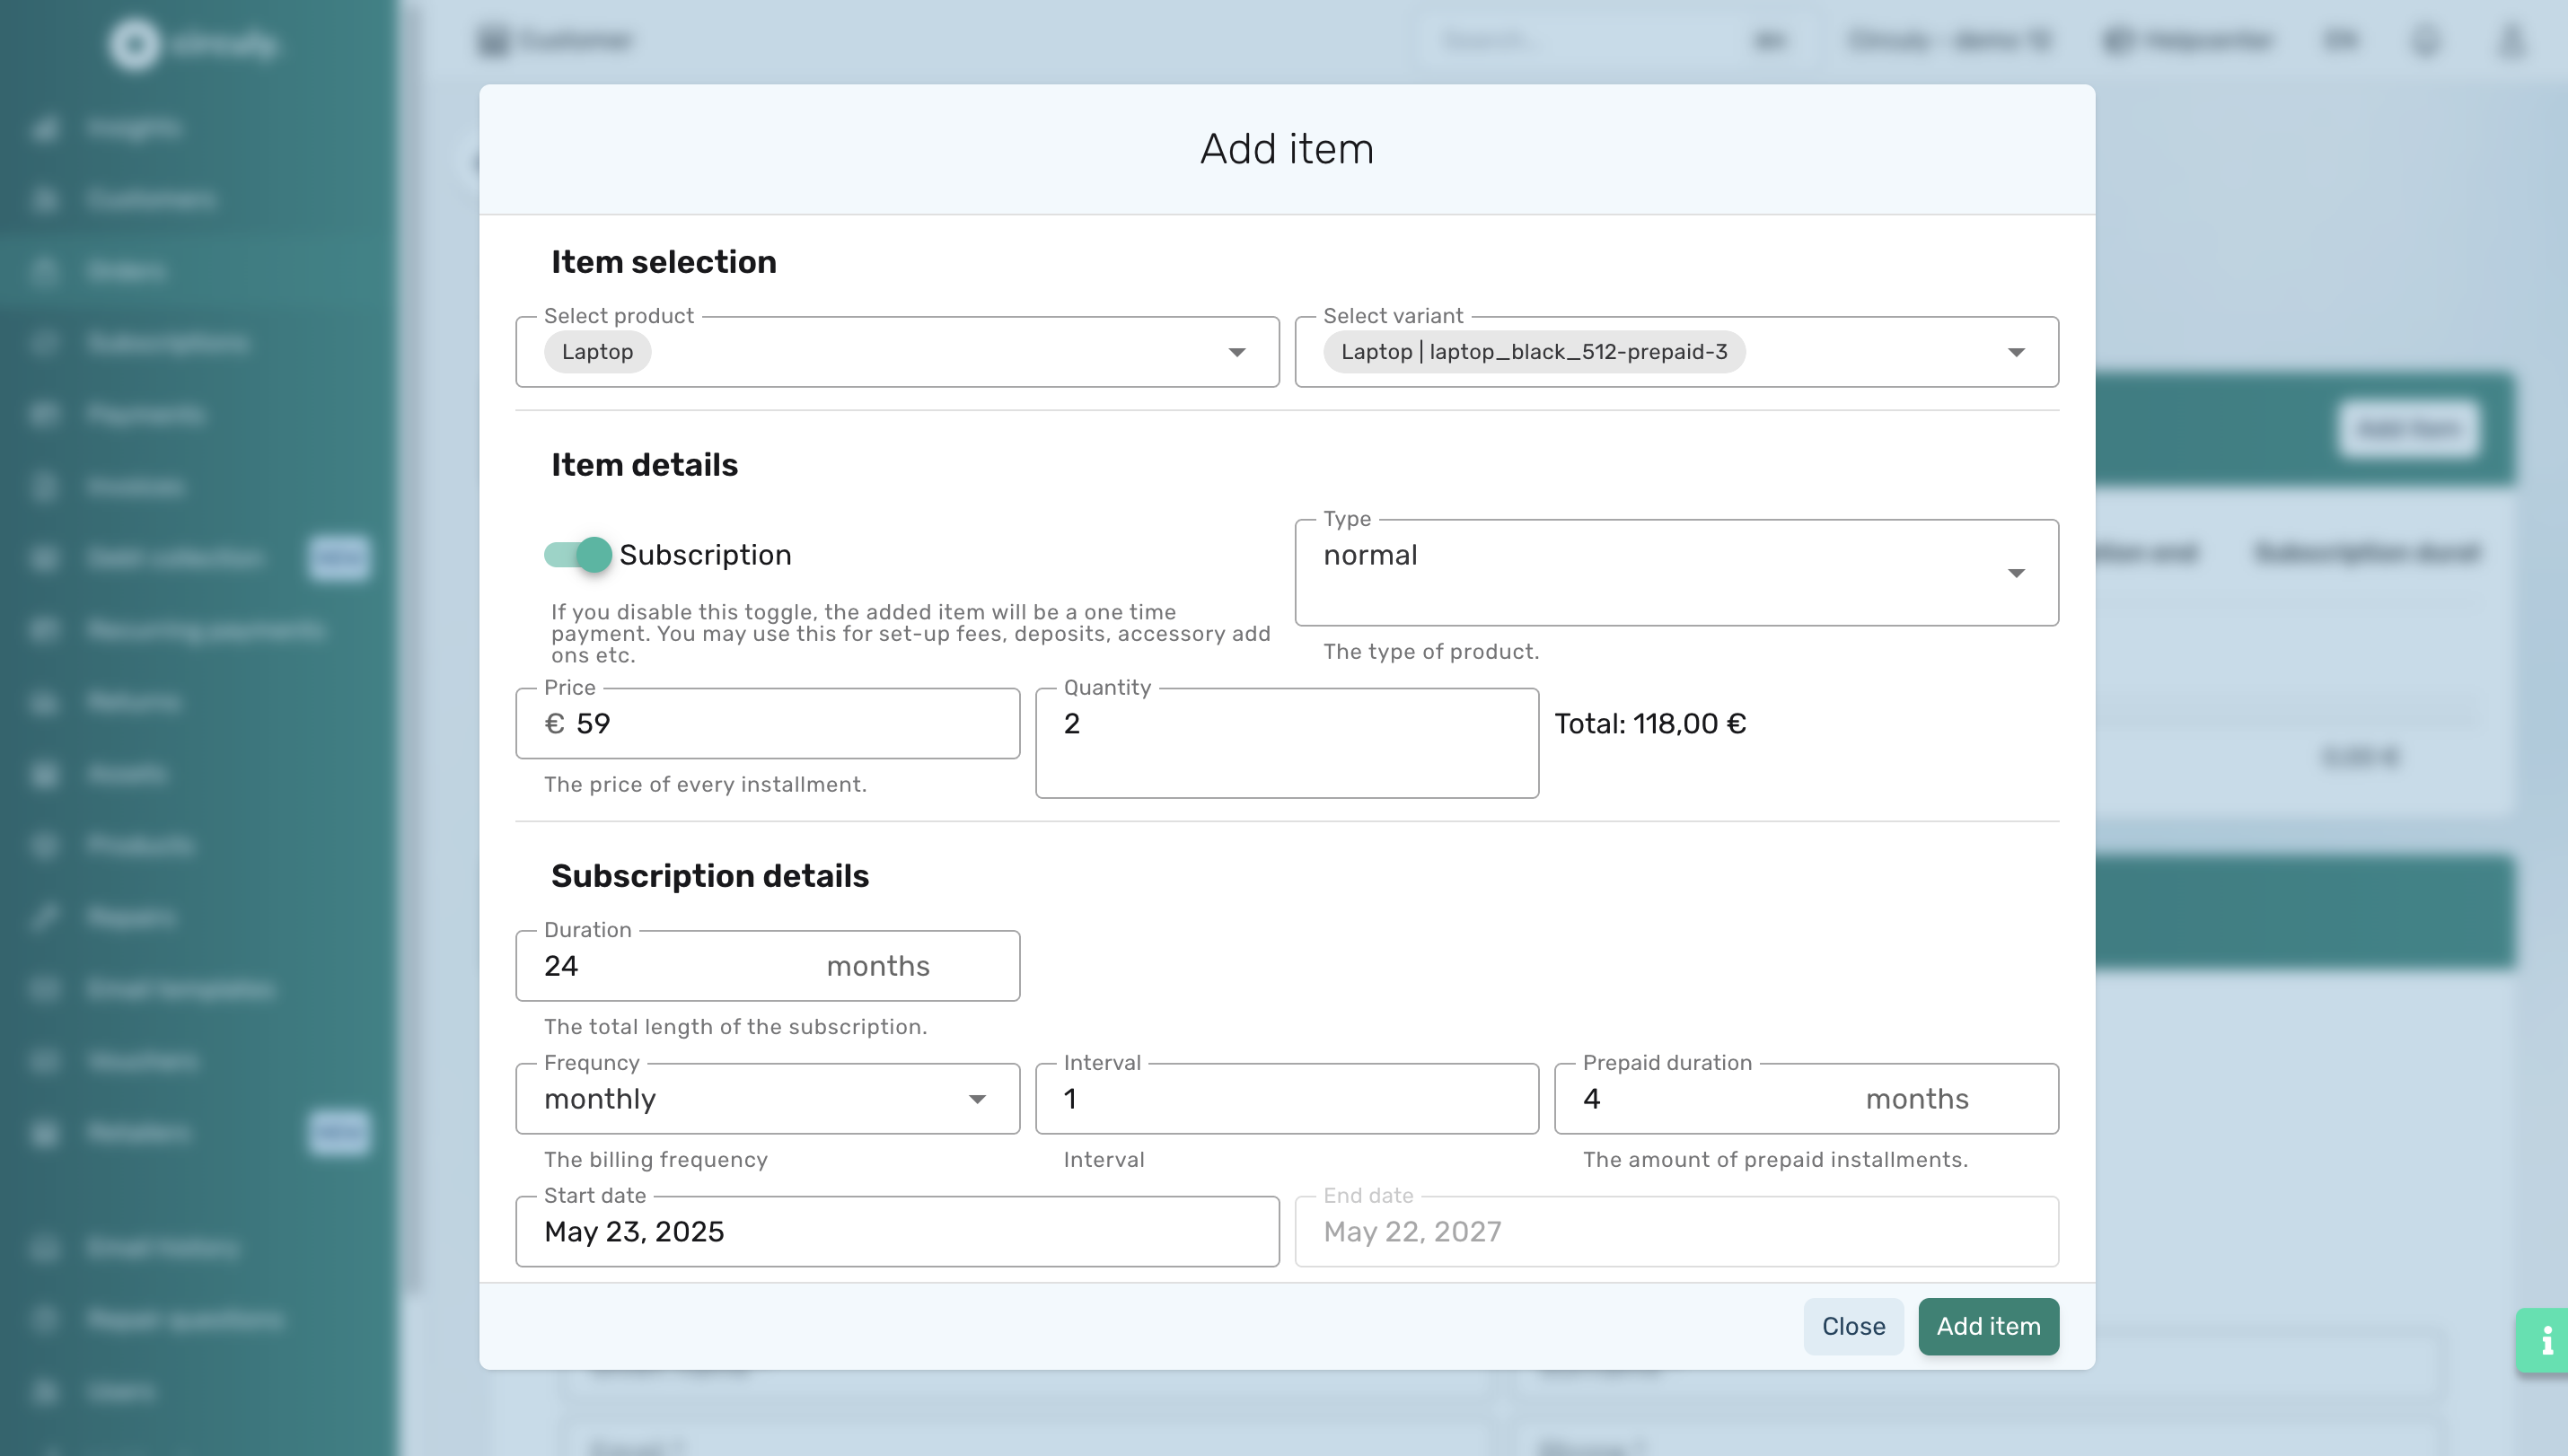
Customer journey
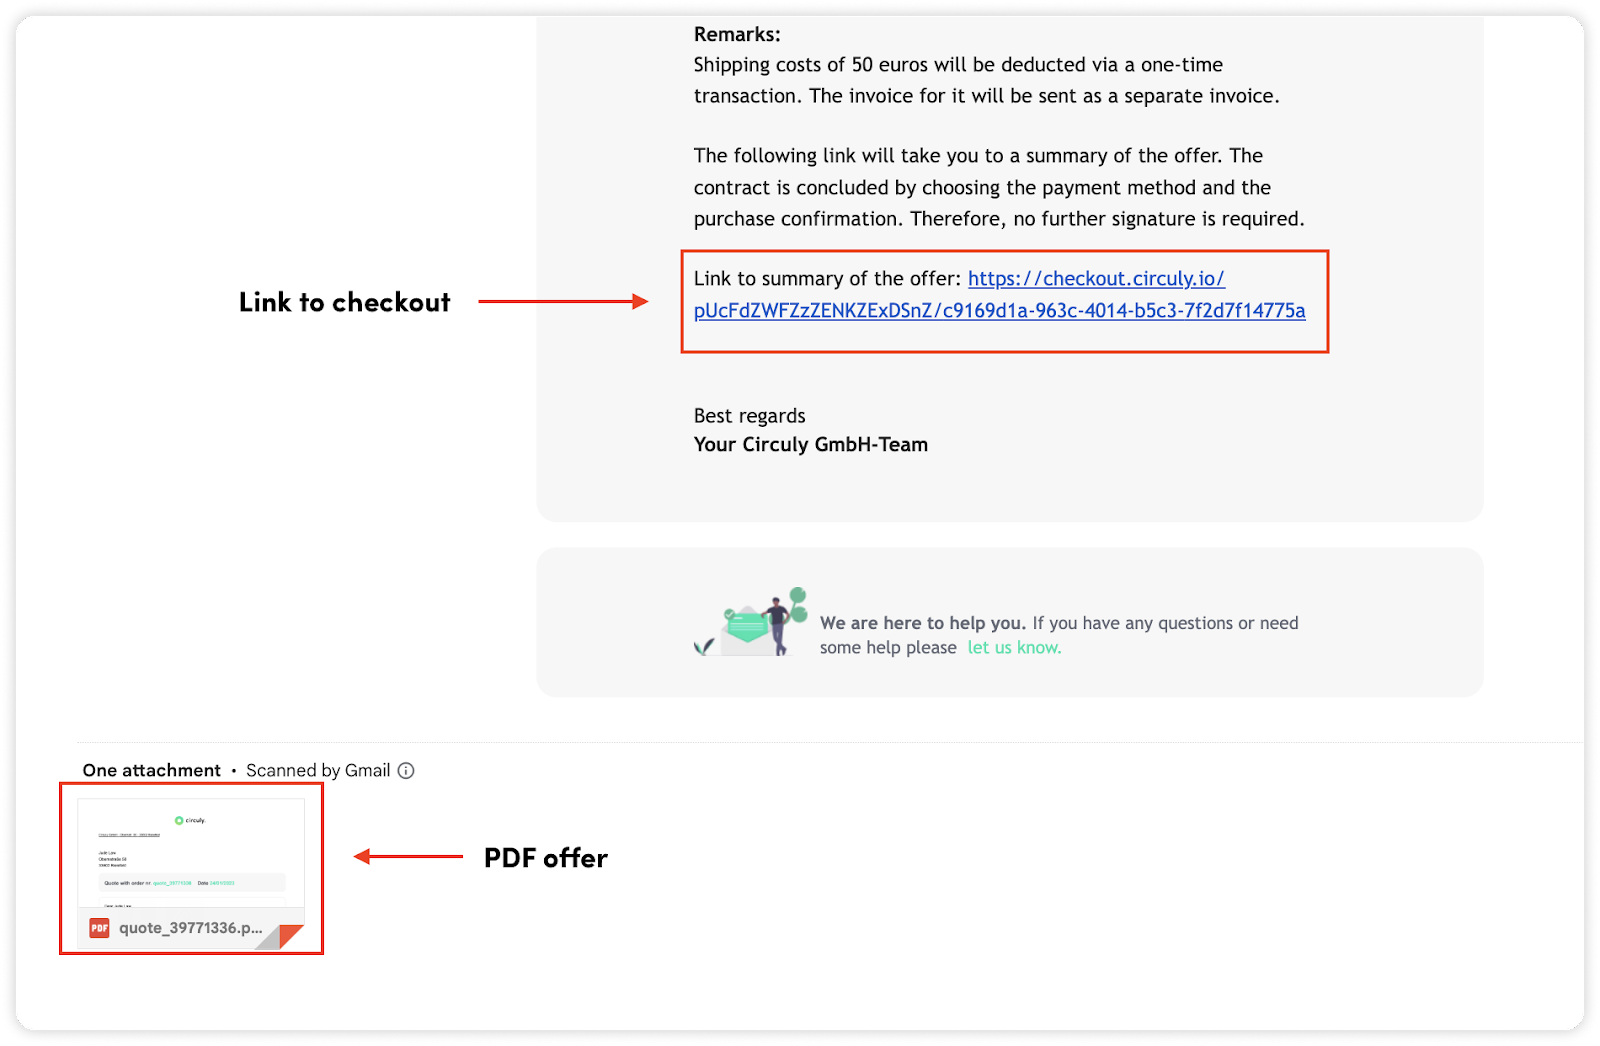
Note: The email templates used to send the email are: Order Offer and Order Offer PDF. Set up the email template before you start using this feature.
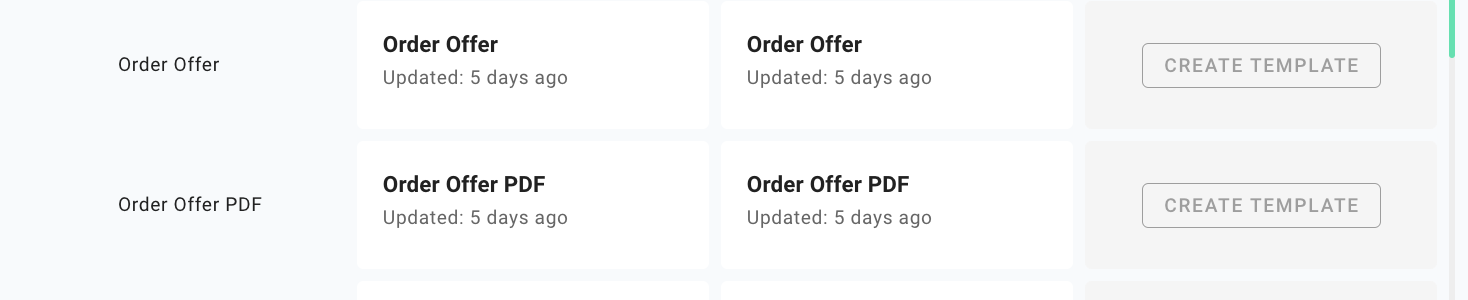
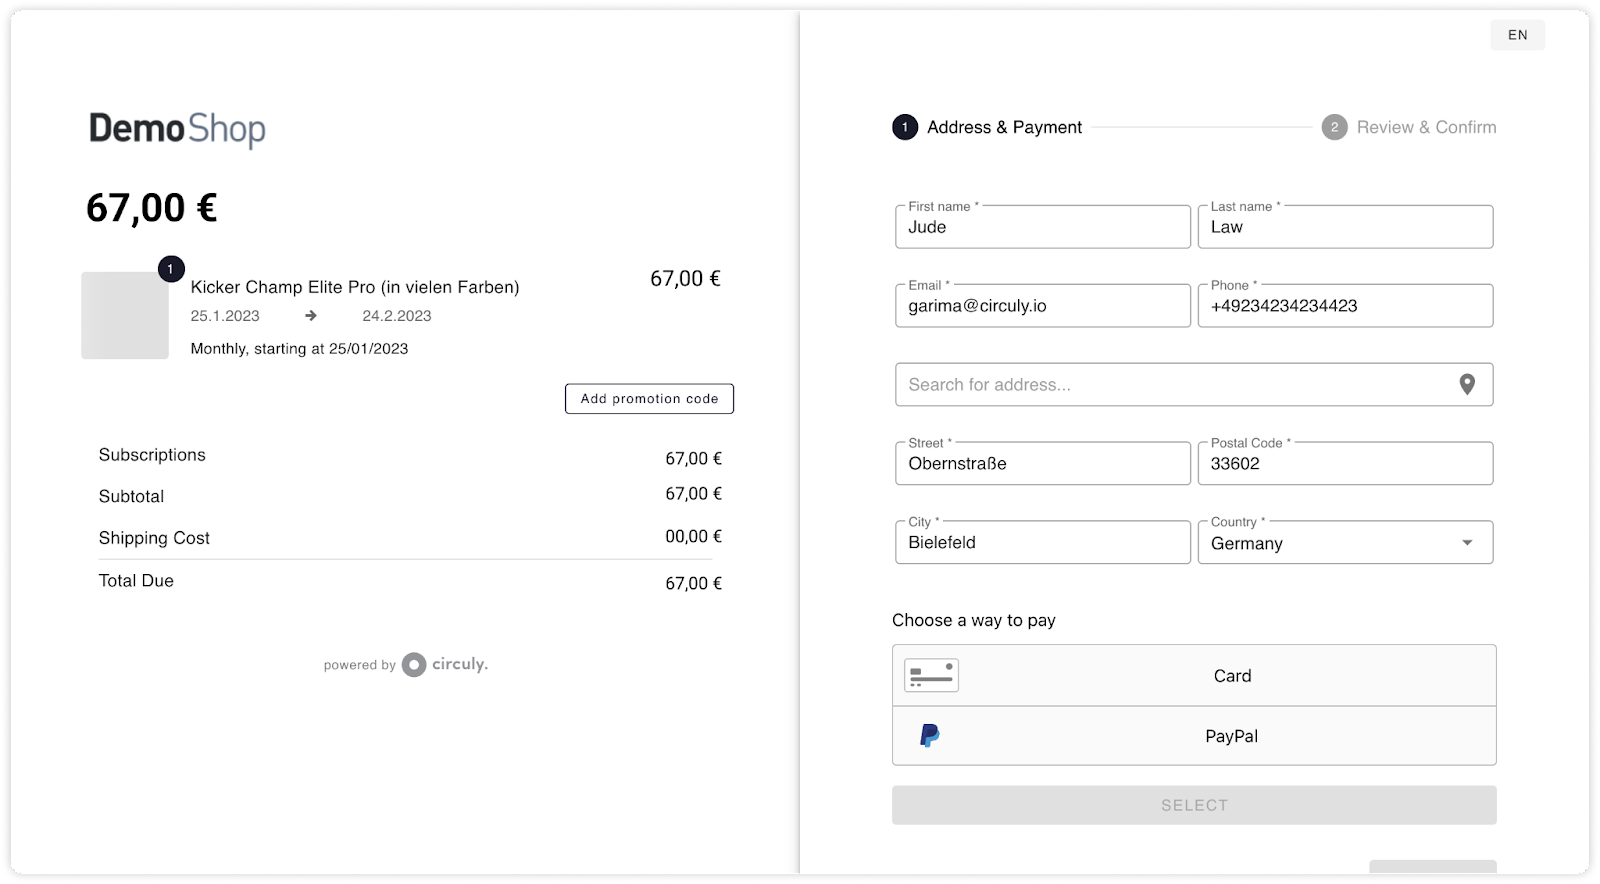
The status of the order will change from open to completed once the customer has successfully completed the process by adding their payment details on the checkout page.
Create a subscription for the order to start collecting the recurring payments.
Note: You can also work with the circuly API to create manual order. You can find the documentation here. Please keep in mind that this works only for offline payments. If you want to create an order with other payment service providers, kindly write a service desk ticket to our customer support.
When a customer completes the checkout process and finalises their order by making a payment, an order is created in circuly, and the initial payment is processed. This initial charge corresponds to the amount the customer agreed to on the checkout page.
However, if you have enabled the "Delay charge in checkout" setting, no payment is processed automatically during checkout. In such cases, the initial payment must be charged manually. This step is essential because, typically, a subscription cannot be created unless the initial payment has been made. This safeguard prevents accidental subscription creation for orders where no payment exists or has not been collected yet.
An exception to this rule occurs if you have also enabled the "Allow unpaid subscriptions" setting alongside "Delay charge in checkout." This configuration allows you to create a subscription even if no payment has been processed. However, this should be treated as a special case and communicated clearly to all users of the circuly Hub to avoid confusion.
If you have enabled the "Delay charge in checkout" setting, no payment is collected after a customer finalises the order. The payment must be charged manually. To do so you can use the charge initial payment feature available in the circuly Hub that lets you manually charge the initial payment.
The option to charge the initial payment can be approached either from the Orders tab or the Customer tab. No matter which way you choose, the result is the same.
After you have charged the initial payment, you can proceed to create a subscription for the order.
Delayed charge is a feature available in the circuly Hub that you can use if you do not want to charge the initial payment in the checkout and instead delay the charge until a later point in time.
Currently the option to delay a charge in the checkout or the initial payment is only available if you use the following Payment Service Providers:
Here’s when you might want to delay a charge:
If you choose to delay the charge during checkout, here’s what happens:
Why this matters:By default, circuly prevents subscription creation without the initial payment to protect your business from fraud and to avoid unintentionally activating unpaid subscriptions.
However, if you have internal processes that require creating subscriptions for unpaid orders, circuly allows you to do this via the Allow unpaid subscriptions setting.
To enable it:Go to Settings > Subscription > Create Subscription > Allow unpaid subscriptions and toggle the switch on.
Once enabled:
📢 Be sure to clarify in the Order Confirmation email that it confirms receipt of the order request—not its acceptance. Update your email template accordingly to manage expectations.
In the Order Overview, you'll also see a new menu option under the three-dot menu: "Charge initial payment"—in case you prefer to initiate the payment manually.
Enable the setting
Note: The change applies to all orders only after you have activated the associated setting.
You need to charge the initial payment.
Note: You can only Create a subscription once the initial payment has been processed. The button/option to so will now we be available to you or you've enabled the Allow unpaid subscription setting.
When a transactional email doesn’t reach your customer, it’s important to understand that sending an email and successfully delivering it to the inbox are two separate things. circuly may send the email without any errors, but the customer still might not receive it due to issues on their end or with the email provider.
This guide helps you determine whether an email was sent and what to do if it wasn’t delivered.
Step 1: Check if the email was sent
Before diving into possible inbox issues, first verify whether the email was actually sent from circuly.
Option 1: Check via the Email History Tab
Option 2: Check via the Customer Profile
Step 2: If the email was sent but not delivered
If the email status is "Success" but the customer didn’t receive it, the issue likely lies with delivery. Here are the most common reasons and what you can do:
1. The email landed in the spam folder
2. DNS settings are misconfigured
3. Using an unsuitable email provider
4. External links in your email template
Step 3: Retry Sending the Email Manually (if needed)
If circuly shows that the email failed to send, you can manually resend the email from the circuly Hub. This helps test whether the issue was temporary or ongoing.
Final Step: Contact circuly support (if necessary)
If you’ve verified that:
Submit a ticket in the circuly Support tab. We’re happy to investigate further or guide you on the next steps.
What are chargebacks?
A chargeback is a term used to describe a customers request to reverse a payment by disrupting the charge on their account statement. Chargebacks were introduced to offer customers an easy way to dispute suspicious transactions and to protect them against financial fraud. A chargeback need not always be due to fraudulent activities but can also be due to simple processing errors such as charging the customer twice or sending a damaged product. A customer can file a chargeback with their bank. Once approved, the customer receives the amount back. But merchant have the option of disagreeing with the chargeback and claiming it back.
Chargebacks and refunds both involve the return of funds but a major differentiating factor between the two is that for refunds the customer directly gets in touch with the merchant while for a chargeback they contact their bank. The process also tends to be longer for chargebacks and the fees are often significantly higher.
How are chargebacks bad for business?
Chargebacks often come with additional fees which are to be paid by the merchant. Banks and card providers also tend to penalise the merchant if the chargeback ratio becomes too high.
How does a chargeback occur?
When customers place an order through your checkout page, they receive an Order Confirmation email. Additionally, they receive a Payment Confirmation email when the initial payment is successfully charged, as well as subsequent Payment Confirmation emails for recurring payments.
In some cases, a customer may dispute a payment, claiming they did not authorize it, and request a chargeback. To initiate this, the customer can click the Payment Service Provider (PSP) link included in the Payment Confirmation email. The PSP processes the chargeback request, and once approved, the customer is refunded the payment.
When a chargeback occurs, circuly automatically updates the order and payment status in your system to reflect the chargeback. Here’s how the feature works in detail:
Chargebacks can be identified in both the Payments and Subscriptions tabs within the circuly Hub. Here's how to view chargebacks in each section:
Chargebacks in the Payments tab
To see the chargeback > Go to the Payments Tab > You’ll see a list of all the payments > Use the filter function to only display payments with the chargeback status.
Chargebacks in the Subscriptions tab
Go to the Subscriptions tab and select a subscription from the Subscription List > In the Subscription Overview Window scroll down to Payments and Recurring Payments.

.png)
Follow up with your customer manually to find out why they have initiated a chargeback. Depending on the outcome of the call you can either agree to the chargeback or charge the customer a one-time payment if the chargeback was mistakenly reported.
If your business ships products within Europe or internationally, understanding how VAT (Value Added Tax) applies is essential. VAT obligations apply whether you're located inside or outside the EU. Additionally, even within a single country—like the USA—tax rates may vary by state. This guide will help you set up taxes properly in circuly to ensure compliant and accurate billing.
Note: If you're operating in the USA, circuly offers an integration with TaxJar for automated tax calculations. Reach out to the service desk to activate this integration.
VAT is a consumption tax charged as a percentage of the value of goods and services purchased by consumers. VAT applies to nearly all goods and services, but different products may be subject to different tax rates depending on their category.
The EU has set a threshold amount for businesses situated within the EU selling to customers in another EU country:
As mentioned above, the VAT is calculated and applied on the basis of three things:
Note: If you are below the threshold you can choose to apply the tax rates of either the country you are located in or the country you are shipping to.
You do not need to configure tax rates if:
With this feature you can set up tax logics that apply to different categories of products based on the different factors that influence it. This features enables you to assign the right taxes to the products. Before you begin setting up the taxes make sure you have set up the following:
Before getting started with the tax rate set up you need to do the following:
Note: If you do not set up the delivery countries in the Settings, you will only see the tax collection from the country that you have entered in your company address (company settings). As a result you will not be able to set up tax rules in the Products tab for countries that have different tax percentages and where you want to offer shipping.
By default, all products are mapped to the default product collection. If you offer products that fall under different tax categories (e.g., standard vs. reduced rate), you must create new collections.A new tax rule row will appear for this collection under both the base and delivery countries.
Products > TaxesA new tax rule row will appear for this collection under both the base and delivery countries.
Now configure tax percentages for each collection and delivery country:
Here’s an example.
Scenario: Your default country is Germany and you’re shipping to Austria and Norway. In Austria you earn a revenue of over 10.000 euros and in Norway, you’re under the threshold amount.
How should the tax percentage boxes be checked for the above scenario?
To apply the correct VAT logic, map products to the appropriate collection:
Products > Products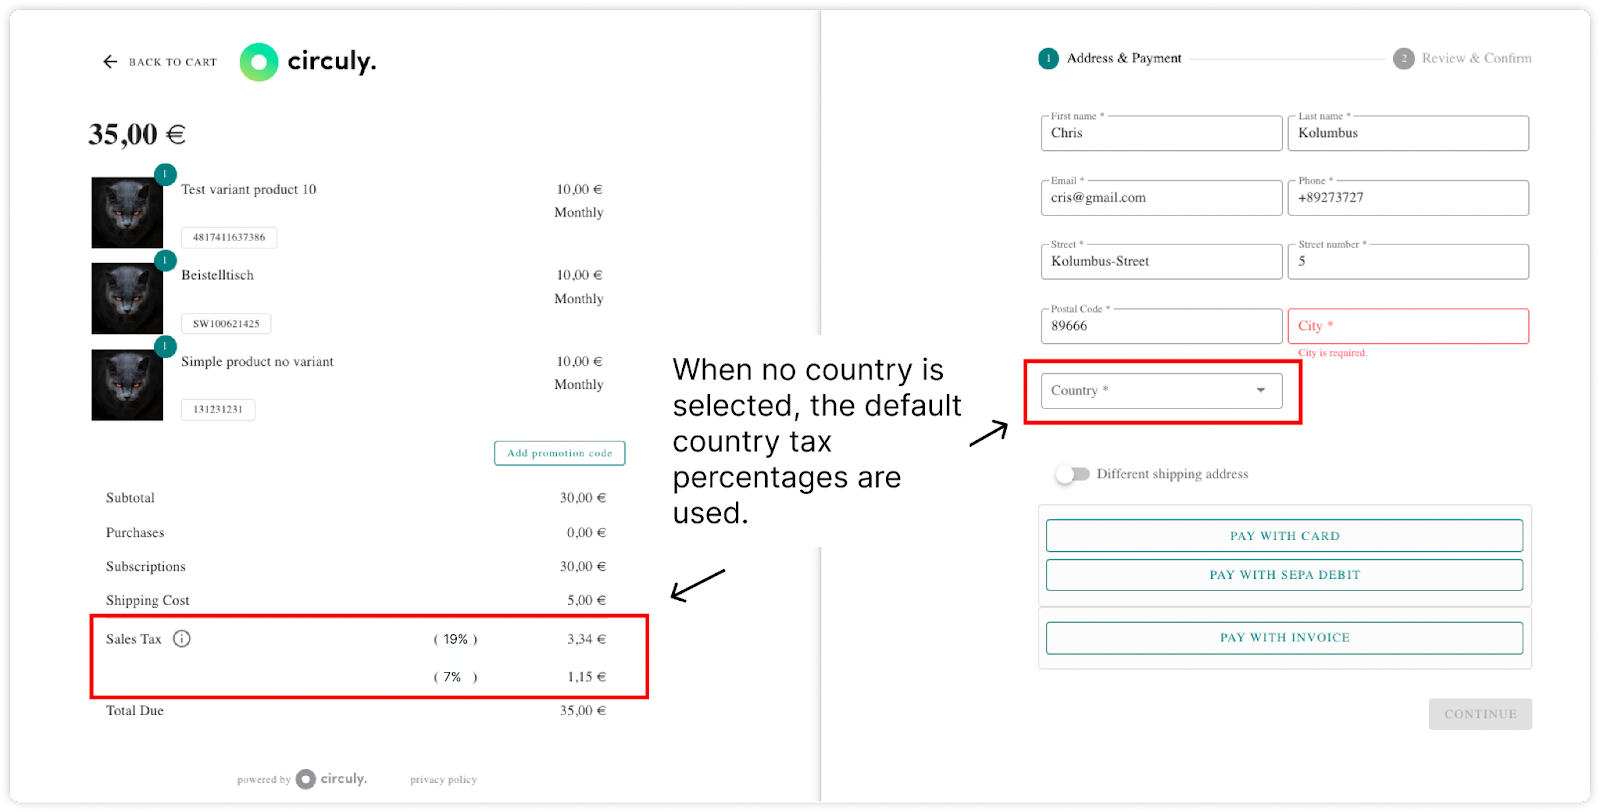
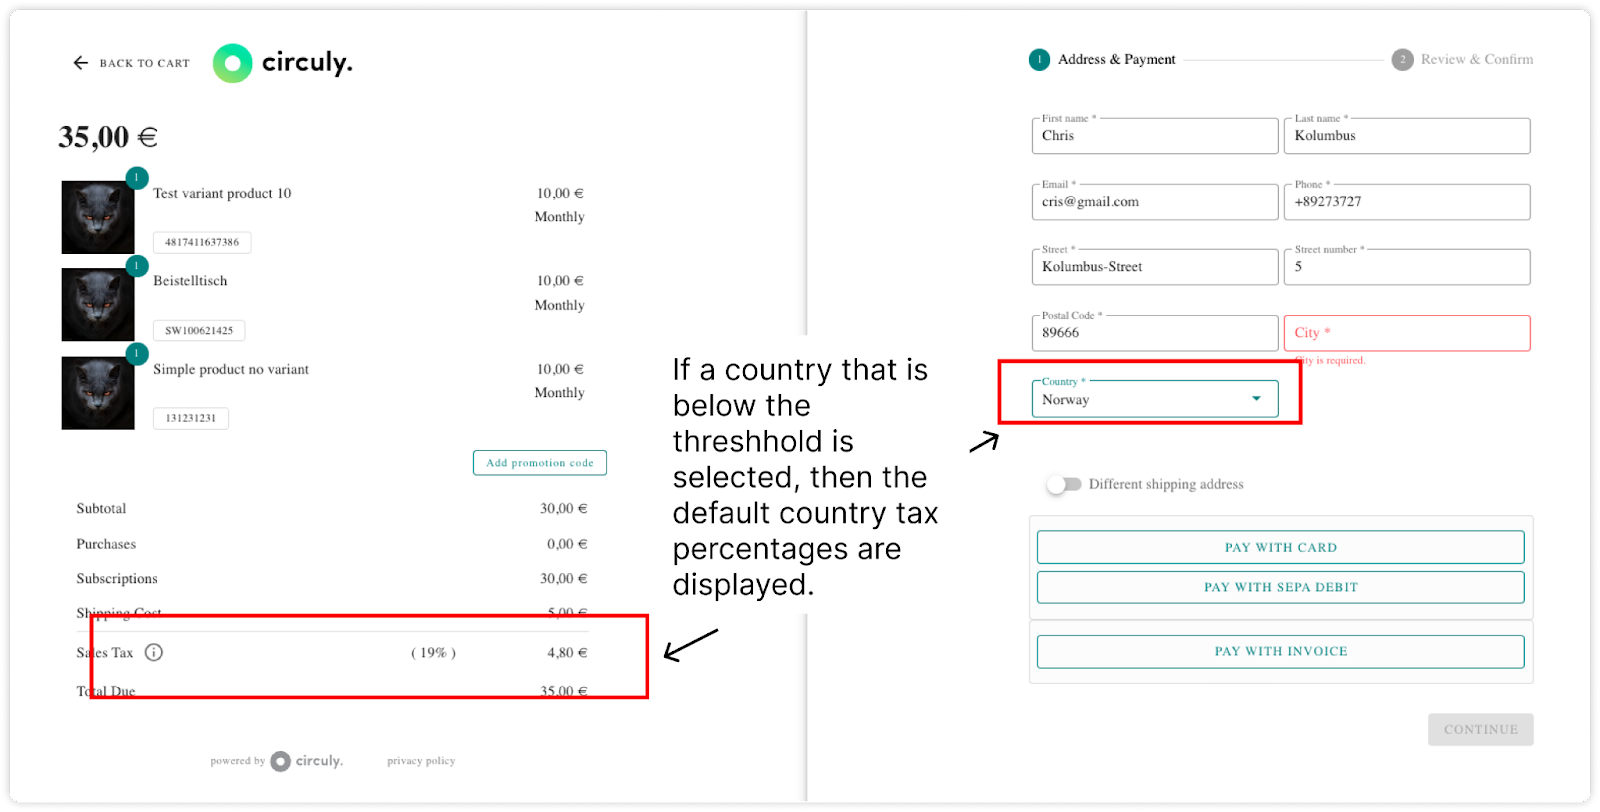
Important: Tax percentages in circuly are fixed in the system. If your business is enrolled in a special tax program or needs custom rules, contact our service desk for adjustments.
Configuring your tax rules in circuly allows you to operate compliantly across borders while ensuring customers are charged the correct VAT. With automated logic tied to product type, revenue thresholds, and shipping destinations, you can reduce errors, simplify reporting, and deliver transparency at checkout.
When using circuly, you need to inform your customers about the use of our services. Please do so in your Privacy Statement by including the following snippet. A privacy policy is a document contained on a website that explains how a website or organization will collect, store, protect, and utilize personal information provided by its users.
This is only a sample for orientation and that we do not guarantee any liability for the legal validity.
For English version, please see below
DE - German
Beschreibung und Zweck
Auf dieser Website nutzen wir für unseren Checkout und das Subscription Management circuly. circuly ist ein Software-Unternehmen aus Deutschland mit dem Hauptsitz in Deutschland, 33602 Bielefeld, Obernstr. 50, Telefon: +49 176 552 884 77. Hierbei handelt es sich um eine integrierte Software-Lösung, mit der wir verschiedene Aspekte unseres Subscription Management abdecken. Dazu zählen unter anderem: Checkout, Kundenlogin, Rechnungen und Zahlungsabwicklungen, Kommunikation, Returen-Management und Reporting. Diese Informationen werden auf Servern unseres Softwarepartners circuly gespeichert. Sie können von uns genutzt werden, um mit unseren Kunden in Kontakt zu treten und unsere Abo-Leistungen zu erbringen. Alle von uns erfassten Informationen unterliegen dieser Datenschutzbestimmung. Wir nutzen alle erfassten Informationen ausschließlich zur Verarbeitung der (Abo-)Bestellung.
Rechtsgrundlage
Die Rechtsgrundlage für die Nutzung der Dienste von circuly ist Art. 6 Abs. 1 lit. f) DSGVO (berechtigtes Interesse). Unser berechtigtes Interesse an dem Einsatz dieses Dienstes ist die effiziente und kundenfreundliche Abwicklung von Abo-Verträgen.
Empfänger
Empfänger ist circuly GmbH, Obernstr. 50, 33602 Bielefeld, Deutschland.
Übermittlung in Drittstaaten
Durch den Einsatz des Dienstes werden ggf. personenbezogenen Daten in ein Drittland übermittelt. Im Falle einer Übermittlung von personenbezogenen Daten stellt der Anbieter das Schutzniveau der DSGVO durch die Einhaltung der Art. 44 ff. DSGVO sicher. Sofern kein Angemessenheitsbeschluss mit dem Drittland besteht, in dem der Datenimporteur seinen Sitz hat, erfolgt die Übermittlung vorbehaltlich geeigneter Garantien. Bei Rückfragen wenden Sie sich gerne an unseren Datenschutzbeauftragten.
Dauer der Datenspeicherung
Die Daten werden gelöscht, sobald sie für die Erreichung des Zweckes ihrer Erhebung nicht mehr erforderlich sind. Darüber hinaus werden die Daten gelöscht, sofern Sie Ihre Einwilligung widerrufen bzw. die Löschung der personenbezogenen Daten verlangen.
Widerspruchsmöglichkeit
Sie haben nach Art. 21 Abs. 1 DSGVO jederzeit das Recht, Widerspruch gegen die Verarbeitung Ihrer personenbezogenen Daten einzulegen. Sofern Sie von Ihrem Recht Gebrauch machen, findet eine Verarbeitung zu diesem Zweck nicht mehr statt. Weitere Informationen hierzu finden Sie weiter oben in unserer Datenschutzerklärung unter “Rechte der betroffenen Personen”.
Vertragliche oder gesetzliche Pflicht
Es besteht keine vertragliche oder gesetzliche Pflicht für die Bereitstellung der Daten.
Weitere Datenschutzhinweise via Link
https://www.circuly.io/data-privacy
https://www.circuly.io/data-processing-agreement
EN - English Version
Description and purpose
On this website we use the circuly checkout and subscription management software. circuly is a software company based in Germany, headquartered at 33602 Bielefeld, Obernstr. 50, phone: +49 176 552 884 77. This is an integrated software solution that we use to cover various aspects of our Subscription Management. These include: Checkout, customer login, invoices and payment processing, communication, return management and reporting. This information is stored on servers run by our software partner circuly. It may be used by us to contact our customers and provide our subscription services. All information we collect is subject to this Privacy Policy. We use all information collected exclusively for processing the (subscription) order.
Legal basis
The legal basis for the use of circuly services is Art. 6 para. 1 lit. f) DSGVO (legitimate interest). Our legitimate interest in using this service is the efficient and customer-friendly processing of subscription contracts.
Recipient
The recipient is circuly GmbH, Obernstr. 50, 33602 Bielefeld, Germany.
Transfer to Third Countries
Through the use of the service, personal data may be transferred to a third country. In the event of a transfer of personal data, the Provider shall ensure the level of protection of the DSGVO by complying with Art. 44 et seq. DSGVO. If there is no adequacy decision with the third country in which the data importer is based, the transfer is subject to appropriate safeguards. If you have any queries, please contact our data protection officer.
Duration of data storage
The data is deleted as soon as it is no longer required to achieve the purpose for which it was collected. Furthermore, the data will be deleted if you revoke your consent or request the deletion of the personal data.
Possibility of objection
In accordance with Art. 21 (1) DSGVO, you have the right to object to the processing of your personal data at any time. If you exercise your right, processing for this purpose will no longer take place. Further information on this can be found above in our data protection declaration under "Rights of data subjects".
Contractual or legal obligation
There is no contractual or legal obligation to provide the data.
Further data protection information via link.
Further data protection information via link
https://www.circuly.io/data-privacy
https://www.circuly.io/data-processing-agreement
Please also make sure, that you include your Privacy Statement into the circuly Checkout. To do so, paste the URL to your Privacy Statement into the settings in the circuly operations backend. If you do not have access to that setting, please create a service desk ticket with the link to your privacy statement.
Mistakes happen—sometimes customers order the wrong product, or the wrong product is shipped to them. Depending on whether the product has already been sent and whether a subscription has started, there are different ways to resolve the issue using the circuly Operations Backend.
Wrong product situations can occur either due to customer error or operational mishandling. circuly offers several workflows to correct these errors depending on the order and subscription status. This article outlines the different cases and the recommended actions.
Here’s what you can do about it:
Scenario 1.1: Subscription Has Already Started
Subscription Status: Active
Do not manually cancel the order or set the subscription to "pending return" before swapping, as swap/replacement is only available for active subscriptions.
Scenario 1.2: Subscription Has Not Yet Started
If the product has not yet left your warehouse, here’s what to do:
Once identified, you can either:
Option 1: Edit the Order Item
Use this if the wrong product, SKU, duration, price, or frequency needs to be corrected.
To enable this option, go to: Settings > Orders > ORDER and toggle on Allow order item editing.
Option 2: Replace the Serial Number
Use this if the product is correct but the wrong serial number was assigned.
With circuly you can export data from the circuly operations backend and plug it into a tool of your choice. The best way to do this is via Zapier where you can also create automations.
If you decide to use Zapier, then the first thing you need to do is to make sure that the tool you want to send information to from circuly is available on Zapier.
circuly also provides you with the option of using webhooks to take data out of circuly and plug it into a tool of your choice to create automations. You can use an API endpoint of our choice or work with Zapier (our recommendation is to use Zapier) to make two apps talk to one another.
Webhooks are automated messages sent from one app to another in case something happens or something is updated/changed. It’s a way for different tools to “communicate” to each other and get automated information when something new happens. With webhooks you can push data from one app to another.
Here’s a simple analogy from Zapier about Wehbooks
“There are two ways your apps can communicate with each other to share information: polling and webhooks. As one of our customer champion's friends has explained it: Polling is like knocking on your friend’s door and asking if they have any sugar (aka information), but you have to go and ask for it every time you want it. Webhooks are like someone tossing a bag of sugar at your house whenever they buy some. You don't have to ask, they just automatically punt it over every time it's available.”
When you use Webhooks there’s a sender that send the data and a receiver that receives that data. So there is a place where the action is “triggered”, and a place this action goes to, to convey that something has happened.
You can use Webhooks to create all sorts of automations. You can use an API endpoint of our choice or work with Zapier (our recommendation is to use Zapier) to make two apps talk to one another.
There’s a lot of room for creativity when it comes to creating automations. The automations you make depends on what exactly you want to automate. Based on that you can think what information you will need from a tool to make that automation work.
Note: Webhooks by Zapier is only available to Zapier users on a paid plan.
Create a Zapier account - to work with zapier, you need to create an account.
Create an account on the tool you want to use - you also need to create an account on the tool you want to use with Zapier.
With webhooks you first have to figure out what you want to automate and the information you will require to automate it. Then you need to match it with the information that is available and can be used to create the automation.
Connecting a shipping tool (we’re using Easyship as an example) to circuly via Zapier and using webhooks to transfer data to the shipping tool.
Detailed steps given below
Now everytime anything in a Subscription is updated, Webhook will catch that update/change and send it to Zapier.
Optional: If you have test orders and subscriptions in your operations backend, you can change something in the subscription to test the trigger. But if no change or update has been made in the Subscription at the time you are creating a Zap then the Test trigger button will not lead to any results.
Note: Make sure to connect your tool with Zapier. Here’s how it works for Easyship > In your Easyship account > Go to Connect in the left nav bar > Click on + New Integration > Select Zapier from the list > Click on the Connect button.
Once you’ve completed the necessary steps in the tool, go to Zapier
To fill in details, either type in the input field or click on the field to get a list of values that can be automatically taken from the data retired via webhooks.
Subscription settings in circuly allow you to control how subscriptions are created, activated, renewed, cancelled, and managed. By adjusting these settings in the circuly Hub, you can streamline operations, automate customer journeys, and stay compliant with local regulations.
This article gives you a complete overview of the subscription-related settings available in circuly, what they do, and when you should use them.
The subscription settings cover areas like:
These settings give you granular control over how subscriptions behave throughout their lifecycle.
These settings give you full control over your subscription logic. You can combine multiple settings to automate processes like:
Make sure to align these configurations with your fulfillment capabilities, legal obligations, and customer experience strategy.
The Refer a friend feature in circuly allows your existing customers to share unique voucher codes with their friends. When a friend uses the voucher code during checkout, they receive a discount—and the referring customer earns a reward, added to their account balance.
This win-win setup helps you acquire new customers while rewarding loyal ones.
Variables used include: is_account_balance, from_account_balance, and final_invoice_amount.
Clearly explain how the reward will be used (account balance, not cashback), and ensure transparency to avoid misunderstandings.
Q: Can customers use their balance for new checkouts?
A: No, account balance is only applied to future recurring payments.
Q: What happens if the balance is greater than the recurring amount?
A: The surplus remains in the account and is used for upcoming payments until exhausted.
Q: Why is the feature only available after the early cancellation period?
A: To reduce fraud and ensure the referring customer remains subscribed for a certain period.
Webhooks are automated messages sent from one app to another in case something happens or something is updated/changed. It’s a way for different tools to “communicate” to each other and get automated information when something new happens. With webhooks you can push data from one app to another.
Here’s a simple analogy from Zapier about Webhooks
“There are two ways your apps can communicate with each other to share information: polling and webhooks. As one of our customer champion's friends has explained it: Polling is like knocking on your friend’s door and asking if they have any sugar (aka information), but you have to go and ask for it every time you want it. Webhooks are like someone tossing a bag of sugar at your house whenever they buy some. You don't have to ask, they just automatically punt it over every time it's available.”
If you want to become a webhooks pro and show off your webhooks knowledge to a colleague (or your boss), we recommend reading this article by Zapier.
Test your knowledge after you’re done reading the article by Zapier: How did webhooks get’s it name?
But you don't really need to be a webhooks pro to use them. Let’s jump right in.
circuly also provides you with the option of using webhooks to take data out of circuly and plug it into a tool of your choice to create automations. You can use an API endpoint of our choice or work with Zapier (our recommendation is to use Zapier) to make two apps talk to one another.
If you decide to use Zapier, then the first thing you need to do is to make sure that the tool you want to send information to from circuly is available on Zapier.
As mentioned above a webhooks catches data and send it to a destination every time something is updated or changed. Webhooks only catches the events that are changed or updated (this is relevant for creating zaps and will be discussed later).
When you use Webhooks there’s a sender that send the data and a receiver that receives that data. So there is a place where the action is “triggered”, and a place this action goes to, to convey that something has happened.
You can use Webhooks to create all sorts of automations. You can use an API endpoint of our choice or work with Zapier (our recommendation is to use Zapier) to make two apps talk to one another.
There’s a lot of room for creativity when it comes to creating automations. The automations you make depends on what exactly you want to automate. Based on that you can think what information you will need from a tool to make that automation work.
Note: Webhooks by Zapier is only available to Zapier users on a paid plan.
Create a Zapier account - to work with zapier, you need to create an account.
Create an account on the tool you want to use - you also need to create an account on the tool you want to use with Zapier.
A return label is a shipping label that’s prepaid and pre-addressed. Let’s see how you can get relevant data out of circuly via webhooks and send it to an app (we’re using Easyship) to creates a return label via Zapier.
With webhooks you first have to figure out what you want to automate and the information you will require to automate it. Then you need to match it with the information that is available and can be used to create the automation.
IMPORTANT: When you use circuly to manage your subscriptions, a subscription has a start date and an end date. If you do not use any of the auto-renewal features, then active subscriptions go into a “pending return” stage when the subscription end date as arrived. If you use the auto-renewal feature then subscriptions stay active until a customer makes a cancellation request from the customer self-service portal or write an email requesting a cancellation. When that happens, you can approve or disapprove the the cancellation based on whether or not the minimum subscription duration has passed and set it to pending return. You ideally want to generate a return label when a subscription goes into the “pending return” and “pending replacement” state.
When a customer makes a cancellation request from the customer self service portal and if you work with the auto-cancel subscription setting, then active subscriptions are immediately and automatically set to pending return and bypass the minimum subscription duration period.
When the subscription status is set as pending return, the return workflow is triggered, meaning that the customer has to return the subscription product within a certain time period.
It is at this stage that you ideally want to generate a return label and send it to the customer so that your customer can return the product.
To create a return label for such subscriptions, follow these steps:
Steps:
Now every time anything in a Subscription is updated, Webhook will catch that update/change and send it to Zapier.
Optional: If you have test orders and subscriptions in your operations backend, you can change something in the subscription to test the trigger. But if no change or update has been made in the Subscription at the time you are creating a Zap then the Test trigger button will not lead to any results.
Webhooks will send information to Zapier every-time something is updated in a subscription which includes all changes to all subscriptions such as subscription extension, subscription renewals, status changes etc.. But you don’t want to create a return label when the subscription is being extended or when a subscription amount is being changed. Therefore you need to set filters. To create a return label, all that you need is the status of the subscription and that’s the filter you can set while setting up your Zap.
Testing the filter
When you test the filter, you might get the message that Your Zap would not have continued. Reason being that the data webhook is sending to Zapier does not contain a sample for pending return because this was not one of the changes that was made to Subscriptions and caught by webhook. See image below.
However this doesn’t mean that the filter doesnt work. If you change the value in the Enter test or insert data field from “pending return” to “active” and click on continue, you’ll see that you know have a success message. See image below.
You can ignore this and click on continue to move to the next step, that is sending info to your shipping tool.
Note: Make sure to connect your tool with Zapier. Here’s how it works for Easyship > In your Easyship account > Go to Connect in the left nav bar > Click on + New Integration > Select Zapier from the list > Click on the Connect button.
Once you’ve completed the necessary steps in the tool, go to Zapier
To fill in details, either type in the input field or click on the field to get a list of values that can be automatically taken from the data retired via webhooks.
In circuly, subscriptions may automatically or manually move into an inactive state when they reach their end date or when a customer initiates a return or cancellation request. However, there are situations where a subscription needs to be restarted—for example, when the customer does not return the product on time, or when you want to reverse a cancellation. That’s where the Reactivate Subscription feature comes into play.
The Reactivate Subscription feature allows circuly users to manually restart a subscription that is no longer active but still eligible for reactivation. When a subscription is reactivated:
Setting to review:Settings > Subscriptions > Recurring Payments > Past billing dates
This setting determines if missed recurring payments from the time the subscription was inactive should be charged once the subscription is reactivated.
In a rental or subscription model, customers may eventually want to keep the product they've grown to love. Whether it's at the end of their subscription period or somewhere in between, circuly gives you the flexibility to manage buyouts efficiently—without disrupting your operations.
This article explains how to initiate and manage product buyouts from the circuly Hub, especially when you want to offer custom prices. It also covers what changes take place in the subscription and what happens after the buyout is processed.
There are two ways to initiate a product buyout in circuly:
The difference between the two options:
The key difference between the two buyout methods lies in how much control you want over pricing.
Note: If you have enabled the Only allow customer-portal buyout after minimum duration is reached setting, this restriction applies only to the Customer Self-Service Portal. Hub- or admin-initiated buyouts are not affected and can be processed at any time, regardless of how long the subscription has been active. This makes the Hub the right option for accommodating buyout requests from customers who have not yet reached their minimum contract duration.
What a product buyout changes in the subscription:
When a product buyout is initiated, several things happen in the background to update the subscription and inventory status:
In circuly, products are expected to be returned at the end of the subscription period. If a product isn't returned by the "Return until" date, the system automatically reactivates the subscription and resumes charging the customer for the unreturned product.
However, when a product is purchased through a buyout, no return is expected. That's why it's important to formally initiate the buyout process—so circuly can:
Skipping this step could cause confusion for your operations team and frustration for your customers.
If you wish to enable your customers to request buyouts on their own from their customer portal, follow this guide on Enable And Process Buyout/Purchase of Subscription Products.
For information on how to handle buyouts from the circuly Hub, continue reading this article.
Step 1: Check the retail price
Before initiating a buyout, make sure the retail price of the product is correct:
Step 2: Initiate the buyout
Make sure the email template you use includes the {{description}} variable so the custom message appears correctly in the customer communication.
Buyout payments can take some time to process when SEPA is chosen. This should be mentioned in the email communication with the customer. Example text you can include in your buyout email: "Thank you for your order. You will receive an order confirmation by e-mail shortly. Depending on the payment method, it may take several days to process your payment. As soon as the payment has been successful, your subscription will be changed to "{statusBoughtOut}" and you will receive an email with your purchase invoice. If your payment cannot be processed, we will also notify you by email."
Learn more about the buyout process.
In subscription-based businesses, renewing a subscription is a crucial process that helps maintain ongoing customer relationships and ensures continued access to your products or services. Renewing a subscription means extending its duration, typically after the initial subscription period ends, allowing the customer to continue using the service without interruption. Depending on the business model, subscription renewals can be handled in two main ways: either manually, based on specific customer requests or circumstances, or automatically, where the system renews the subscription at the end of the term.
This article will guide you through the different methods available for renewing subscriptions in your circuly system—whether you want to manually extend a subscription or automate the renewal process to save time and ensure consistency.
Typically, when customers place an order on your website, they agree to a specific subscription duration. This duration is considered both the minimum and the full length of the subscription by the circuly system. Once this period ends, several outcomes are possible, including subscription renewal, cancellation, product return, or product buyout. You have the flexibility to choose whether or not to have the Circuly system automatically renew a subscription at the end of the term. If preferred, you can manually extend the subscription contract based on your specific needs or individual customer cases.
When you use this option to change the end date of a subscription, there is no impact of this action on the auto renew button in the subscription overview window.
If you want to renew or extend the subscription by its original duration then turn on the switch for the Auto renew subscriptions setting. From now on subscriptions will be renewed by the original subscription duration. For example if it was a 12 months subscription then towards the end of the subscription period it will be extended for another 12 months.
If you do not want to renew the subscription by its original subscription duration then you can define a custom value for the renewal. To do this > First go to the Auto renew subscriptions setting and turn on the switch > Next go to the Custom auto renew subscription setting and turn on the switch for this setting > Then add a numeric value in the Custom auto renew duration input field. From now on the subscription will be renewed by the value defined in this input field.
Important: Do not enable the switch for the Auto renew subscriptions setting if you want to renew subscriptions manually on on individual subscription level as every subscription will be renewed automatically at the end of the subscription period if you enable the auto-renew subscription setting.
When a subscription has been auto-renewed because of the auto-renew subscription setting, the auto-renew switch in the subscription overview window will be enabled. The button provides a visual reference to determine which subscription is renewed and which is not.
If you use the Only allow customer-portal buyout after minimum duration is reached setting, the subscription's auto-renew status is used to determine whether the buyout option becomes visible in the Customer Self-Service Portal. Specifically, the buyout option is only shown once the minimum contract duration has passed (auto_renew = true).
This means that how you configure auto-renewal directly affects when customers can initiate a buyout from their portal. If you want customers to be able to buy out their subscription product before the minimum term is up, a Hub- or admin-initiated buyout remains available regardless of auto-renew status.
Customer information in Circuly can be updated in three ways:
Editing customer details is essential for keeping records accurate—whether it's correcting a typo, updating a phone number, or changing the delivery address for a specific order.
However, not all customer-related data is editable in one place. This is intentional: a customer might have multiple orders or subscriptions, and changes like address updates (shipping and billing) may apply only to a specific order—not their entire profile.
Tip: You can also update customer details using circuly's API. refer to the Update a customer endpoint for more information.
In B2C contexts, the email and phone number typically belong to the customer themselves. However, in B2B scenarios, one customer profile may be used to place orders on behalf of multiple individuals. In such cases, the contact information (email and phone) may reflect the person placing the order rather than the actual recipient. This information may need to be updated over time, especially when responsibilities shift within a company, while the shipping address remains tied to the end recipient.
When editing the address, you'll see separate fields for the shipping address and the billing address. Make sure to update the correct one based on what the customer needs changed—for example, the delivery destination versus the invoicing contact.
In many cases—especially B2B—orders are placed by one contact person but delivered to different recipients. For this reason, address and birth date updates are made per order rather than globally across a customer profile. This ensures the right delivery information is applied where it's needed without affecting other subscriptions or orders linked to the same account.
Customers can also update their own information through the Customer Self-Service Portal.
However, similar to how it works in the circuly Hub, address changes are made on a per-order basis. If a customer needs to change their shipping address, they must do so from the specific order view—ensuring that address updates apply only to the relevant order and not universally across all active subscriptions.
These updates are reflected directly in the circuly Hub.
For a detailed breakdown of how customers can update their information in the portal, refer to:
When processing a product swap within an active subscription, you can define specific reasons for the swap. These reasons serve internal communication purposes and help keep your operations team aligned on the context of product exchanges.
Swap reasons are shown in the Replacement Window when a swap is initiated. This makes it easy for your team to choose the appropriate reason for the product exchange and document it for future reference. Swap reasons are only visible internally and do not affect the customer’s view or experience.
replacement to automatically tag orders associated with this swap.In a typical eCommerce flow, a customer places an order, the product is shipped, and the seller estimates a delivery time—usually within a few days. The subscription is created, either manually or through automation, and a start date is assigned accordingly.
When creating a subscription manually, the circuly user has the option to select the subscription start date. By default, this field is pre-filled with a date influenced by the Subscription start date setting (e.g., “+3” to indicate a start date 3 days from today). If no such setting is defined, the field may default to a random future date. In automated flows (bulk upload or API), the start date is included in the incoming data and adopted directly by the Circuly system.
It's important to note: if a subscription has not yet been created for an order, the start date can be freely defined or adjusted during the subscription creation process. However, if a subscription already exists and the start date needs to be changed, then the approach is different—and that’s where the Edit Recurring Payments feature becomes relevant.
This is especially useful in scenarios where the initial billing plan—let’s say starting on the 2nd of the month—no longer aligns with reality due to delays (e.g., the product was only delivered on the 15th). Instead of canceling and recreating the subscription, you can shift the start date and all future billing to the 15th of each month going forward, while preserving the subscription structure.
The subscription’s billing will now align with the new start date, and the end date will shift accordingly to maintain the original contract duration.
circuly gives you the flexibility to correct subscription timelines when things don’t go as planned. By adjusting the start date after delivery delays or other operational reasons, you ensure billing fairness and maintain customer trust—without disrupting the overall contract terms.
As your subscription business grows, manually creating subscriptions for each incoming order can become time-consuming and inefficient. That’s why circuly offers an automatic way to create subscriptions—by linking the subscription creation process to the “Mark as fulfilled” action in the circuly Hub.
This method allows your team to create subscriptions automatically when an order is marked as fulfilled, saving time while ensuring accuracy and consistency in your workflow.
To enable automatic subscription creation, you need to configure two settings in your circuly Hub:
3, the subscription start date will be 3 days after the order is marked as fulfilled.Settings > Subscription > Create Subscription.3).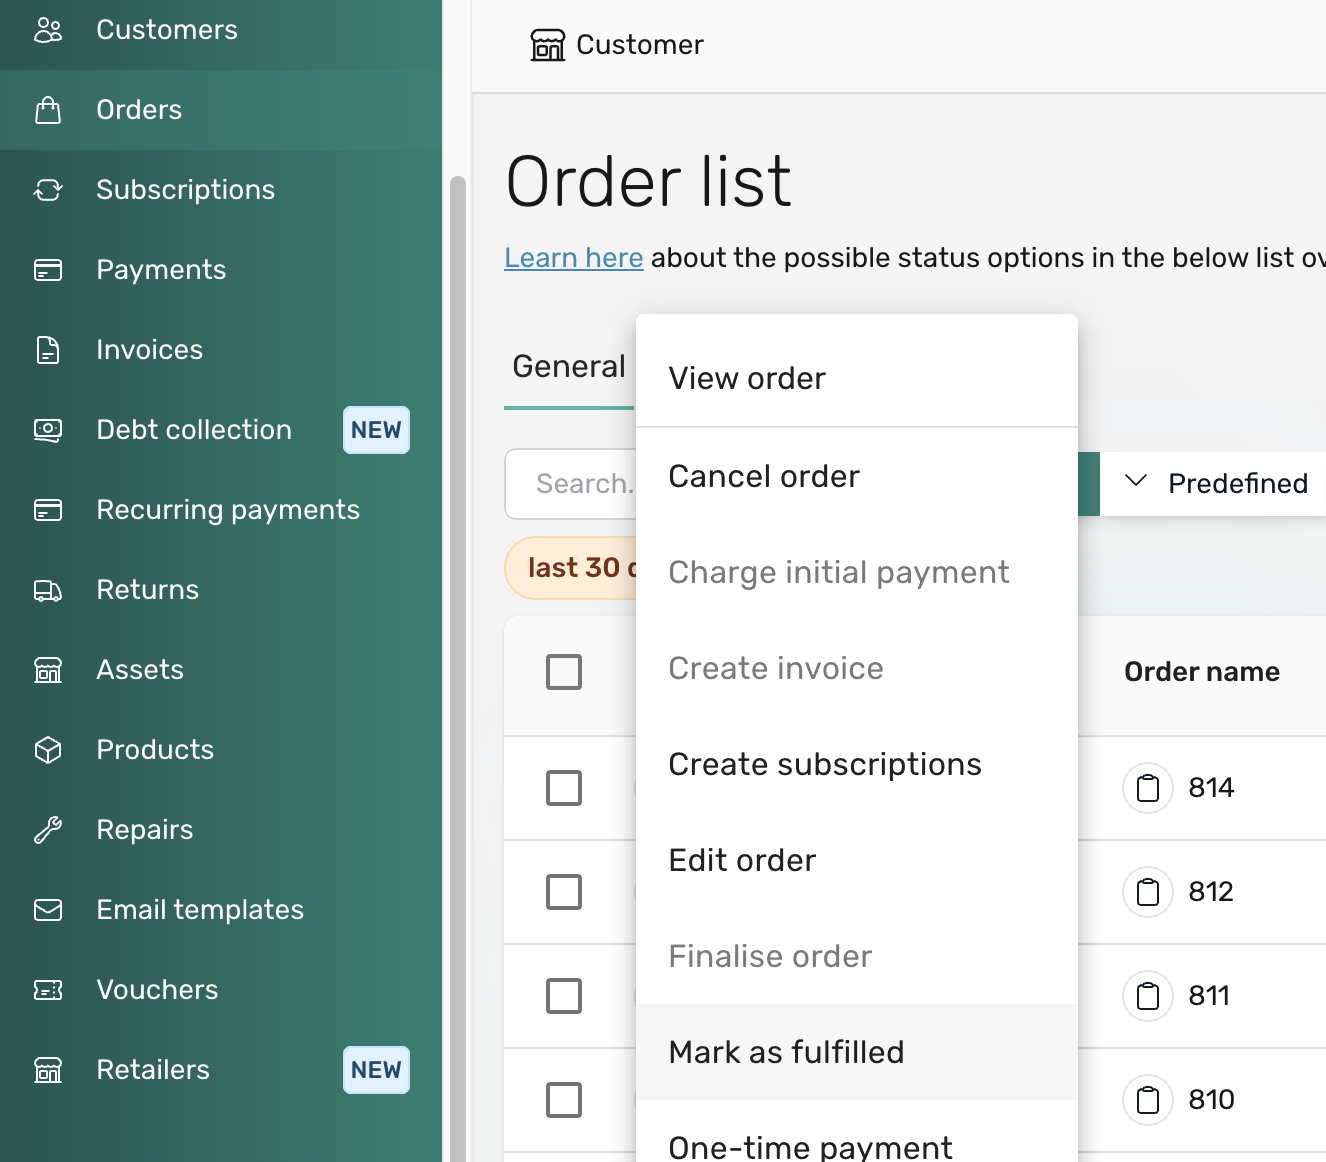
That’s it—circuly will automatically create a subscription for that order using the configured settings.
Subscription plans can be added to existing products or you can start from scratch and create new products with subscription plans. The approach you take depends on whether or not you have an existing shop with existing products and if you want to keep your subscription business separated from your sales business.
A subscription plan is a term used to describe the agreement between the vendor and the customer, that covers the terms for usage of a product for an agreed upon price and an agreed upon duration.
Typically there are four important components in a subscription plan:
These four components together define and make up a subscription plan. A subscription plan usually consists of components that have a price implication but it also include components that do not have a price implication.
Important: When you get circuly on board to manage your subscriptions, subscription plans are always created in Shopify by using product variables and metafields and not in circuly. circuly is only connected to your shop system via API and can easily retrieve the necessary information about the product and subscription and process it accordingly.
This gives you more flexibility in creating, maintaining and editing your subscription plans as your business approach changes.
Here’s an example: Bugaboo Flex by Bugaboo
Bugaboo Flex is a subscription service by Dutch baby goods manufacturer, Bugaboo. Bugaboo uses Shopify to set up their subscription products, catalogue them and create subscription plan.
Given below are different components of their subscription plan.
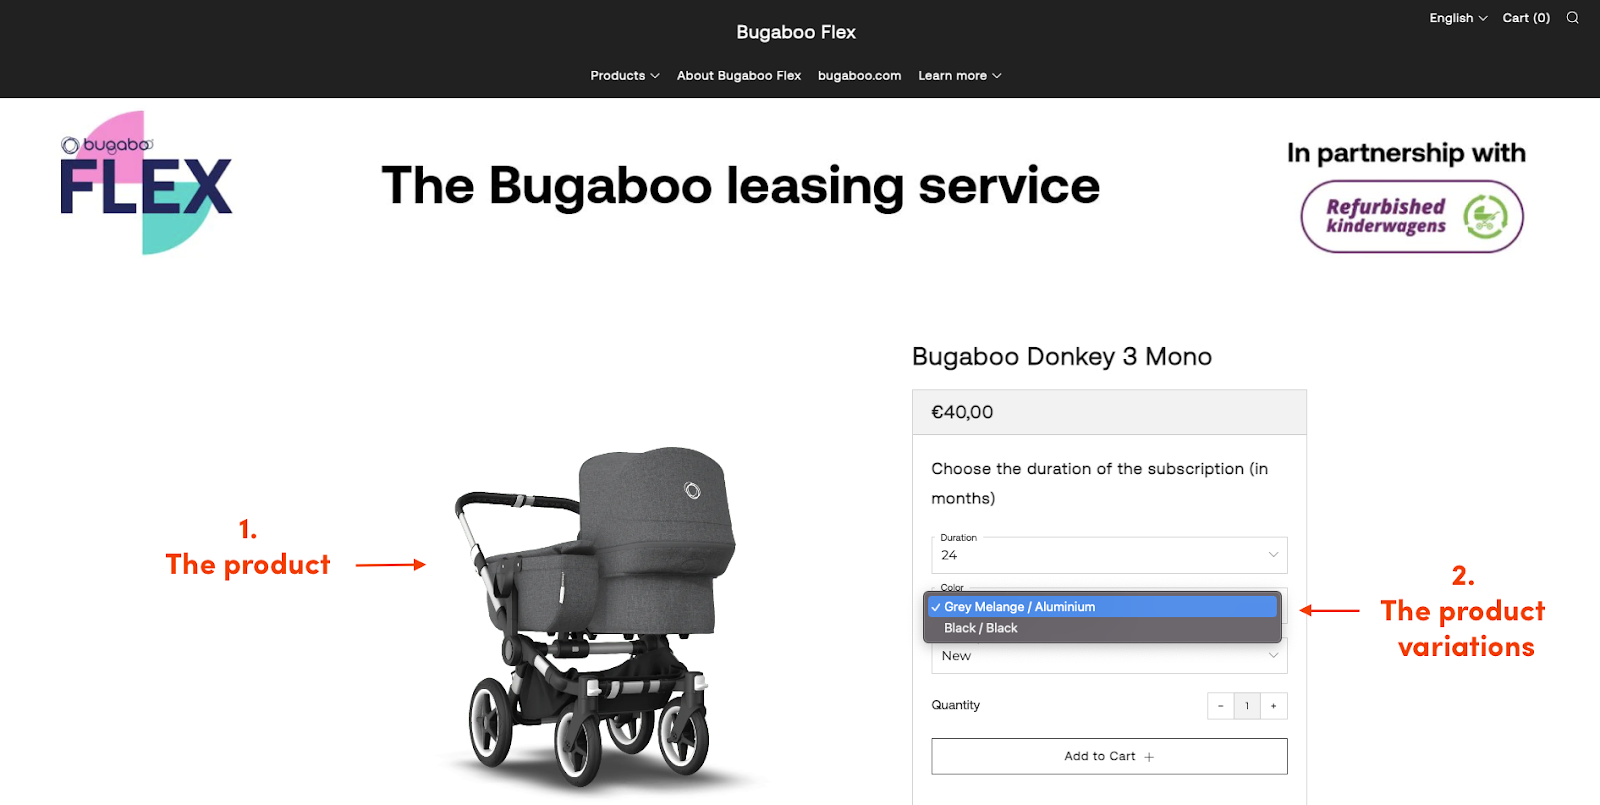

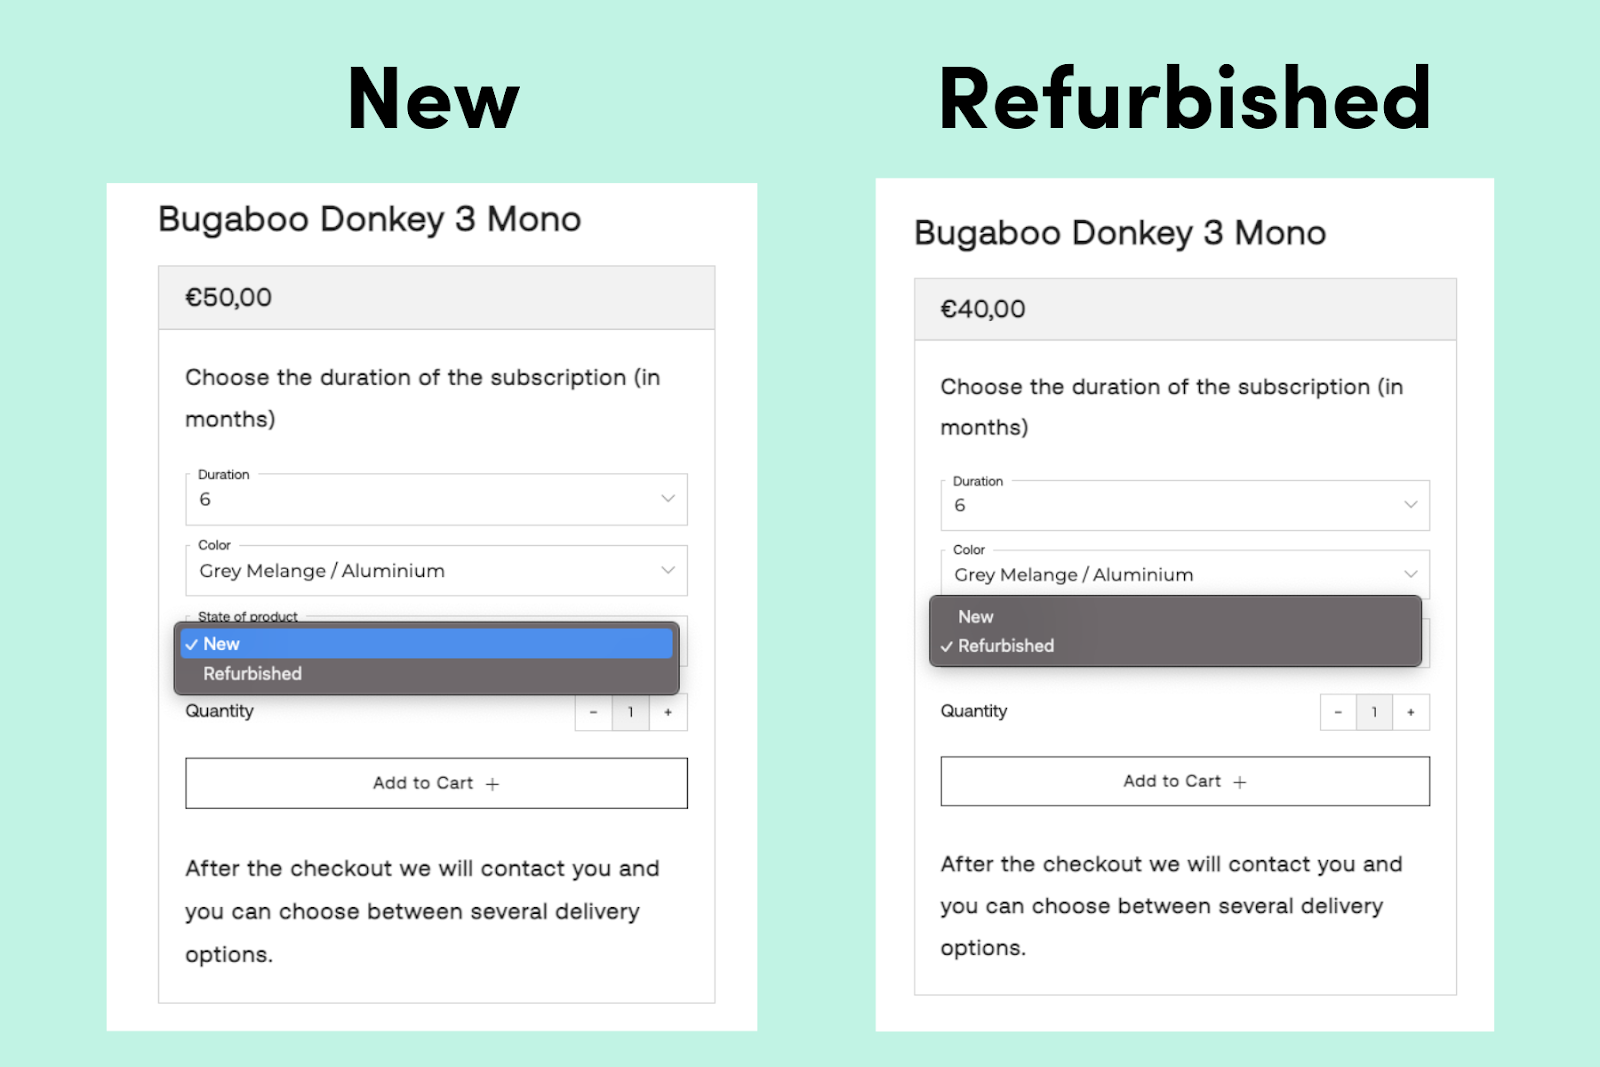
As you can see the subscription plan varies as per the different components and these components vary from one business to another.
Therefore before setting up your subscription plan it is important to work out all the components that will have an impact on the price and also the components that will not have an impact on the price but are included to provide more customisation option to the customer.
There are two steps involved in setting up a subscription plan:
Adding products

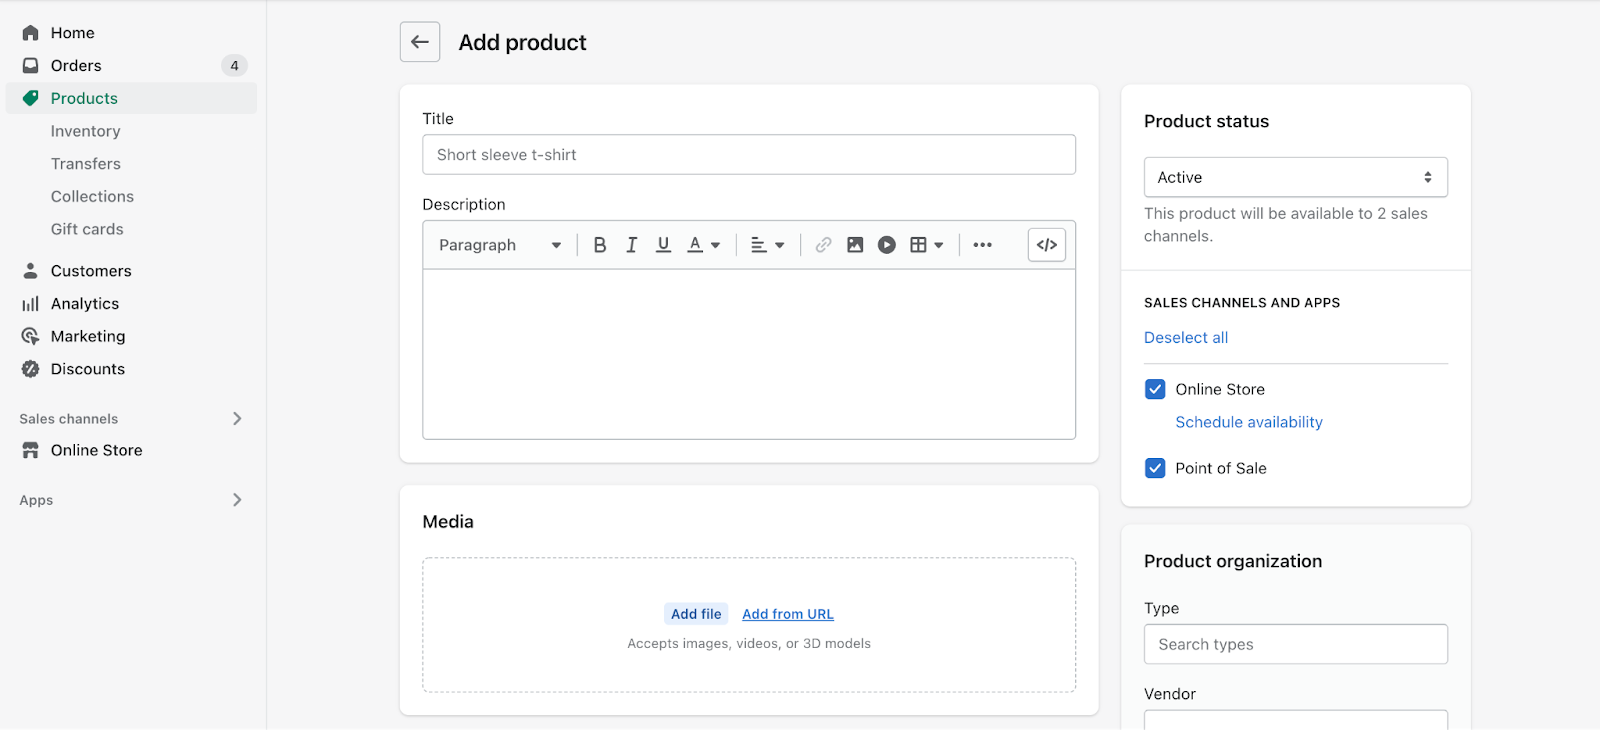
Adding variants
Add variants if your product comes in more than one option such as size, colour, storage etc. Use variants to define the components of a subscription plan for the same product.
For example: You want to create a subscription plan for renting Macbook Pro which is available in two colours and in different subscription durations. One variant option will be colour, that is Silver or Black and another variant option will be subscription duration, that is, 1 month, 6 month, 12 month and 18 month subscription.
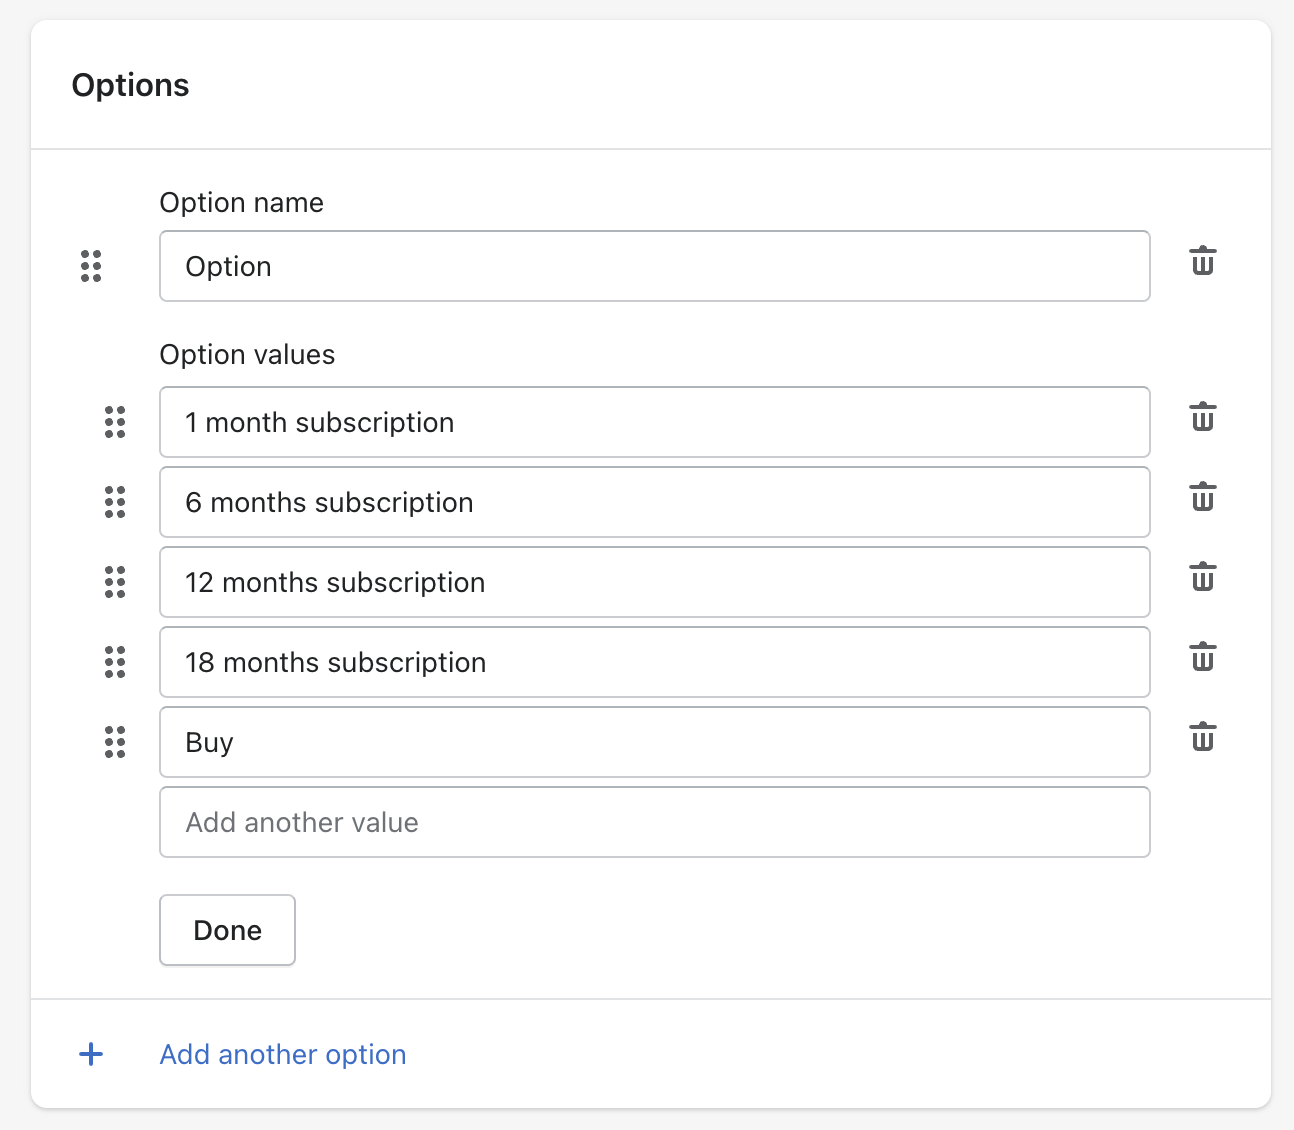
If the variant options have an impact on the price, add the price in the Variants fiel as shown in the image below.
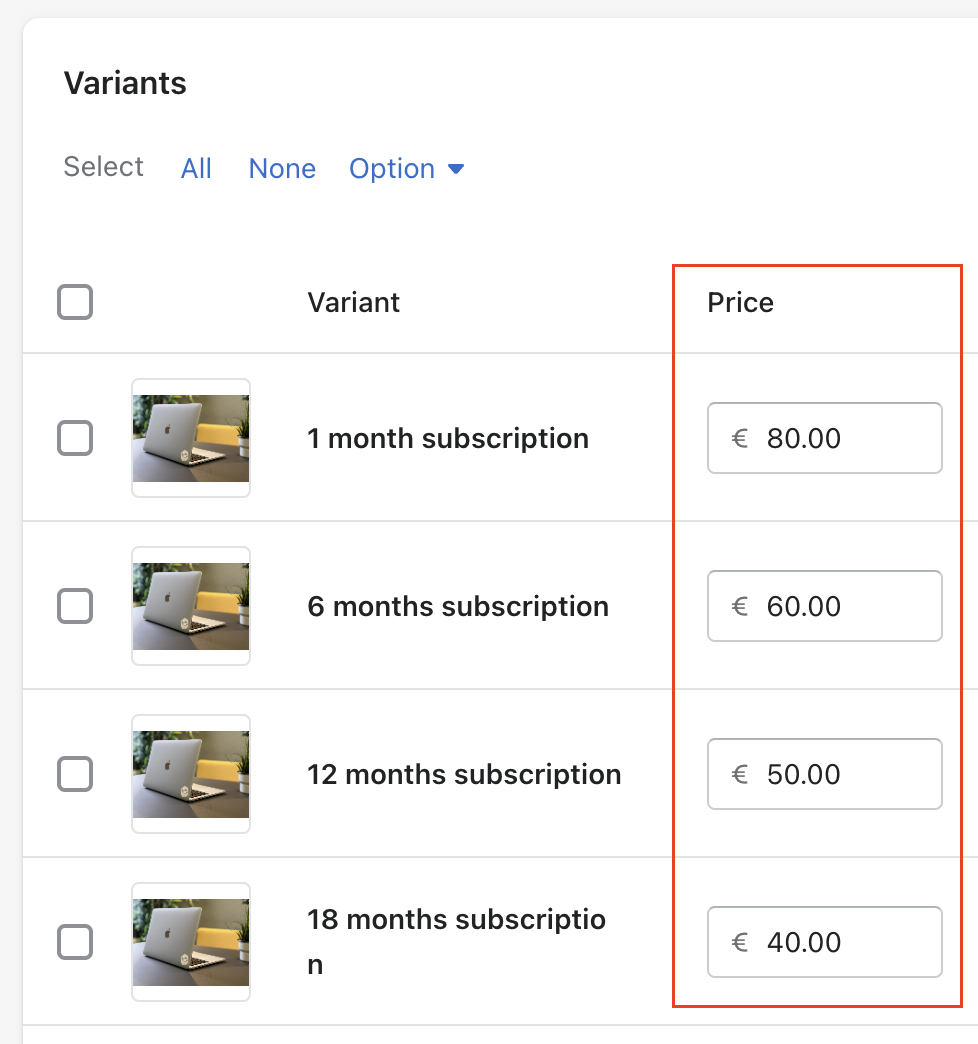
Steps:
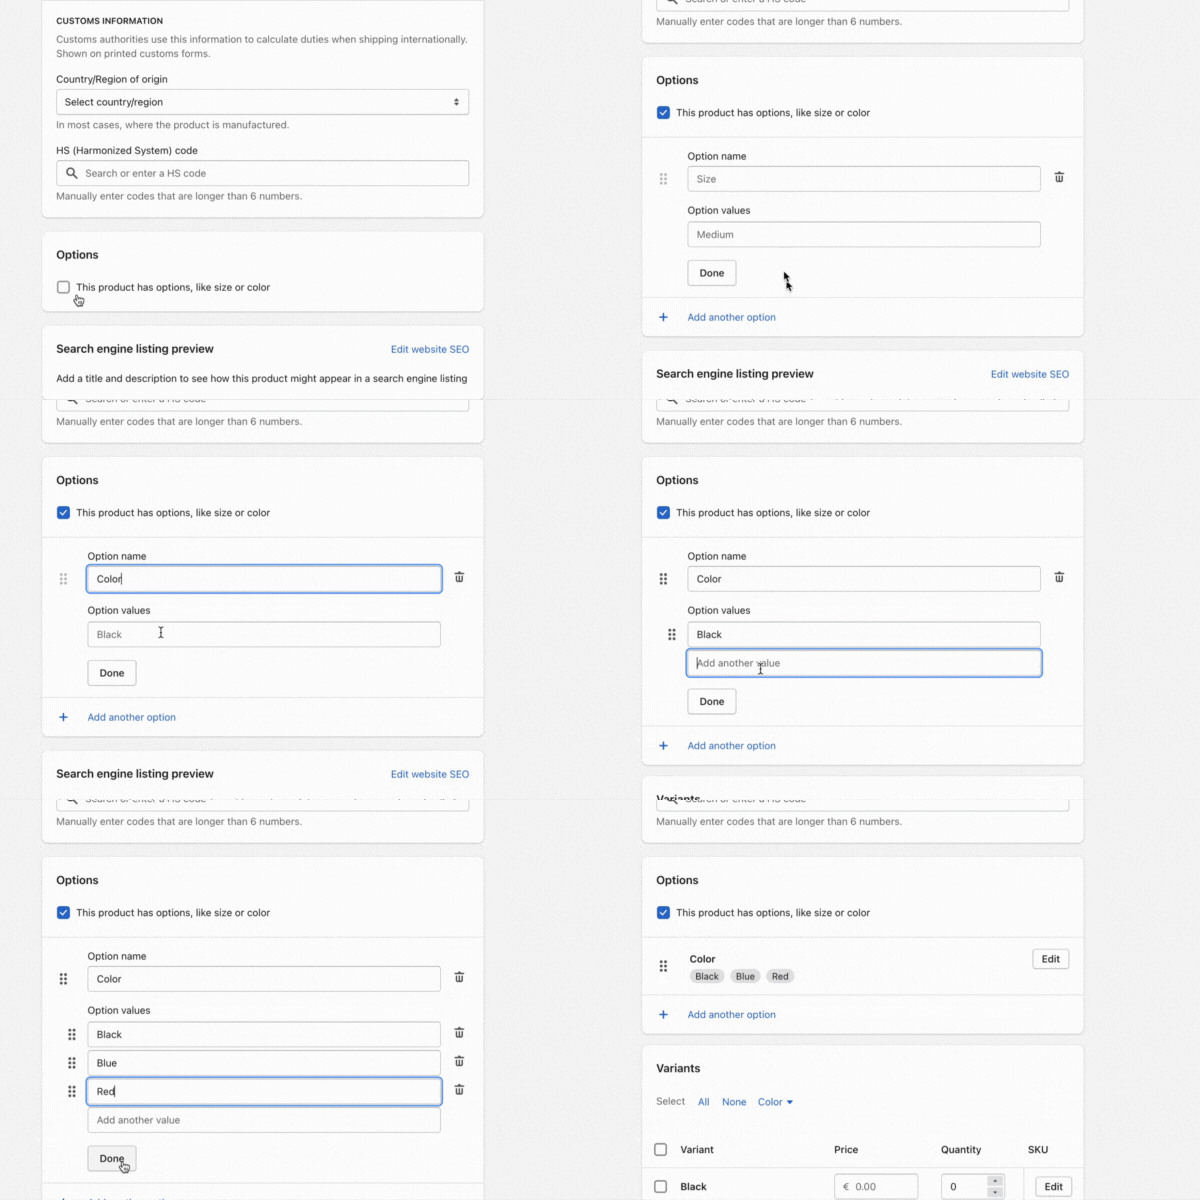
Here’s an example of how the variants look.
.gif)
Pro tip: give all the variants the same SKU so that the stock descreses as soon as an order is placed for all subscription durations
Metafields enable you to customise the functionality and appearance of your Shopify store by allowing you to save specialised information that isn't usually captured in the Shopify admin. You can use Metafields to display specialised information on your website/online store in a variety of ways. For a renntal/subscription business using metafields helps to define whether a product is a “rented” product or a “bought” product.
Once you’ve created a few products with its product variants continue to create a subscription plan using Metafields.
Steps:
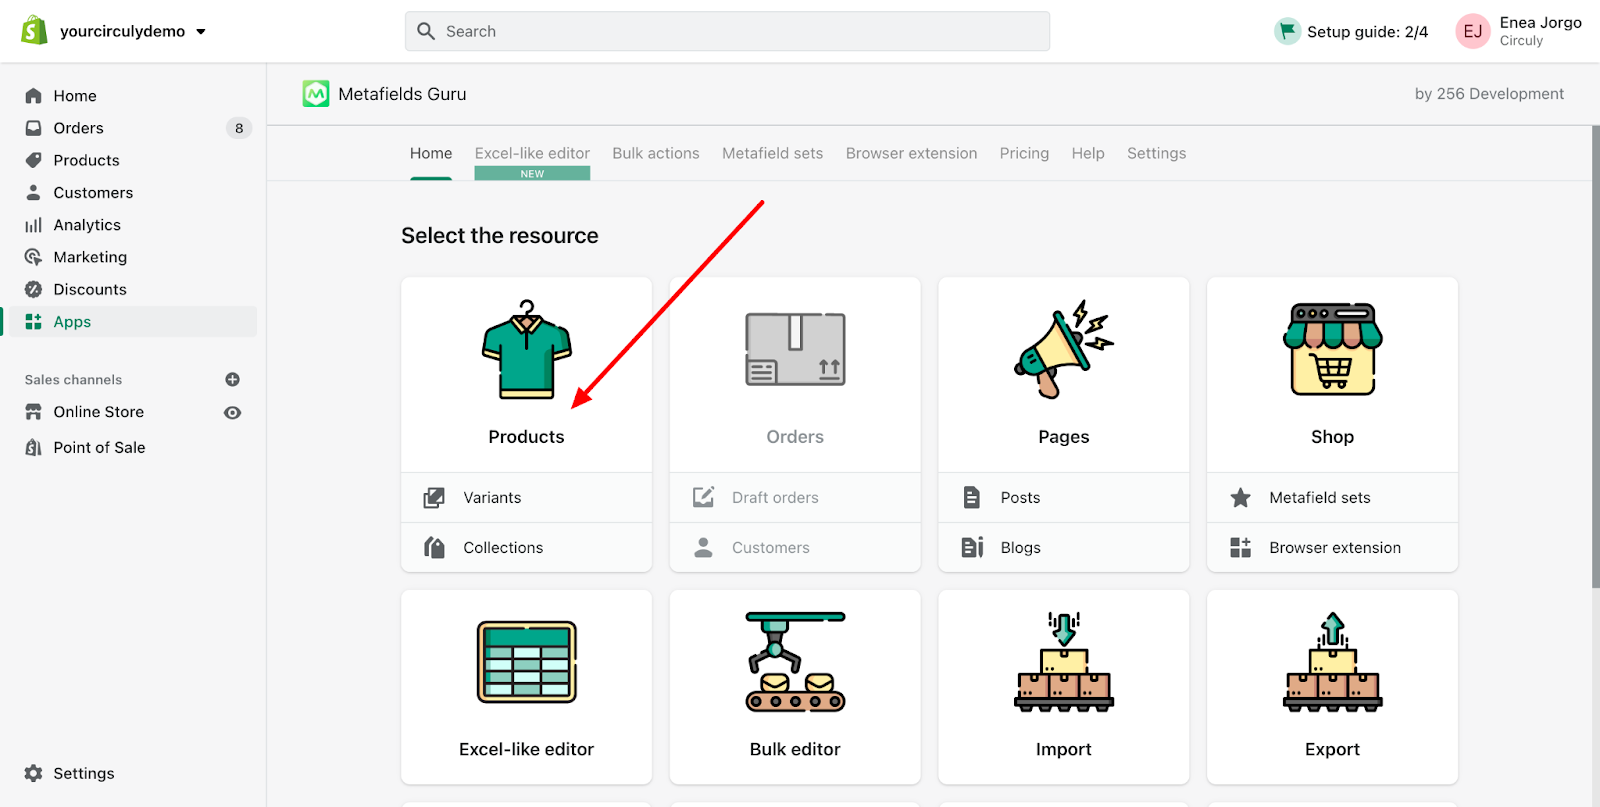

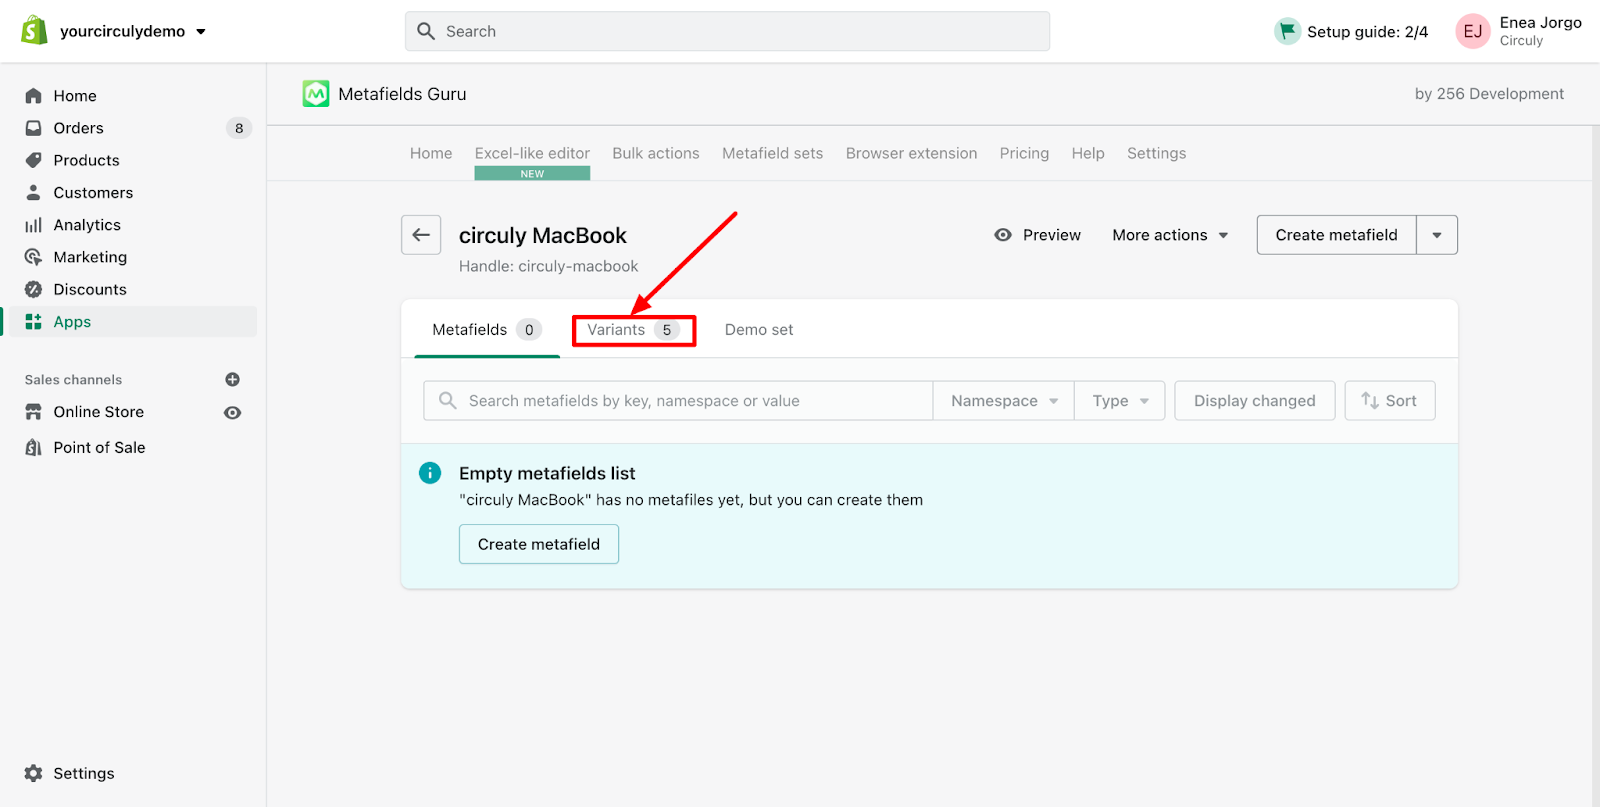
Note: Creating metafields to define whether the product is a subscription product or a regular product, the subscription duration and the subscription period.
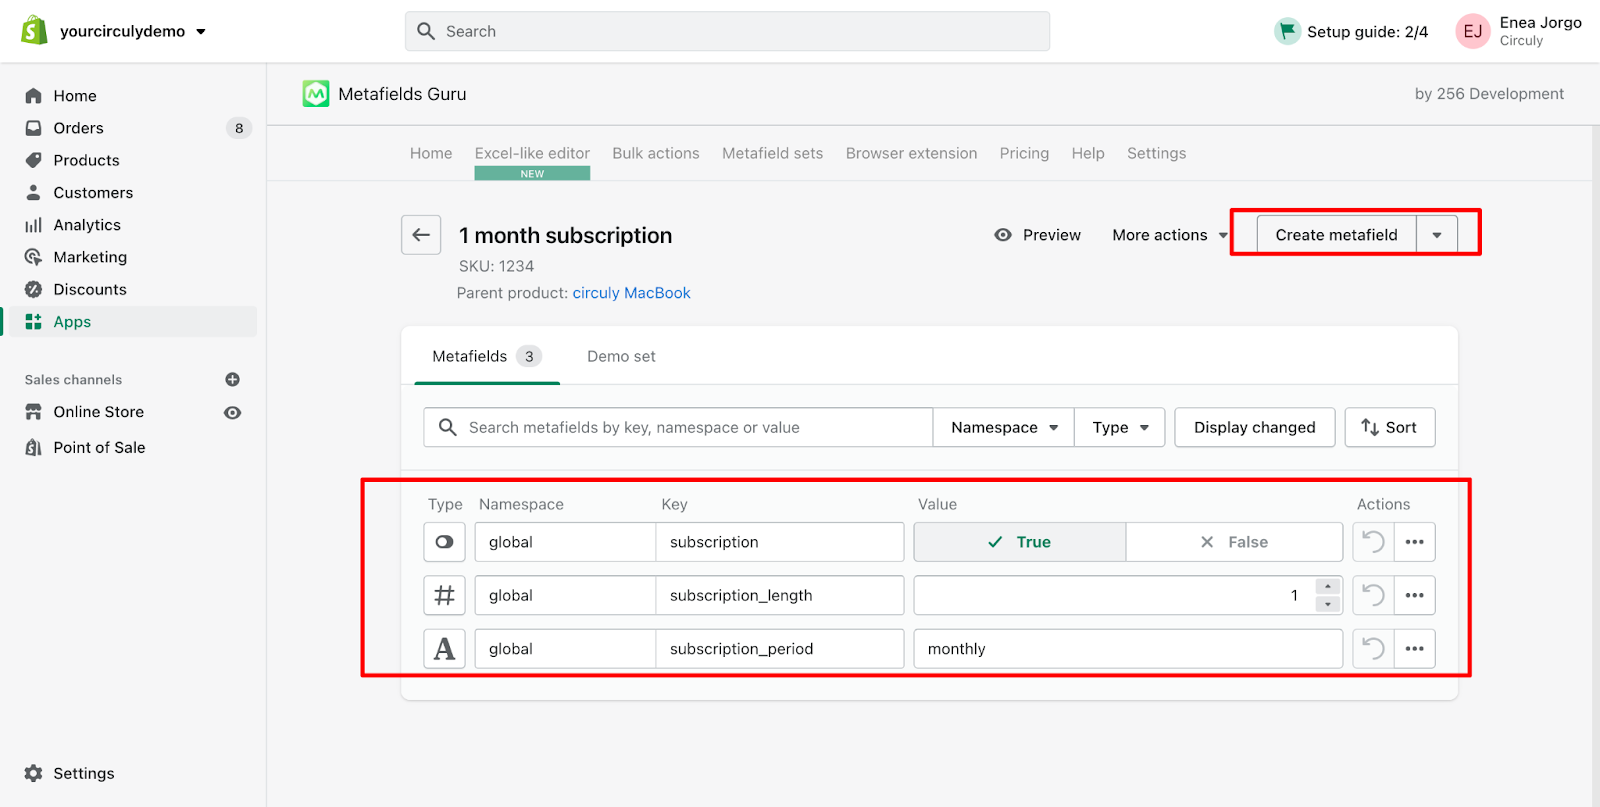
Bulk action
For bulk action, filter all variants and map them with the conditions mentioned above. You can filter them by Product ID, Product Name etc.
If you want to add more components to your subscription plan besides the one mentioned above, you can easily do so by using the Metafield Guru App. To set up additional fields such as a countdown, description, color etc, read this article.
circuly provides a convenient way to bulk update orders and create subscriptions, helping you save time and maintain accuracy. This guide walks you through the steps to bulk update orders, create subscriptions, and understand the resulting actions in circuly.
Follow these steps to efficiently bulk update orders and create subscriptions:
Before you begin you can filter the Order List to only display orders that are currently unprocessed that is orders that do not have a subscription attached to them yet. To do so > Navigate to the Orders tab > Click in the button that says Predefined to display the predefined filter options > Select Unprocessed from the list.
The Order List now displays orders that need to be processed.

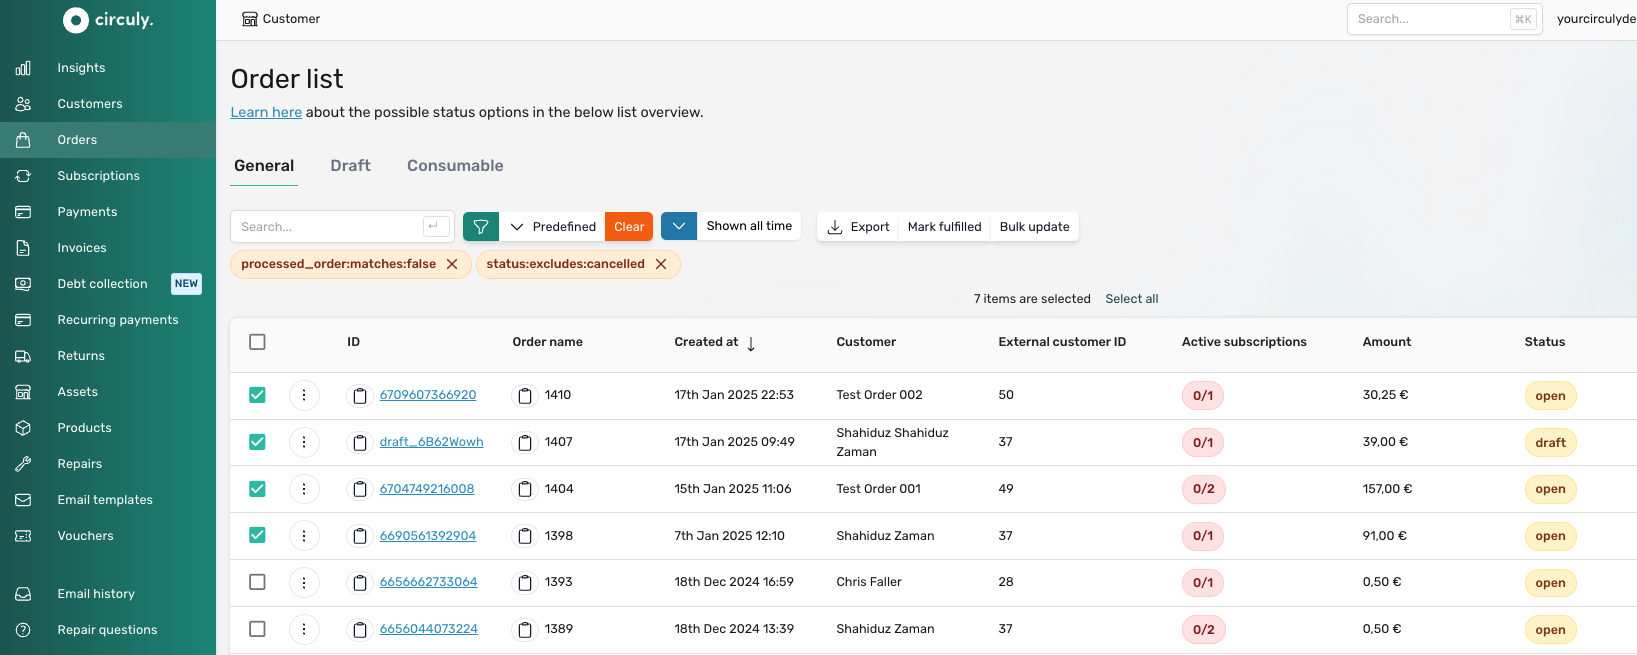
.png)
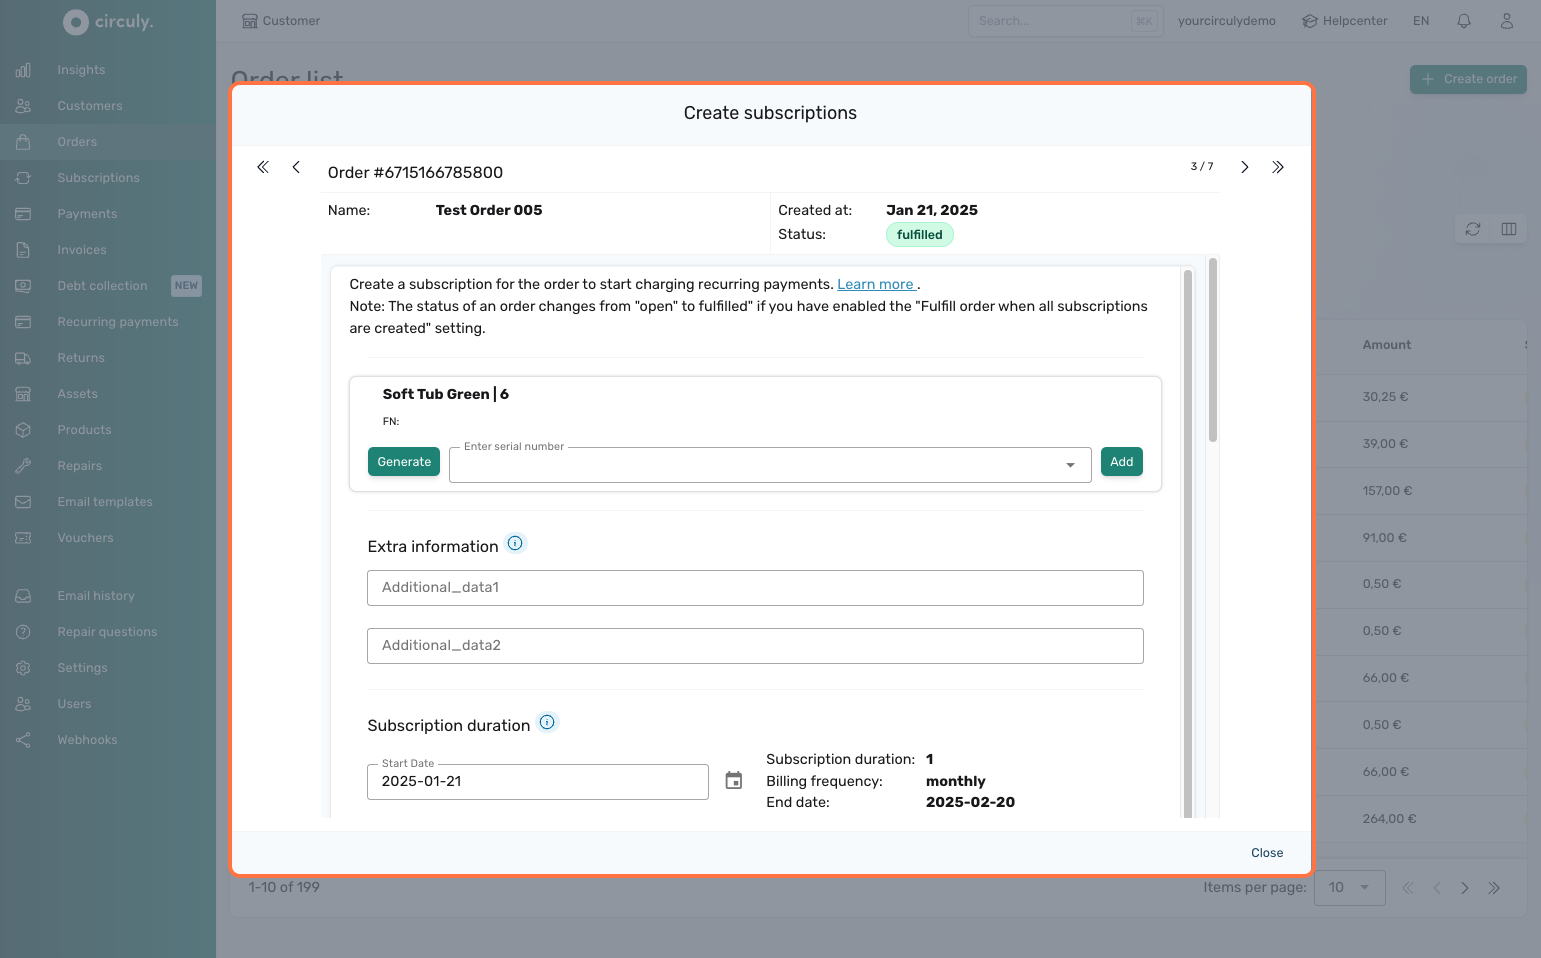
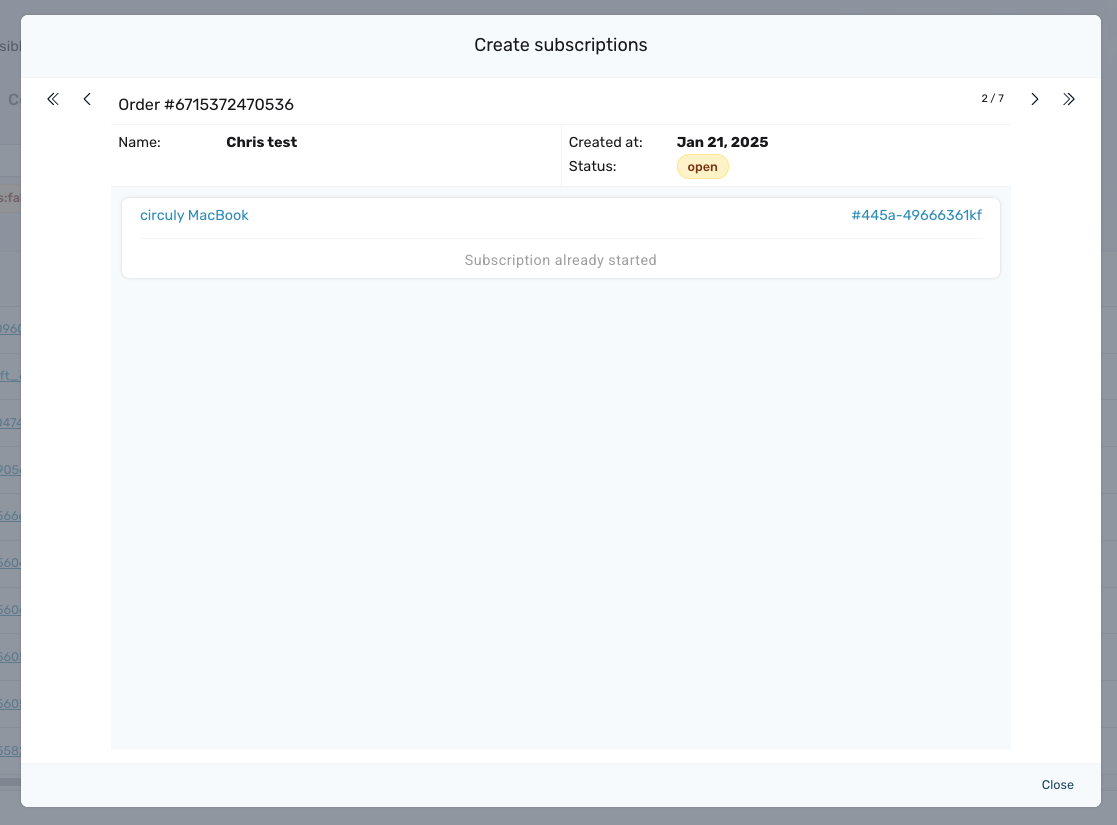
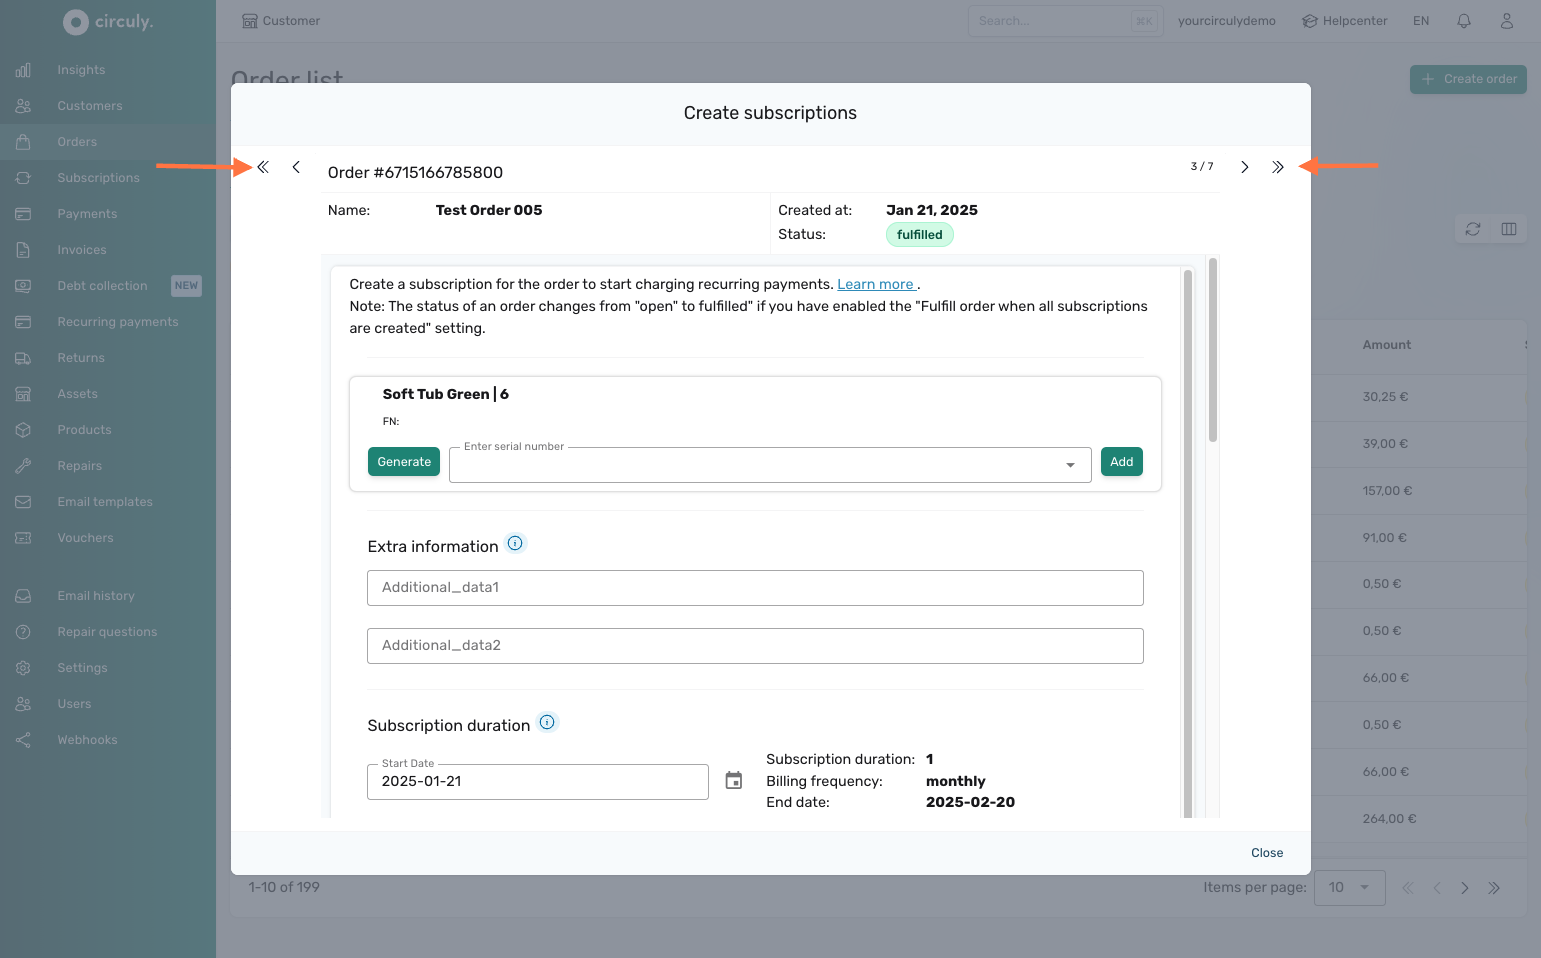
In the Returns tab of the circuly Hub, you can process assets by either marking them as returned or bought. The action you take depends on what happened to the product—whether it came back or was purchased by the customer.
Managing returns accurately ensures that assets are properly tracked, subscriptions are ended at the right time, and customer communications are triggered accordingly. circuly gives you two distinct options during the return handling workflow:
When to Use
Use this option when the customer has returned the product and it is now back in your possession.
What Happens
Tip: Always check the “Delete future recurring payments” box if the product is returned and you no longer want to charge the customer.
When to Use
Select this option when the customer has bought the product and will not return it.
What Happens
Metafields enable you to customise the functionality and appearance of your Shopify store by storing specialized information that isn't usually captured in the default Shopify admin. For rental or subscription-based businesses, metafields are a powerful way to distinguish between “rented” and “bought” products in your store setup.
In a subscription business, knowing whether a product is meant to be rented or purchased outright is crucial for managing pricing, user experience, and business logic. Metafields let you store and manage this distinction in Shopify
To distinguish between rented and bought products, use the following metafield structure:
subscription → true / false (Defines if the product is a rental)subscription_length → number (Specifies the duration of the subscription)subscription_period → daily / weekly / monthly / yearly (Defines the time unit for the subscription)These metafields can be applied to each product variant individually or through a bulk process.
There are two ways to set up metafields:
Option 1: Set Up Metafields One-by-One
subscription → true (for rental) or false (for purchase)subscription_length → e.g., 12subscription_period → monthly / weekly / yearly, etc.

subscription: true, subscription_length: 12, subscription_period: monthlysubscription: falseUsing metafields correctly ensures your Shopify storefront displays accurate information and integrates properly with circuly’s subscription features. Whether you're offering long-term rentals, short-term leasing, or outright sales, properly structured metafields allow you to manage product types efficiently across your catalog.
In compliance with Germany’s "two-click cancellation" law (effective July 1, 2022), consumer-facing businesses must make it easy for customers to cancel subscriptions online. The law requires a clearly labeled, always-accessible cancellation button on the website, leading to a confirmation process that validates the cancellation.
circuly helps you fulfill these legal requirements while streamlining the cancellation workflow for both your business and your customers.
The two-click cancellation process consists of:
Here’s how the two-click cancellation process works using circuly:
1. Add a cancellation button on your website
Create a visible, always-accessible button labeled “Cancel Subscription” that links to the Self-Service Portal login page.
2. Configure cancellation options in the circuly Hub
Enable the cancellation button in the portal
Enable auto-cancellation (optional)
Enable pickup date selection (optional)
Add cancellation reasons
3. Add email addresses for customer support
Support email (shown in the portal)
Customer care email (receives cancellation notices)
4. Customise the confirmation email
The “Subscription Cancellation Received” email is sent to the customer after submitting their request. You should:
What circuly does after a cancellation depends on your settings:
Once the product is returned, mark it as returned in the Returns tab to end the subscription and stop recurring payments.
When the product is returned, mark it as returned to stop recurring payments.
When it comes to efforts in invoicing, ensuring accuracy is crucial to maintain legal and financial integrity. Occasionally, errors may arise in invoices, such as incorrect details or missing information. While minor typos can often be overlooked, any mistake that affects mandatory information—such as those outlined in § 14 Paragraph 2 No. 2 of the German VAT Act—must be corrected. Essential invoice details, such as the correct names and addresses of both the supplier and recipient, the invoice date, a clear description of the goods or services, and the VAT charged must be present in the invoice. If any of these mandatory elements are missing or incorrect, the invoice must be corrected to ensure compliance with legal requirements and avoid potential issues with tax authorities.
As part of the correction process, the wrongly generated invoices first must to be cancelled and a new invoice needs to generated with the correct information. Cancelling the wrong invoice is an important step for the following reasons:
In summary, canceling the incorrect invoice and issuing a new one is the proper procedure to ensure legal compliance, accurate tax reporting, and transparency with customers.
In circuly you can cancel an invoice with the wrong information and generate a new invoice in its space with just a few clicks.
1. Cancelling an invoice does not automatically refund the associated payment because its purpose is different. Under German law, an invoice issued with incorrect information must be formally 'cancelled' to comply with legal requirements. However, the payment linked to the incorrect invoice may still be valid. As such, cancelling the invoice does not affect the payment. If you also need to refund the payment, you must initiate a separate refund operation.
2. Generating a new invoice does not trigger any emails. If you want to send the invoice to the customer, you need to do so manually. To do so > Click on the ↓ PDF button to download the invoice and send it to the customer using your company email.
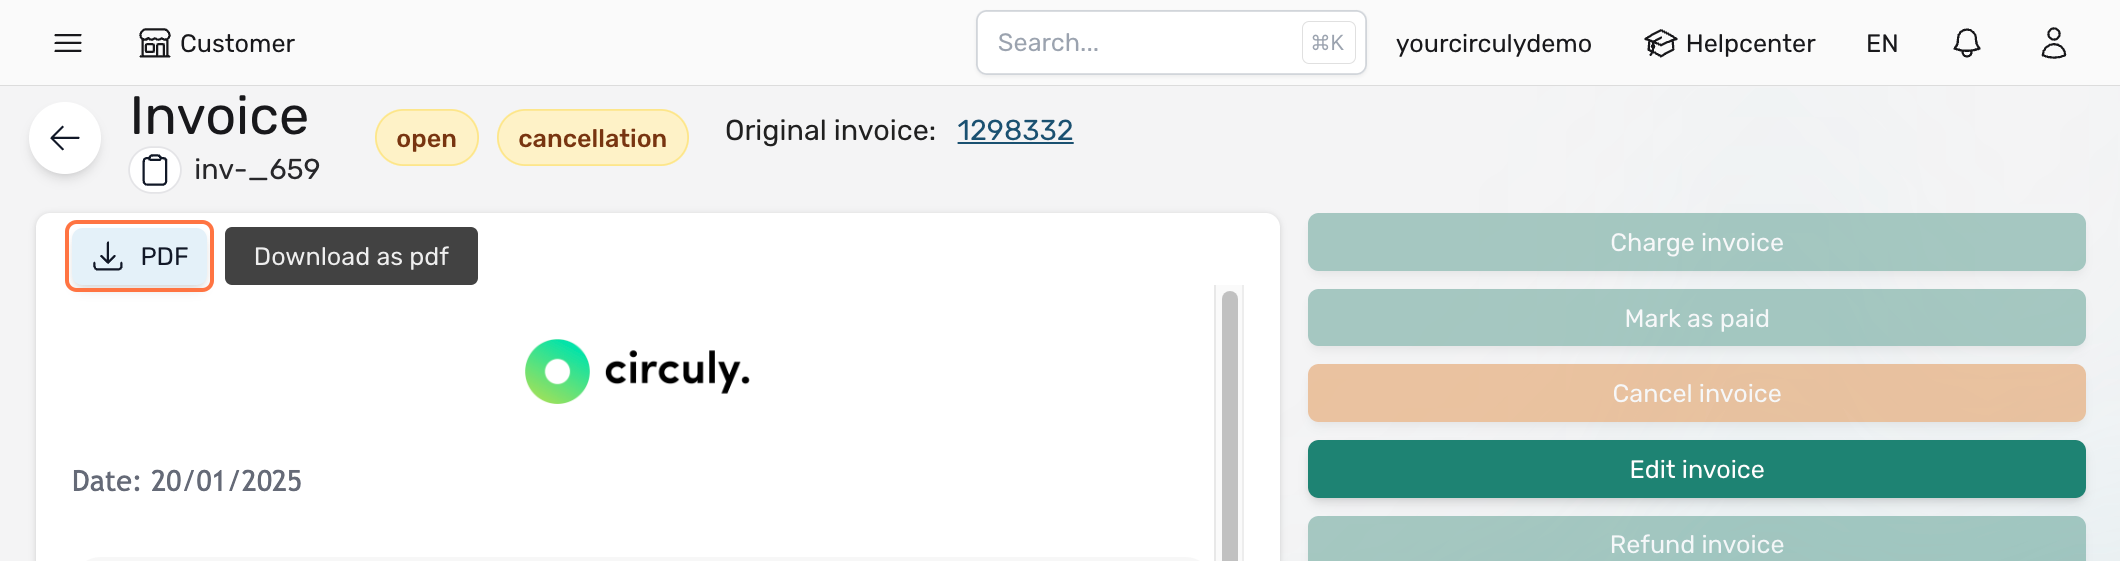
Step 1: Correct the wrong information
Step 2: Cancel the old invoice
Step 3: Generate a new invoice
Typically invoice errors are related to either customer or order details. Therefore the first step is to correct the wrong information.
Updating customer details
For updating the customer details (such as email and phone number) go to Customers > Select the customer from the Customer List > Go to Billing information in the button right corner > Click on the edit icon > Update the details in the Edit customer window > Click on the Submit button to save your changes.
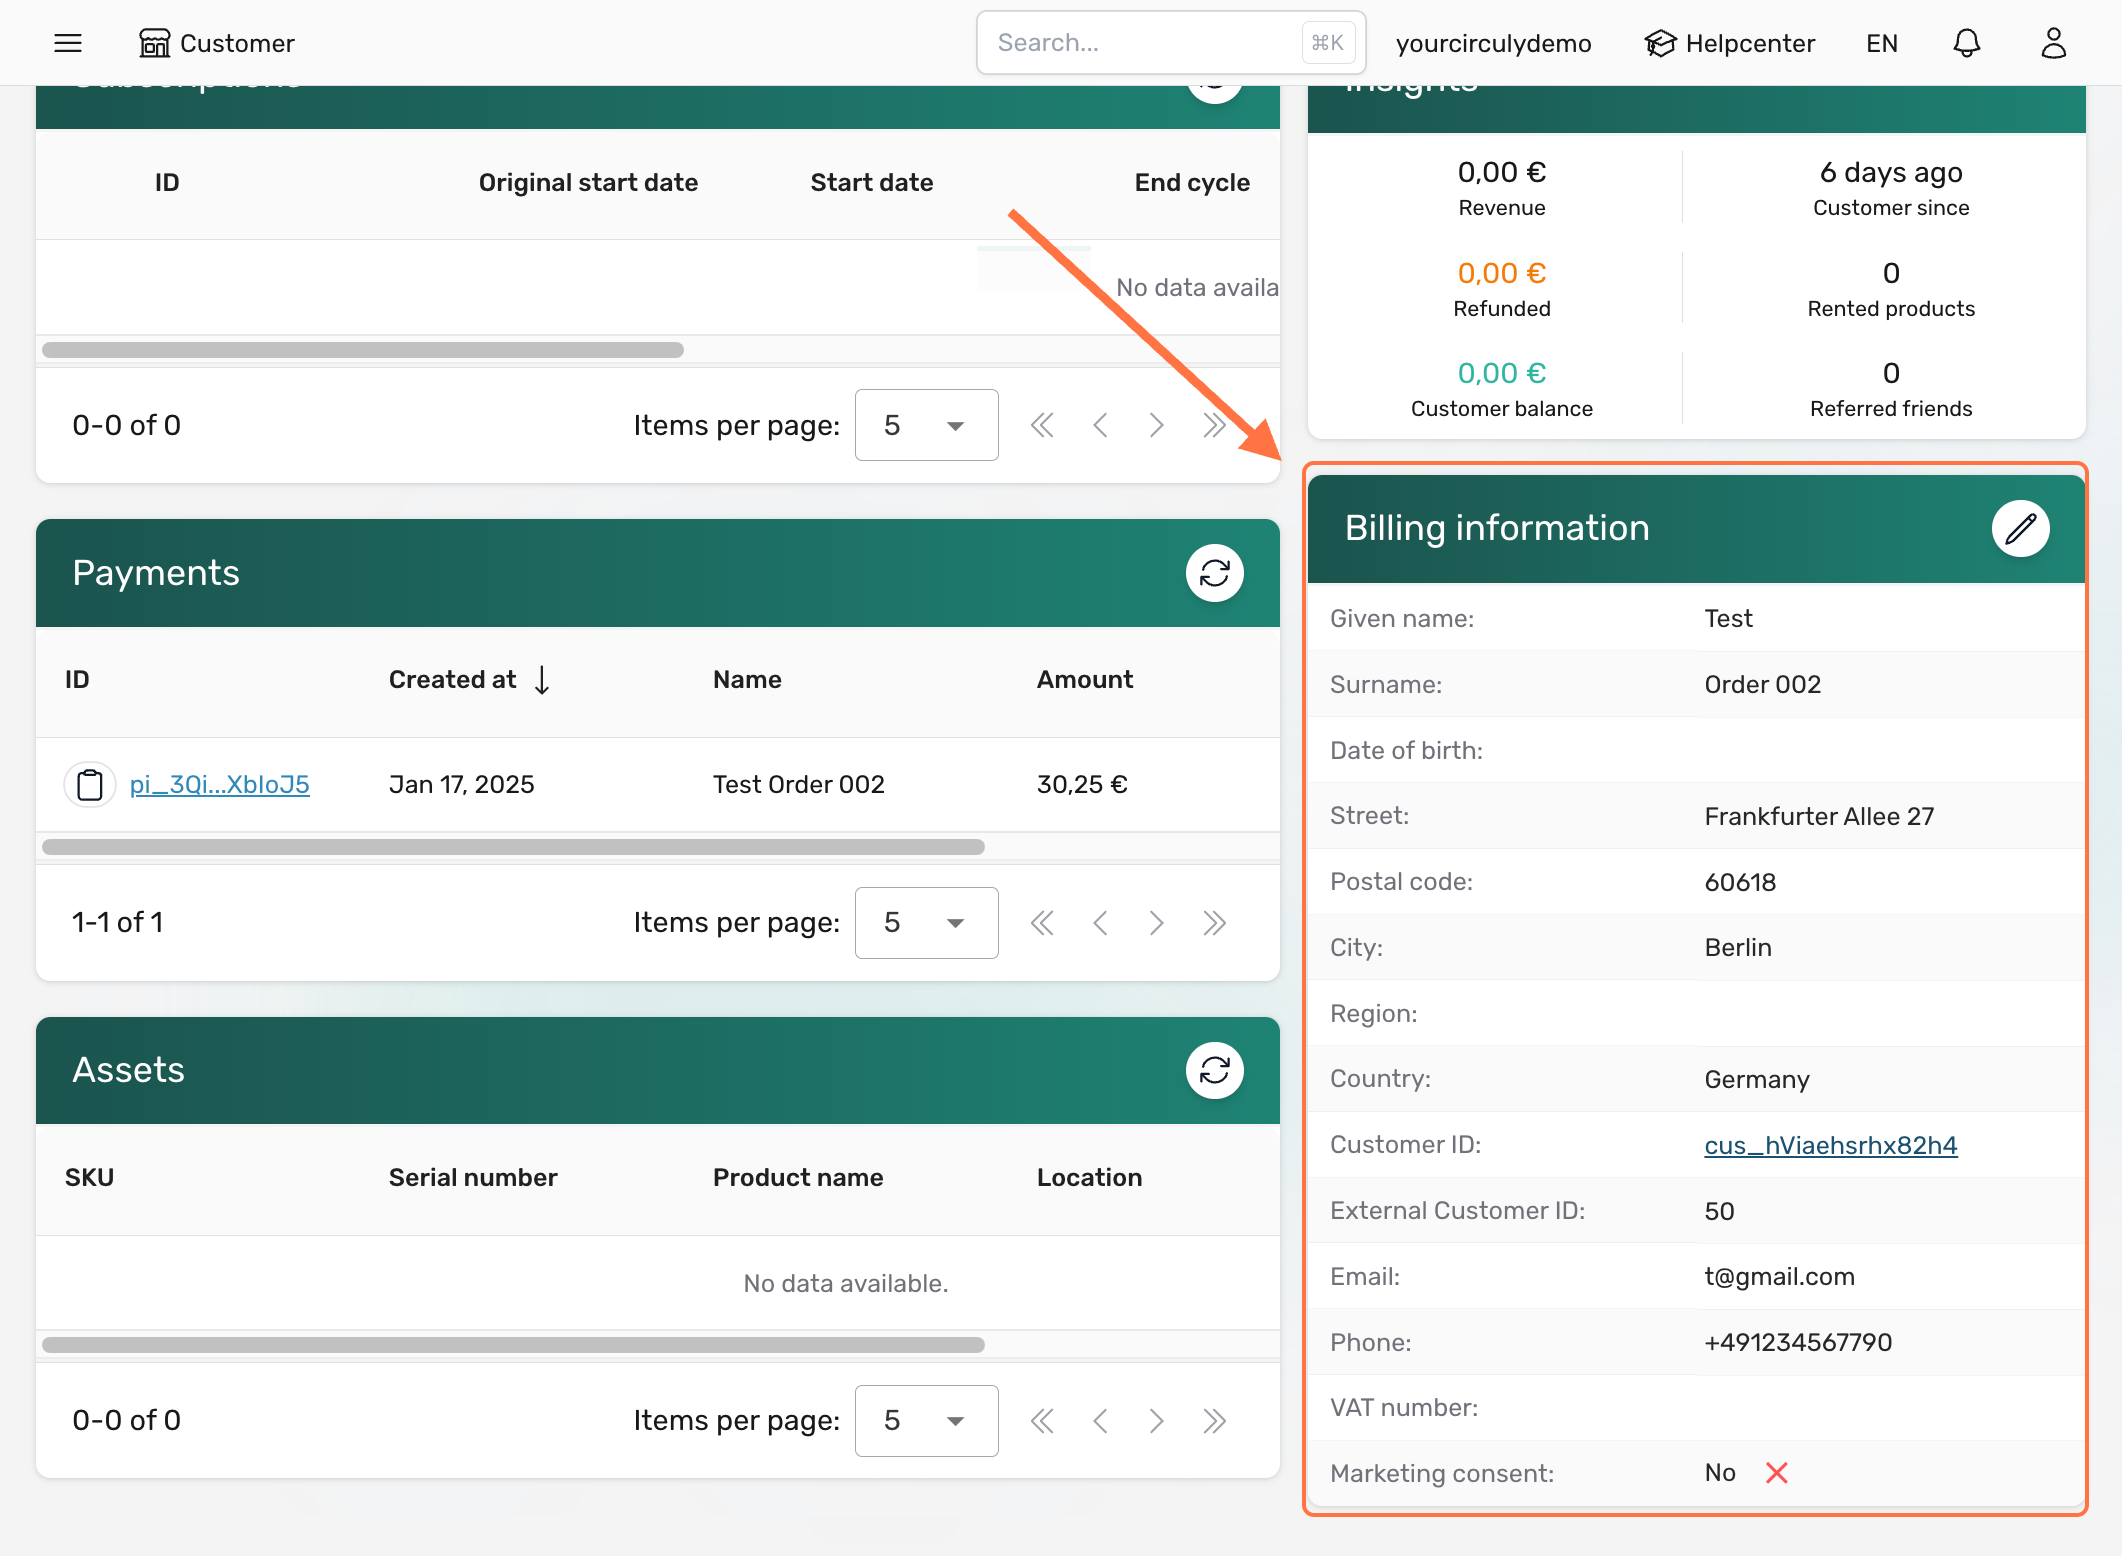
Updating order details
For updating order details (such as the address, date of birth, VAT number etc., of the customer) go to Orders > Select the order from the Order List > Go to Billing information in the bottom right corner > Click on the edit icon > Update the details in the Edit customer window > Click on the Submit button to save your changes.
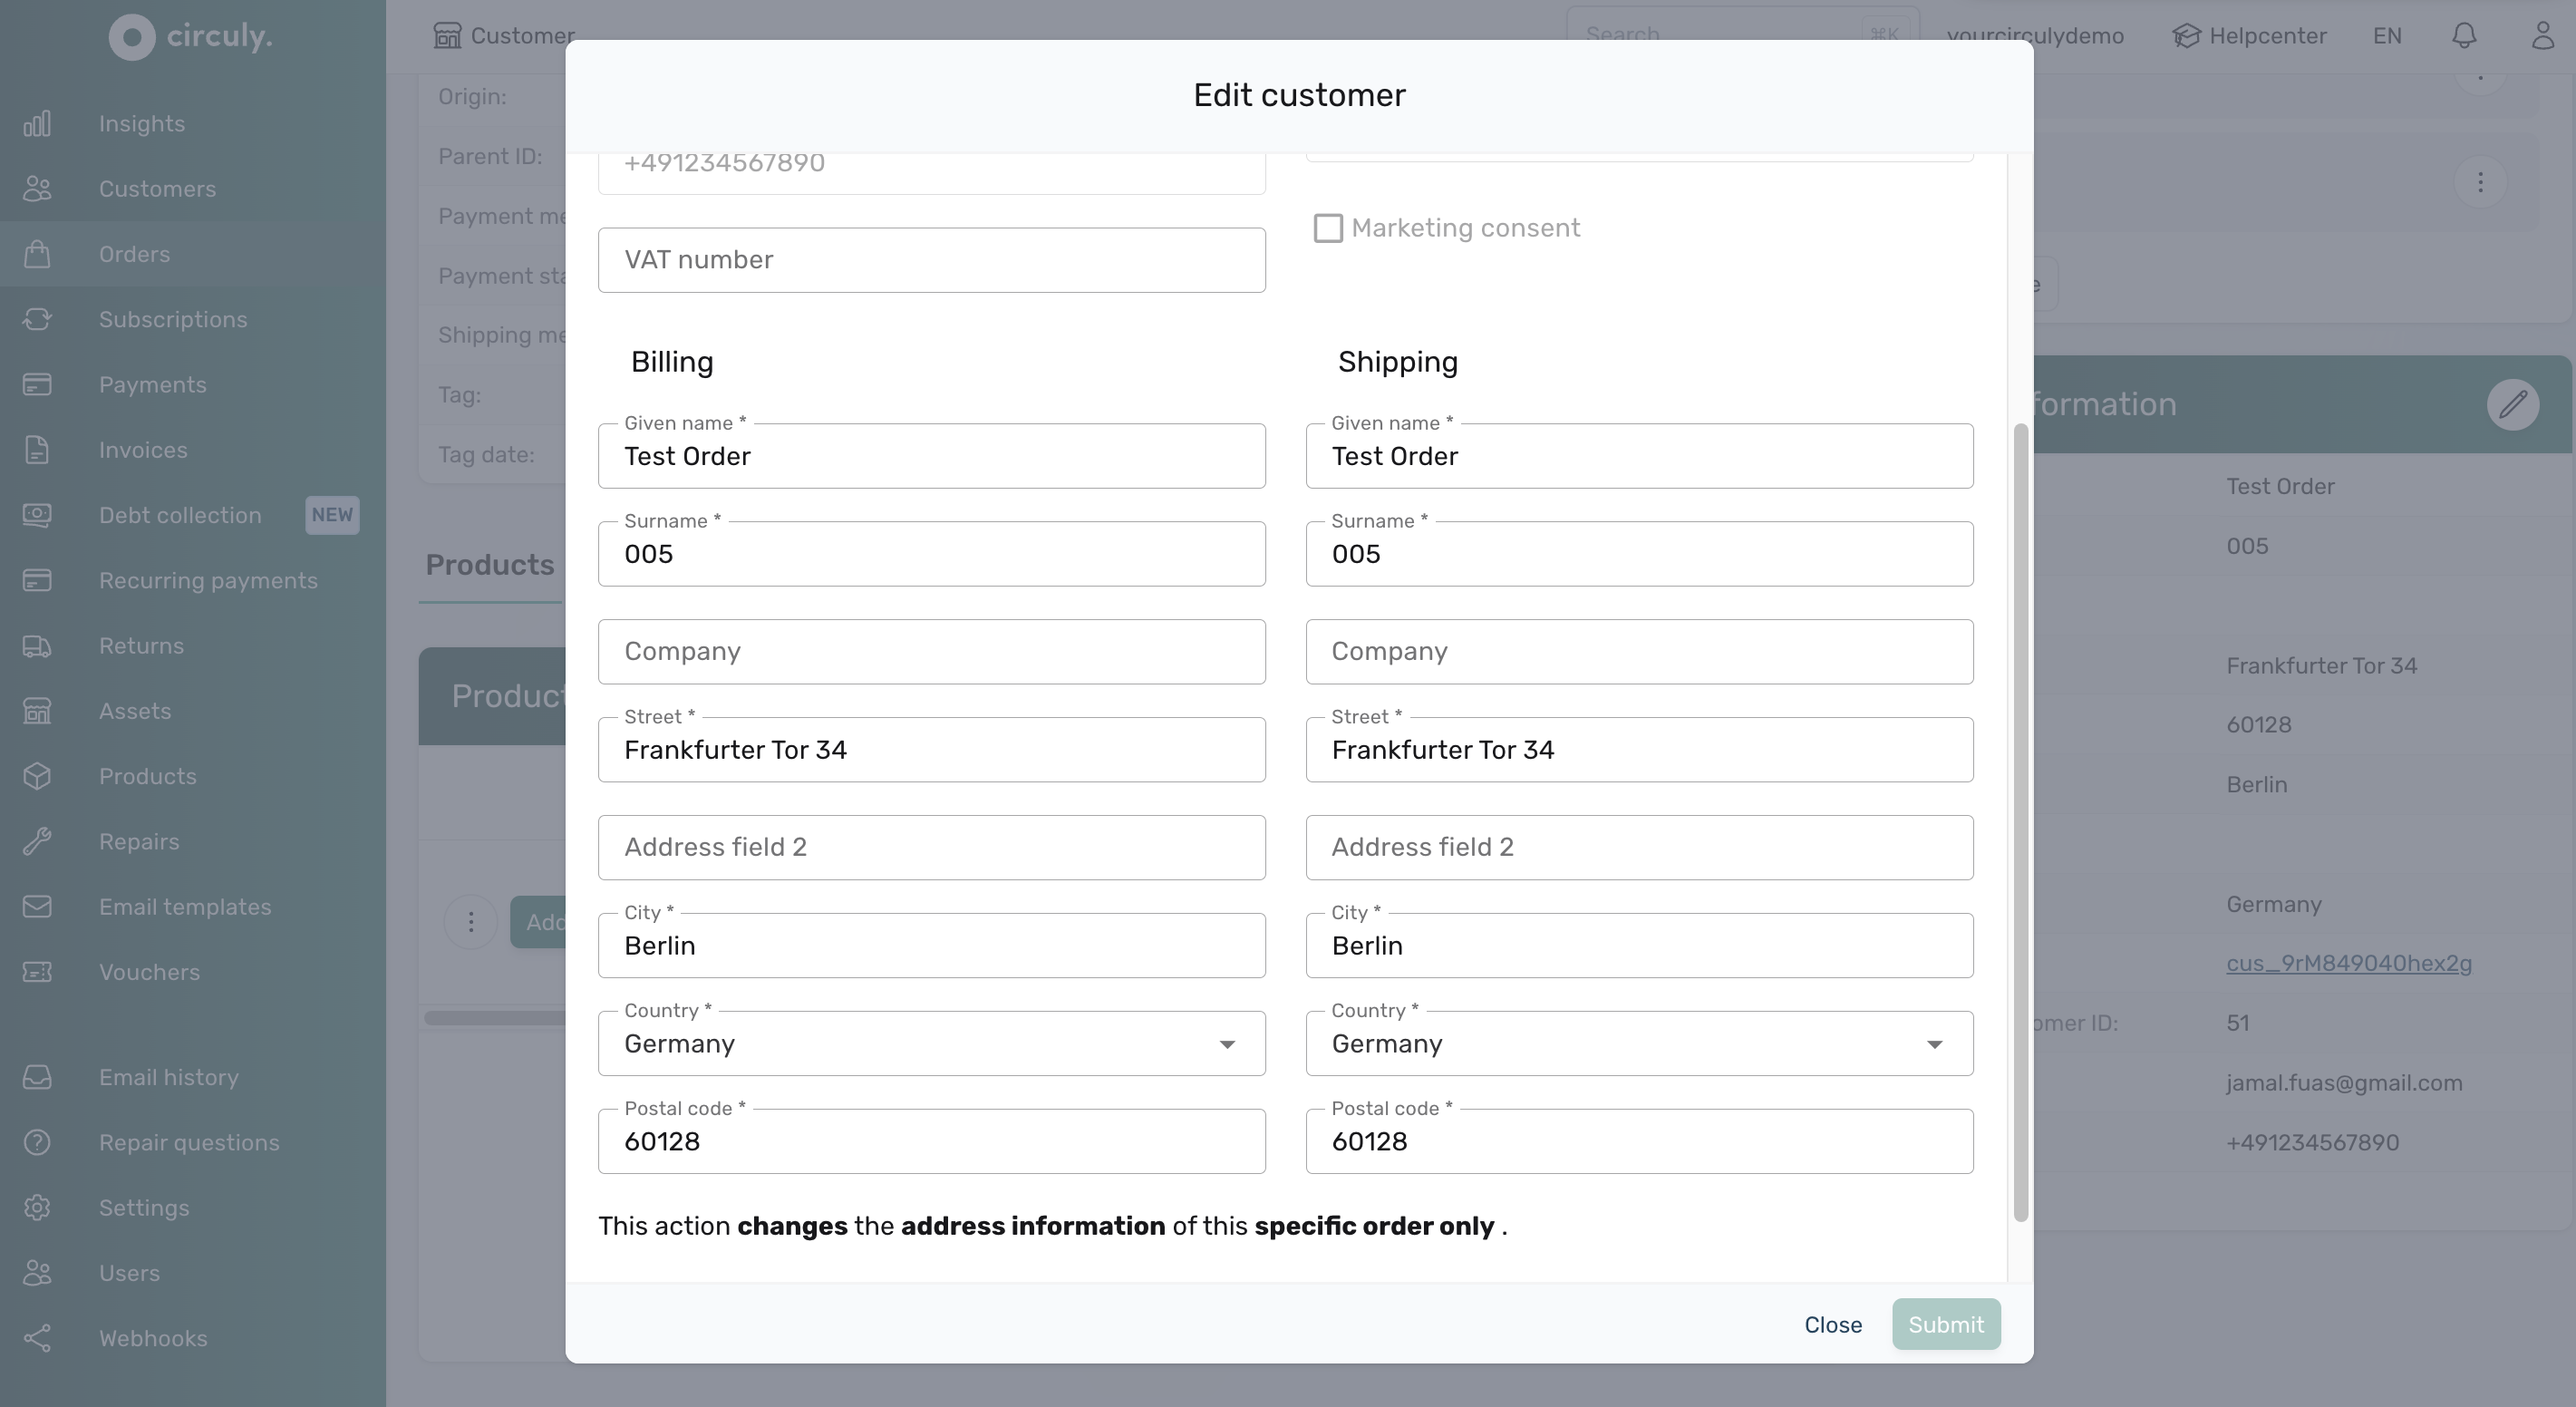
Once you have corrected the wrong information, you can proceed to cancelling the invoice with the wrong information. To do so:

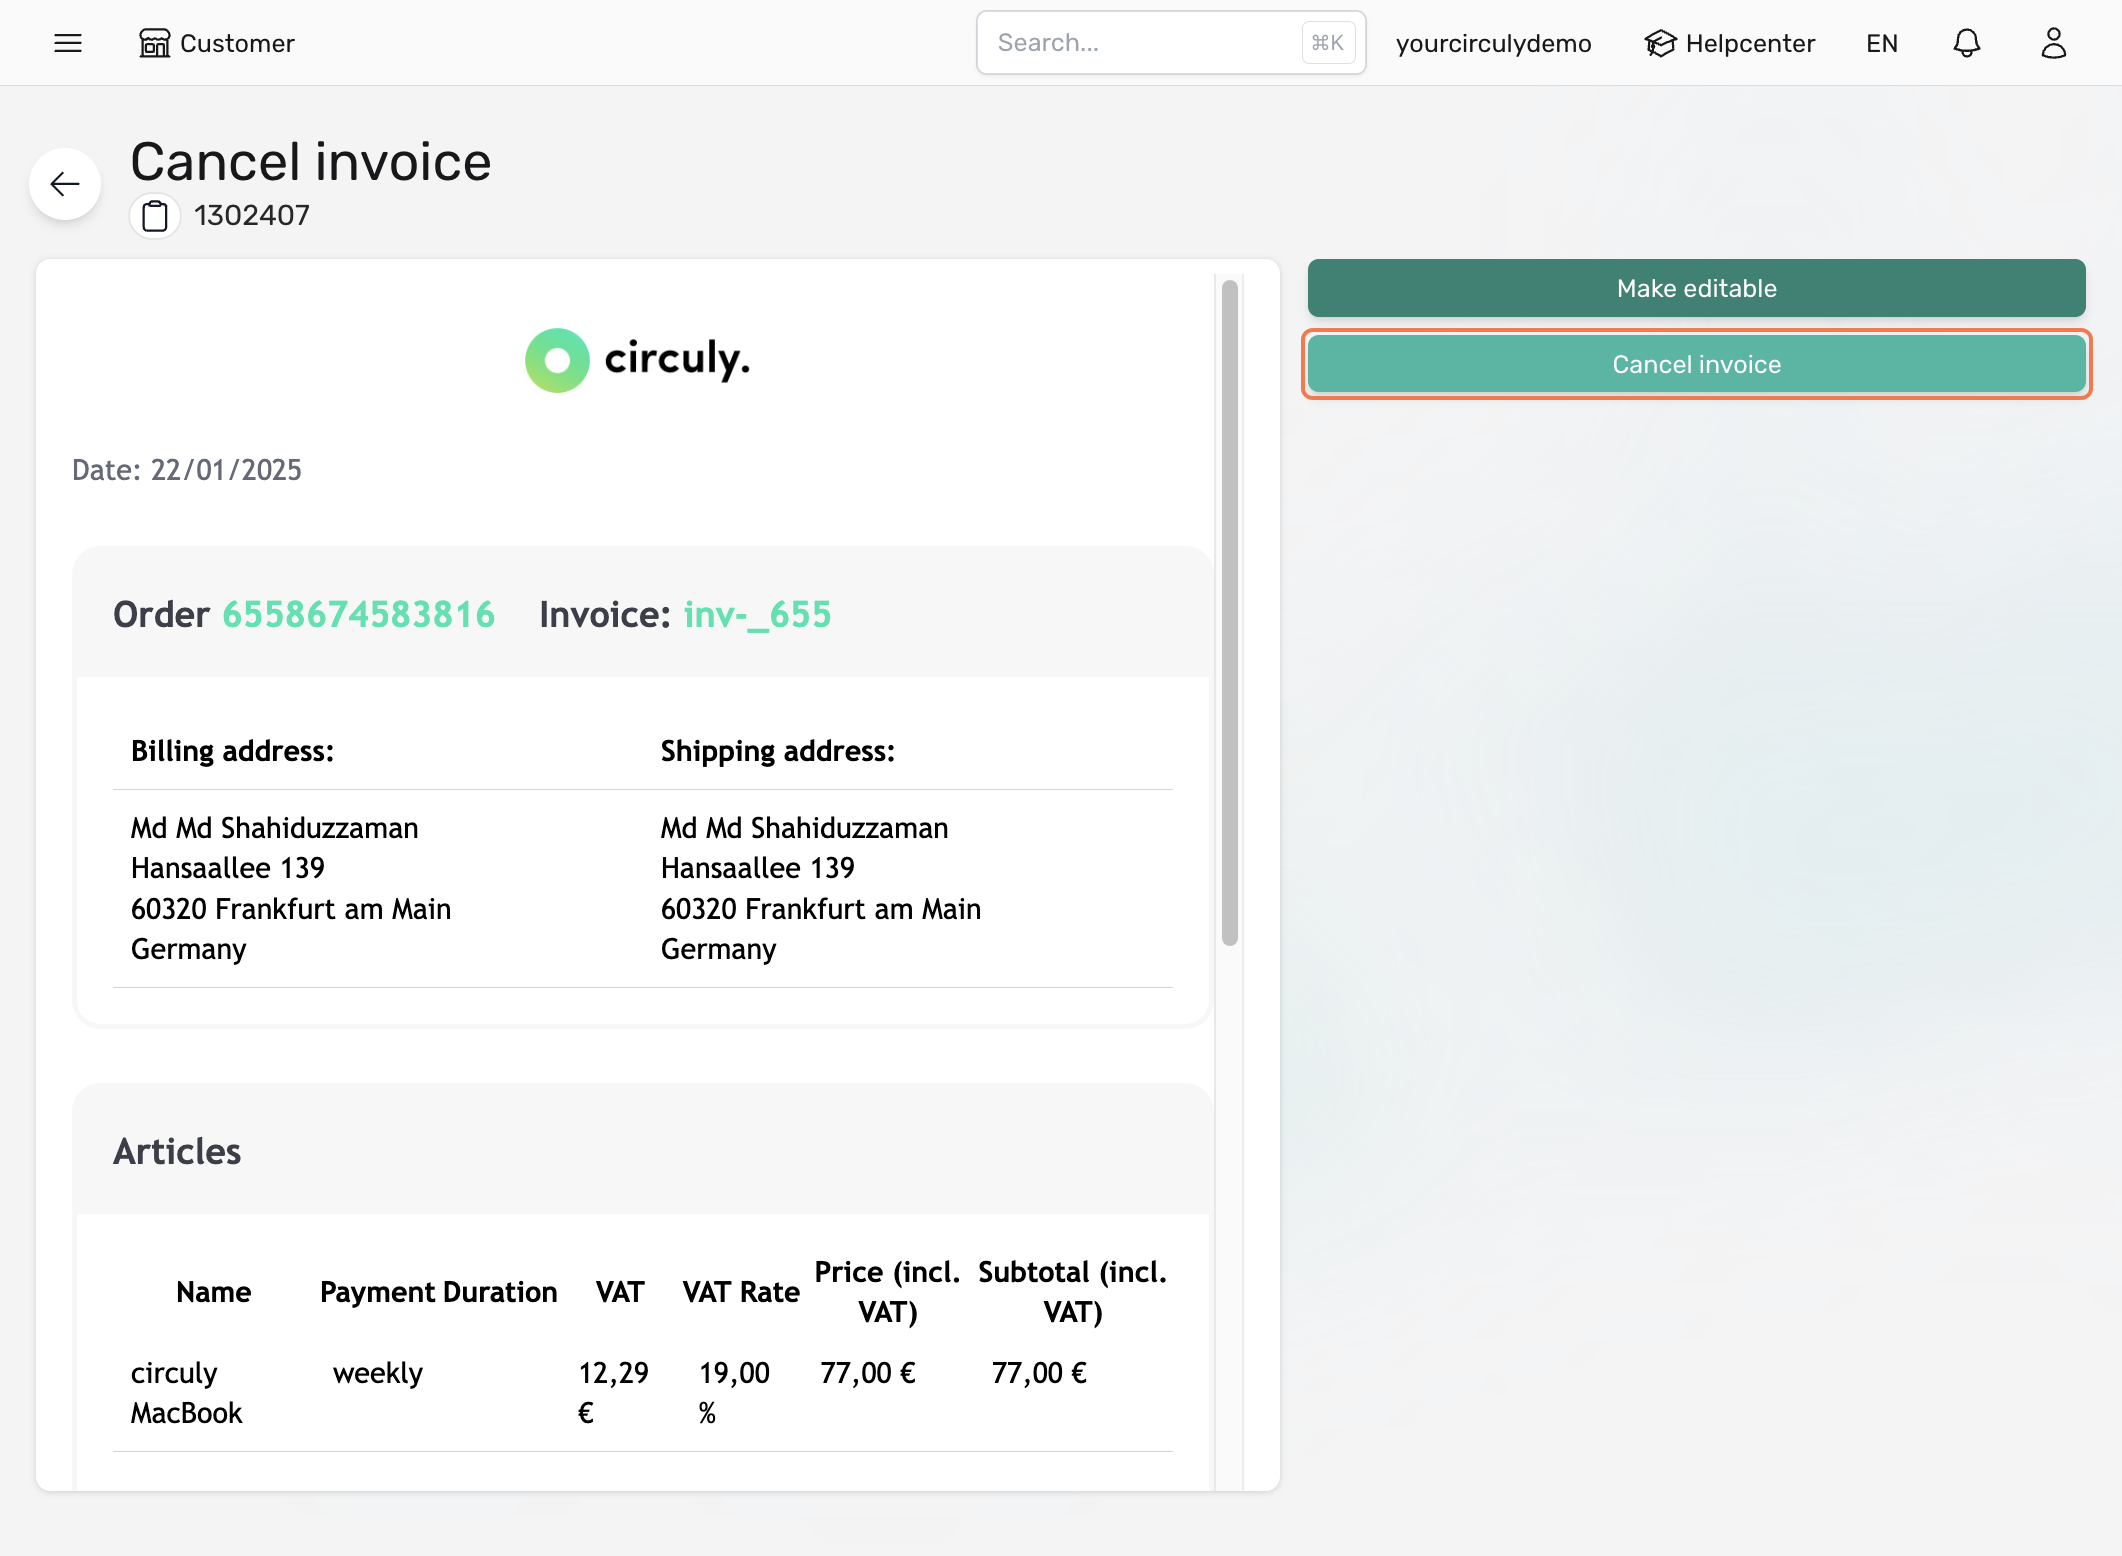
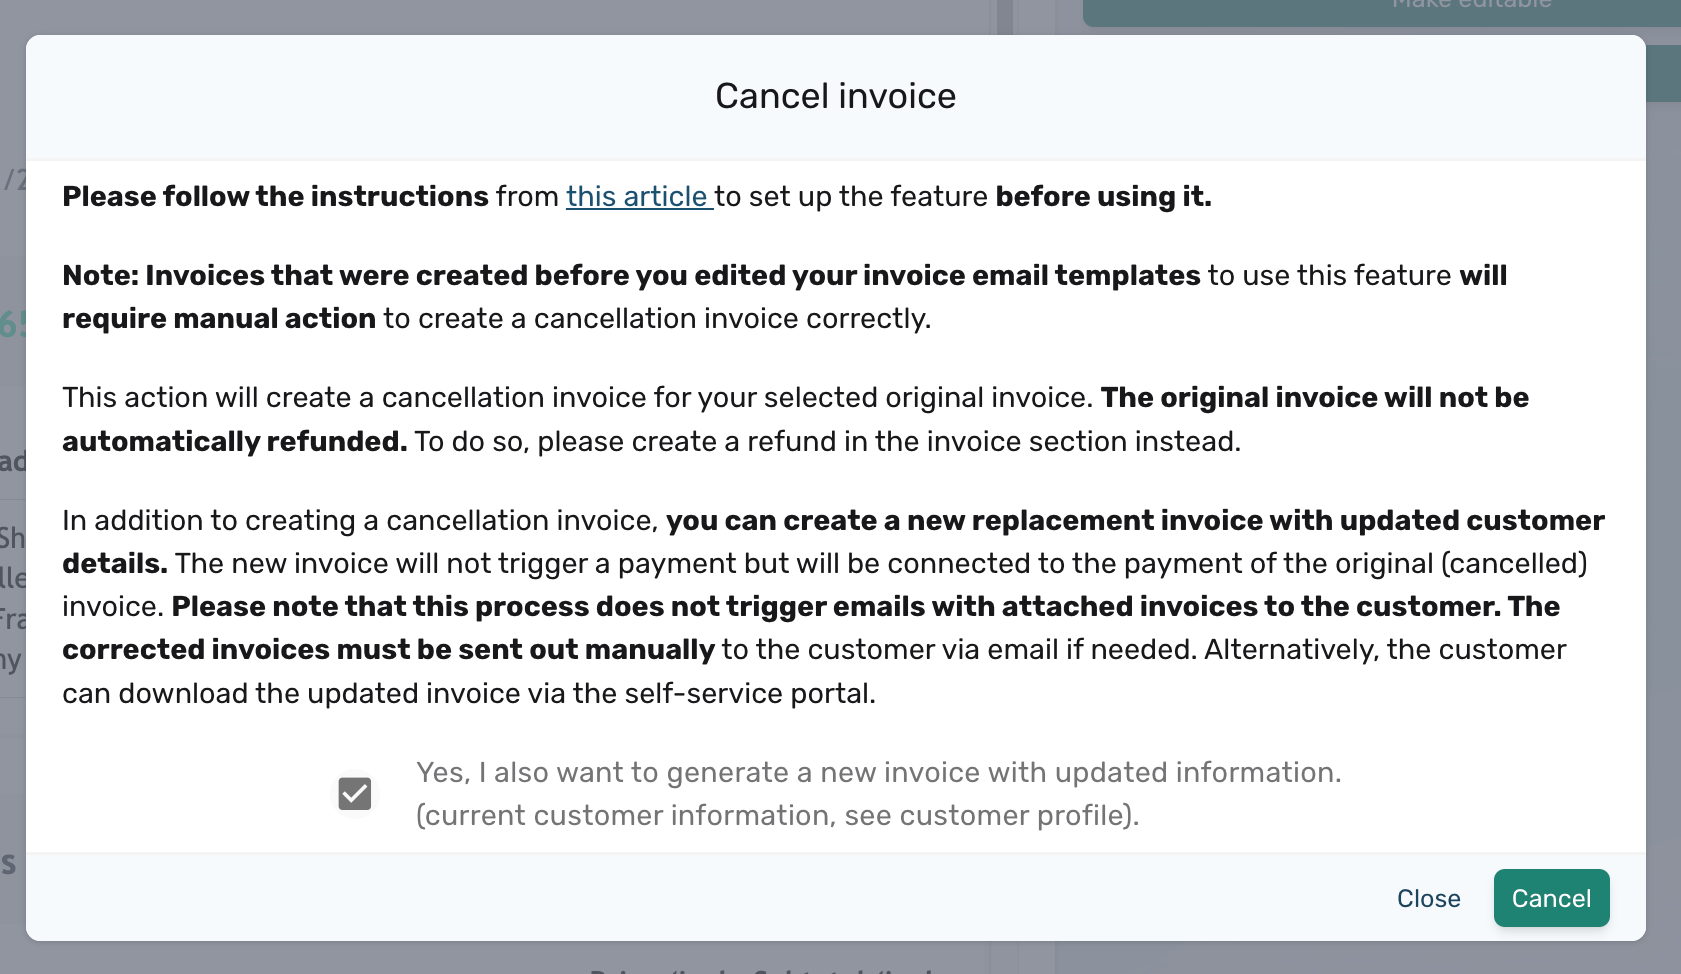
A few changes take affect:



In a subscription business, timing matters—especially when it comes to starting the billing cycle. To ensure a smooth experience for both your business and your customers, circuly enables you to define a custom subscription start date. This ensures that subscriptions begin only after the product has had time to reach the customer, avoiding complaints or confusion about billing before delivery.
When a customer places an order via your website and completes the checkout process, a new order appears in the circuly Hub. At this point, you need to manually create a subscription for the order to start collecting recurring payments.

During subscription creation, you’ll see a subscription start date picker in the creation window. If you’ve configured the Subscription Start Date setting in advance, circuly will automatically pre-fill this date based on the custom logic you’ve defined.

Settings > Subscription > General.3, the subscription will start 4 days after the order is placed.3, making the total delay 4 days (1 + 3).In the customer portal, your customers can make a cancellation request (if you've not disabled the option to do so in your settings). When they do so, the subscription is cancelled and the subscription status is set to pending return (if the Auto-cancel subscription setting is enabled in the Customer Self-Service Portal settings). Setting the subscription status to pending return triggers the return process.
You can decide whether or not a subscription should be automatically cancelled and if the subscription status is set to pending return when a customer makes a cancellation request through the customer portal.
In the circuly operations backend, you can enable or disable the auto-cancel subscription setting.
If you want to enable this setting, follow these steps:
Once you enable this, all future cancellation requests made via the customer login will be auto cancelled and the subscription status will be set to pending return so that return workflow can trigger.
When this setting is disabled, and a customer makes a cancellation request from the customer login the following happens:
For your customer: your customer will receive an email that the cancellation request is being processed.
For you: the connected customer support inbox will receive an email that a cancellation request has been made from the customer login. Additionally, a note will be created on the order level that a cancellation request has been made for this order.
In circuly, there are two main ways to handle cancellation requests:
While both actions are related to cancelling a customer's intent to keep a product, they serve different operational purposes and have different implications—particularly in how they impact order processing, return handling, and refunds.
This article helps you understand when to use each and why the distinction matters.
While both "cancel order" and "set as pending return" help you process cancellations, they serve very different purposes.
Use "cancel order" when:
Use "set as pending return" when:
You should cancel an order if the customer requests a cancellation before the product has been shipped and before the subscription has been activated. This is often the case if the customer changes their mind shortly after placing an order, or if you offer a cancellation window before fulfillment.
When you cancel an order:
This flow is especially important if you rely on logistics partners who do not use circuly but manage orders based on what they see in the shop system.
If the product has already been shipped or a subscription has already been created, you should not cancel the order. Instead, set the subscription status to pending return.
This action signals that:
This is the correct action when a customer wants to end a subscription mid-term, or at the end of their minimum commitment, and you want to track the return process and update inventory accordingly.
Unlike cancelling an order, setting the subscription to pending return does not trigger a refund and does not cancel the order in your shop system.
If you use fulfilment partners who depend on order statuses in the shop system, it’s critical to use “cancel order” when a product hasn’t been shipped. This will ensure they don’t send out an item the customer no longer wants.
If a product has already been sent and the customer wants to return it, setting the subscription to pending return is the right approach. It prevents further billing, begins the return workflow, and ensures that the product eventually comes back and can be marked as returned.
Refund logic also differs:
After you cancel an order:
After you set a subscription as pending return:
Choosing the correct action helps you stay aligned with your internal processes, avoid sending products unnecessarily, and handle customer expectations correctly.
When a customer ends their subscription, it’s essential to initiate the return process smoothly. circuly handles this through the “Pending Return” status, which helps trigger return workflows and customer communication automatically.
The subscription can be marked as pending return automatically by the system or manually by a circuly user—depending on the situation.
The Pending Return status plays a key role in return management:
There are two ways to set the subscription status to pending return:
💡 You can also automate this process using the Customer API:
Use this PUT request to set a real subscription end date →
Use this method if a customer requests a cancellation before their subscription ends.
Step 1: Log in and Find the Subscription
Step 2: Set Status to Pending Return
⋯ in the top right corner.Step 3: Add Details (Optional)
In the Set subscription to pending return window:
Step 4: Decide on Future Charges
You’ll see the option: Delete future recurring payments.
Step 5: Confirm the Action
Click the CONFIRM button to finalise.
Once the subscription is marked as Pending Return:
In circuly, the term "pending return" appears in multiple tabs and processes within the circuly Hub. It’s not just a label—it’s a core status that plays a critical role in operations like cancellations, returns, and subscription reactivations. This article explains what "pending return" means, when and how it’s applied, what it triggers, and which settings it depends on.
The status "pending return" indicates that a product is still with the customer but is expected to be returned.
You’ll see this status in the Status column of various lists in the circuly Hub, including:
What does "pending return" do?
If the status of a subscription is not set the to "pending return":
Setting the status to “pending return” is essential to:
When a subscription is marked as pending return, it means the customer has the product but hasn’t returned it yet. This could be because:
Regardless of the reason, you expect the product to come back. If not, you must have safeguards in place—like reactivating the subscription to continue charging the customer.
circuly will automatically update the subscription status to pending return in the following scenarios:
Exception: If the product is marked as stolen/missing during a swap, the status is not set to pending return—because you no longer expect the item to come back.
You may need to manually assign the pending return status in the following cases:
Doing so triggers the return workflow, including return instructions and tracking.
When a subscription is marked as pending return, circuly triggers the following actions:
To make the “pending return” workflow work efficiently, configure the following in Settings > Subscriptions > Cancel Subscription:
Learn more about the return workflow and the assoiciated settings here.
Product returns are a key part of running a subscription business. In circuly, returns can happen for various reasons—like swaps, cancellations, or when a subscription ends. Some return processes are fully automated, while others require manual steps.
This article explains the different return scenarios, what actions you or your team need to take, and which settings control how circuly handles each case.
Info: The return workflow ensures that when a subscription ends or when a customer requests a cancellation or swap you either receive the product back, or you resume charging the customer if the product is not returned within a specified time frame.
When a customer requests a swap, circuly automatically sets the status of the product currently with the customer to Pending replacement (this has the same effect as "Pending Return").

At the same time, circuly creates a new order for the replacement product.
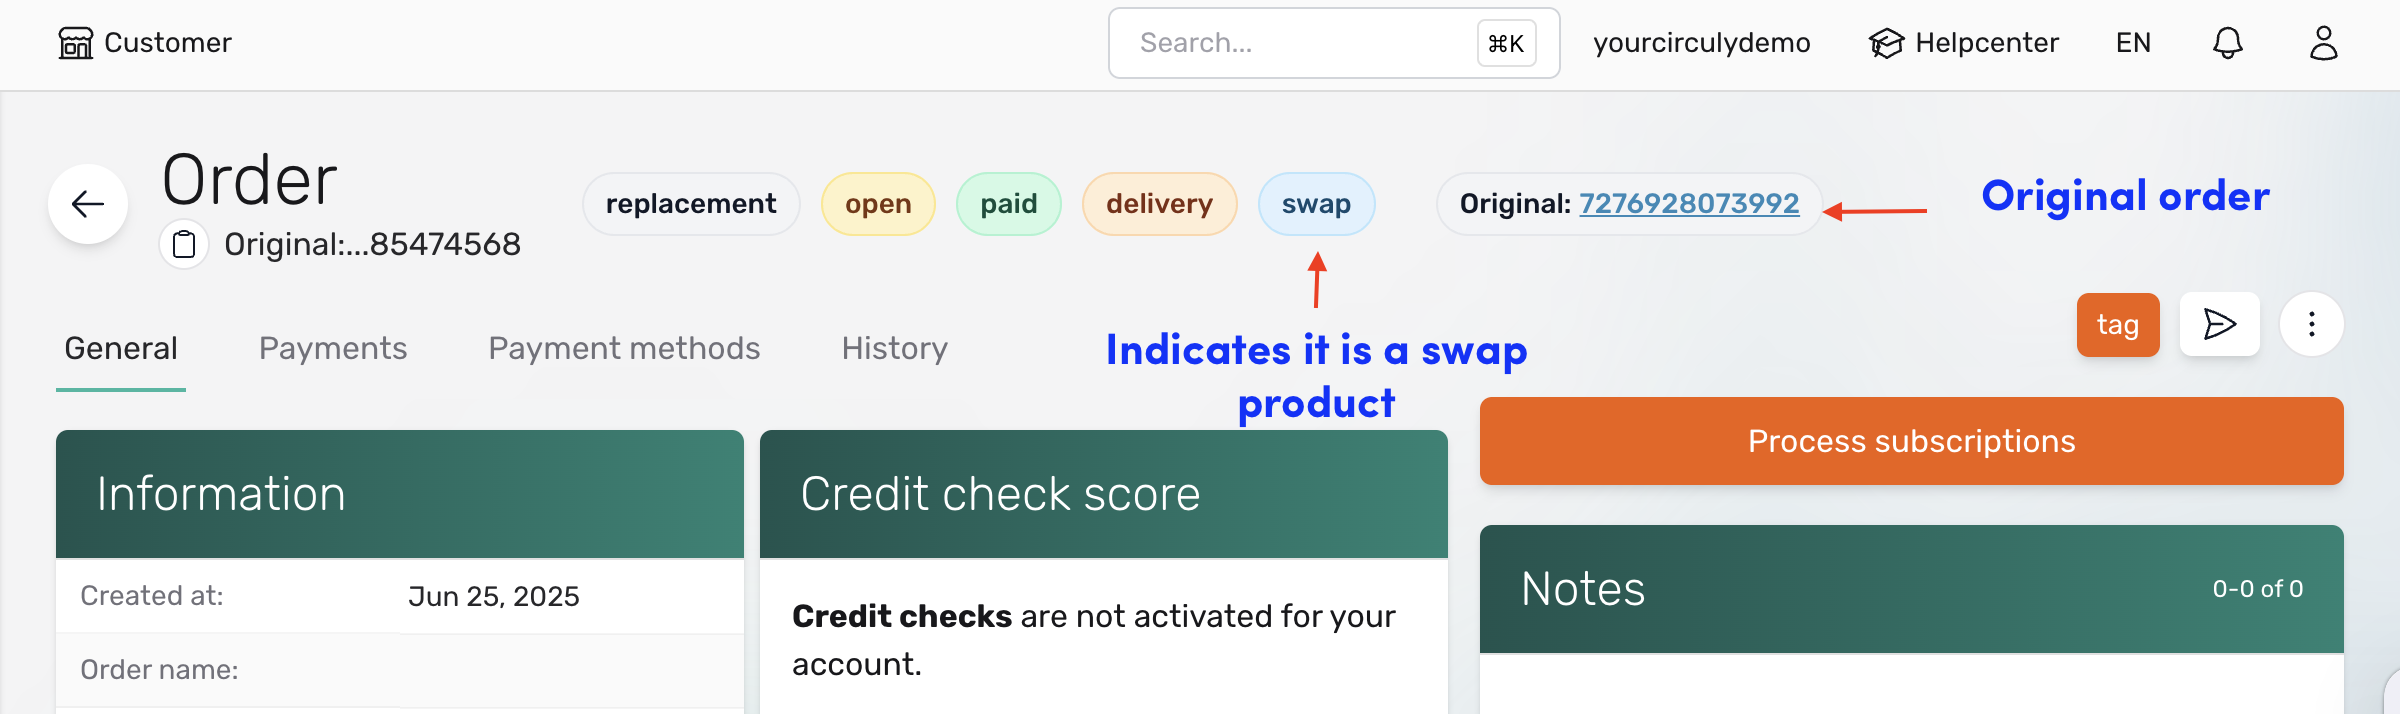
The customer receives a Swap Confirmation Email with instructions on how and when to return the original product. The customer must return the product within the time period you’ve defined in your settings (called the Return Until Period).
If the product is not returned within that period, circuly can automatically reactivate the original subscription and resume charging recurring payments, depending on your settings.
What you need to do:
Info: For a detailed guide on return settings, scroll down to the Return settings to configure section.
In addition to the general return settings, you can also configure specific options that apply only when the product return is triggered by a swap request. Follow this guide to learn more.
If a customer requests to cancel their subscription before the scheduled end date, the return workflow must be started manually.
To begin the return process, you need to manually change the subscription status to "Pending Return" in the circuly Hub. Once marked as pending return, circuly automatically sends the Subscription pending return email to the customer with return instructions.
From that point, the same return rules apply: the product must be returned within the Return until period. If it isn’t, circuly will reactivate the subscription based on your reactivation settings.
What you need to do:
Info: For a detailed guide on return settings, scroll down to the Return settings to configure section.
When a subscription naturally reaches its end date, circuly automatically sets the subscription status to "Pending return"—no manual action is required.
The customer should receive the Subscription almost over email ahead of the end date. This email should contain the return instructions.
The customer is expected to return the product within the number of days defined in your Return until period setting. If they don’t return the product in time, circuly will automatically reactivate the subscription and resume charges, if that setting is enabled.
What you need to do:
Info: For a detailed guide on return settings, scroll down to the Return settings to configure section.
These three settings control how circuly handles product returns and subscription reactivations:
Let’s say:
In this case:
After a product is returned by the customer and before it can be rented out again, the product goes through the repair process. The repair process exists to make sure that the product meets the necessary quality standards before it is sent to another rental cycle.
Since the repair process varies from one business to another, you can set-up your own custom repair process in the circuly operations backend. You can track the status of the product as well as the time and money needed to repair the product. This will help you to track your products’ lifetime value and keep the transparency about your products high.
Before we begin with the set up of the Repair Questions, read the summary below to understand the various elements of the Repair Questions Section.
The three sections of the Repair Question Section are showcased below.

The Components Column is used to create the repair process page(s) and to fill the page(s) with repair questions. Each page is one step of qualifying your product. The pages are connected to each other by a “next”/”back” button or “submit” button. See examples below of an existing Repair Workflow.
Page 1 with three repair questions. The Repair Question type is Radio group (available in the Components Column and explained later in detail).

More fields can show up based on the response to the question. See example below.
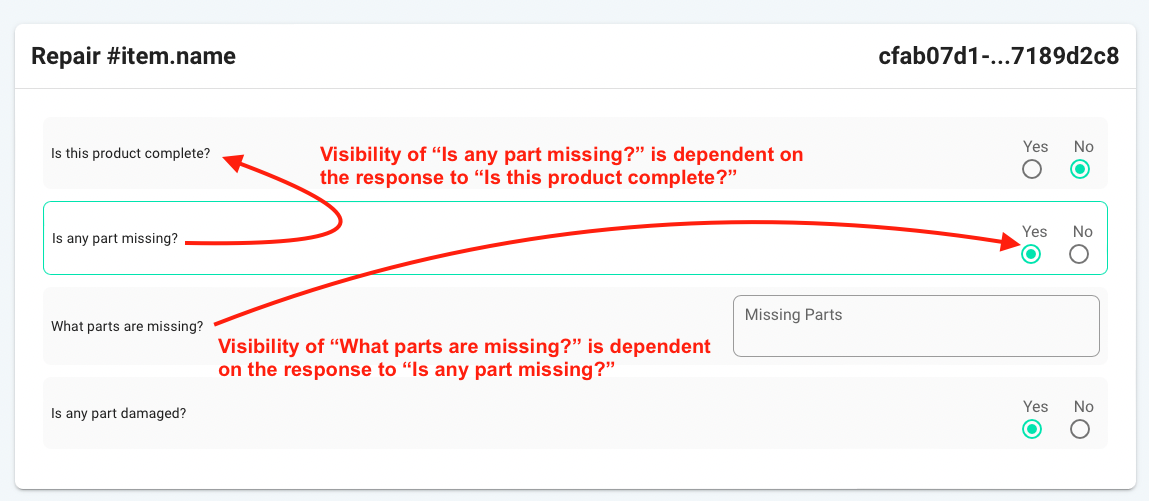
Page 2 with two repair questions. The Repair Question type is Radio group (available in the Components Column and explained later in detail).
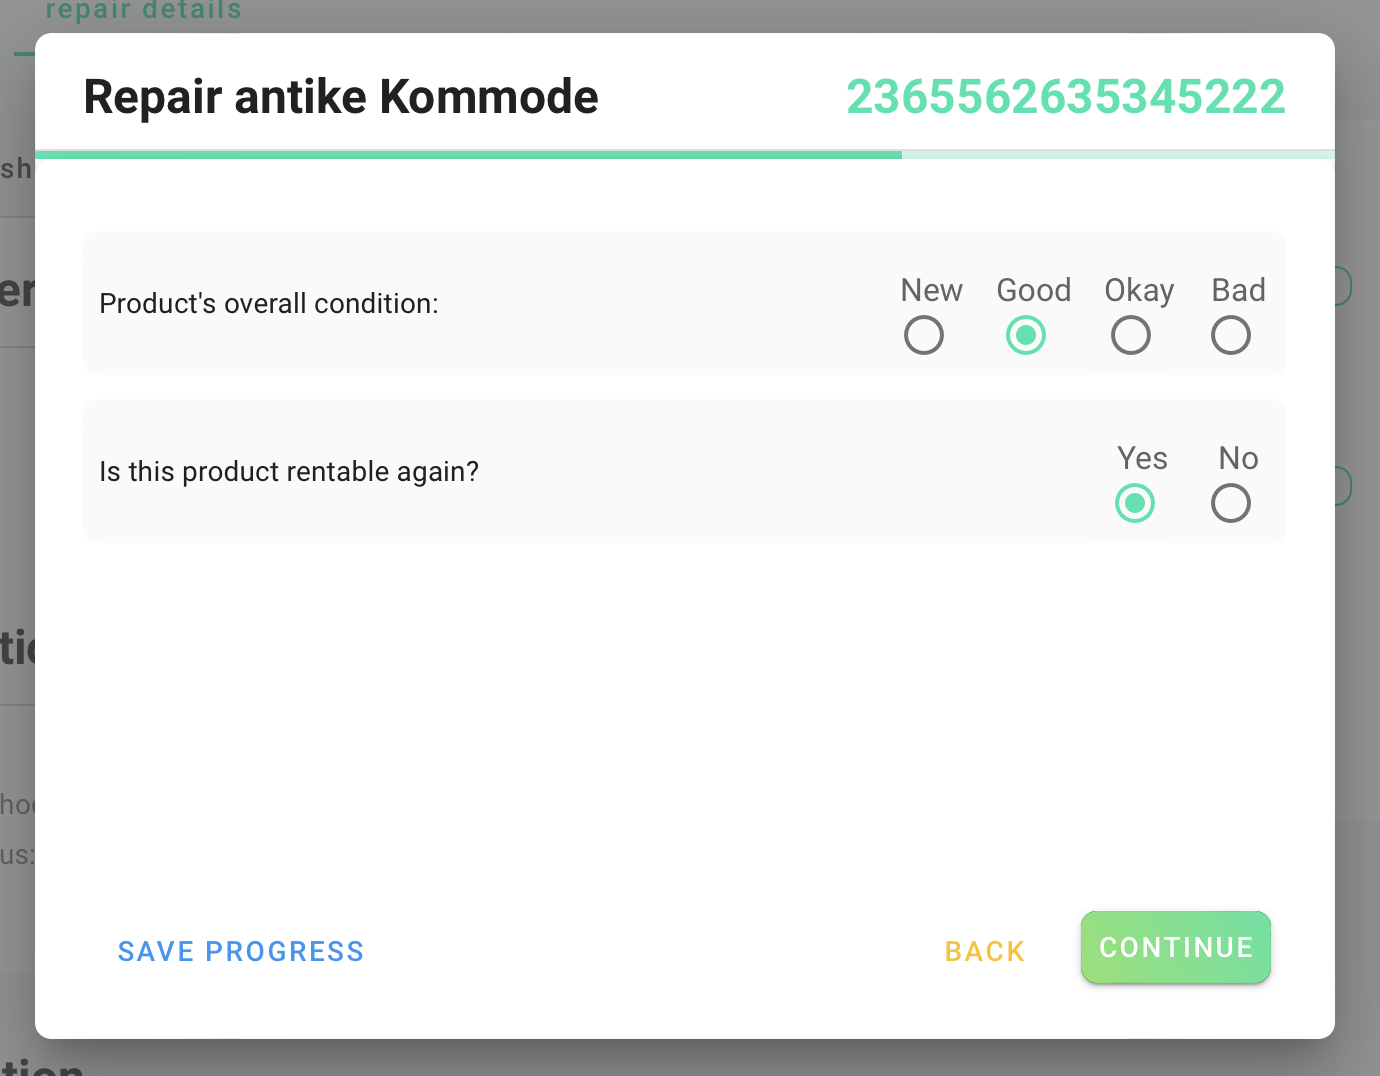
Page 3 with one repair questions. The Repair Question type is Text Field (available in the Components Column and explained later in detail).
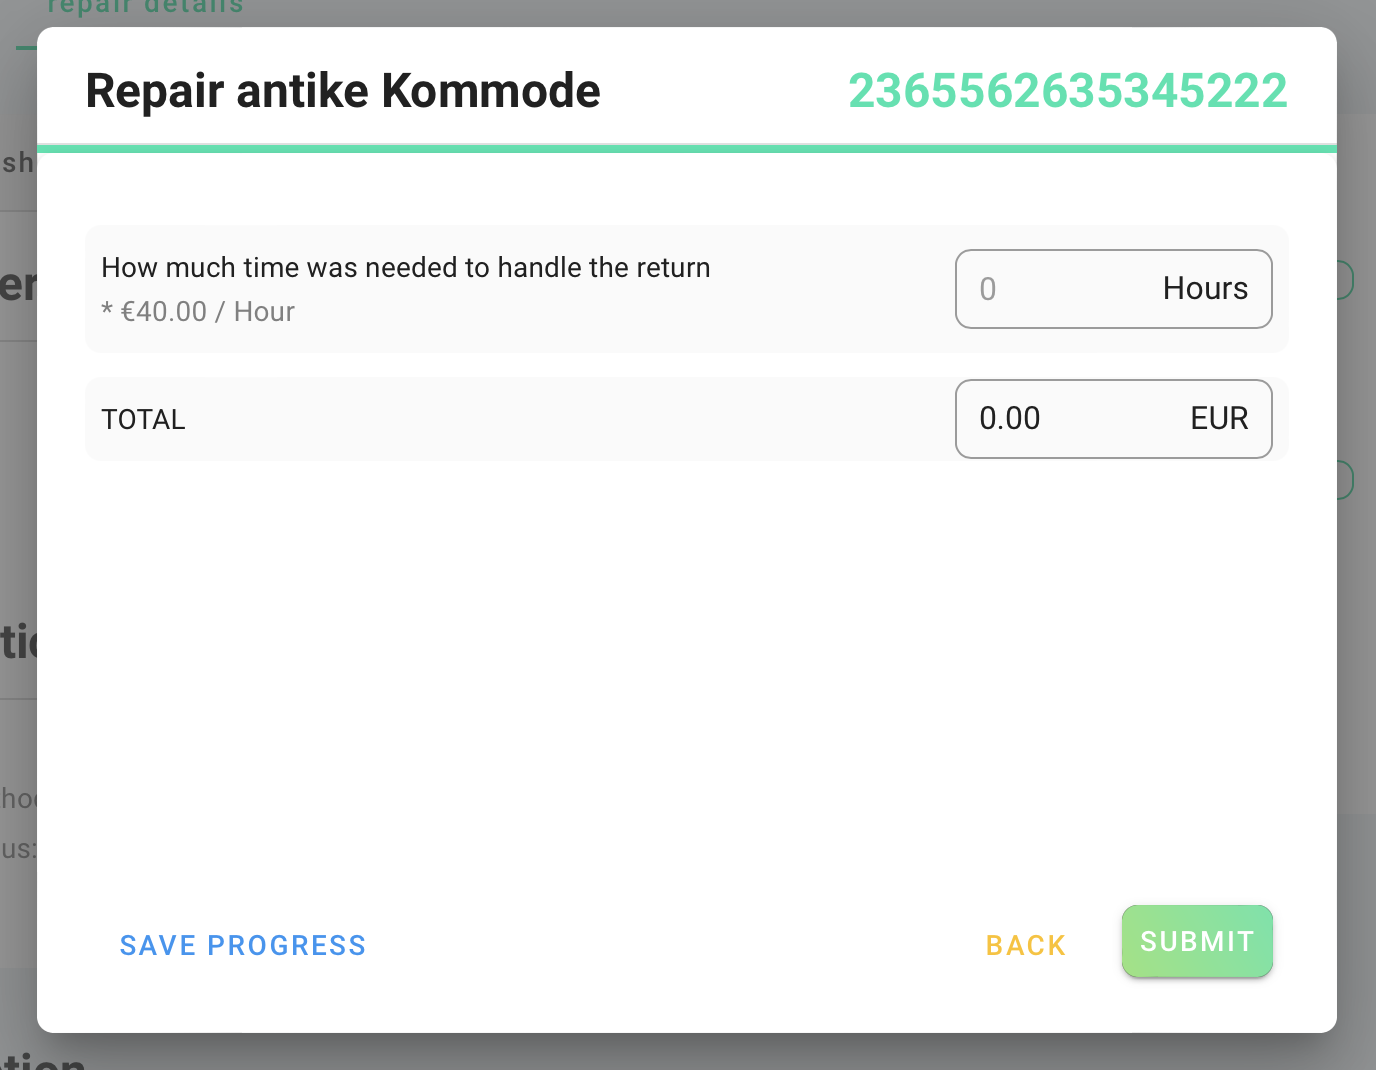
Items in the Component Column showcased in the image below.
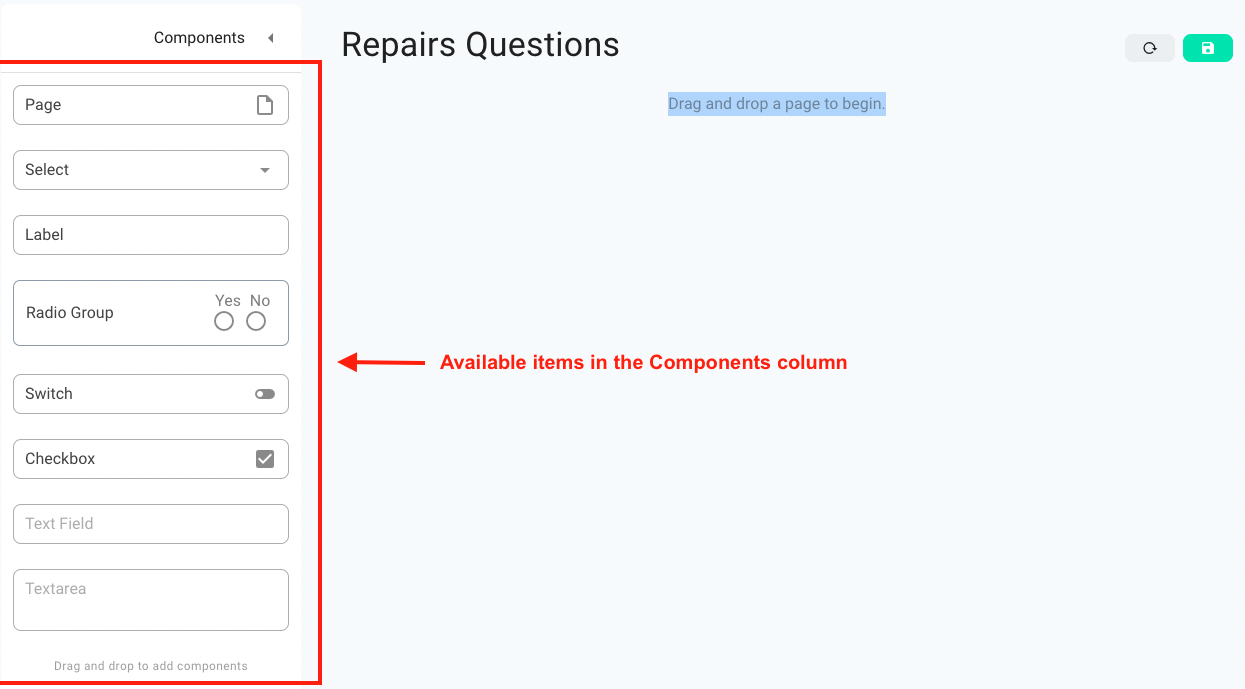
Page: you always start by dragging a Page Item from the Components Column to the Middle Column. You CANNOT add any items from the Components Column to the Middle Column without adding a Page Item first. The items go into the page therefore adding a Page Item is the first step. You can drag multiple Page Items to the Middle Column. Each page represents one step in the repair process as shown in the example above with the different pages.
The image below shows Pages in the Middle Column added from the Components Column.
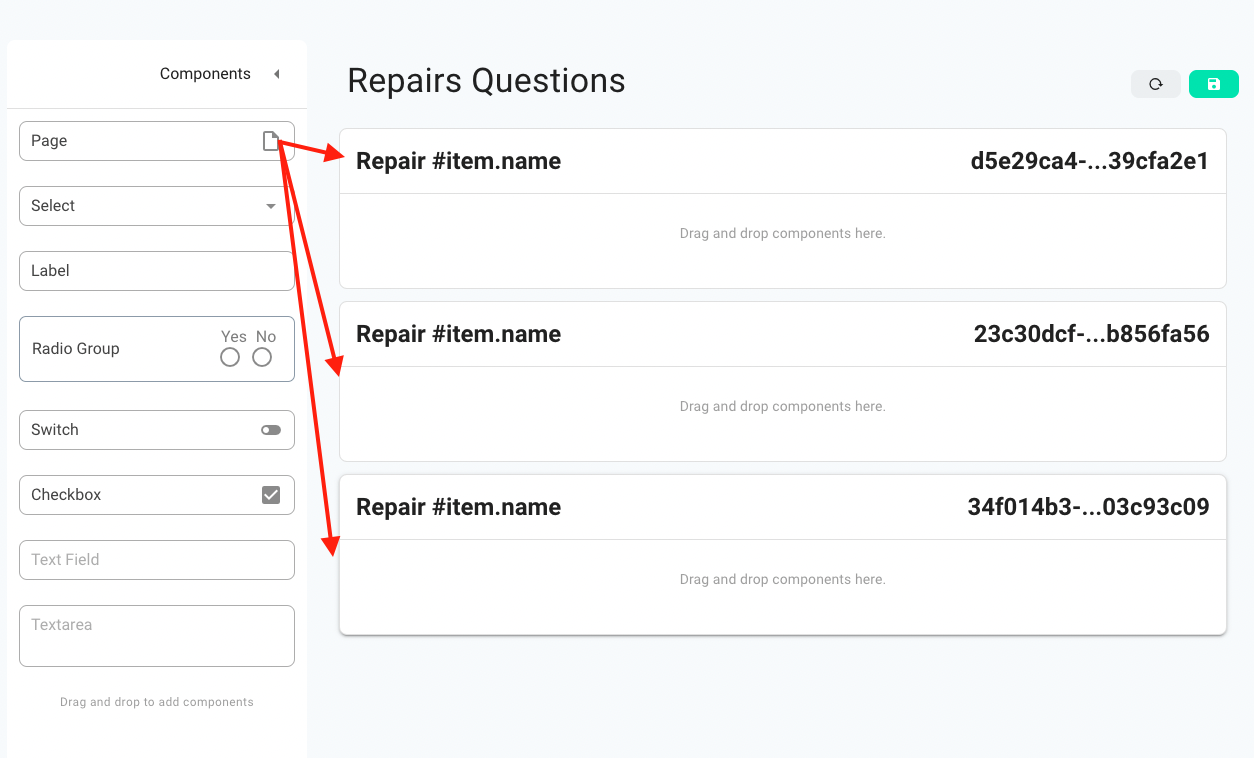
Select: the Select Item is a type of Question Item that you can use if you want a dropdown menu as the answer to the question. See image below for example.
The image below shows the Select Item.
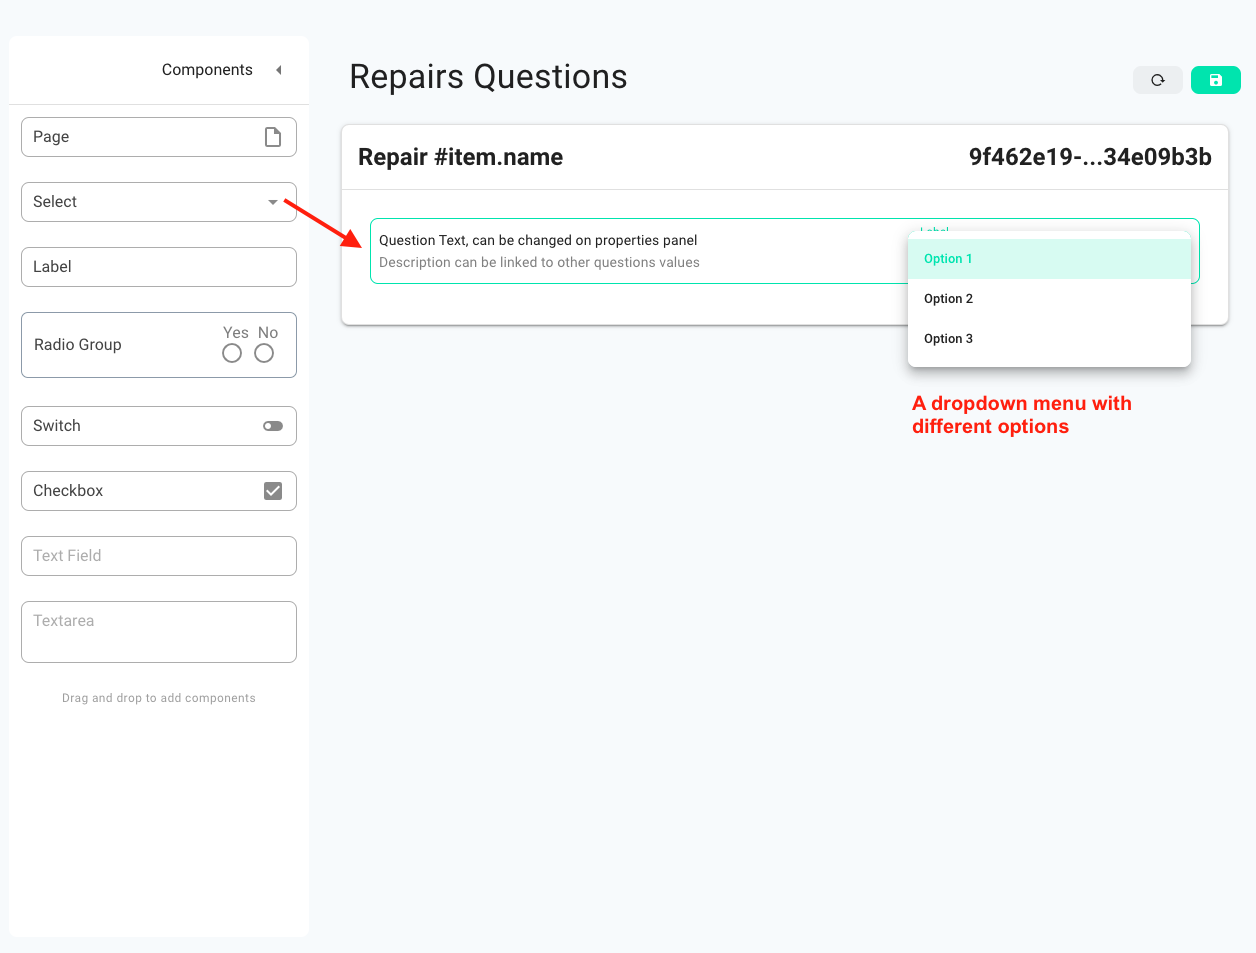
Label: the Label Item contains a question and a description field. The Label Item can be used to group different items if they have the same main heading or belong to the same category. See example below.
The image below shows the Label Item.
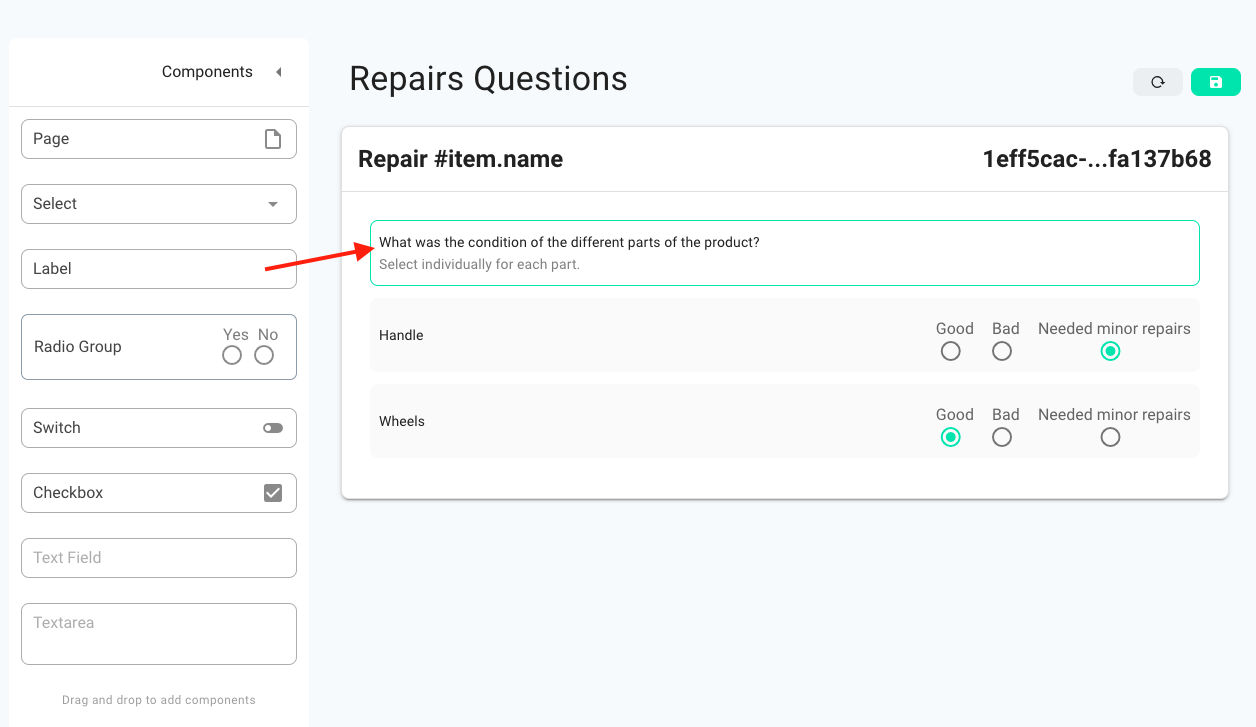
Radio Group: a Radio Group Item is a type of Question Item from which one can select a value from a defined list. See example below.
The image below shows the Radio Group Item.
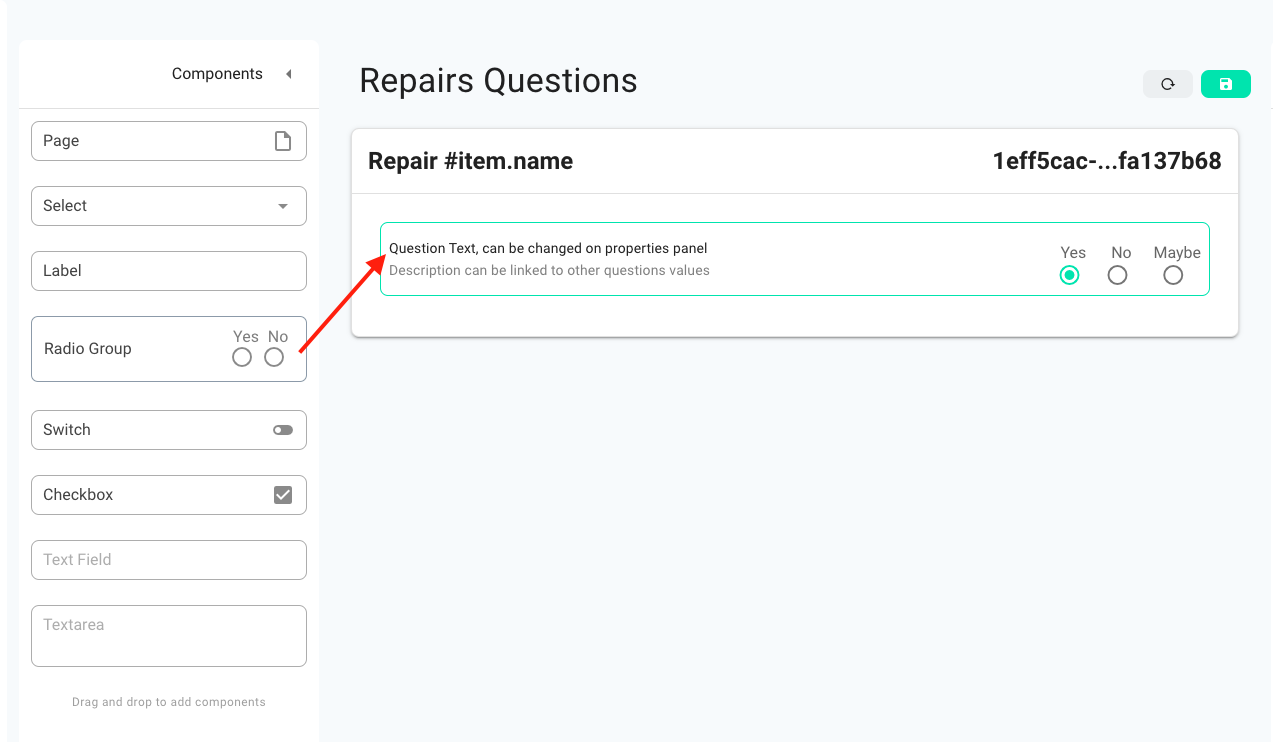
Switch: the Switch Item lets you toggle on/off your selection. See example below.
The image below shows the Switch Item.
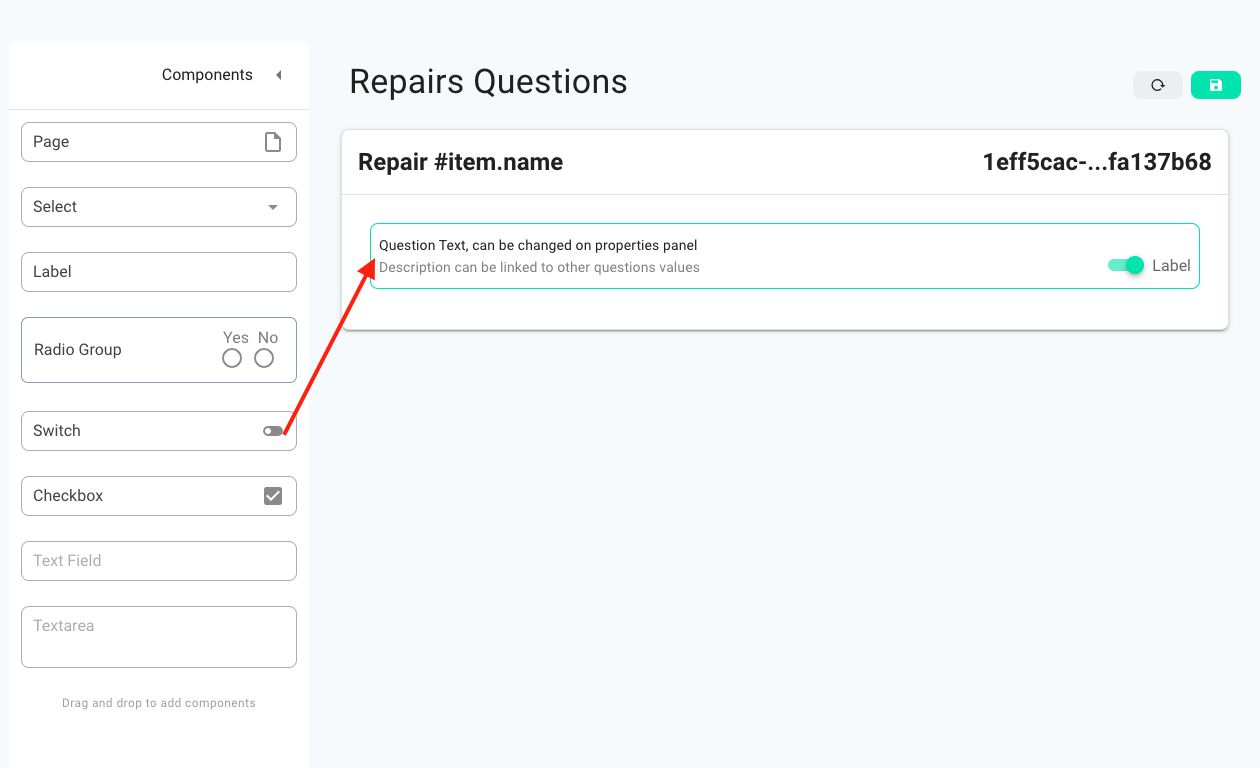
Checkbox: the Checkbox item, as the name suggests, let’s you check/uncheck your selection. See example below.
The image below shows the Checkbox Item.
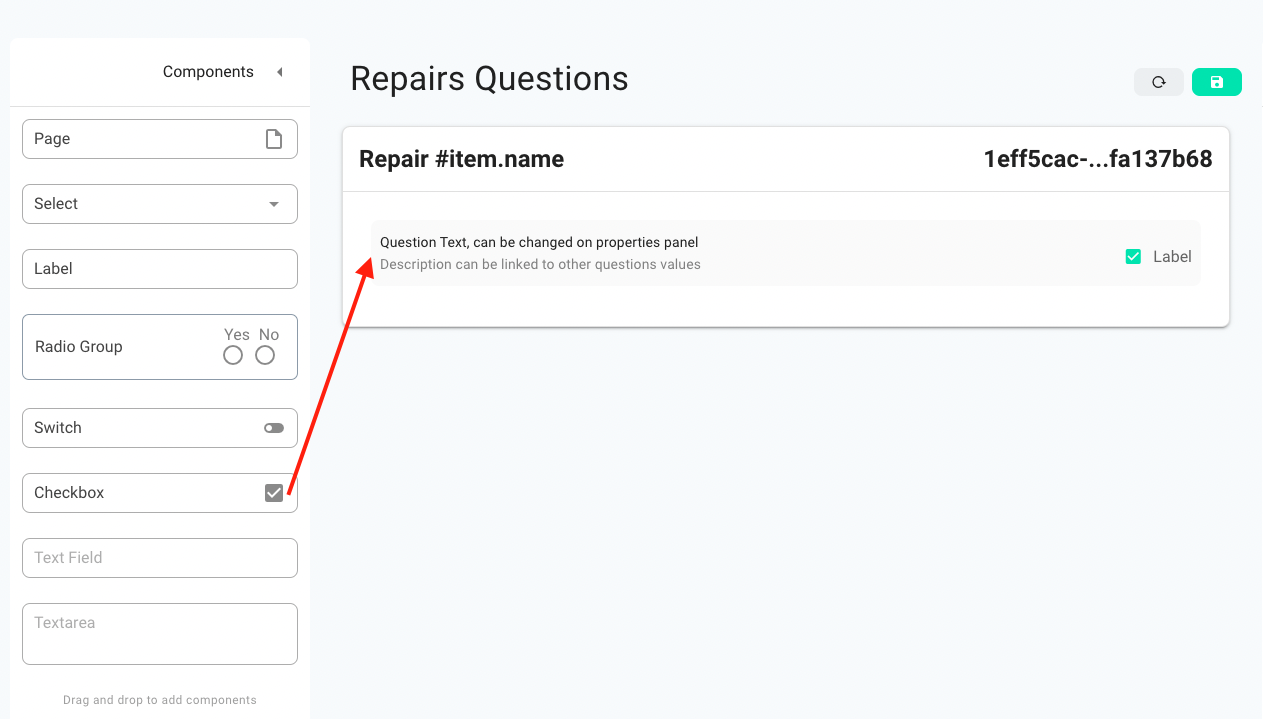
Text Field: the Text Field Item allows you to add a short text as a response to the question/state/description. See example below.
The image below shows the Text Field Item.
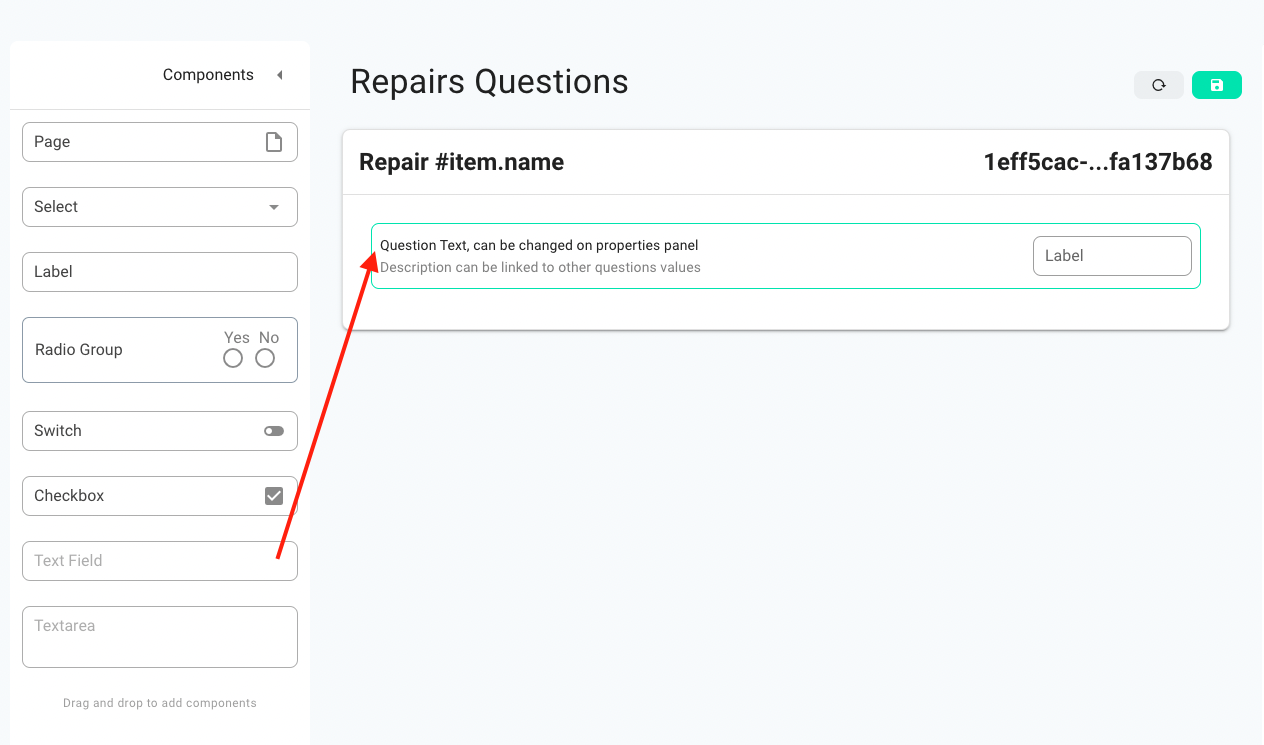
Text Area: a Text Area Item also allows you to add a text bit in contrast to Text Field Item where you can only add a short text, you can add a larger text in the Text Area Item.
The image below shows the Text Area Item.
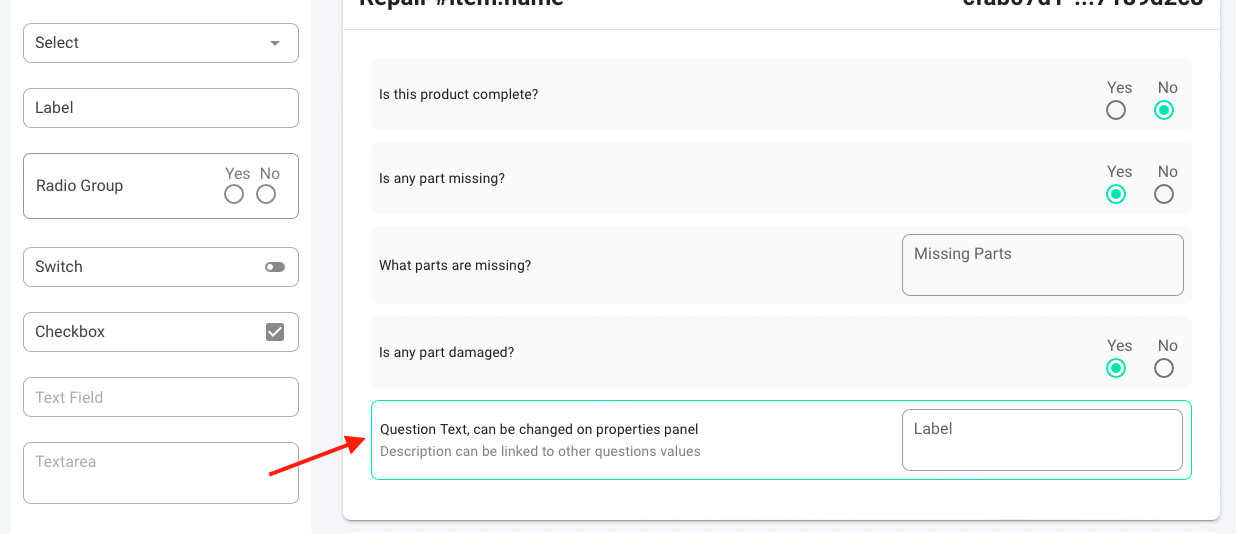
This is where you drag items from the Components Column to create pages and questions. The questions can be edited in the Properties Column. The middle column renders the selected item from the Components Column. Once you’ve set up a few pages you can switch between them.
The image below highlights the Middle Column.
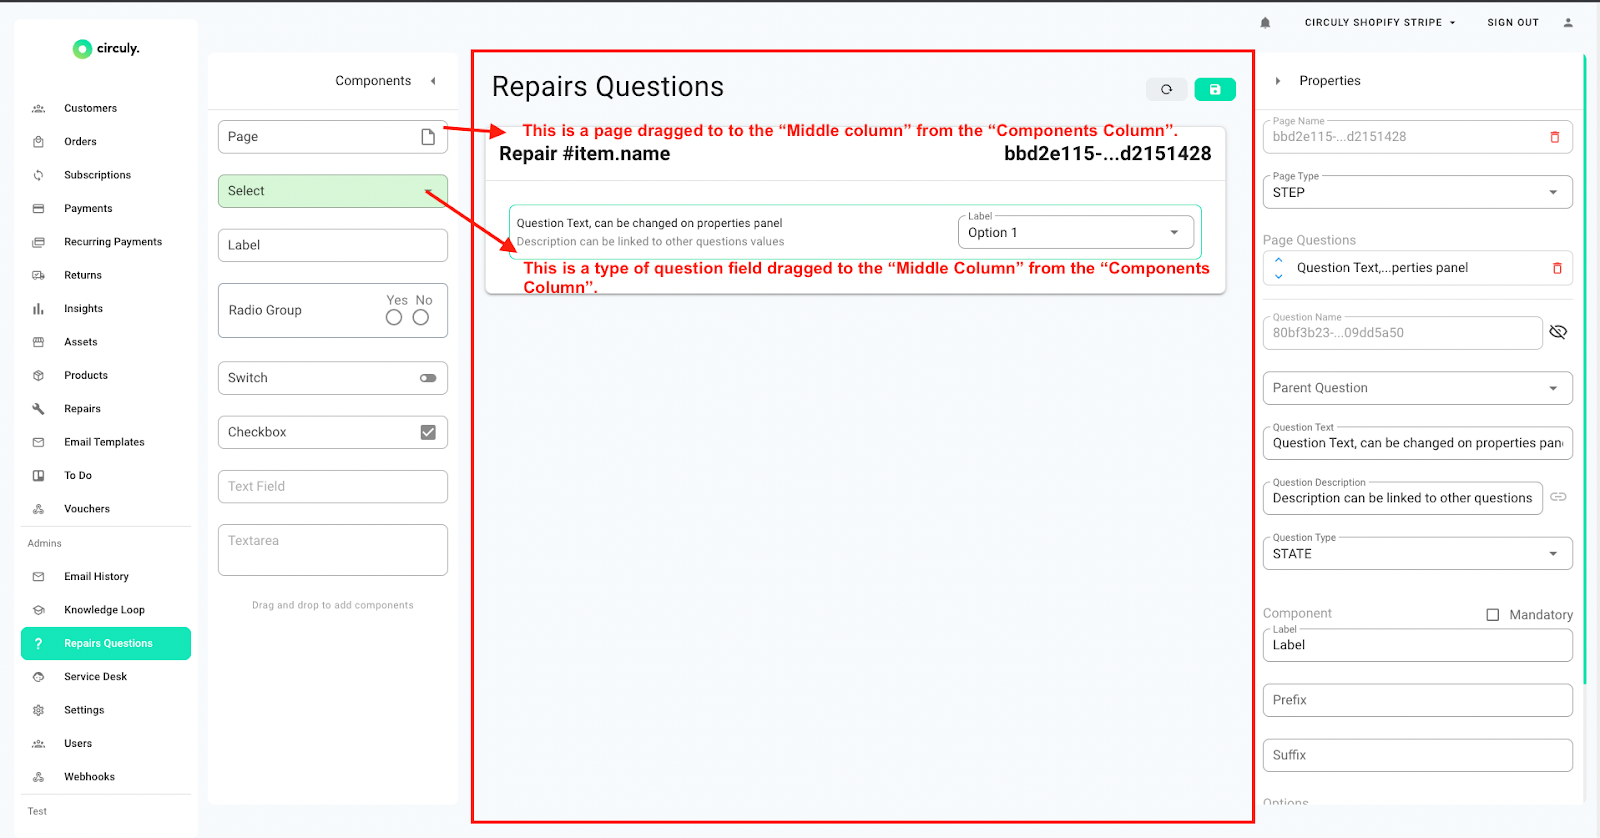
In the Middle column you can only see the items and cannot edit them. To edit them you need to use the Properties Column. When you edit an item in the Properties Column, it is rendered in the Middle Column and gives you an idea of how the questions would be displayed.
The Properties Column lets you edit the items that you select and drag to the Middle Column from the Component Column.
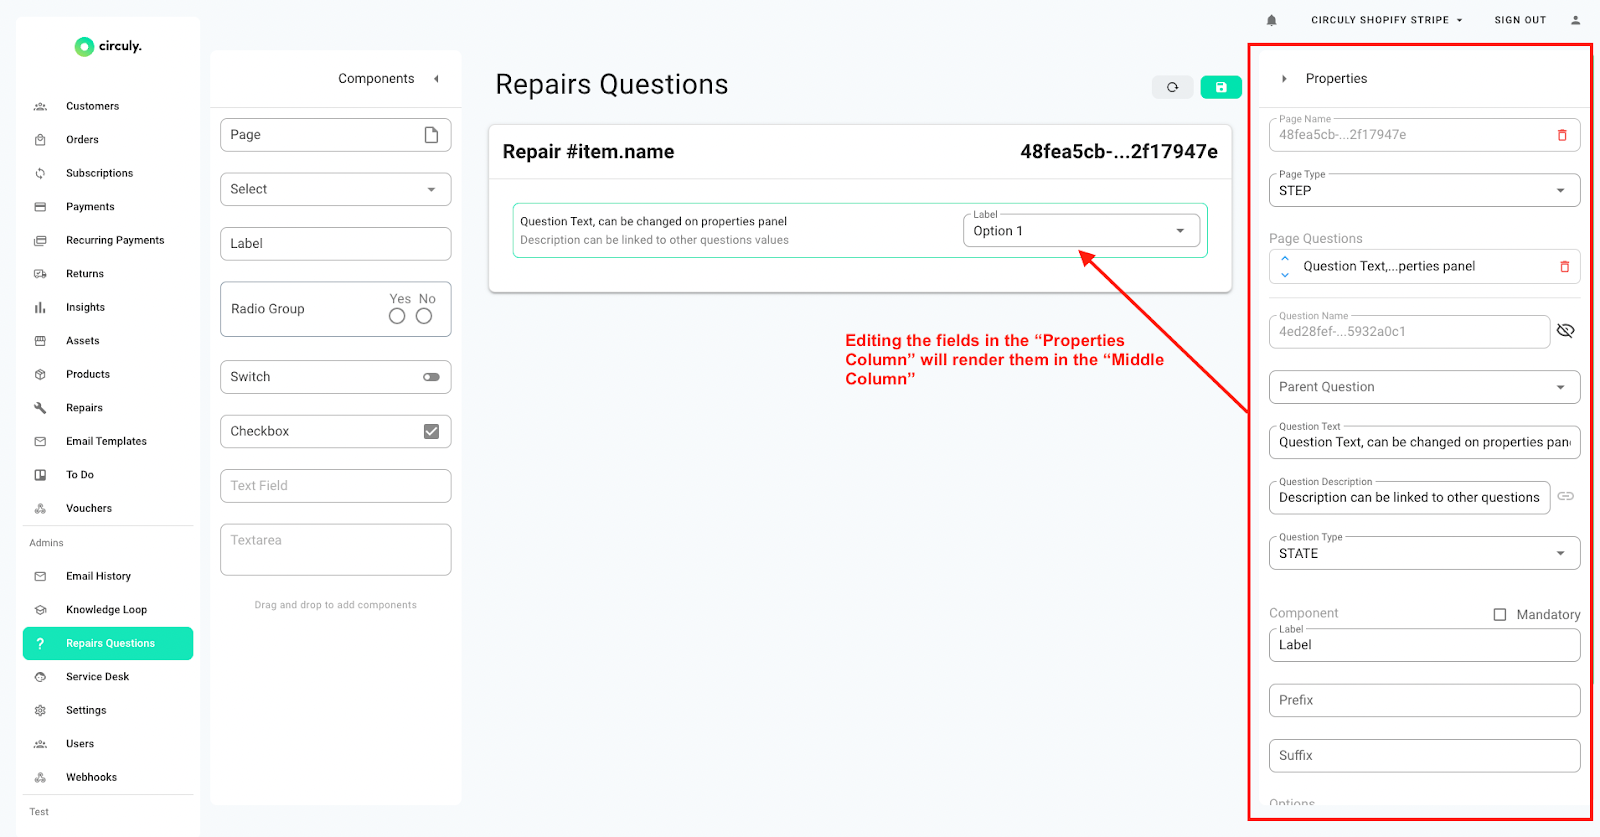
When you add a Page Item to the middle Column from the Components Column, the Page Properties are displayed in the Properties Column.
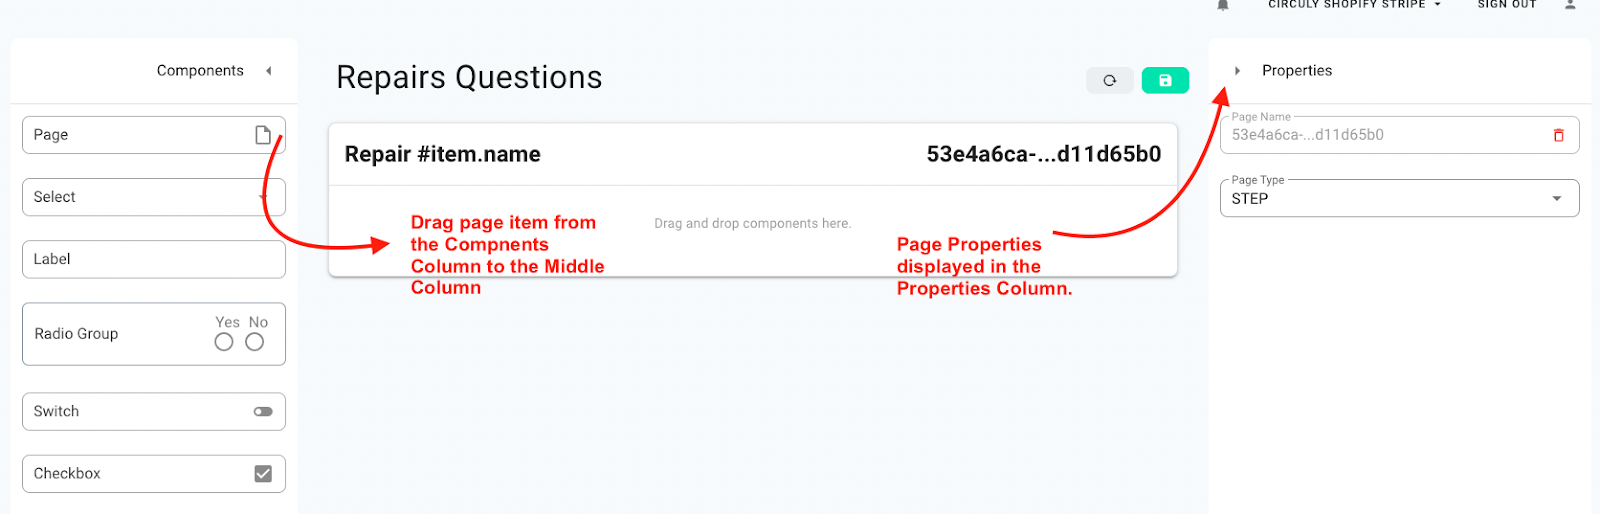
Page Name: a unique text followed by a delete button. Clicking on the delete button will delete the page together with the questions in it. The page name is not editable and is randomly generated.

Page Type: you can choose between Step or Summary as the Page Type. If you select Step, then this means that the current page is just one page out of x pages and will be followed by the next page when the user goes through the repair process. If you select Summary then the summary page is meant to be the last page before submitting the repair process.
Page Question: in the Page Question section you can edit the questions and its components. The Page Question section is displayed only when there is a Question Item in the Page Item. See the image below:
No Question item on the page.
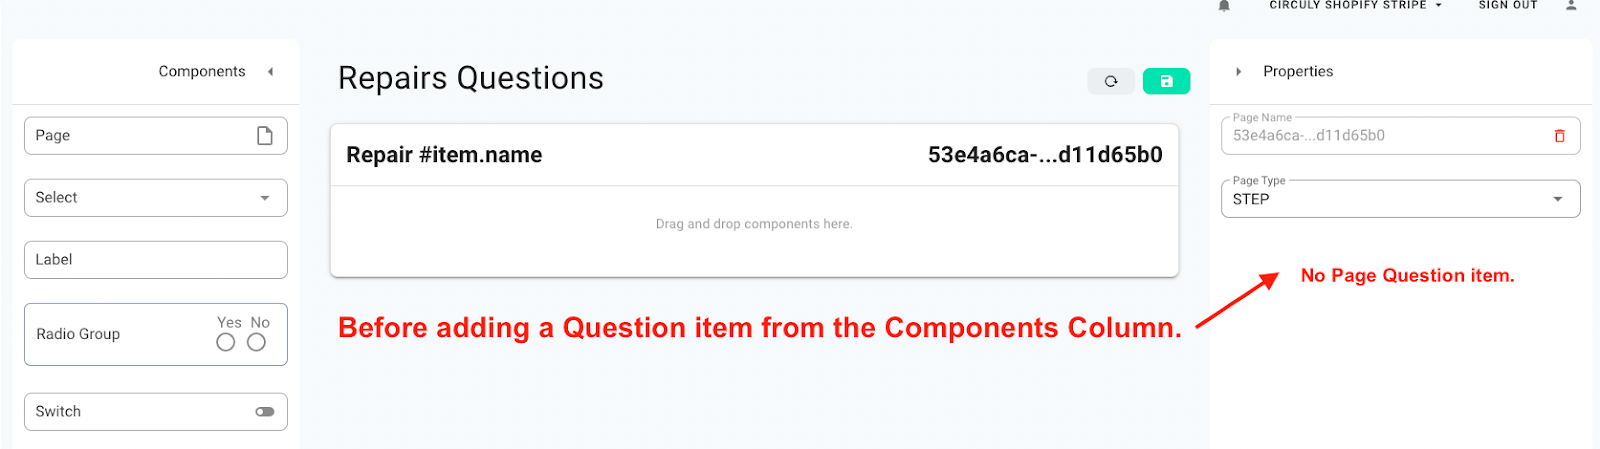
With Question Item on the page.

When you add a Question Item to the Middle Column from the Components Column, the Page Question Properties are displayed in the Properties Column. The Question Properties may change according to the Question Item selected from the Components Column.

Page Questions: this section shows all the questions that are on a particular page. To edit a question field, select the question from the Page Questions list. You can use the up and down arrow icons displayed next to the question to change the order of the questions in which they are displayed on the Page Item.

Question Name: the question name is randomly generated and cannot be edited.
Parent Question: a parent question as the name suggests is a question upon which other questions are dependent. Basically a question from which the selected question can retrieve the following:
- Description: the question will use the value of the parent question as a description. (eg: the parent question asks for damaged items and this question will retrieve those and ask for a price or repair duration)
- Visibility: also defined as conditional value field, one can define a value the parent must have in order for the selected question to be visible (e.g.: the parent question asks if the item is rentable and the selected question(may be: delete from stock?) is visible when the parent’s value is "No").
Let’s look at examples to understand how parent questions and non-parent questions interact together.
Background
The first Page Item in the Middle Column has 4 questions. Question 1 “Is the product complete?” is an independent question and is not dependent on any other question.

If the user selects “Yes” in response to “Is this product complete” question, then the dependent questions will disappear because logically according to the question, it doesn't make sense to display the other questions, if the product is complete. See example below:
Response to “Is this product complete?” is “No”, the other questions stay on the page.
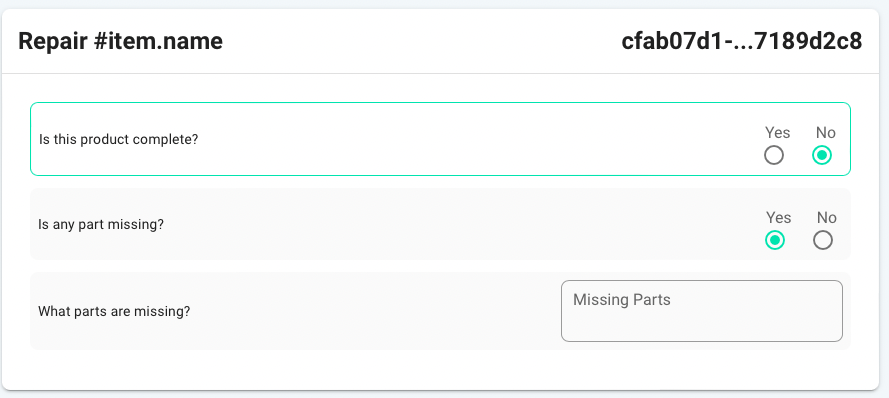
Response to “Is this product complete?” is “Yes”, the remaining questions disappear.
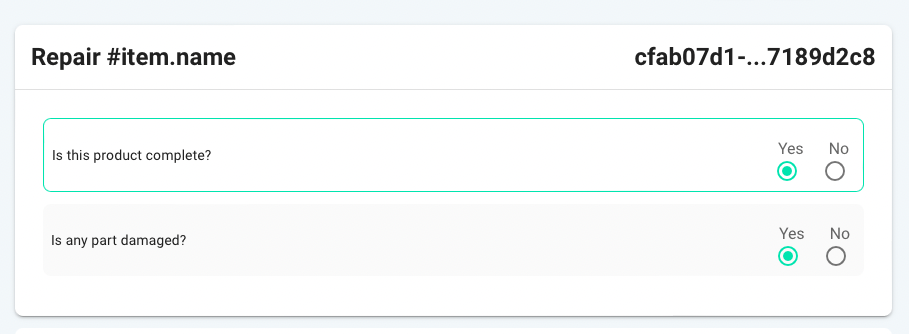
How this process is set up is explained below:
If the visibility of a question is dependent on the response/selection of some other question, then a few things need to be done in the Properties Column to make that interaction happen.
In the image below you can see that the visibility of "Is any part missing" is dependent on the response of "Is this product complete?".
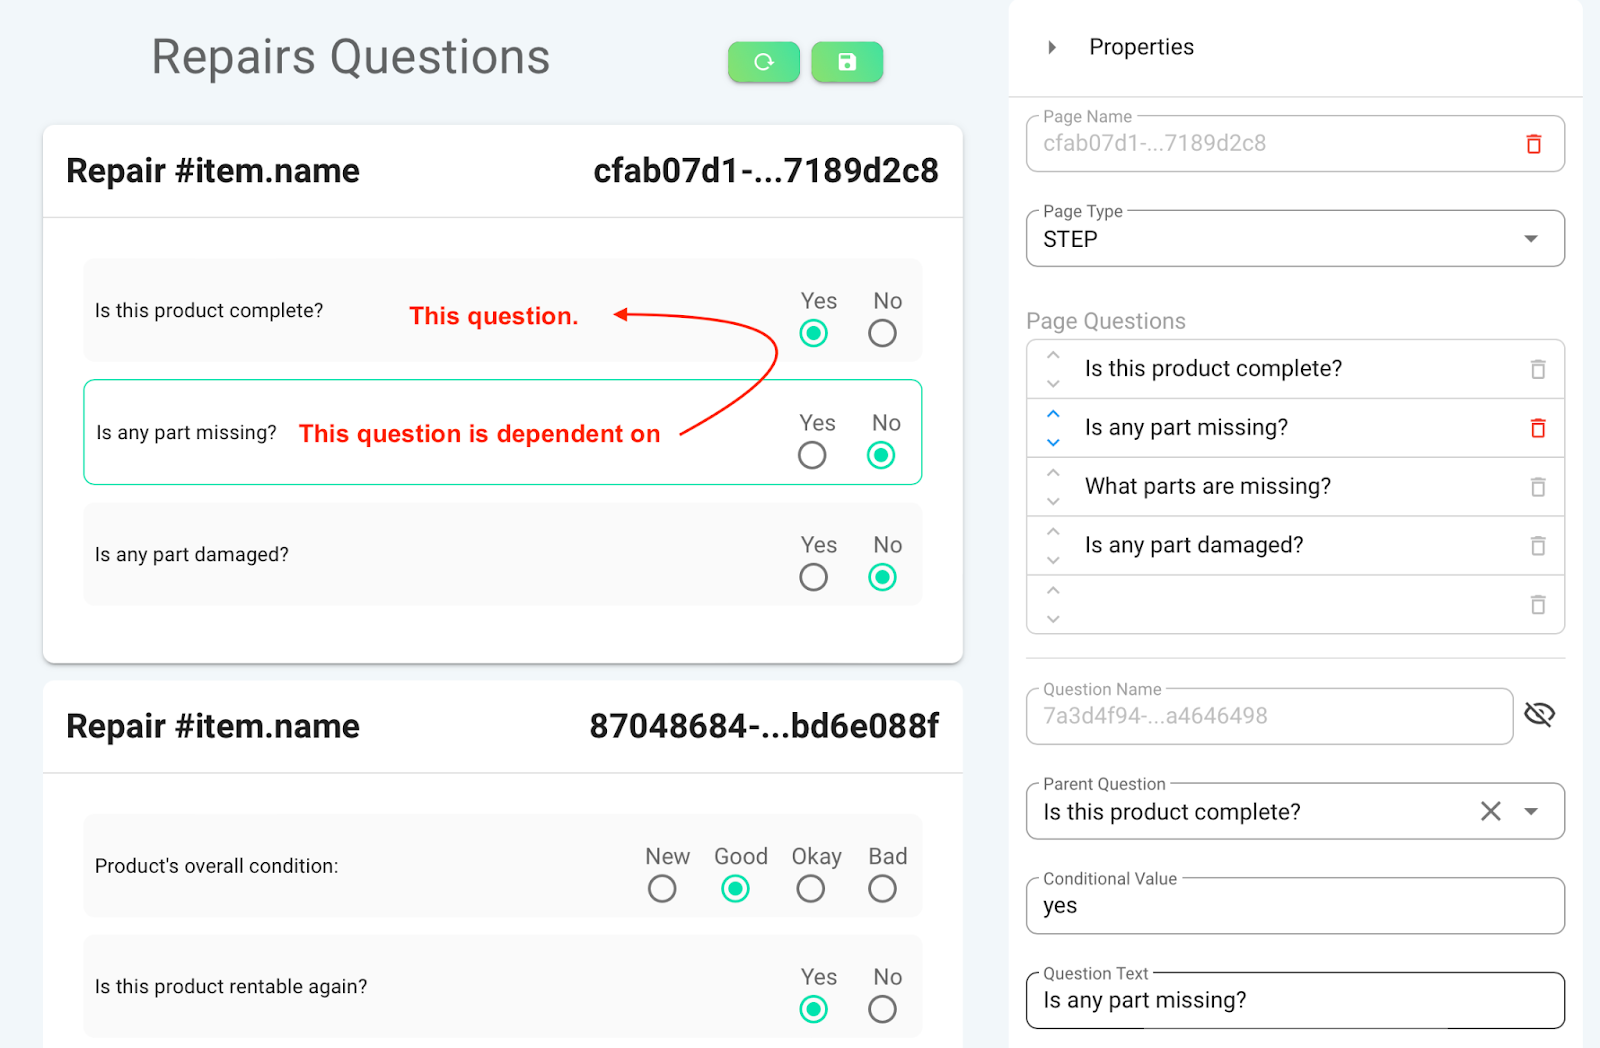
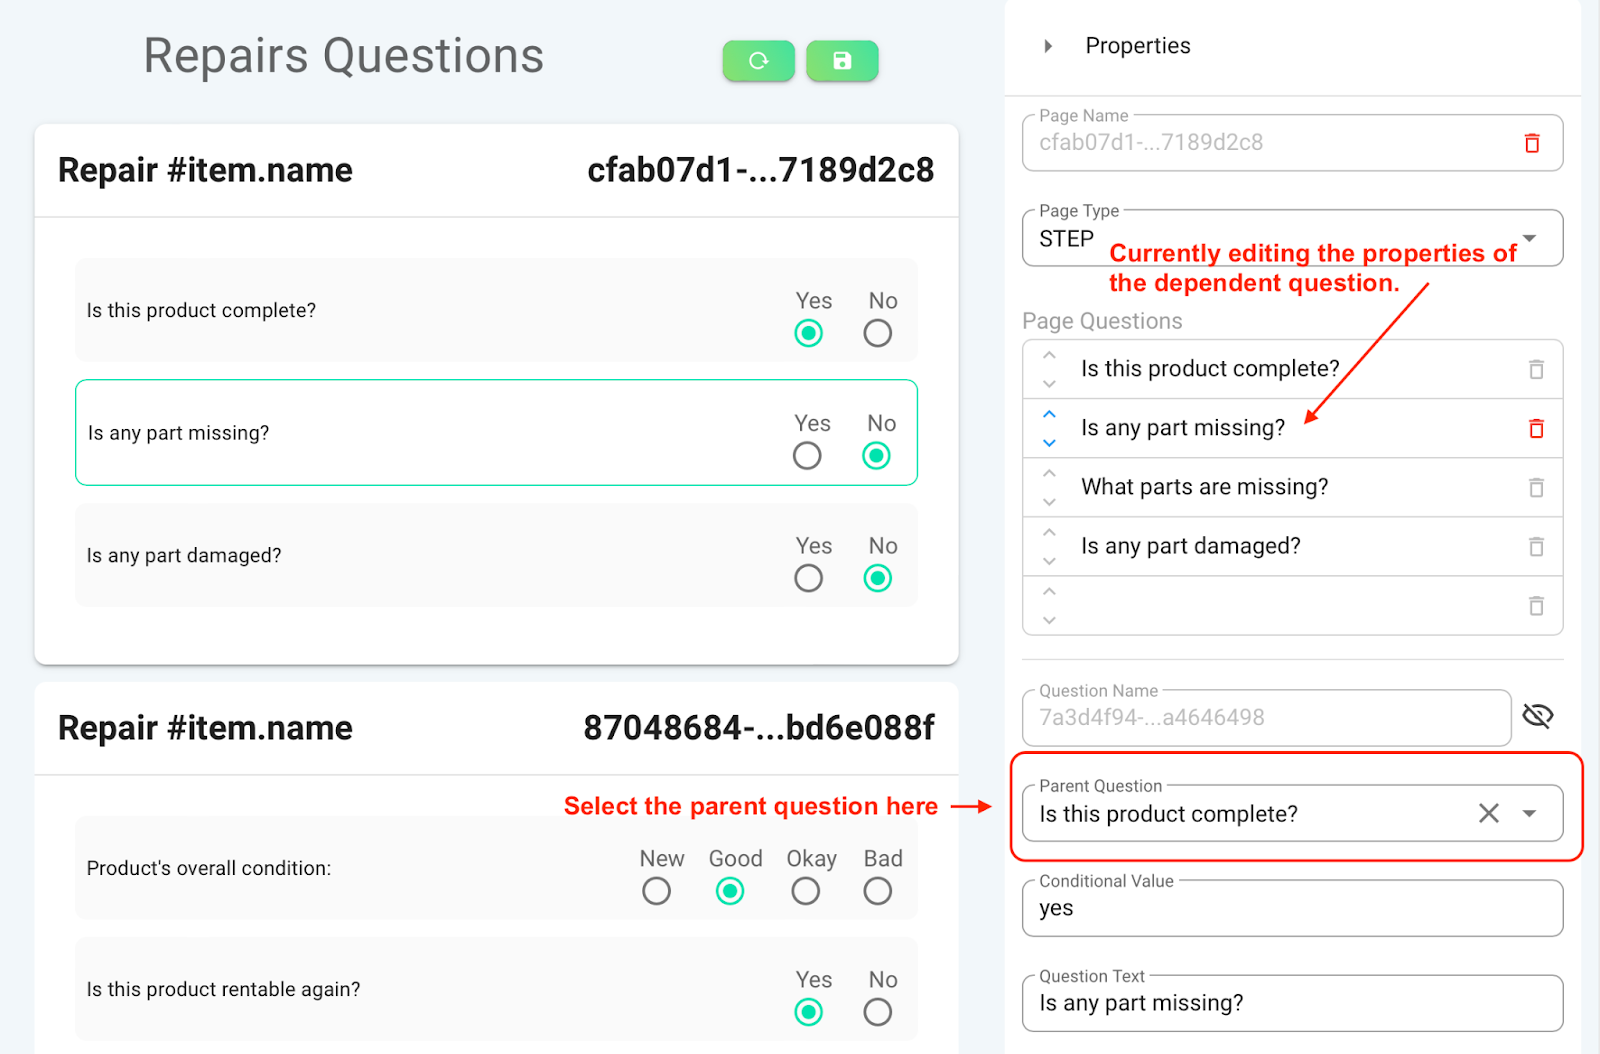
“Is any part missing” is dependent on “Is this product complete” therefore while editing the properties of the “Is any part missing” question, select “Is the product complete” as the parent question in the Parent Question field. The Parent Question field displays a dropdown list of questions that are available and previously created. Therefore it is advisable to have the parent question first and then work your way down to the dependent questions.
If you assign a conditional value, (see image below) then that means that white editing the properties of the next question, you define this question as the parent question and if the conditional value matches the value of the parent question then the next question will be displayed.
Important: the Contitional Value field in the Properties Column is case sensetive.
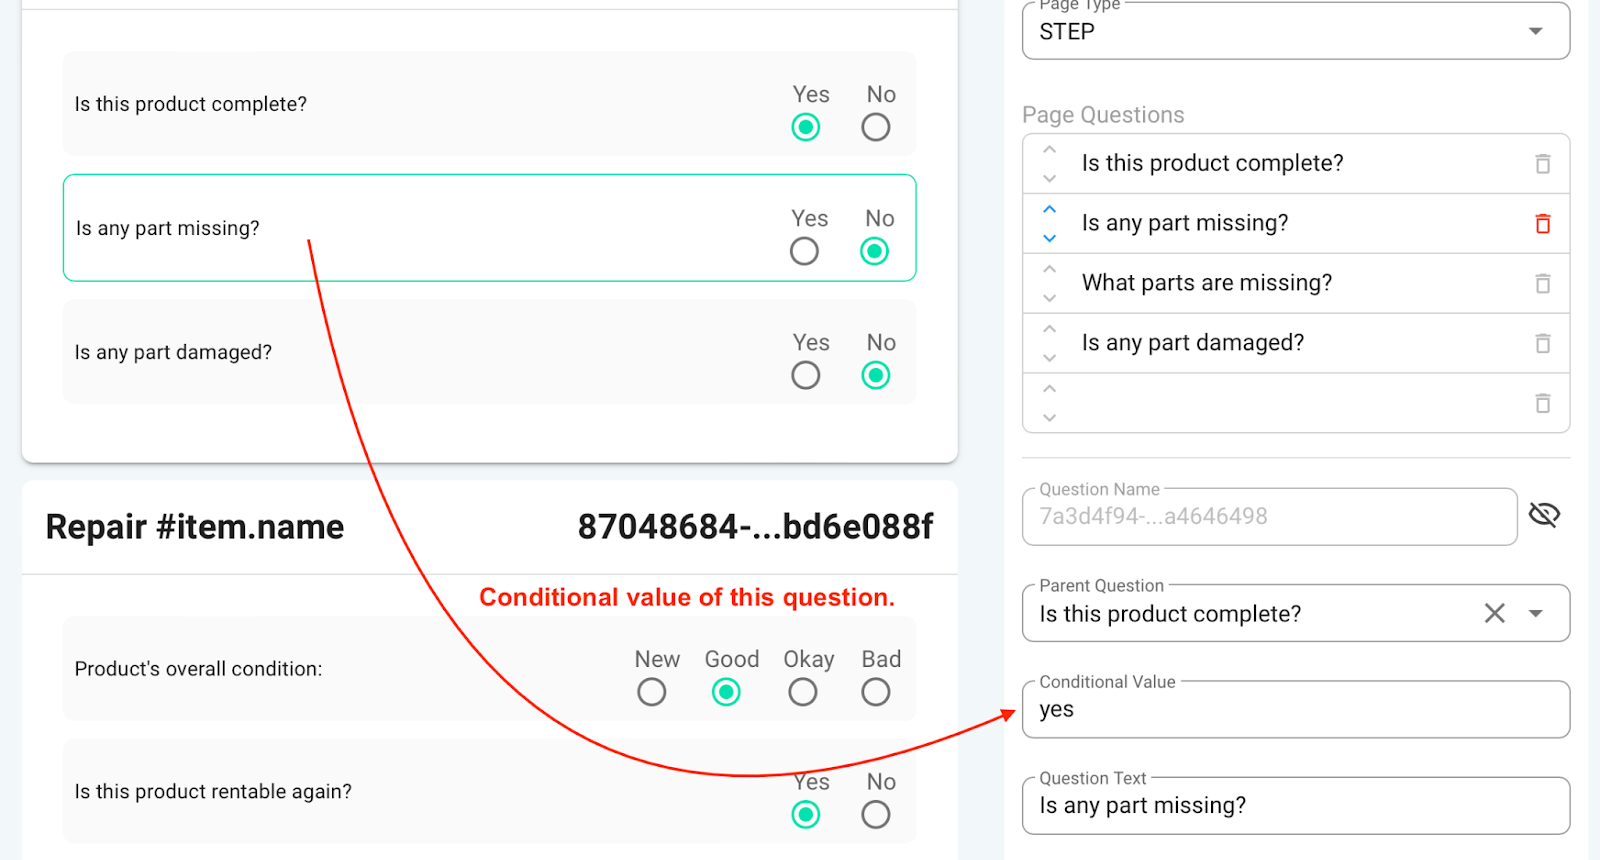
The conditional value of “Is any part missing” is “Yes”, which means that if the user selects “Yes” as a response to this question, then another action will happen, that is another question will become visible that is dependent on this question. (see image)
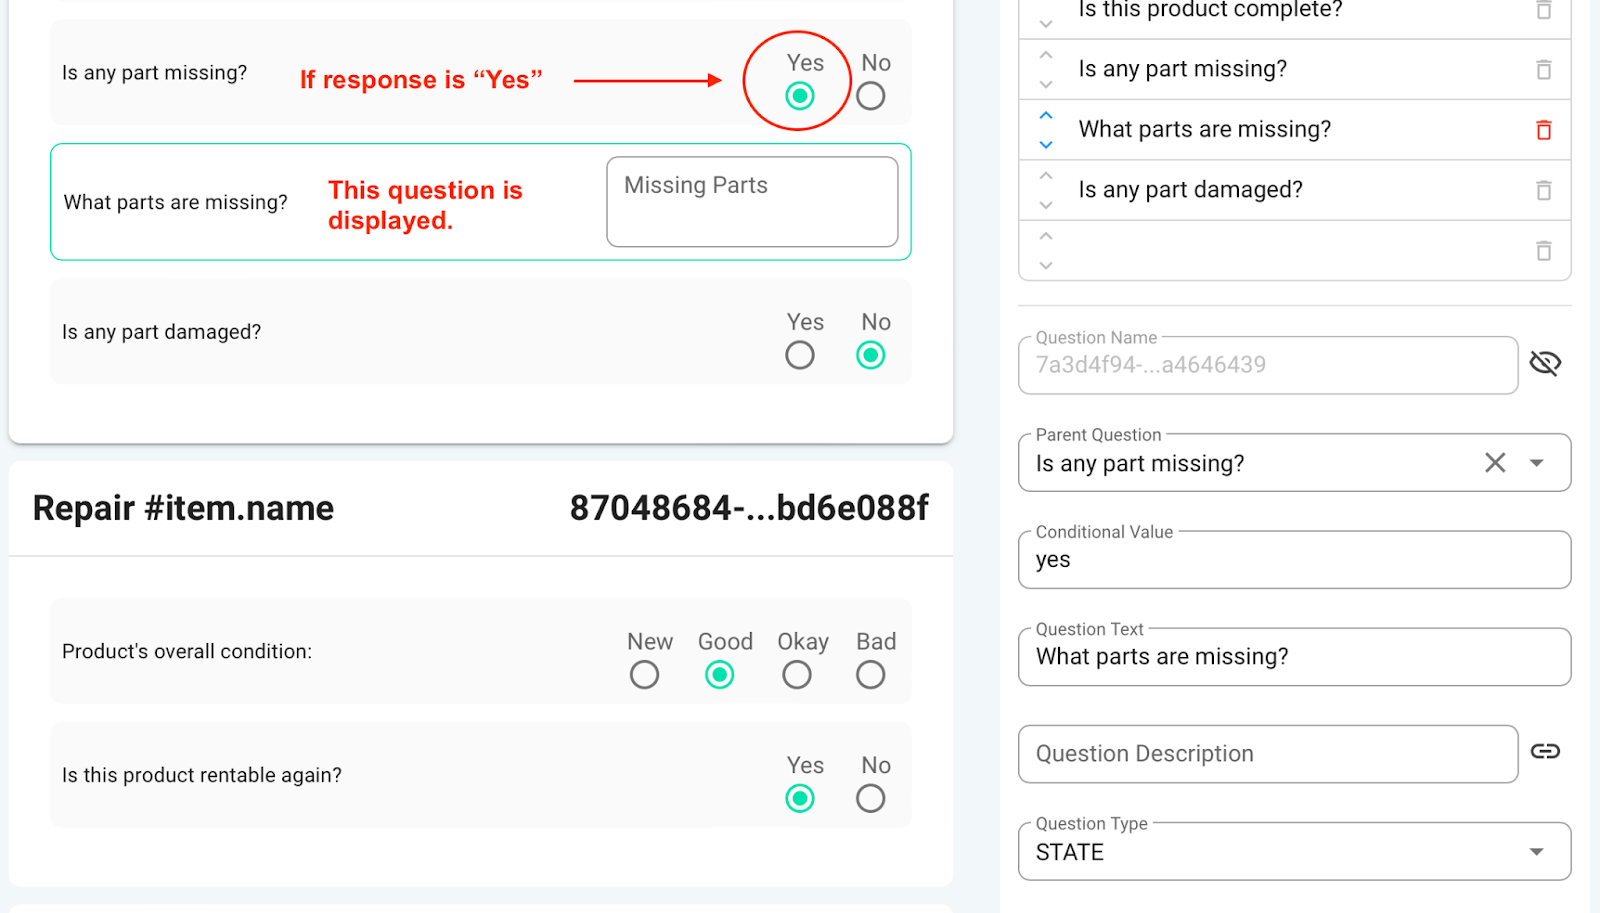
This interaction happens when the parent question is defined as “Is any part missing” while editing the properties of the “What parts are missing” question and the Conditional Value input field contains “Yes”.

Question Text: the main text displayed in the question field. See image below.
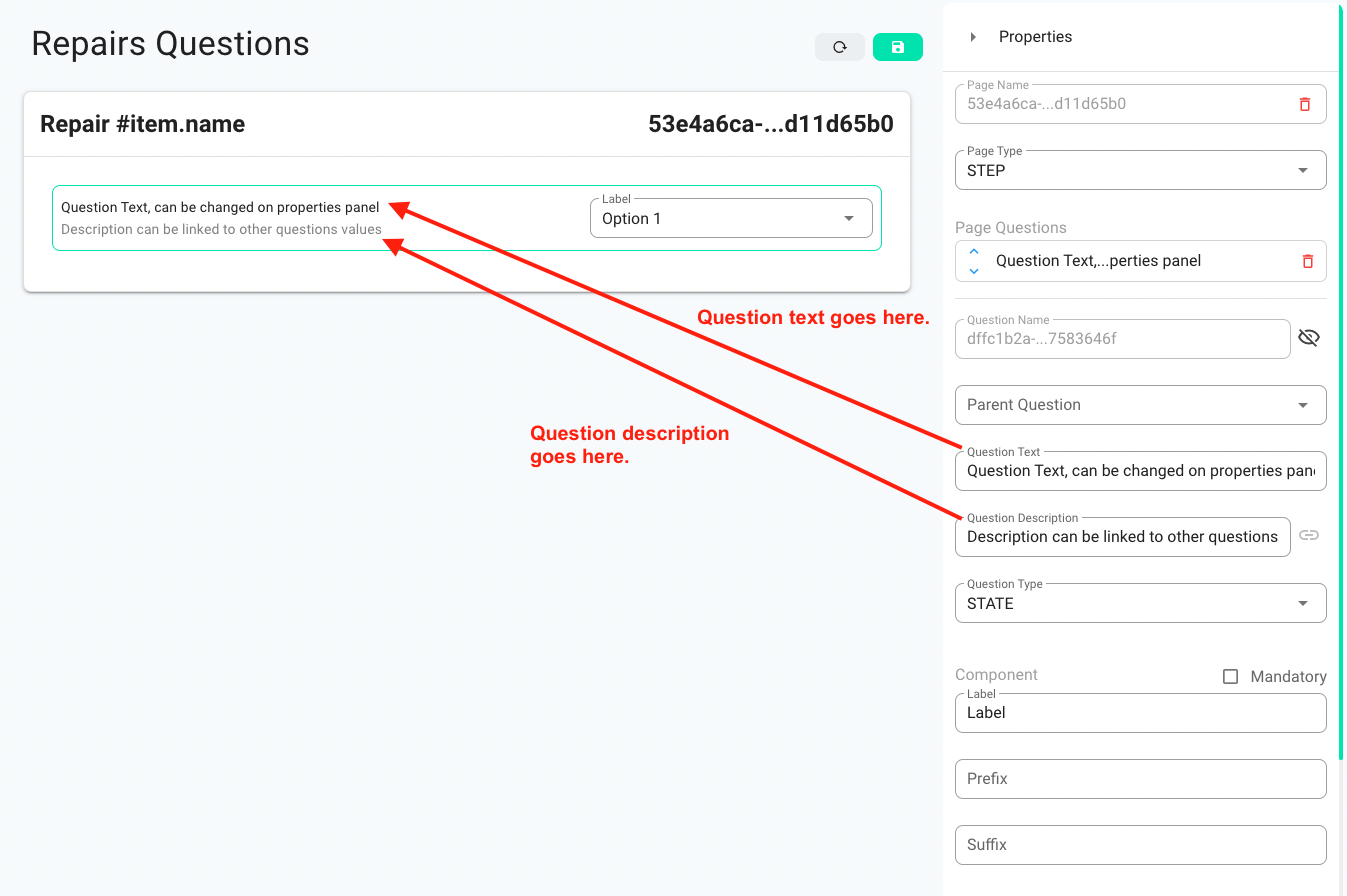
Question Description: the description field that goes under the question. Can be left blank if you don’t want to have a description for the question. See image below:
Question Type: question type has four possible options. They are explained below:

- State: information indicating state. For example the state of the product (good, bad, needs repair, not rentable etc.)
- Cost: information indicating cost. If the question is in the Summary Page Type then a checkbox will appear indicating if this is a total cost question, which will sum all the other cost questions if selected. Also the total cost question is only one and will be saved in the server as item repair cost.
- Duration: information indicating duration. Comes with a “Duration to cost” checkbox that when selected will allow the user to specify a cost rate that will be multiplied by the duration and then included into total cost(if there is any). See example below:
Important: Please note that Action as a Question Type is still in development and therefore cannot be used at the moment.
Mandatory Checkbox: decide if you want to make the questions mandatory. If you make a question mandatory then you cannot proceed without selecting an option for the question.
Label: you can add a label to Question Items that support it (e.g. checkbox, Select etc Question Items). See image below:
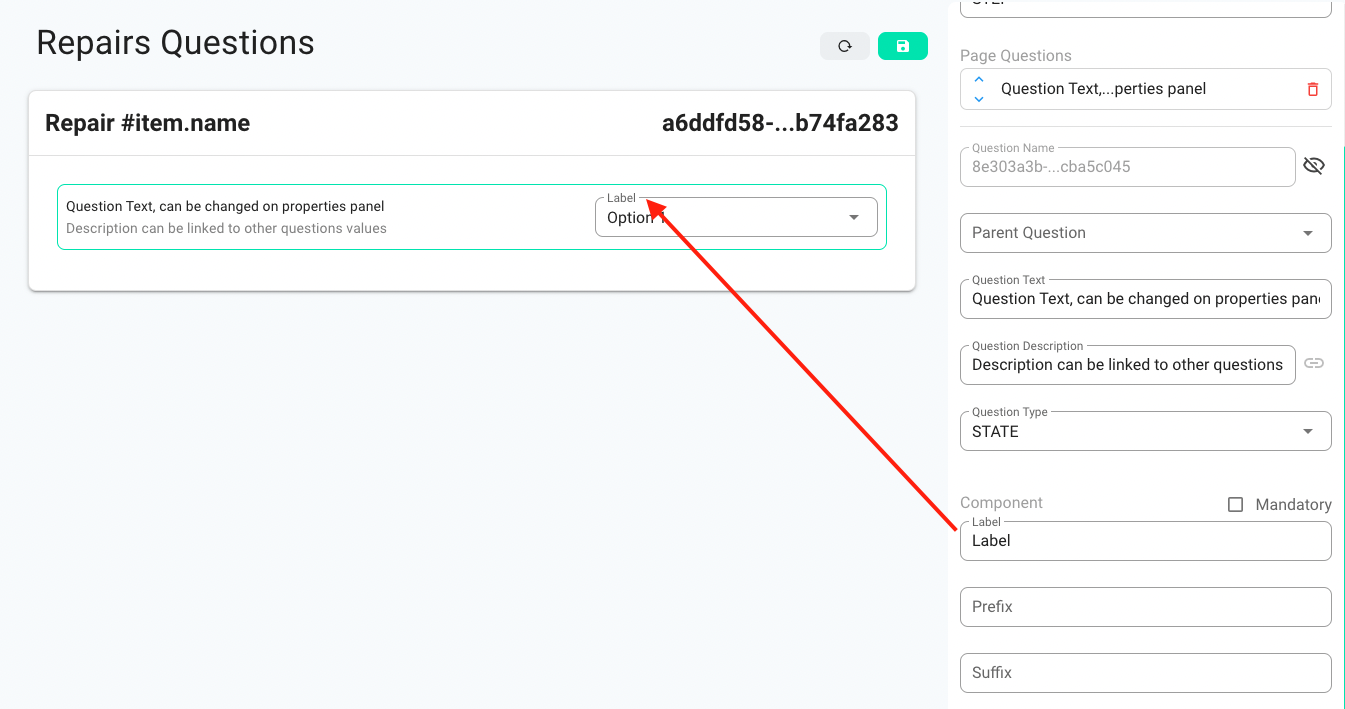
Prefix: you can add a prefix to Question Items that support it. See image below:
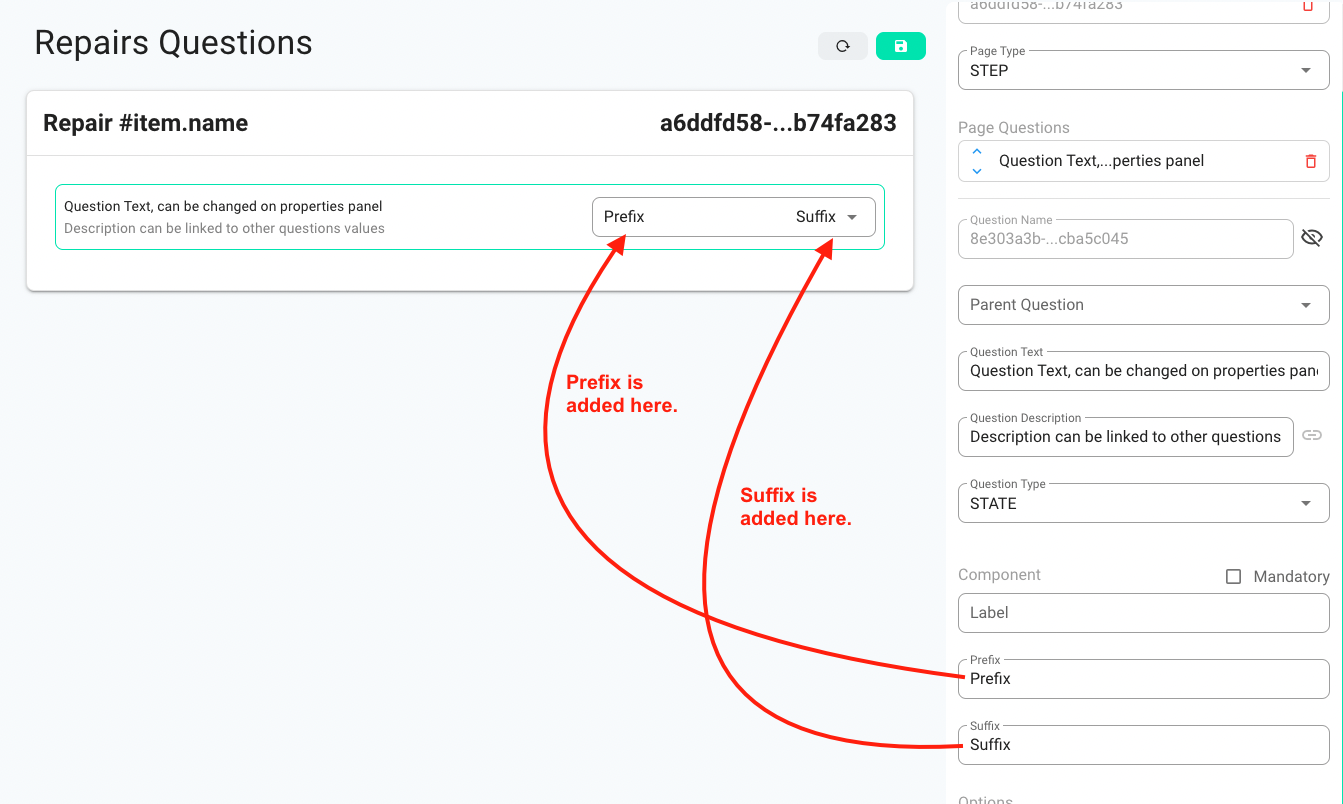
Suffix: you can add a suffix to Question Items that support it. See image below:
Placeholder: you can add a placeholder text in Question Items that support it. The placeholder text will disappear when the user starts typing in the field.
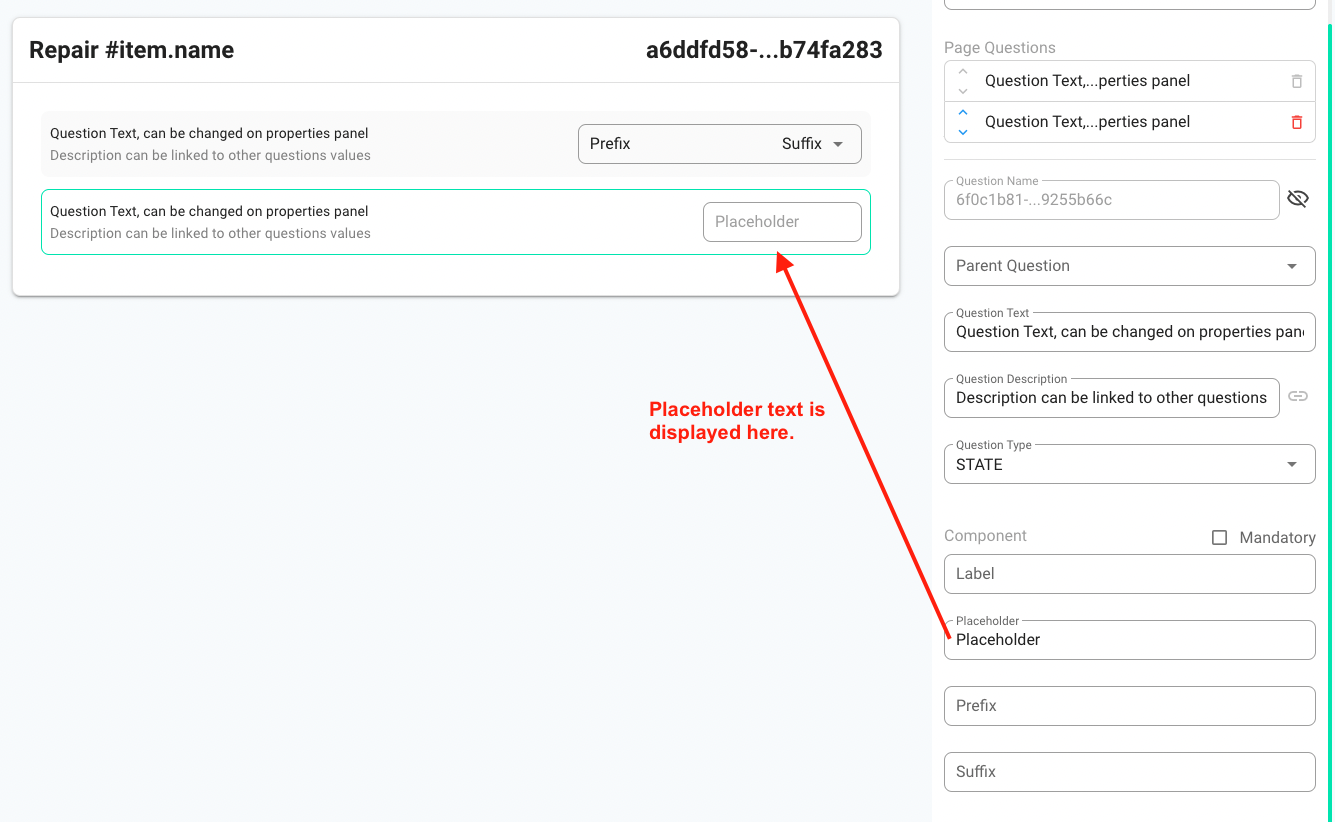
Options: adds/removes options to/from Question Items that support it (eg: radio group). See example below:
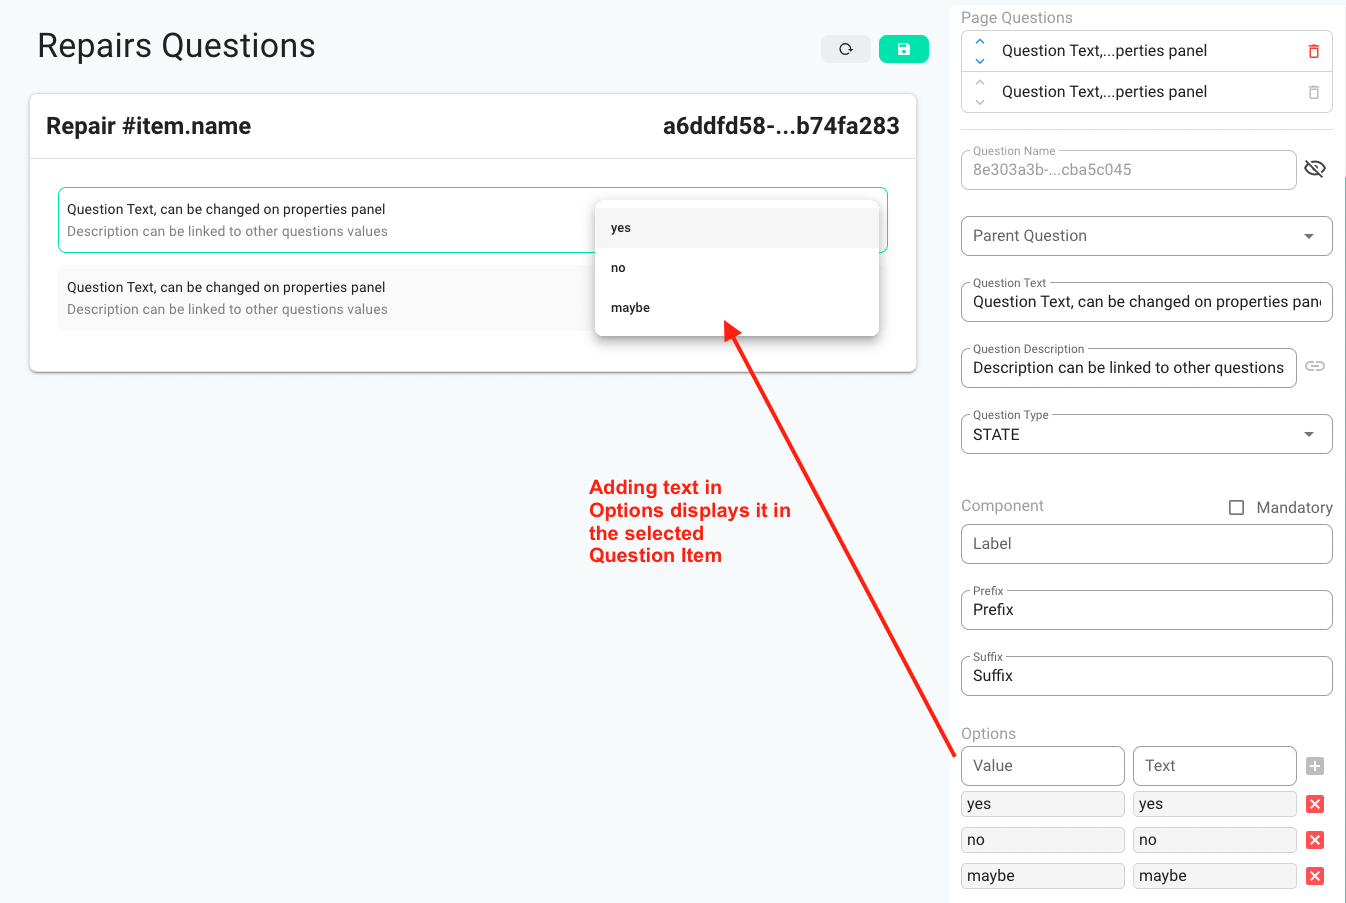
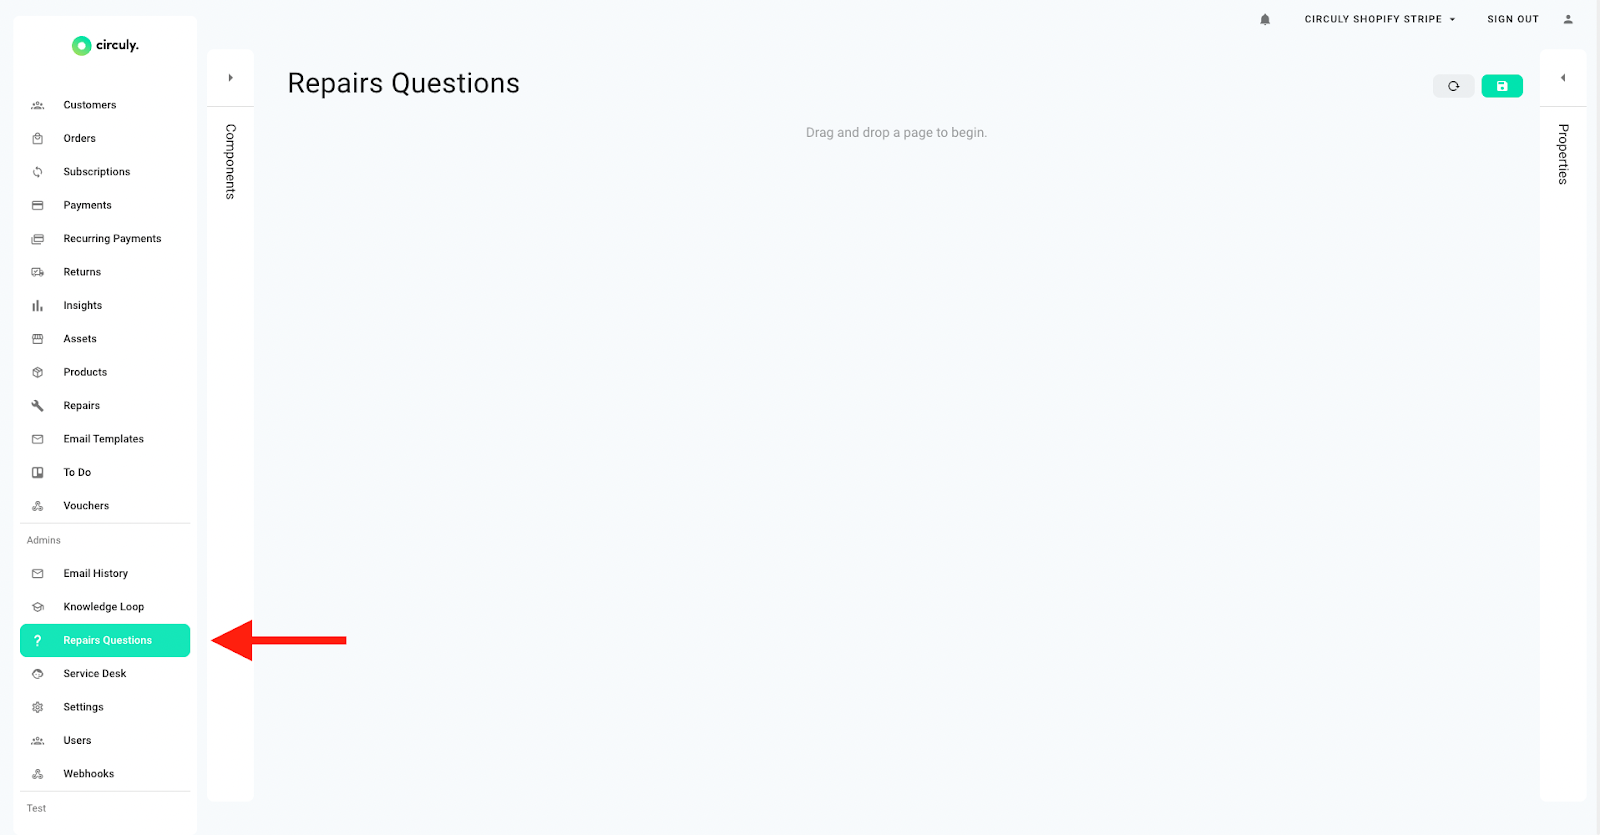
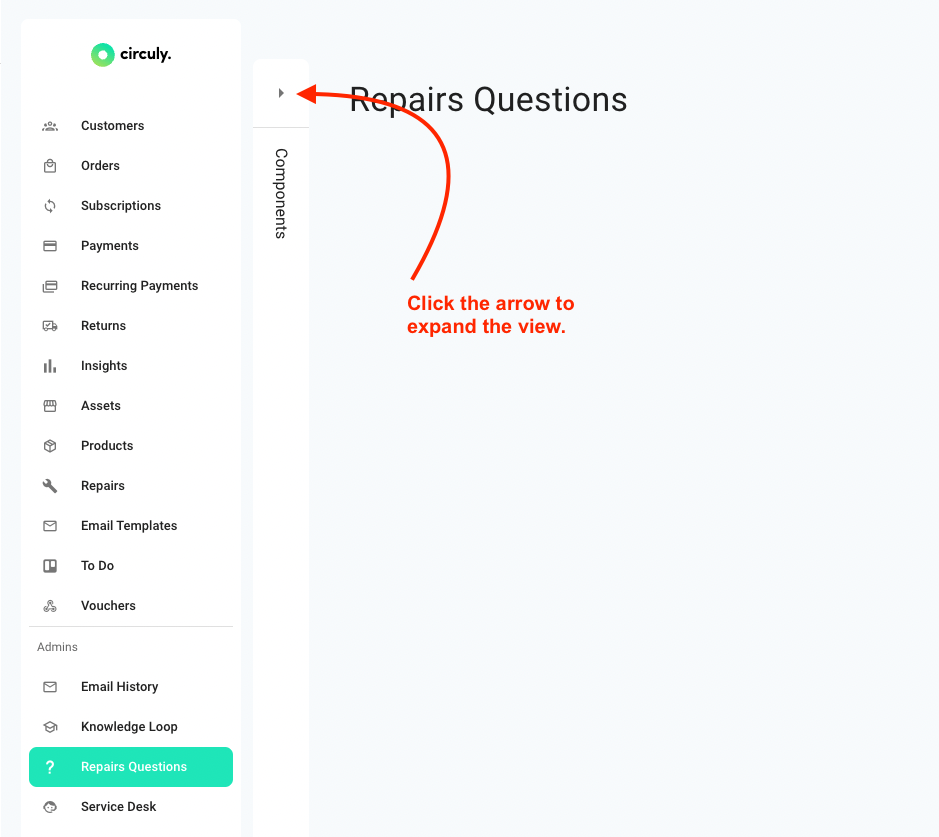
Your repairs can either be new (when a new return is added to the repair section and you haven’t worked on it yet) or blocked (when you have started with the repair process, but you haven’t finished yet). If you finish your repair it will be automatically deleted out of the repair list.
You can save your progress when working on your repair at any time and continue working on it at a later point.
During the return process, not all products are actually sent back. Some customers choose to buy the product instead of returning it—especially near or after the end of their subscription period.
To reflect this accurately in your system, circuly now allows you to mark a product as bought directly in the return handling process—eliminating the need for a separate buyout workflow.
This feature lets you handle two common scenarios more efficiently:
By marking a product as bought during the return process, the circuly system will:
This gives you operational flexibility while keeping your inventory and payment records accurate.
circuly helps you automate important customer communication through transactional emails. These emails are directly tied to certain events in your rental business — for example, when an order is placed, a payment is processed, a subscription renews, or a return is initiated. Once the event occurs, circuly automatically sends out the appropriate email to your customer.
Important:
Review this article to gain a deeper understanding of what default, allowed and preferred language is and how they are used by circuly.
Here’s how circuly’s email templates work and what you can do with them:
Most of the transactional email templates in the circuly Hub fall under four key categories:
(Some templates also exist outside these categories, which you can configure similarly.)
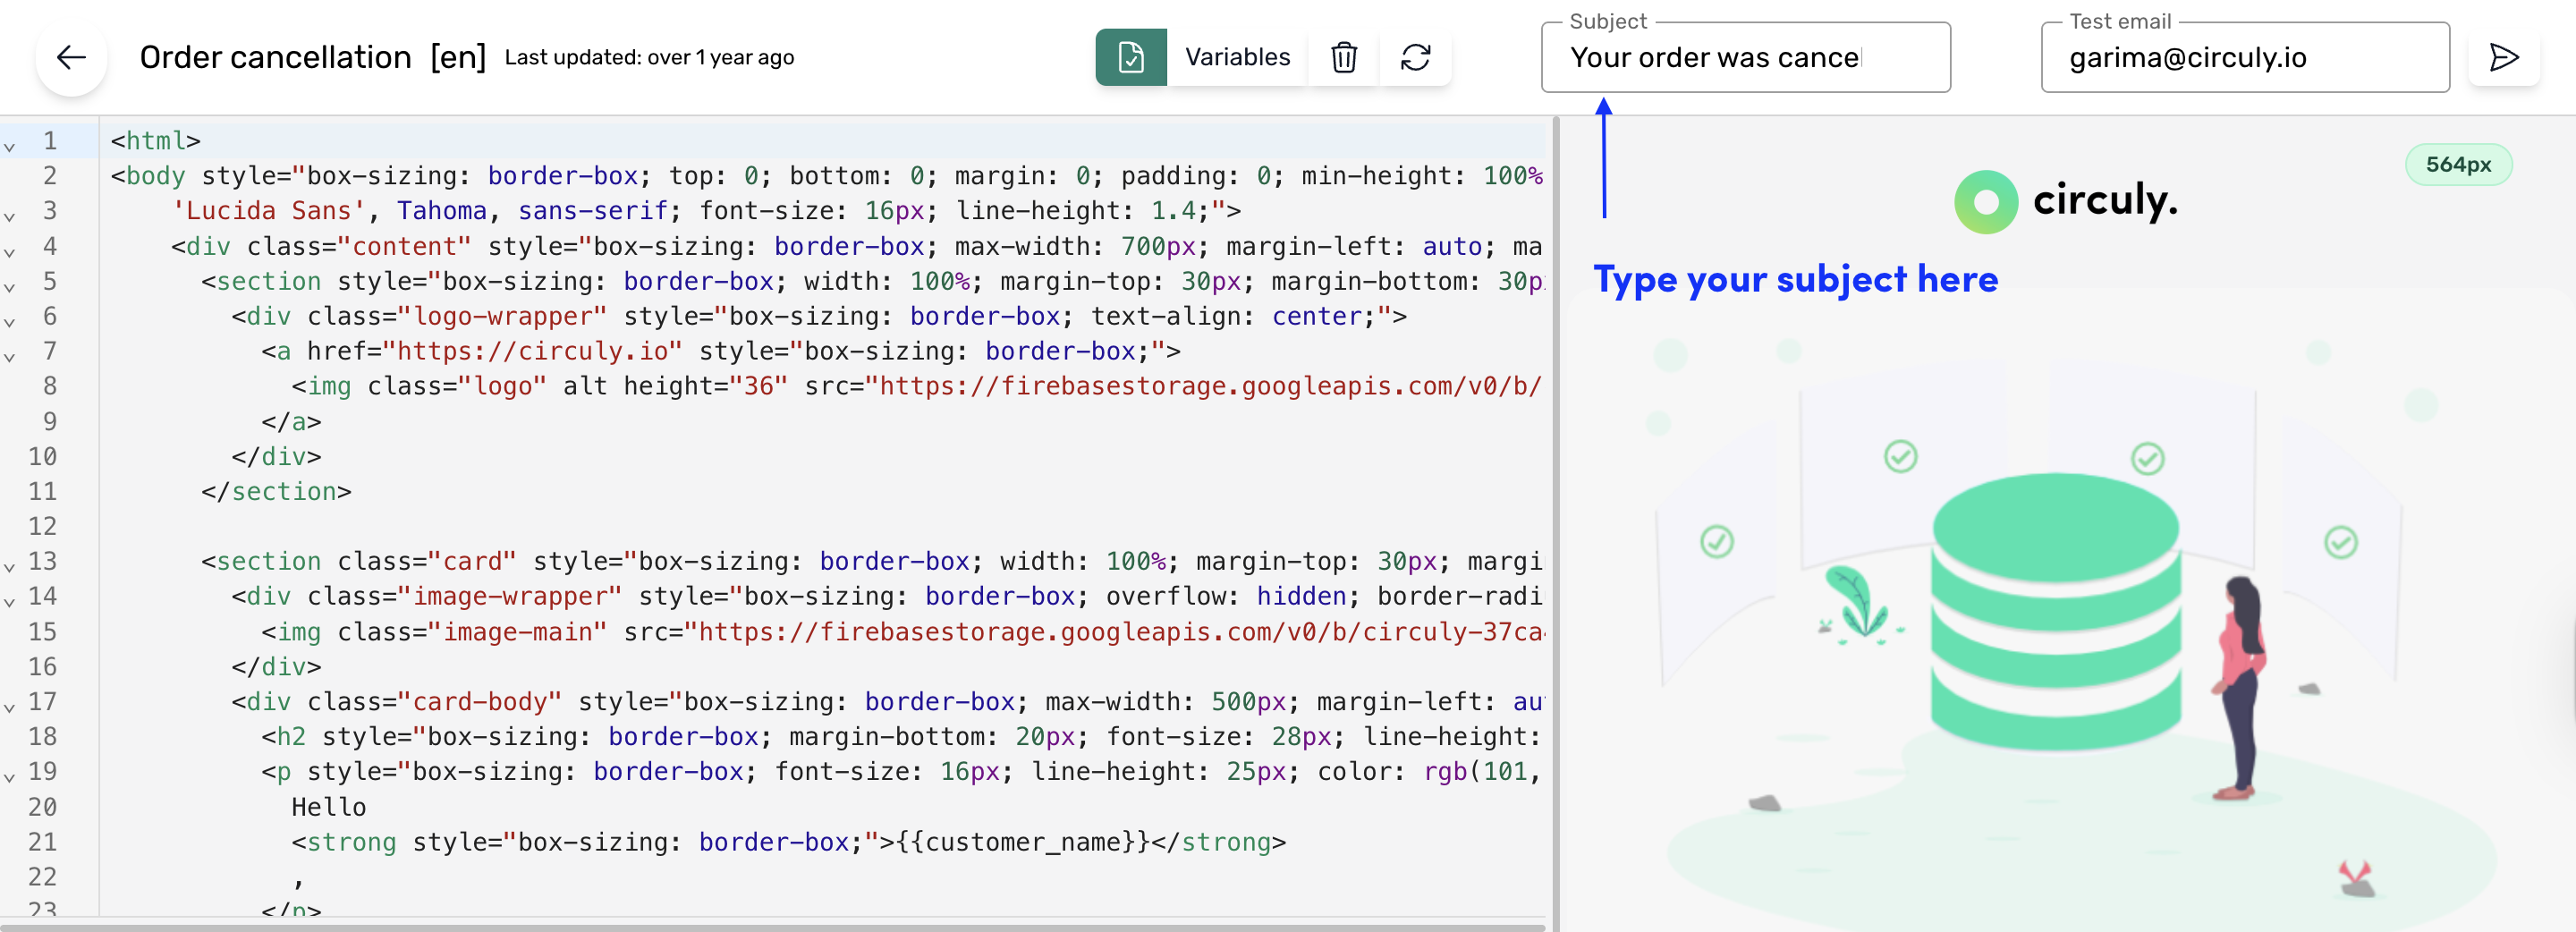
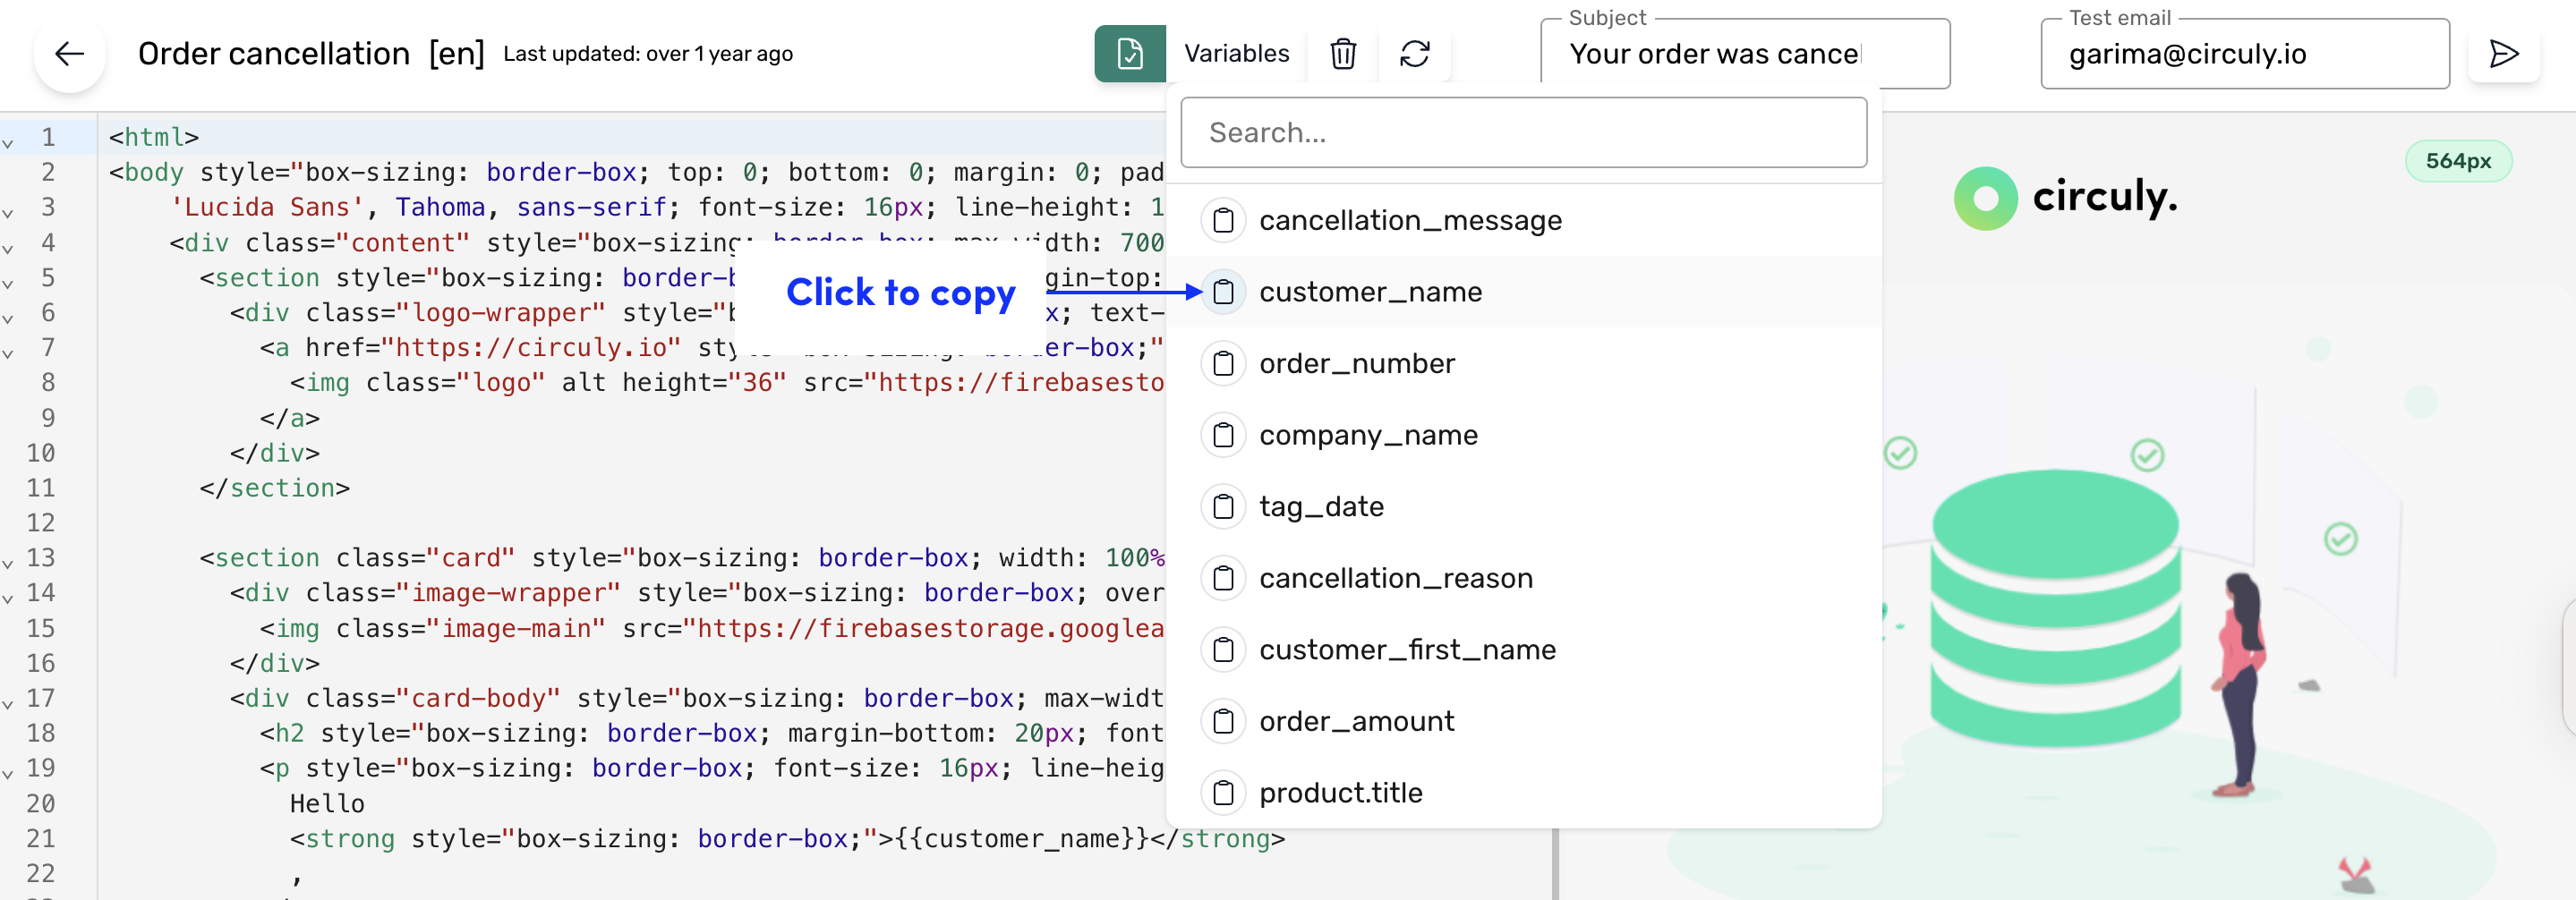
Note: Variables are tied to specific templates, so not every variable is available everywhere.
<img> tag with the class="logo".src with your logo URL.height="36").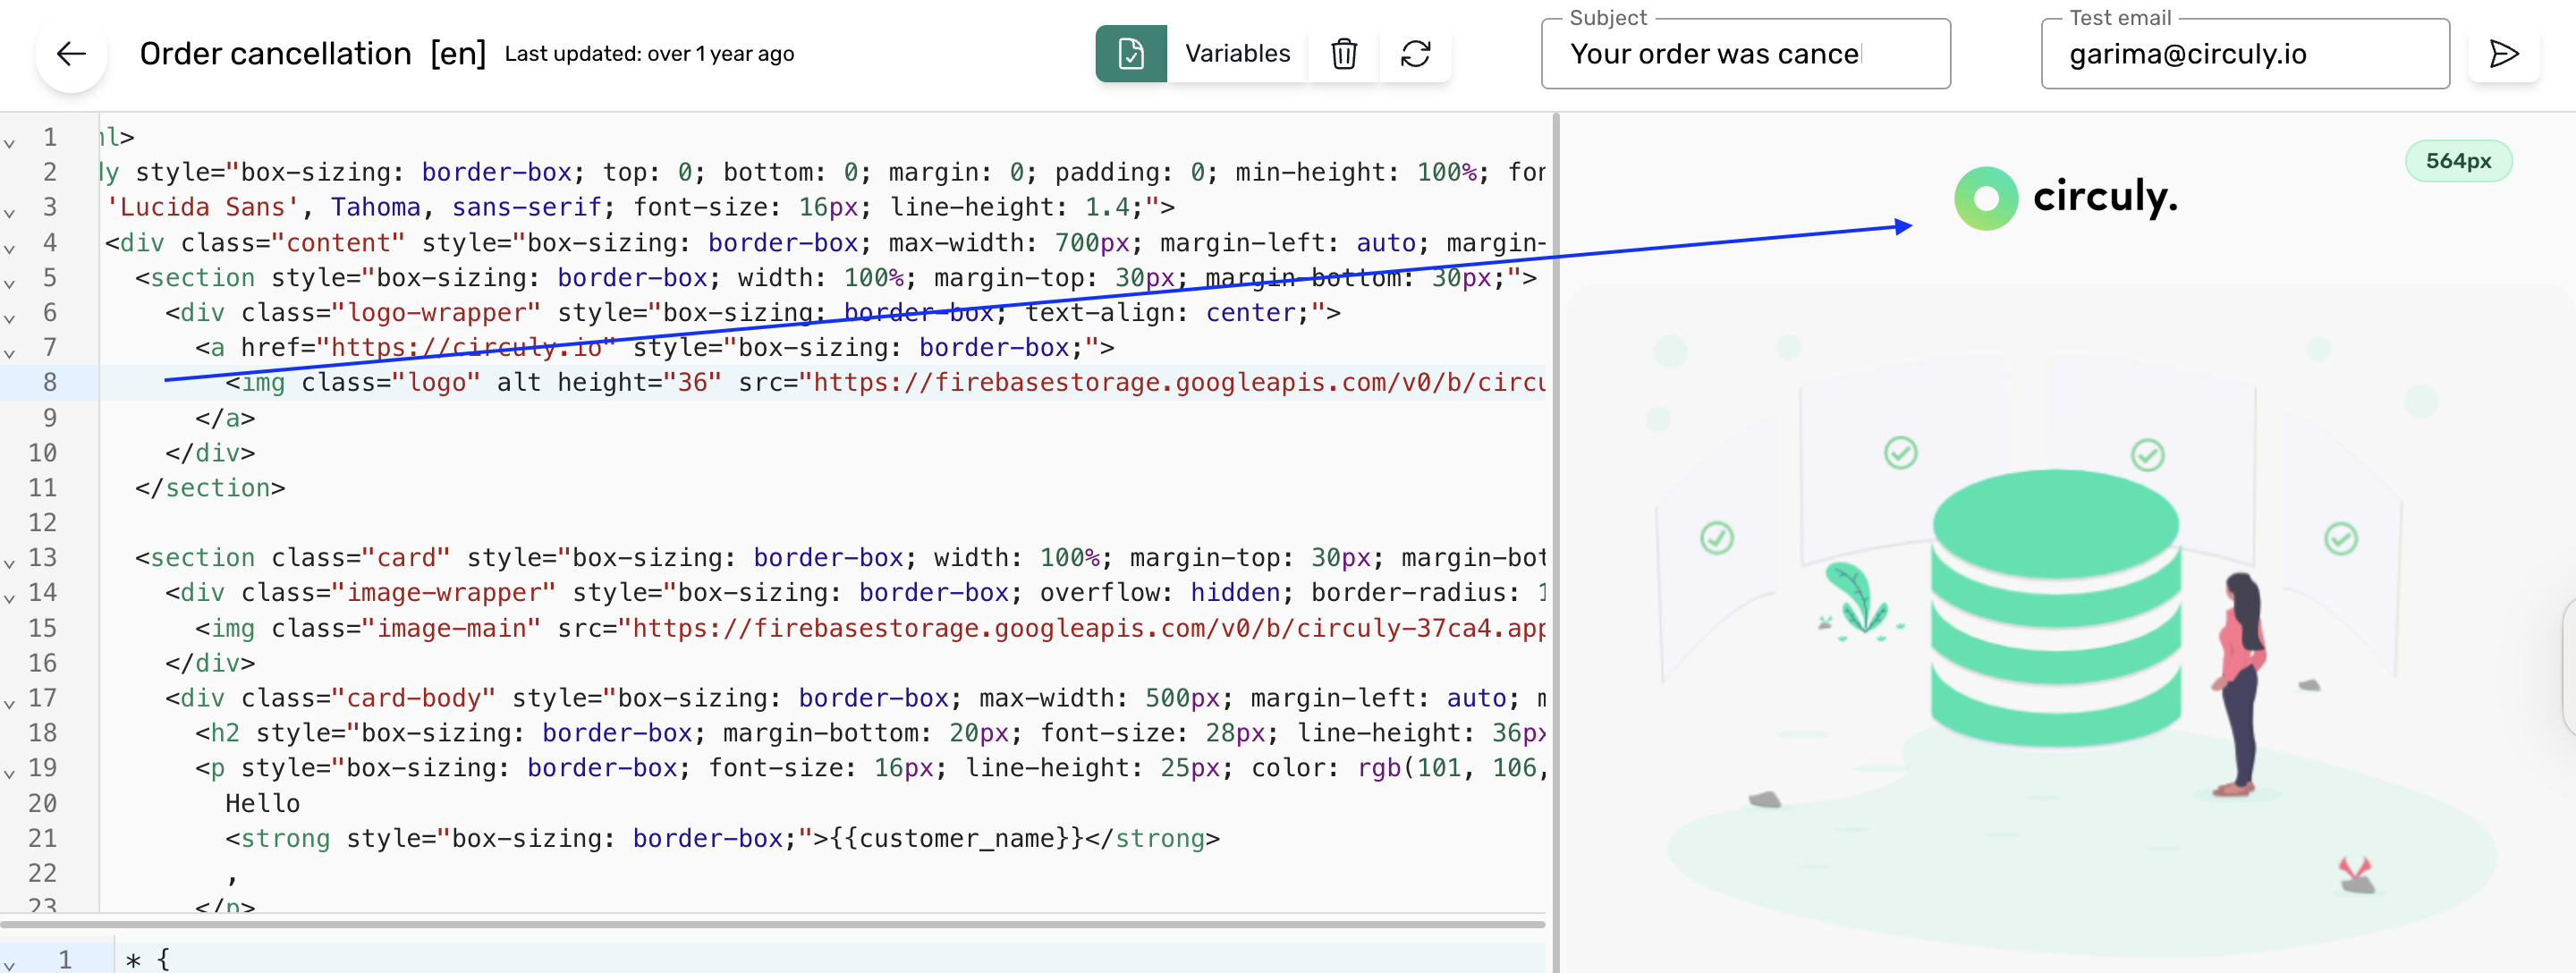
Step 1: Preconnect in the <head>:
The code is used in HTML to include a font from Google Fonts. It helps by establishing a connection to the font server in advance, allowing faster loading. It also ensures cross-origin access for the font resources. The code specifies the font URL and loads the font stylesheet.
Place the following snippet within the <head> section.
The third <link> tag specifies the URL of the font file you want to use. Modify this tag to link to your font from Google Fonts. For example, you can change the family attribute value to the desired font and weight.
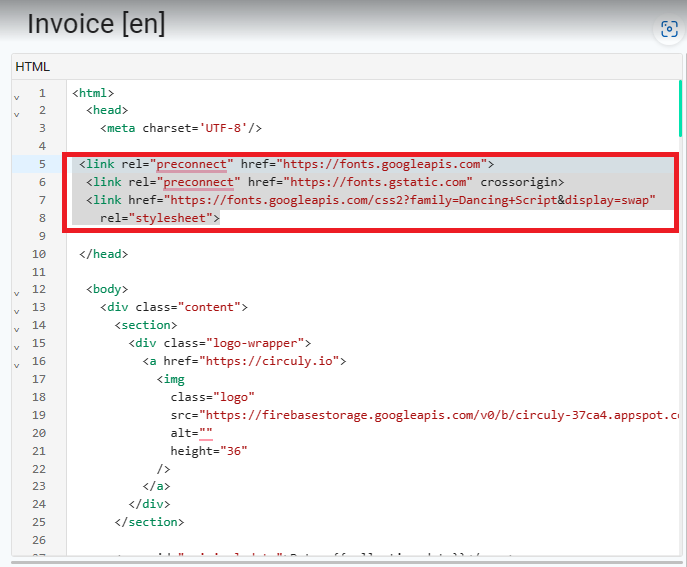
Step 2: Import the font
The CSS code snippet provided in our example is used to define a custom font. It allows you to specify the font family name and the source URL or path where the font file is located.
Import the source url of your chosen font (f.g. from Browse Fonts - Google Fonts )
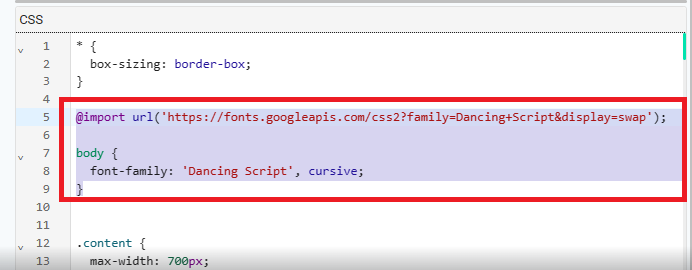
Step 3: Style specific class attributes with your customised font
Styling specific classes allows you to target and apply styles to specific elements within your HTML structure. By using classes, you can selectively style certain elements while leaving others unaffected. This provides more control and flexibility in designing your template. It allows you to create consistent styles across multiple elements that share the same class, without affecting other elements on the page. (In our example we have styled the custom font for the card-header element)
Identify the elements in HTML that you want to style and apply the font rule within the CSS section for this specific class.
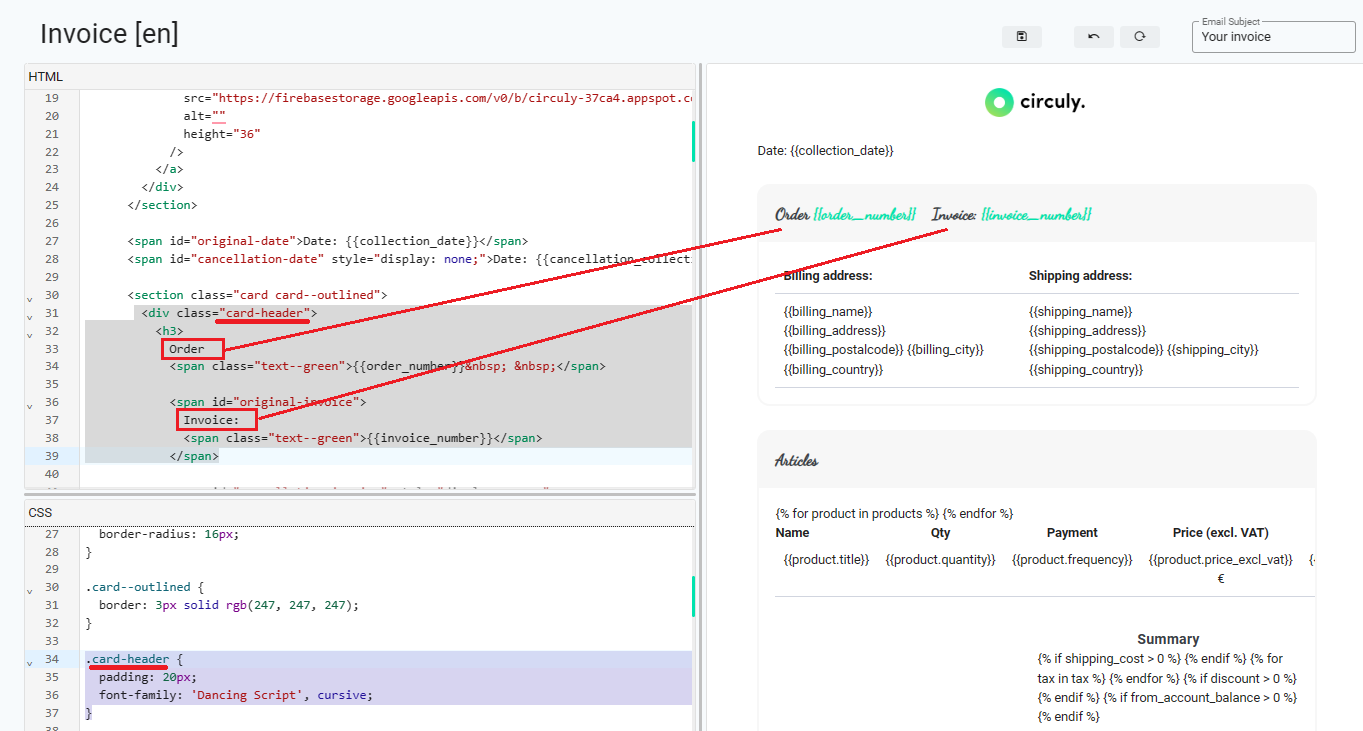
Using colour codes in the hexadecimal format #ff0000or rgb(255, 0, 0) - both serve the purpose of defining colours. However, there are a few reasons why using hexadecimal colour codes is considered more advantageous because of its simplicity, memorability, flexibility, and compatibility with CSS. In our given example, the color of the text inside the <h2> element is styled using CSS. The colour property is set to #ff0000, which represents the hexadecimal value for the colour red.
To Do:
Pick your hexadecimal colour (f.g. HTML Color Picker) and apply the colour code as a rule to your CSS element
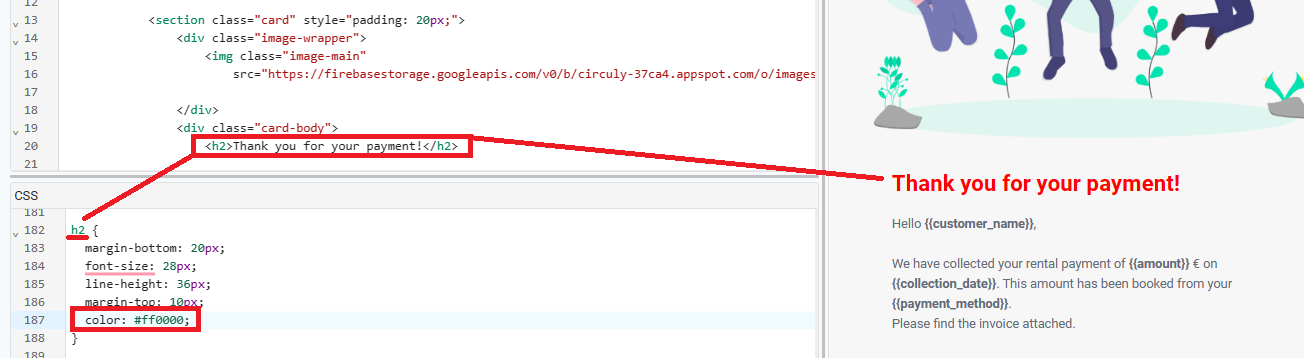
To use a link in HTML, you need to use the <a> element, which is used to create clickable hyperlinks.In our example, the email address "example@circuly.io" is added as a mailto link within the <a> element. This allows users to click on the link to open their default email client with a pre-filled email to that specific address.
To Do:
Set the <a> element to create the link, specifying the destination URL or relative path in the href attribute and add the desired link text. Use <a href="URL">Link Text</a> as a general link or <a href="mailto:EMAIL">Link Text</a> as a mail link.

To add an image to your HTML document, use the <img> tag. Place the tag where you want the image to appear within the HTML structure.
In our example we have the class attribute assigned to the image tag. It specifies a CSS class name ("image-main") that can be used to style the image using CSS later on. The src attribute specifies the source of the image. In this case, the image source is a URL pointing to an image file hosted on the web.
To Do:
Use <img src="URL" alt="Description of the image"> and set the URL of your hosted image.
If desired, delete unwanted default circuly images by removing the <img> tags.

Our example HTML shows a <section> element with the class attribute class="card", which can serve as a container for your footer content. Within the section, there is a nested structure consisting of <div> elements with various classes for styling purposes. The innermost <div> with the class attribute class="card-body--image" contains the actual content of the footer. It includes a <strong> element for emphasising the text "We are here to help you," followed by plain text and an <a> element for adding a hyperlink. The relevant CSS styling classes for the provided code snippet are .card-body .card--list and .card-body--image
To Do:
If desired, modify the text and hyperlink in HTML or if you want to change the image to a custom picture, you can replace the 'URL' in the background-image CSS property with the URL of your custom image.
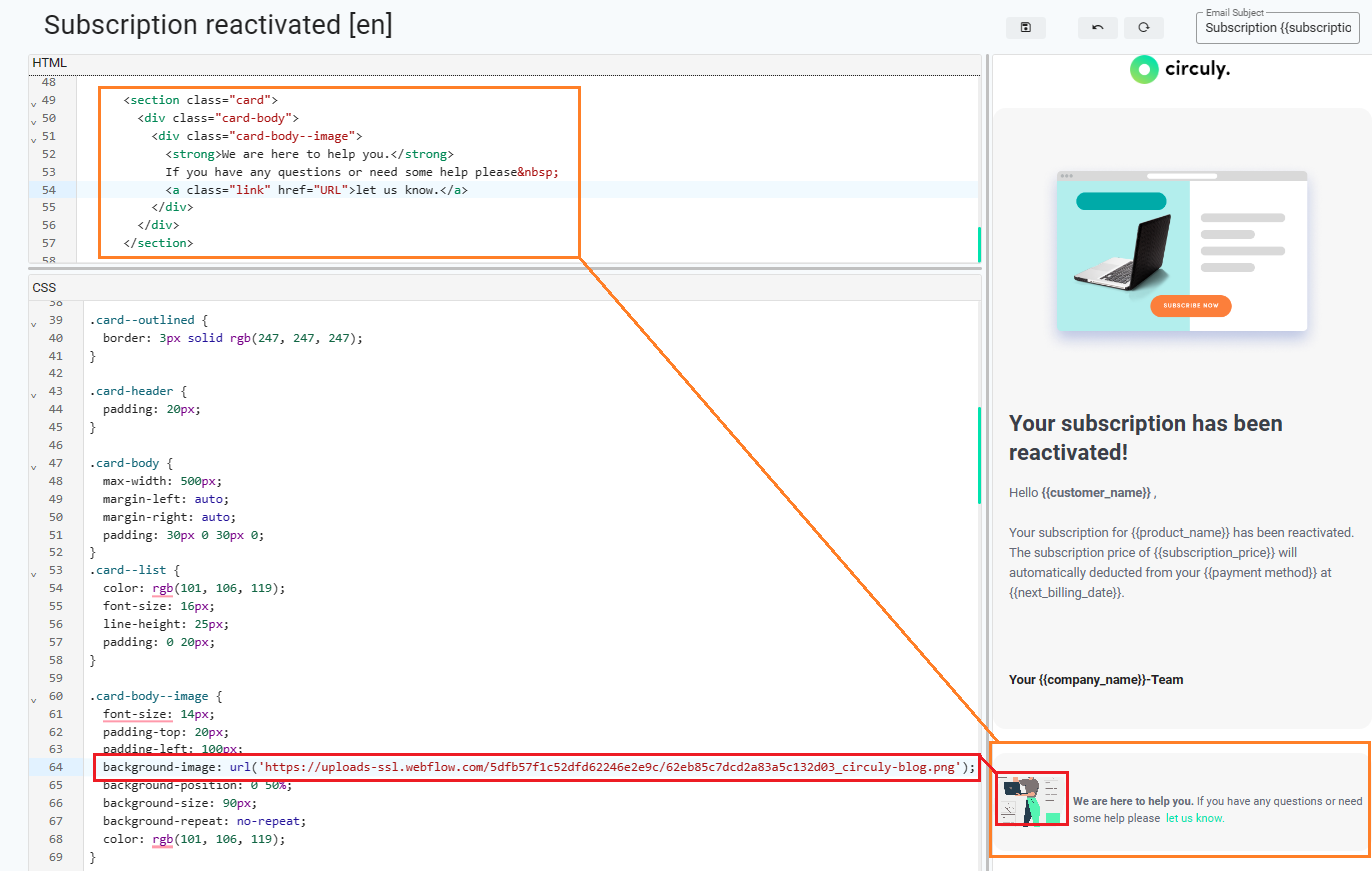
In our HTML example, the button's URL is dynamically populated by a variable called shop_url. This variable is used within the href attribute of the <a> element to determine the destination to your shop when the button is clicked. While the current default implementation uses the shop_url variable to automatically populate the button's URL, it is technically possible to replace this variable with any other URL redirection. Within the CSS below you can easily modify the styling of the button, such as background colour, text colour and shape.
To Do:
If desired, modify the text in HTML and button design in CSS.
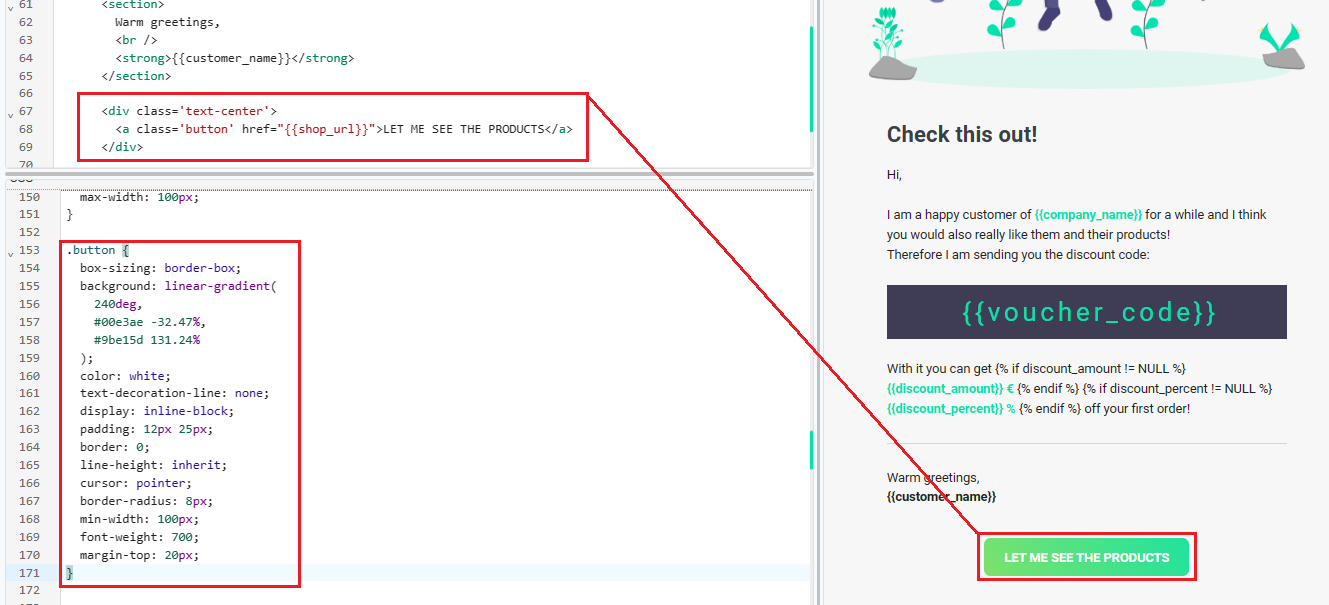
Within the one-time password and refer a friend template, per default we have set up boxes to highlight the OTP and voucher code.In our example of the OTP template, the default HTML represents a paragraph element (<p>) with the class otp-backdrop. Inside the paragraph, there is a placeholder ({{otp_code}}) that suggests the usage of a variable to dynamically populate the code content.Within the CSS below you can easily modify the styling of the box, such as background color, text color and shape.
To Do:
If desired, modify the box design in CSS. Please do not replace the default variable.
